|
|
~MENU~ |
| Home |
| The Concept |
| The Boat |
| Bringing Her Home |
|
Weekly Progress Log |
|
Daysailor Projects |
| The Boat Barn |
| Resources |
| Other Sites |
| Email Tim |
|
|
|
From a Bare Hull: Interior Basics (Page 4) |
|
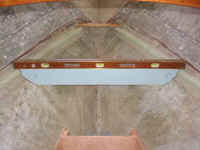
V Berth and Settee Structure (Continued) Since I wanted to minimize the weight of structure in the ends of the boat, I planned to use 3/8" plywood for the V-berth platform. This material, while adequately strong, however, is thin enough that it tends to bend when weight is placed atop. To counter this tendency, I decided to fabricate an additional athwartships support midway along the length of the berth.
|
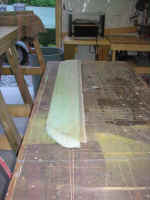 Once the foam was dry-fit, I prepared it for
fiberglass by rounding over the bottom corners. I left the top alone,
since I planned to later remove a width of the foam for replacement with a
wooden "nailer", so to speak: that is, a strip of wood
designed to accept screws used to secure the plywood platform, since the
screws wouldn't bite well into just thin fiberglass over foam. To
encapsulate the foam, I applied a layer of 24 oz. biaxial fabric to each
side, wrapping it around the bottom as needed. I could only do one
side at a time, so this took two separate days. Once the foam was dry-fit, I prepared it for
fiberglass by rounding over the bottom corners. I left the top alone,
since I planned to later remove a width of the foam for replacement with a
wooden "nailer", so to speak: that is, a strip of wood
designed to accept screws used to secure the plywood platform, since the
screws wouldn't bite well into just thin fiberglass over foam. To
encapsulate the foam, I applied a layer of 24 oz. biaxial fabric to each
side, wrapping it around the bottom as needed. I could only do one
side at a time, so this took two separate days.
|
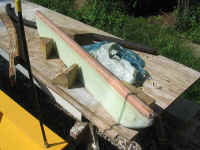 With both sides covered with glass, I ground off
any rough edges, particularly on the bottom side, and then set up my table
saw to remove a strip from the top edge that corresponded exactly to the
thickness of a strip of mahogany that I had milled. Then, I epoxied
the mahogany strip to the top edge of the structure and clamped it in place
overnight. When the epoxy cured, I sanded the squeezeout away and
rounded over the top corners slightly, then covered the wood with another
strip of the 24 oz. biaxial fabric. Since I was anxious to complete
the piece, and since it was a hot, sunny day outside, I placed the piece
outside the shop in the sun to cure more quickly--my very own post-cure
autoclave oven, just like the cool boatbuilders have, but for substantially
less cost! With both sides covered with glass, I ground off
any rough edges, particularly on the bottom side, and then set up my table
saw to remove a strip from the top edge that corresponded exactly to the
thickness of a strip of mahogany that I had milled. Then, I epoxied
the mahogany strip to the top edge of the structure and clamped it in place
overnight. When the epoxy cured, I sanded the squeezeout away and
rounded over the top corners slightly, then covered the wood with another
strip of the 24 oz. biaxial fabric. Since I was anxious to complete
the piece, and since it was a hot, sunny day outside, I placed the piece
outside the shop in the sun to cure more quickly--my very own post-cure
autoclave oven, just like the cool boatbuilders have, but for substantially
less cost!
|
 With the hot sun, the fiberglass cured
sufficiently to allow sanding in only an hour or two, which allowed me to
continue with the construction of the piece more quickly. I installed
a final light layer of fiberglass cloth over the seam between sections of
fiberglass at the bottom of the piece, where I had not had sufficient width
of the tape to properly overlap during the initial encapsulation.
Again, I turned to my "autoclave" to speed the cure time so that I
could continue working. With the hot sun, the fiberglass cured
sufficiently to allow sanding in only an hour or two, which allowed me to
continue with the construction of the piece more quickly. I installed
a final light layer of fiberglass cloth over the seam between sections of
fiberglass at the bottom of the piece, where I had not had sufficient width
of the tape to properly overlap during the initial encapsulation.
Again, I turned to my "autoclave" to speed the cure time so that I
could continue working.
|
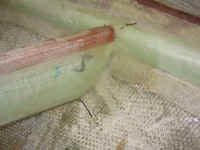 After confirming the fit, I secured the piece
in place with hot-melt glue, ensuring that it was level, plumb, and flush
with the outboard berth supports. With some thickened epoxy, I created
fillets at the junction between the hull and the support on each side, and
then finally tabbed it permanently in place with some 15 oz. biaxial tape. After confirming the fit, I secured the piece
in place with hot-melt glue, ensuring that it was level, plumb, and flush
with the outboard berth supports. With some thickened epoxy, I created
fillets at the junction between the hull and the support on each side, and
then finally tabbed it permanently in place with some 15 oz. biaxial tape. |
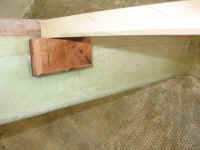 The
final piece of structure required in the V-berth area was a longitudinal
support, running from the chainlocker bulkhead aft to the forward part of
the settee structure. This support was needed to support the
centerline seam in the plywood used for the berth platform--something to
which to screw the plywood. The
final piece of structure required in the V-berth area was a longitudinal
support, running from the chainlocker bulkhead aft to the forward part of
the settee structure. This support was needed to support the
centerline seam in the plywood used for the berth platform--something to
which to screw the plywood.
|
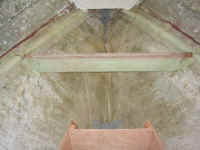
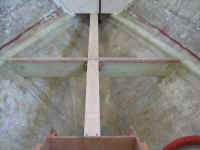 To
support the new longitudinal support at the transverse beam (above), I
epoxied small mahogany cleats on each side, located at the appropriate
height given the thickness of the board I planned to use for the
support. Because these cleats were attached to the foam
"beam", I used only epoxy to secure them to the fiberglass--no
screws. When the epoxy cured, I cut and installed the wooden
longitudinal supports with bronze screws directly into the cleats; I added a
third cleat back at the forward side of the settee structure to catch the
after end of the longitudinal beam. To
support the new longitudinal support at the transverse beam (above), I
epoxied small mahogany cleats on each side, located at the appropriate
height given the thickness of the board I planned to use for the
support. Because these cleats were attached to the foam
"beam", I used only epoxy to secure them to the fiberglass--no
screws. When the epoxy cured, I cut and installed the wooden
longitudinal supports with bronze screws directly into the cleats; I added a
third cleat back at the forward side of the settee structure to catch the
after end of the longitudinal beam.
|
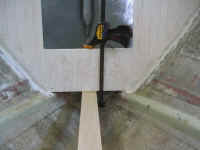 At
the forward end, I ran the new beam beneath the chain locker support
bulkhead and epoxied it to the underside of the cleat that was already in
place there from securing the bulkhead. I also drove two bronze screws
in from the top to secure it further. At
the forward end, I ran the new beam beneath the chain locker support
bulkhead and epoxied it to the underside of the cleat that was already in
place there from securing the bulkhead. I also drove two bronze screws
in from the top to secure it further.
As with all my wooden cleats and structure, I took the time to chamfer the bottom edges and sand all the pieces smooth with 120 grit paper. |
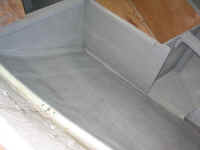
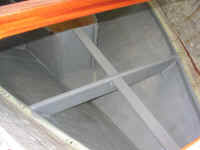 With
that, the structure for the V-berth was complete. After cleaning the
area thoroughly, I continued by applying two coats (on two separate days) of
Interlux Bilgekote gray epoxy paint to the areas below the level of the
eventual platform. With
that, the structure for the V-berth was complete. After cleaning the
area thoroughly, I continued by applying two coats (on two separate days) of
Interlux Bilgekote gray epoxy paint to the areas below the level of the
eventual platform.
|
|
