|
|
~MENU~ |
| Home |
| The Concept |
| The Boat |
| Bringing Her Home |
|
Weekly Progress Log |
|
Daysailor Projects |
| The Boat Barn |
| Resources |
| Other Sites |
| Email Tim |
|
|
|
From a Bare Hull: Interior Basics (Page 2) |
|
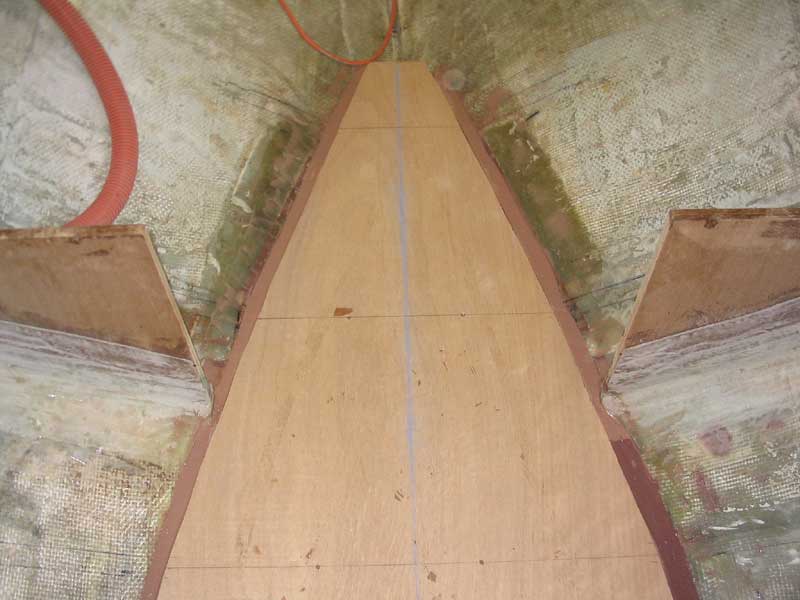
Cabin Sole: Template and Substrate 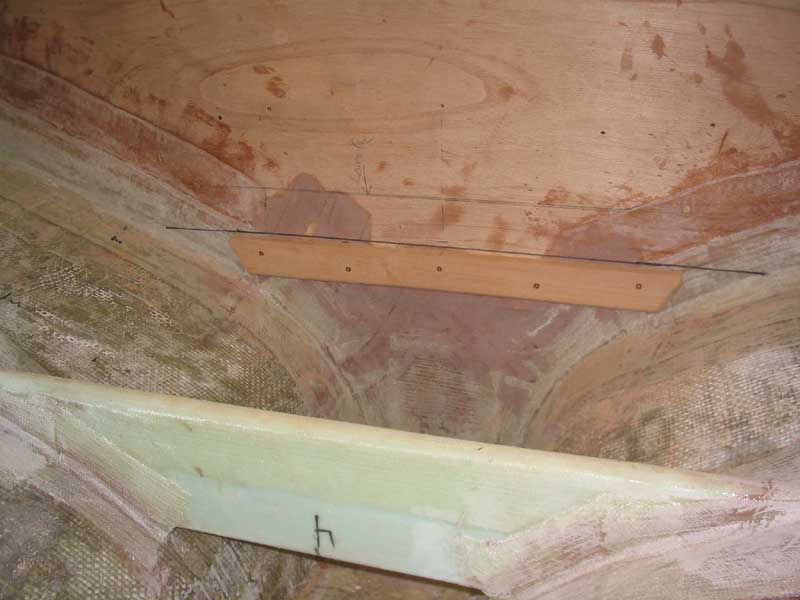 Next, I used some
corrugated cardboard to create a template of the cabin sole, from which I
cut a piece of 13mm Meranti plywood for the cabin sole substrate. To
help support the sole where it met the mid bulkhead, I added a mahogany
cleat that I milled to fit; even though the cleat would be hidden in the
final result, I took an additional few minutes to chamfer the bottom edge
and sand the whole thing smooth. Next, I used some
corrugated cardboard to create a template of the cabin sole, from which I
cut a piece of 13mm Meranti plywood for the cabin sole substrate. To
help support the sole where it met the mid bulkhead, I added a mahogany
cleat that I milled to fit; even though the cleat would be hidden in the
final result, I took an additional few minutes to chamfer the bottom edge
and sand the whole thing smooth.
|
|
|
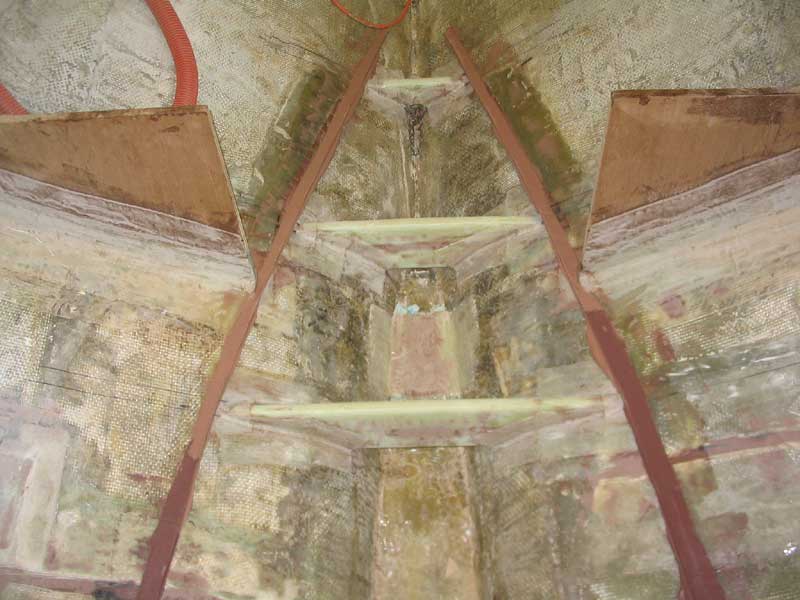
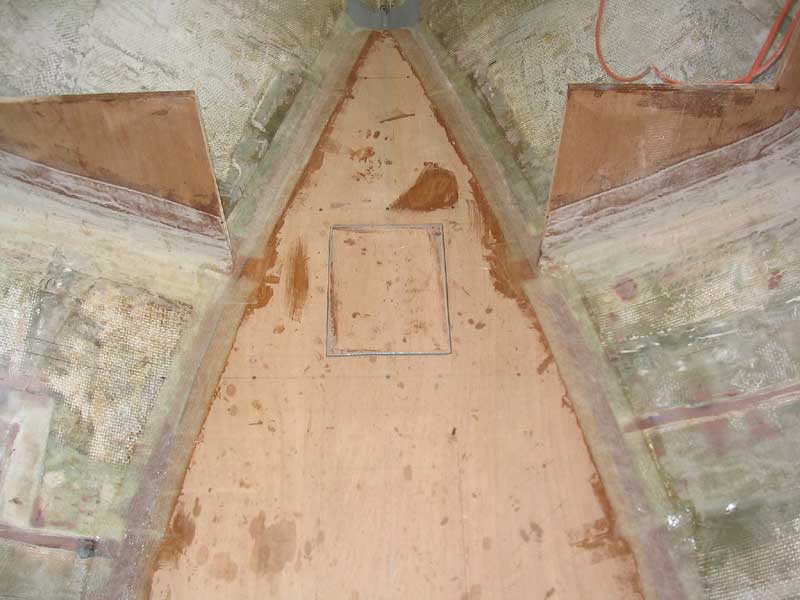
 The substrate fit closely to the hull at its
bottom edge, but because of the curvature of the hull, the top edge
was up to 2" away from the hull. I decided to fill this gap with
epoxy to help cradle the sole and to create more flat, usable area.
Because the angle of the hull was so severe, I had deemed it impractical and
too time-consuming to attempt making a beveled cut on the plywood to better
match the angle. The substrate fit closely to the hull at its
bottom edge, but because of the curvature of the hull, the top edge
was up to 2" away from the hull. I decided to fill this gap with
epoxy to help cradle the sole and to create more flat, usable area.
Because the angle of the hull was so severe, I had deemed it impractical and
too time-consuming to attempt making a beveled cut on the plywood to better
match the angle.
|
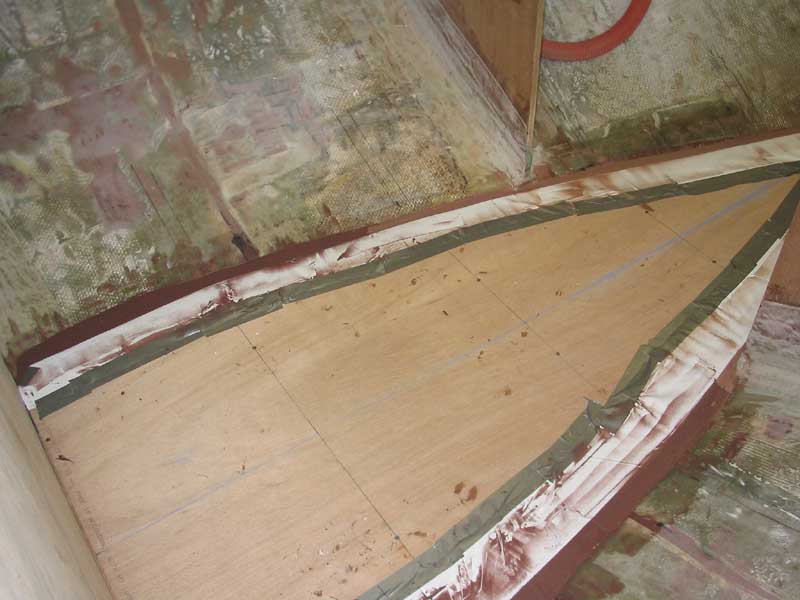 To fill the gaps, I carefully and tightly
wrapped the edges of my plywood substrate in plastic, securing it with duct
tape. Then, I temporarily secured the plywood to the floors with
drywall screws to hold it in the proper position. I double-checked the
level in both directions. Then, I troweled thickened epoxy into the
gaps, holding the trowel tightly to the plywood to ensure a level
screed. I was surprised at the amount of epoxy that the job took, and
had to mix two additional pots to finish the job. I left the epoxy to
cure overnight before carefully removing the plastic-coated substrate to
reveal a nicely-molded epoxy edging on all sides. After removing the
protective plastic, I reinstalled the substrate and sanded the hull and new
epoxy to prepare it for further steps and to remove any ridges and excess
left from the previous day's trowel. To fill the gaps, I carefully and tightly
wrapped the edges of my plywood substrate in plastic, securing it with duct
tape. Then, I temporarily secured the plywood to the floors with
drywall screws to hold it in the proper position. I double-checked the
level in both directions. Then, I troweled thickened epoxy into the
gaps, holding the trowel tightly to the plywood to ensure a level
screed. I was surprised at the amount of epoxy that the job took, and
had to mix two additional pots to finish the job. I left the epoxy to
cure overnight before carefully removing the plastic-coated substrate to
reveal a nicely-molded epoxy edging on all sides. After removing the
protective plastic, I reinstalled the substrate and sanded the hull and new
epoxy to prepare it for further steps and to remove any ridges and excess
left from the previous day's trowel.
|
|
|
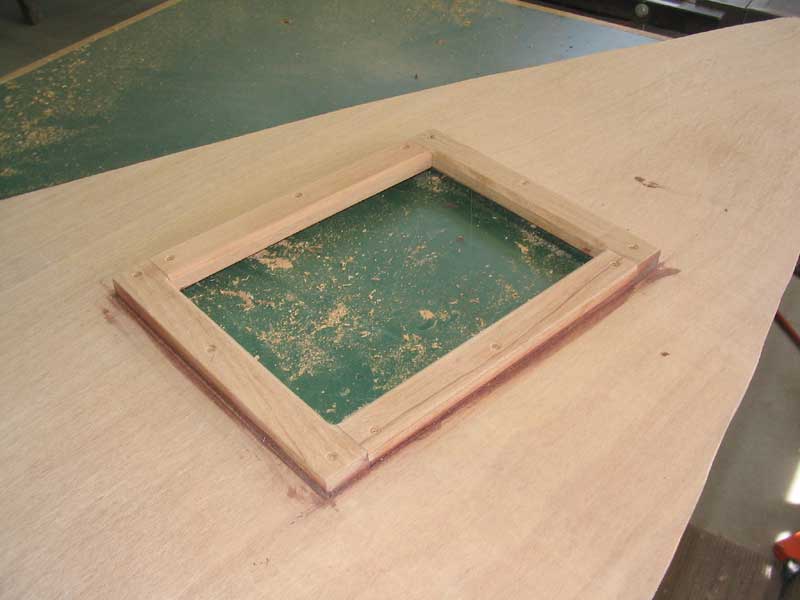 With
the plywood substrate cut and fitted, my next step was to cut a couple
access hatches in the sole--one in way of the mast step, and a second one
all the way aft, just forward of where the sole intersected the mid
bulkhead. I used a jigsaw to cut the openings after carefully marking
them out to ensure they each ended up between the floors. With
the plywood substrate cut and fitted, my next step was to cut a couple
access hatches in the sole--one in way of the mast step, and a second one
all the way aft, just forward of where the sole intersected the mid
bulkhead. I used a jigsaw to cut the openings after carefully marking
them out to ensure they each ended up between the floors.
|
 When
I had each opening cut, I milled some mahogany to use for cleats beneath the
sole, which would support the hatches from beneath. I cut the pieces
to fit and installed them on the underside of the sole with resorcinol glue
and bronze screws. As a finishing touch, I use a router equipped with
a chamfer bit to ease the inside lower edges of each set of cleats. When
I had each opening cut, I milled some mahogany to use for cleats beneath the
sole, which would support the hatches from beneath. I cut the pieces
to fit and installed them on the underside of the sole with resorcinol glue
and bronze screws. As a finishing touch, I use a router equipped with
a chamfer bit to ease the inside lower edges of each set of cleats.
|
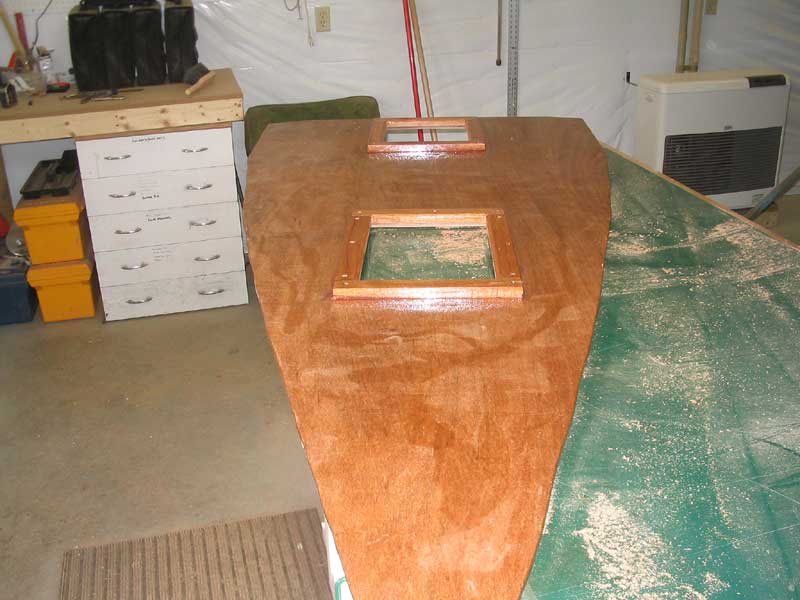
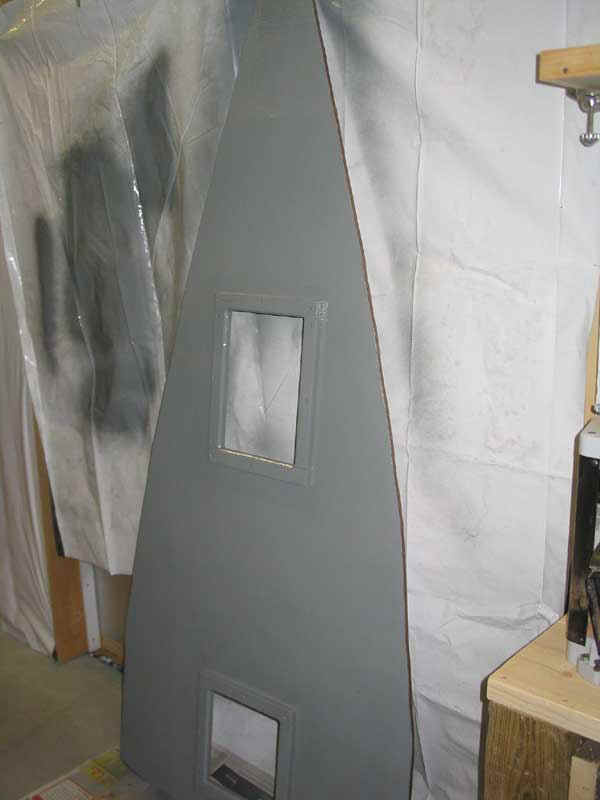 My
final steps before installing the sole once and for all were first to coat
the entire underside, cleats, and edge grain with unthickened epoxy.
When the epoxy cured, I gave it a quick sand and then applied a coat of gray
Bilgekote paint for added protection. My
final steps before installing the sole once and for all were first to coat
the entire underside, cleats, and edge grain with unthickened epoxy.
When the epoxy cured, I gave it a quick sand and then applied a coat of gray
Bilgekote paint for added protection.
|
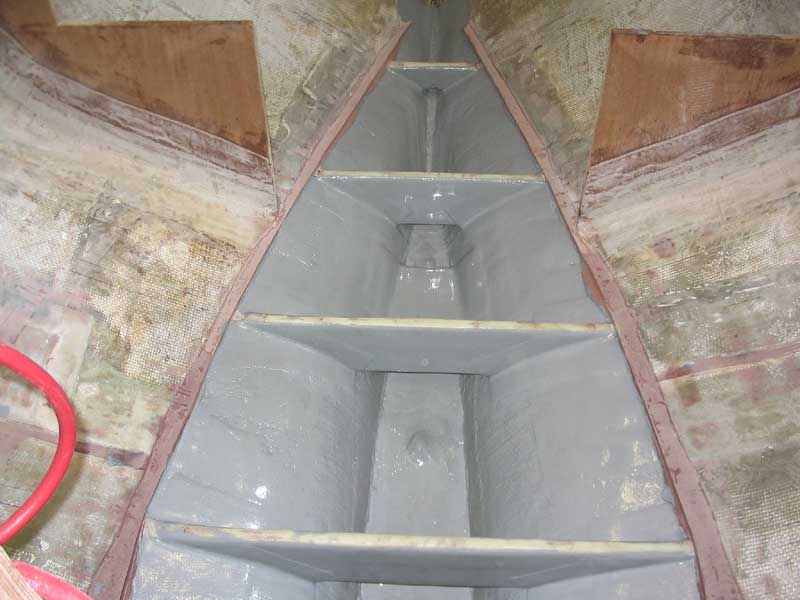 Before
installing the sole, I applied two coats of the same gray Bilgekote to the
entire bilge area beneath the new cabin sole, up as high as the epoxy
fillets around the sole edges. I painted the entire area except for
the tops of the floors, since I planned to use some thickened epoxy adhesive
there when I installed the sole for good. Applying the new paint to
the bilge was a satisfying job that transformed the raw, ugly
fiberglass. Even though most of the area would be inaccessible
once the sole was installed, it felt good knowing that it was all properly
painted, and would resist damage from moisture and be easier to keep clean
in the future. Before
installing the sole, I applied two coats of the same gray Bilgekote to the
entire bilge area beneath the new cabin sole, up as high as the epoxy
fillets around the sole edges. I painted the entire area except for
the tops of the floors, since I planned to use some thickened epoxy adhesive
there when I installed the sole for good. Applying the new paint to
the bilge was a satisfying job that transformed the raw, ugly
fiberglass. Even though most of the area would be inaccessible
once the sole was installed, it felt good knowing that it was all properly
painted, and would resist damage from moisture and be easier to keep clean
in the future.
|
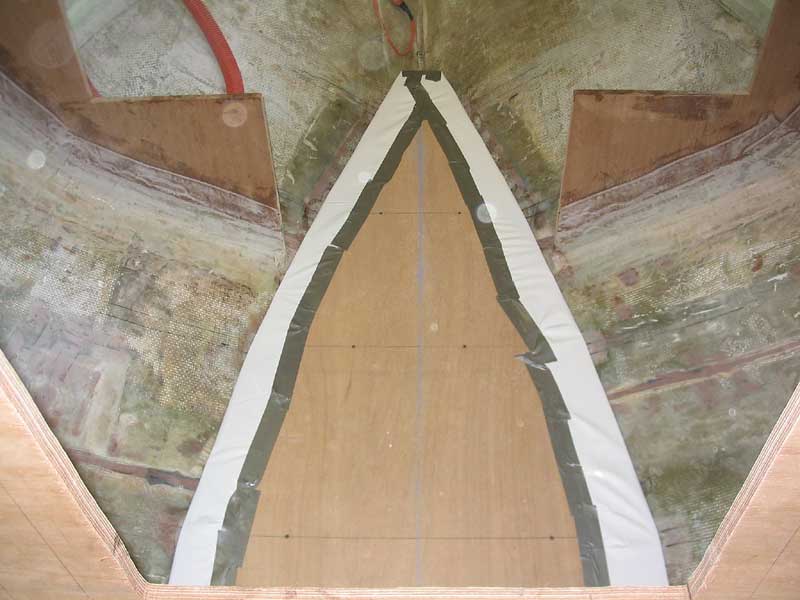
 Once
I had the second coat of paint on, I permanently installed the cabin
sole. I applied a bead of thickened epoxy to the top edge of each
floor, including the wooden cleat at the bulkhead, and carefully lowered the
sole into position, where I secured it temporarily to the floors with
drywall screws (to be removed once the epoxy cured). Finally, I
secured the sole to the hull with a layer of 24 oz. biaxial tape along the
length of each edge. Once
I had the second coat of paint on, I permanently installed the cabin
sole. I applied a bead of thickened epoxy to the top edge of each
floor, including the wooden cleat at the bulkhead, and carefully lowered the
sole into position, where I secured it temporarily to the floors with
drywall screws (to be removed once the epoxy cured). Finally, I
secured the sole to the hull with a layer of 24 oz. biaxial tape along the
length of each edge.
Finish work and final surfacing on the sole won't happen till much later in the project. |