|
|
~MENU~ |
| Home |
| The Concept |
| The Boat |
| Bringing Her Home |
|
Weekly Progress Log |
|
Daysailor Projects |
| The Boat Barn |
| Resources |
| Other Sites |
| Email Tim |
|
|
|
From a Bare Hull: The Deck: Details |
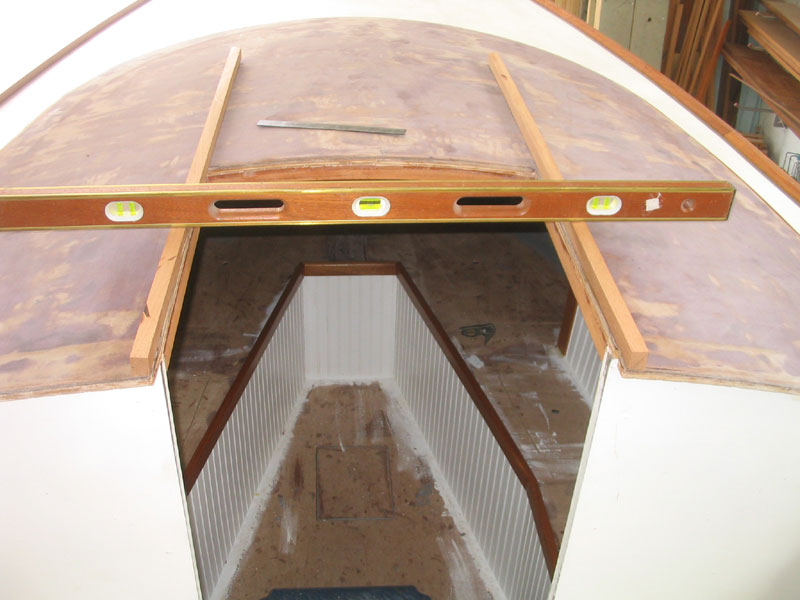
| Companionway Hatch Much earlier, I had cut the opening for the companionway in the cabin trunk. Now, with all the final details coming together, it was time to manufacture a sliding hatch and traditional swashboards to finish off the opening.
|
 The
companionway slide would only be able to open as far as the back of the
mast, which location I had just determined with the arrival of the mast
and the opening of the cabin trunk for the mast partners. With
this location pegged, I found I could cut off a few inches of the rails. The
companionway slide would only be able to open as far as the back of the
mast, which location I had just determined with the arrival of the mast
and the opening of the cabin trunk for the mast partners. With
this location pegged, I found I could cut off a few inches of the rails. |
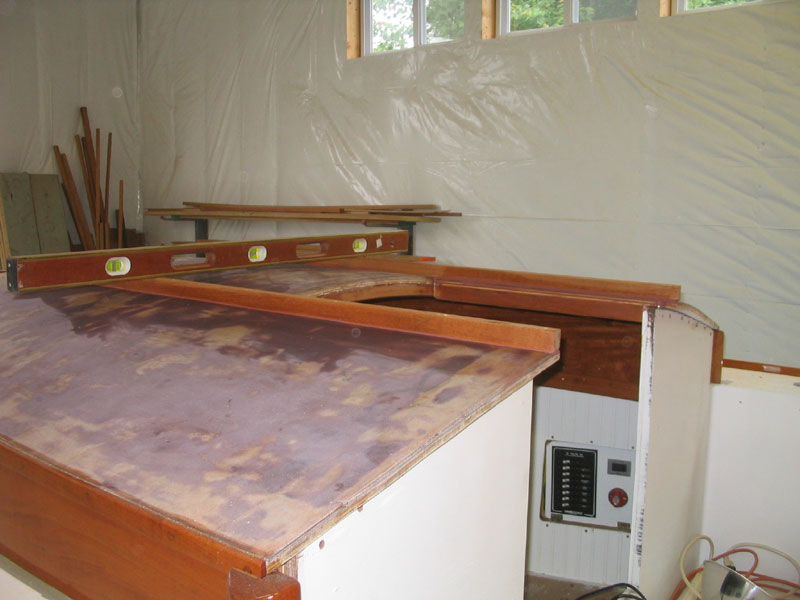 After
fine-tuning the rails' location, I installed them with mahogany-colored
5200 and bronze screws that only slightly penetrated the relatively thin
coachroof, and served mostly to hold the wood while the adhesive cured. After
fine-tuning the rails' location, I installed them with mahogany-colored
5200 and bronze screws that only slightly penetrated the relatively thin
coachroof, and served mostly to hold the wood while the adhesive cured. |
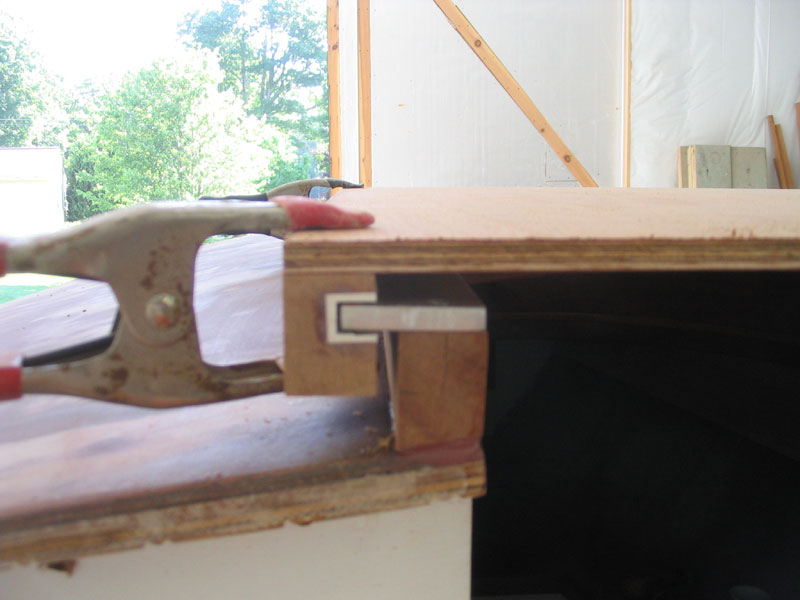
T 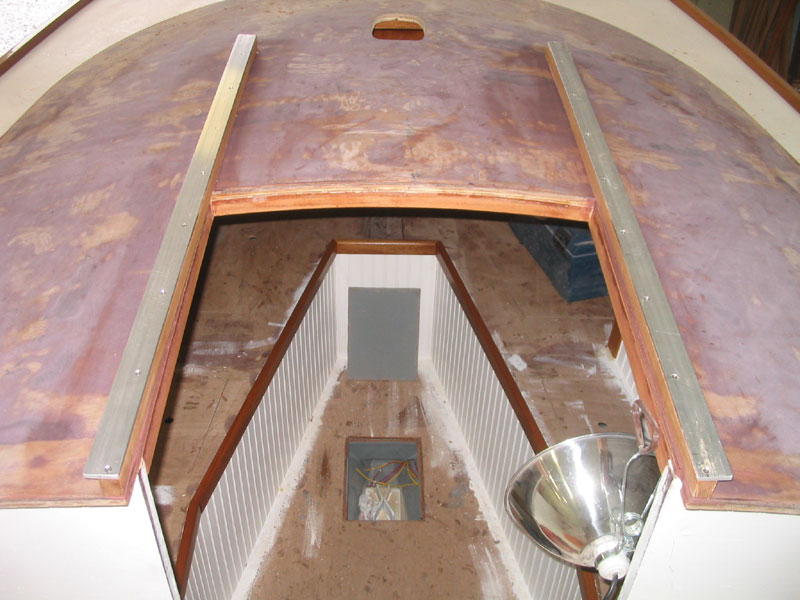 o
provide a surface on which the hatch would slide, I bought an 8' length
of 1/4" thick aluminum, 1-1/2" wide, and cut it to the appropriate
lengths to match the lengths of the rails. After grinding the ends
smooth and with a slight radius, I installed the aluminum with stainless
steel screws, which I set in a countersink so that they heads would be
flush with the surface. I was careful to check the screw spacing
beforehand to ensure that the screws did not interfere with the bronze
screws holding the rails in place beneath. o
provide a surface on which the hatch would slide, I bought an 8' length
of 1/4" thick aluminum, 1-1/2" wide, and cut it to the appropriate
lengths to match the lengths of the rails. After grinding the ends
smooth and with a slight radius, I installed the aluminum with stainless
steel screws, which I set in a countersink so that they heads would be
flush with the surface. I was careful to check the screw spacing
beforehand to ensure that the screws did not interfere with the bronze
screws holding the rails in place beneath. |
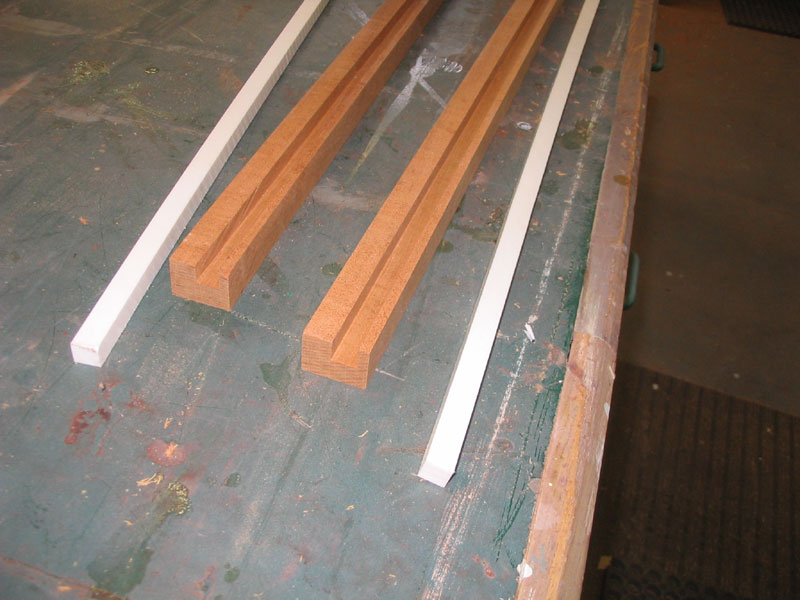 I
made the edge rails for the hatch from mahogany. I could have just
cut a dado in the wood and allowed that to ride on the overhanging
aluminum channel, but I thought it would be better if I lined the dados
with VHMW polyethylene. To do this, I milled a 1/2" wide by 1/2"
deep dado in the rails, and then epoxied in a square profile of the VHMW
polyethylene. While I would not ordinarily choose to attempt to
epoxy this material, I figured for this low-stress application it would
provide enough adhesion over the long haul. I
made the edge rails for the hatch from mahogany. I could have just
cut a dado in the wood and allowed that to ride on the overhanging
aluminum channel, but I thought it would be better if I lined the dados
with VHMW polyethylene. To do this, I milled a 1/2" wide by 1/2"
deep dado in the rails, and then epoxied in a square profile of the VHMW
polyethylene. While I would not ordinarily choose to attempt to
epoxy this material, I figured for this low-stress application it would
provide enough adhesion over the long haul. |
 After
the epoxy cured, I milled a new dado in the center of the plastic
insert, 5/16" wide and a bit under 1/2"deep. This left a U-shaped
lining of the slippery material inside the groove. After
the epoxy cured, I milled a new dado in the center of the plastic
insert, 5/16" wide and a bit under 1/2"deep. This left a U-shaped
lining of the slippery material inside the groove.Next, I epoxied a piece of mahogany plywood to the tops of the rails, taking care to ensure that the rails slid properly without too much or too little clearance on the rails. Despite this caution, the hatch ended up being a bit tight in its closed position, annoyingly. |
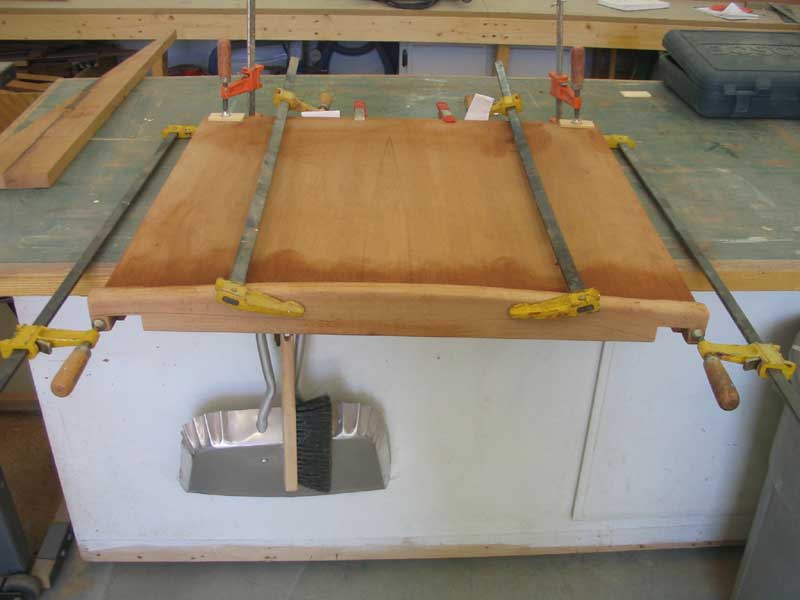 I
continued the hatch construction the next day, and milled and installed
trim pieces at the forward and after edges. The forward piece was
scribed to match the curvature of the coachroof, with moderate clearance
beneath; I cut the after piece to allow a handgrip above, and milled the
top edge to match the curvature of the cabin trunk. Since the
hatch itself was flat, the slight curve on the trim added much in the
way of appearance. It would have been nice if I had built a hatch
with a cambered top to match the cabin trunk, but I just didn't have it
in me at this stage of the process. Maybe I'll rebuild the hatch
later. I
continued the hatch construction the next day, and milled and installed
trim pieces at the forward and after edges. The forward piece was
scribed to match the curvature of the coachroof, with moderate clearance
beneath; I cut the after piece to allow a handgrip above, and milled the
top edge to match the curvature of the cabin trunk. Since the
hatch itself was flat, the slight curve on the trim added much in the
way of appearance. It would have been nice if I had built a hatch
with a cambered top to match the cabin trunk, but I just didn't have it
in me at this stage of the process. Maybe I'll rebuild the hatch
later. |
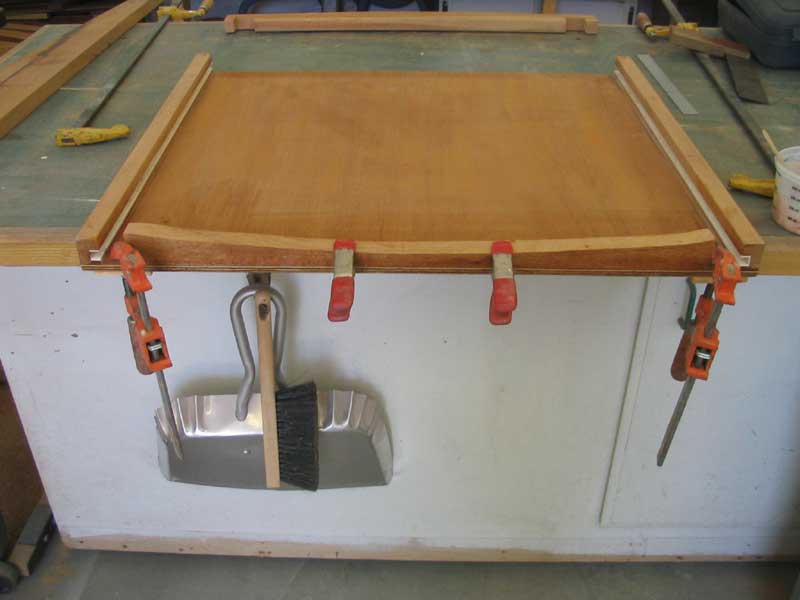 With
the fore and aft trim complete, I installed them with epoxy adhesive,
and then milled some final trim pieces for the sides of the hatch to
cover the plywood endgrain. To allow for water drainage from the
hatch field, I milled some grooves in each trim piece, even with the
hatch top, that would hopefully promote water runoff. I installed
the final trim with more epoxy, and when all the glue was dried I sanded
everything clean and smooth, and rounded over the outer edges of the
side and end trim for a pleasing appearance. With
the fore and aft trim complete, I installed them with epoxy adhesive,
and then milled some final trim pieces for the sides of the hatch to
cover the plywood endgrain. To allow for water drainage from the
hatch field, I milled some grooves in each trim piece, even with the
hatch top, that would hopefully promote water runoff. I installed
the final trim with more epoxy, and when all the glue was dried I sanded
everything clean and smooth, and rounded over the outer edges of the
side and end trim for a pleasing appearance. |
Companionway Trim
The companionway trim comprised more than a half dozen different pieces of trim, all cut and milled to fit the areas in question. I began with interior trim, adding trim that encircled the inside of the companionway opening. Then, I cut a horizontal sill piece that covered the base of the companionway, and extended past on each side, fore and aft, to create a nice profile and promote water drainage. |
 With
these pieces installed, I moved on to the vertical stiles, which also
incorporated a 13/16" groove to accommodate the swash boards later.
I held the edge of the vertical stiles even with the surrounding
bulkhead stiles for a relatively seamless appearance. Using the
stile as a guide, I marked the lower sill piece accordingly, and then
sanded a slight angle into the portion of the sill that extended into
the cockpit, hoping that it would be sufficient to promote water
drainage off the boards and down into the cockpit well. With
these pieces installed, I moved on to the vertical stiles, which also
incorporated a 13/16" groove to accommodate the swash boards later.
I held the edge of the vertical stiles even with the surrounding
bulkhead stiles for a relatively seamless appearance. Using the
stile as a guide, I marked the lower sill piece accordingly, and then
sanded a slight angle into the portion of the sill that extended into
the cockpit, hoping that it would be sufficient to promote water
drainage off the boards and down into the cockpit well. |
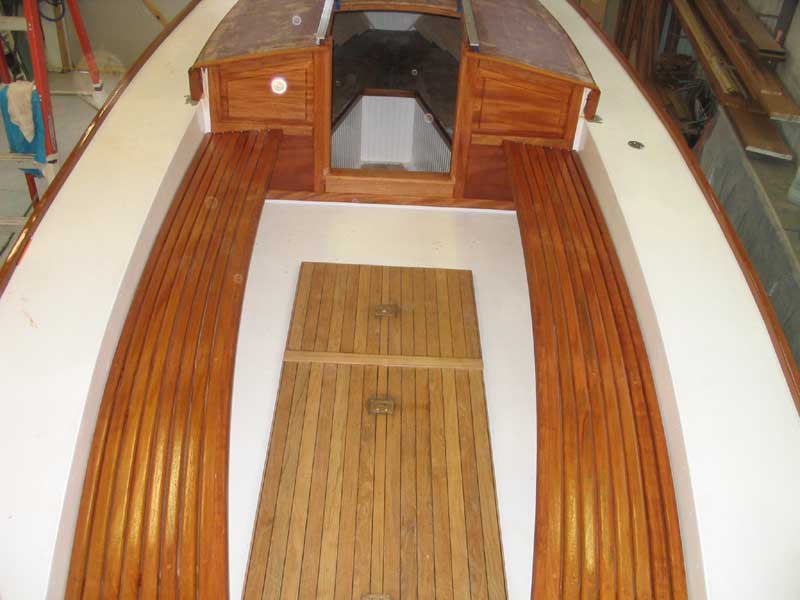 With
all pieces appropriately milled and sanded, I installed them with bronze
screws and, where applicable, polysulfide sealant. Then, I plugged
the screw holes and, when the glue was dry, removed the excess bung and
sanded everything smooth with 220 paper. Finally, I began the
varnish process, incorporating the varnish with that of the cockpit
bulkhead and seating areas. With
all pieces appropriately milled and sanded, I installed them with bronze
screws and, where applicable, polysulfide sealant. Then, I plugged
the screw holes and, when the glue was dry, removed the excess bung and
sanded everything smooth with 220 paper. Finally, I began the
varnish process, incorporating the varnish with that of the cockpit
bulkhead and seating areas.Next: cabin ladder and a small water stop on the sill. |