
|
|
~MENU~ |
| Home |
| The Concept |
| The Boat |
| Bringing Her Home |
|
Weekly Progress Log |
|
Daysailor Projects |
| The Boat Barn |
| Resources |
| Other Sites |
| Email Tim |
|
|
| From a Bare Hull: Cabin Trunk (Page 9) |
|
Cabin Trunk Trim The plywood and fiberglass used for the coachroof left a visible and unattractive seam (and exposed plywood endgrain) at the top edge of the cabin trunk. I needed to apply some trim to cover this area. Of course, trimming the seam was complicated by the curved design of the cabin trunk--a key design feature of the boat, but one that enhanced the level of difficulty for many tasks. Still, I had bent many a piece of wood around the curvature before, so it was simply a matter of doing it again. |
|
I considered and rejected several different approaches and overall trim profiles in my mind before eventually settling on a fairly straightforward approach. Initially, I hoped to use some leftover toerail pieces for the trim. The curved/beveled profile would look good, I thought, particularly if turned upside down. To prepare, I first ripped the leftover toerail stock to remove only the outer portion containing the profile, much as I did when applying a small strip to the outside of the breasthook earlier (which, in fact, gave me the idea for the coachroof trim). This left me with a relatively thin strip of material that I hoped I could bend around the forward curve of the cabin trunk...though I had my suspicions that it might prove to be a challenge. |
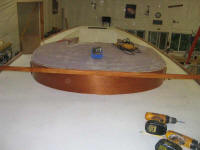 I began to dry-fit the trim to test its bendability and to pre-drill all the
screw holes needed to hold it in place. I planned to use temporary drywall
screws and washers to secure the piece in place while epoxy adhesive cured, and
then remove the screws and fill the holes with bungs. Beginning at the
centerline, I secured the strip with a screw and washer, and then began to
slowly bend the piece around the curvature, adding additional screws every 6" as
I went. I began to dry-fit the trim to test its bendability and to pre-drill all the
screw holes needed to hold it in place. I planned to use temporary drywall
screws and washers to secure the piece in place while epoxy adhesive cured, and
then remove the screws and fill the holes with bungs. Beginning at the
centerline, I secured the strip with a screw and washer, and then began to
slowly bend the piece around the curvature, adding additional screws every 6" as
I went. |
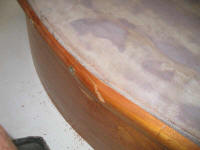 Unfortunately, as I had feared, the toerail profile ended up being too thick and
brittle to conform to the curve, at least for cold molding, and when I had only
two or three screws installed, the piece broke. I was unsurprised, but was
disappointed nonetheless. I removed the broken pieces and returned to the
shop floor to regroup. Unfortunately, as I had feared, the toerail profile ended up being too thick and
brittle to conform to the curve, at least for cold molding, and when I had only
two or three screws installed, the piece broke. I was unsurprised, but was
disappointed nonetheless. I removed the broken pieces and returned to the
shop floor to regroup. |
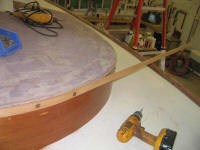 I decided to keep it simple. The lines of the cabin trunk did not cry out
for any sort of ornate or bulky trim, so in the end I decided to mill some
simple 1/4" thick strips of mahogany, each about 1+ inches wide, and use those.
I knew that 1/4" strips of wood should bend to the curve with relative ease.
I milled several strips, even though I knew I'd only need one long piece and two
shorter pieces to complete the work, but I figured if I had extra prepared
beforehand, the likelihood of the wood breaking during installation would be
minimized. I decided to keep it simple. The lines of the cabin trunk did not cry out
for any sort of ornate or bulky trim, so in the end I decided to mill some
simple 1/4" thick strips of mahogany, each about 1+ inches wide, and use those.
I knew that 1/4" strips of wood should bend to the curve with relative ease.
I milled several strips, even though I knew I'd only need one long piece and two
shorter pieces to complete the work, but I figured if I had extra prepared
beforehand, the likelihood of the wood breaking during installation would be
minimized. |
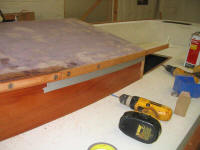 With the strips milled, I began to dry-fit them just as before, beginning at the
centerline. The new trim bent relatively easily around the curve, and
before long the first piece--extending seamlessly around the front portion of
the cabin trunk and down the sides--was temporarily installed. I used
washers beneath the screws to give each screw a wider bearing surface and to
prevent the heads from digging into the wood. With the strips milled, I began to dry-fit them just as before, beginning at the
centerline. The new trim bent relatively easily around the curve, and
before long the first piece--extending seamlessly around the front portion of
the cabin trunk and down the sides--was temporarily installed. I used
washers beneath the screws to give each screw a wider bearing surface and to
prevent the heads from digging into the wood.
I marked for the end cuts and removed the strip, after first applying some masking tape beneath the strip to help protect the cabin trunk during installation. After cutting 45 degree angle cuts at the ends, I prepared to install the piece permanently. First, though, I eased the bottom edge of the trim strips into a gentle chamfer, since working on this edge would be difficult once the trim was installed. I left the top edge raw for now, intending to complete final shaping once the trim was installed. |
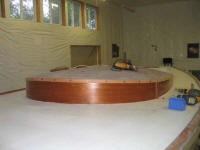 I installed the trim with thickened epoxy adhesive, spreading the adhesive onto
the edges of the cabin trunk, taking care to fill the seam left between the
plywood coachroof and the solid wood cabin trunk. With the adhesive
spread, I reinstalled the strip with the temporary screws. I cleaned up
the excess epoxy, and continued with the final two short pieces required to
complete the job. I installed the trim with thickened epoxy adhesive, spreading the adhesive onto
the edges of the cabin trunk, taking care to fill the seam left between the
plywood coachroof and the solid wood cabin trunk. With the adhesive
spread, I reinstalled the strip with the temporary screws. I cleaned up
the excess epoxy, and continued with the final two short pieces required to
complete the job. |
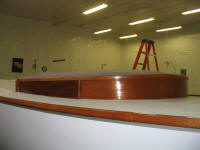 The final pieces posed little challenge, as there was virtually no curvature to
the cabin trunk at the after ends. After cutting a matching angle on the
forward ends of the strips, I dry-fit them, as before, masked off the cabin
trunk, and permanently installed them with epoxy adhesive and temporary screws. The final pieces posed little challenge, as there was virtually no curvature to
the cabin trunk at the after ends. After cutting a matching angle on the
forward ends of the strips, I dry-fit them, as before, masked off the cabin
trunk, and permanently installed them with epoxy adhesive and temporary screws. |
|
When the epoxy cured, I removed all the temporary screws, and then enlarged the screw holes with a 3/8" Forstner bit to an appropriate depth for bungs. Then, I installed new bungs in the holes with resorcinol glue, and allowed the glue to cure overnight before shaving off the excess plugs with a block plane. |
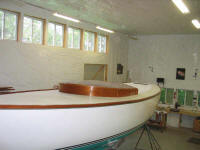 Finally, I sanded the new trim piece and bungs to a smooth finish, and eased the
upper edge as needed. I also removed the excess overhanging trim from the
after end of the cabin trunk, and then installed some solid wood coaming blocks
that I had built much earlier, using more thickened epoxy to secure them in
place at the ends. Finally, I sanded the new trim piece and bungs to a smooth finish, and eased the
upper edge as needed. I also removed the excess overhanging trim from the
after end of the cabin trunk, and then installed some solid wood coaming blocks
that I had built much earlier, using more thickened epoxy to secure them in
place at the ends. |
|
The main cabin trunk trim was complete. Work remaining: lots of varnish! |
|
Back to Main Menu> |