| Bolero
Project |
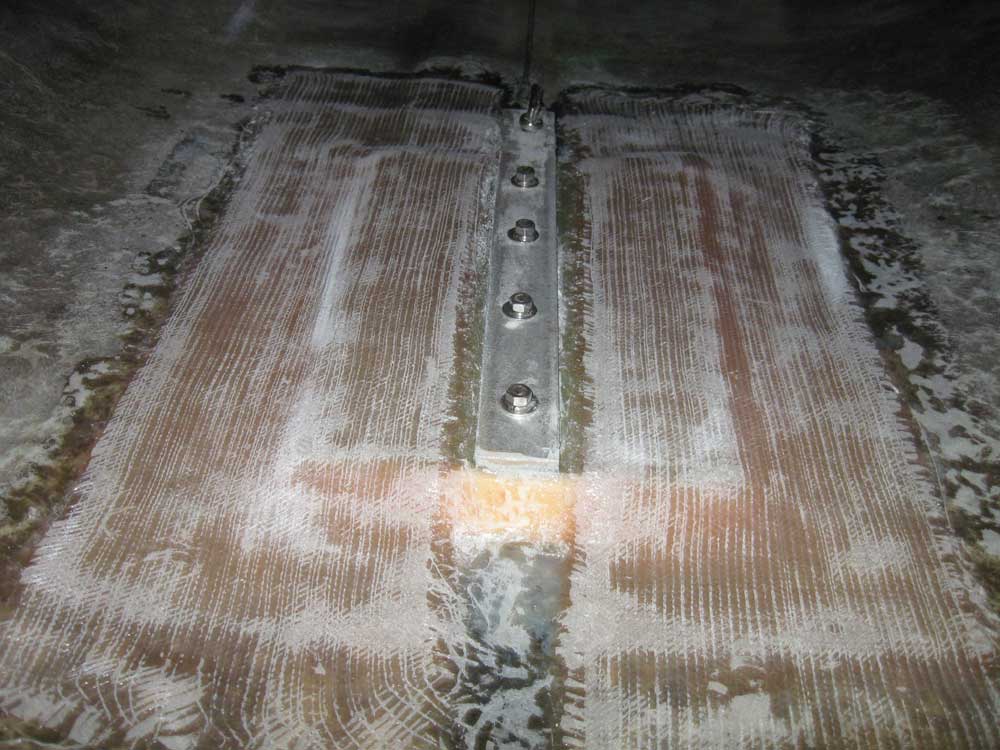
Friday, July 25, 2008 I filled the day with a wide variety of chores, beginning with the backstay chainplate fiberglass, which I washed and sanded to remove any minor roughness and to prepare it for paint later on. |
|
|
|
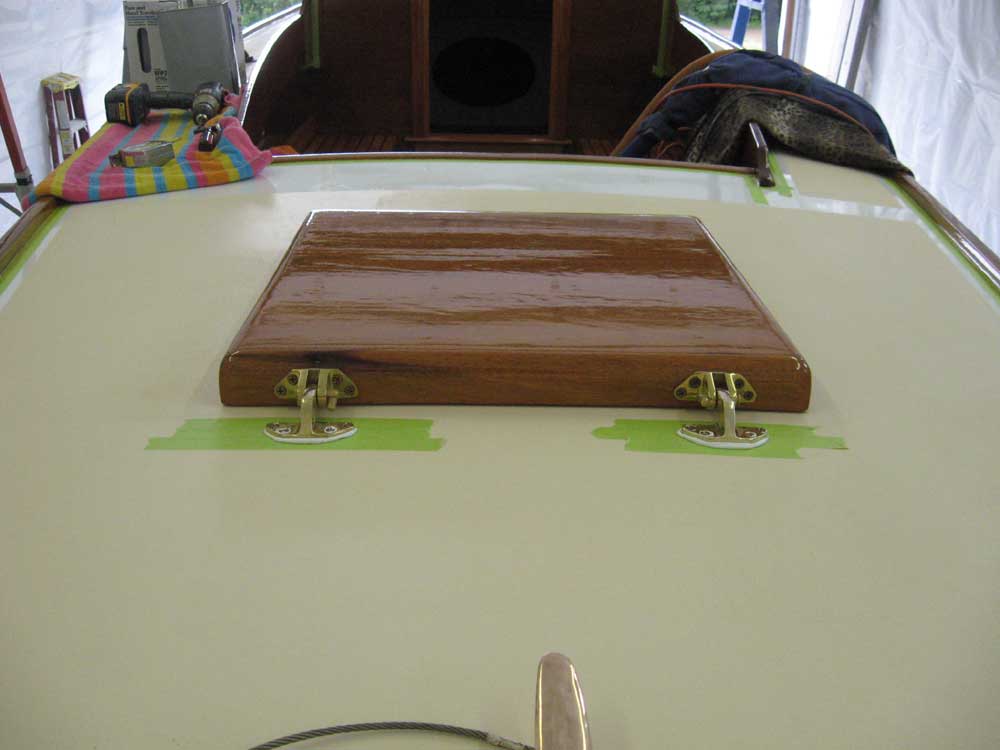
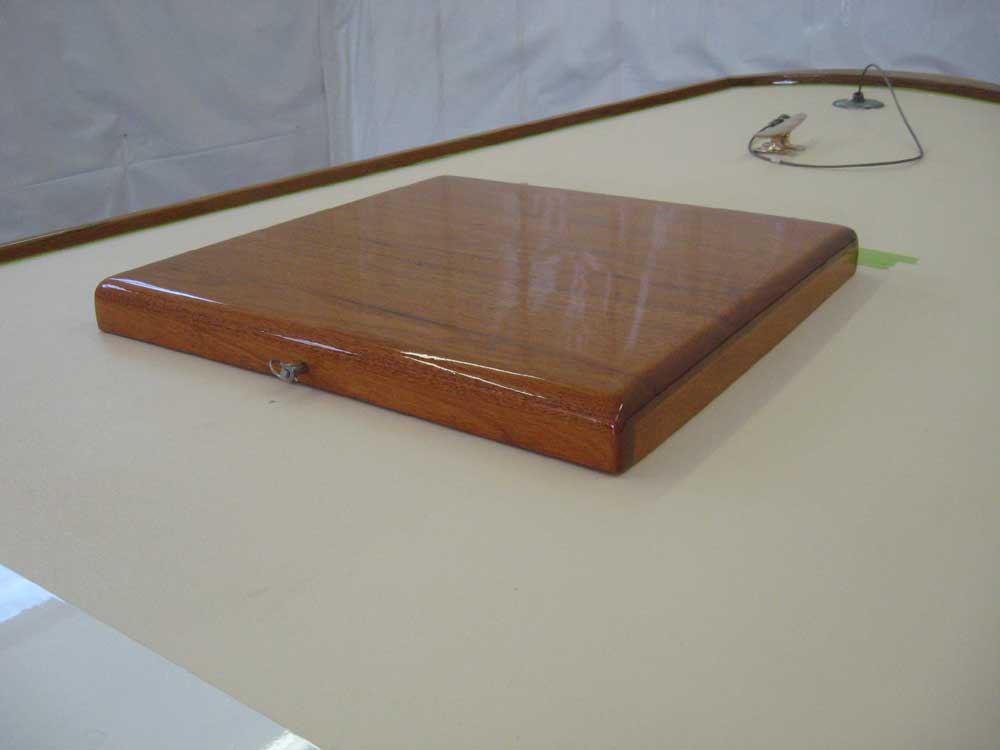
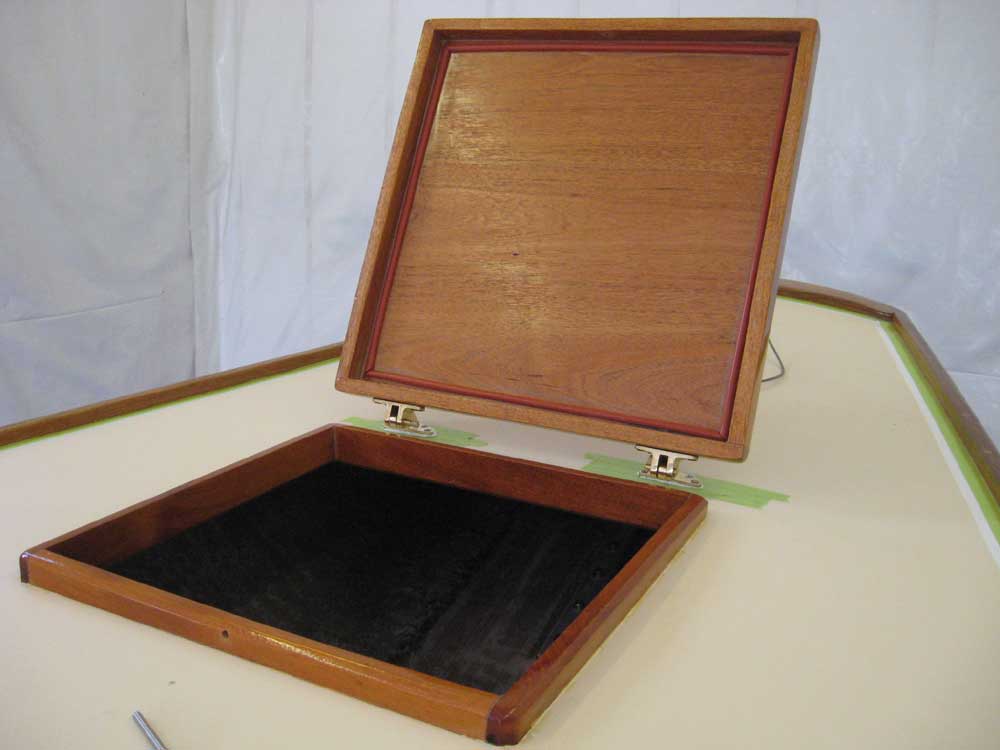
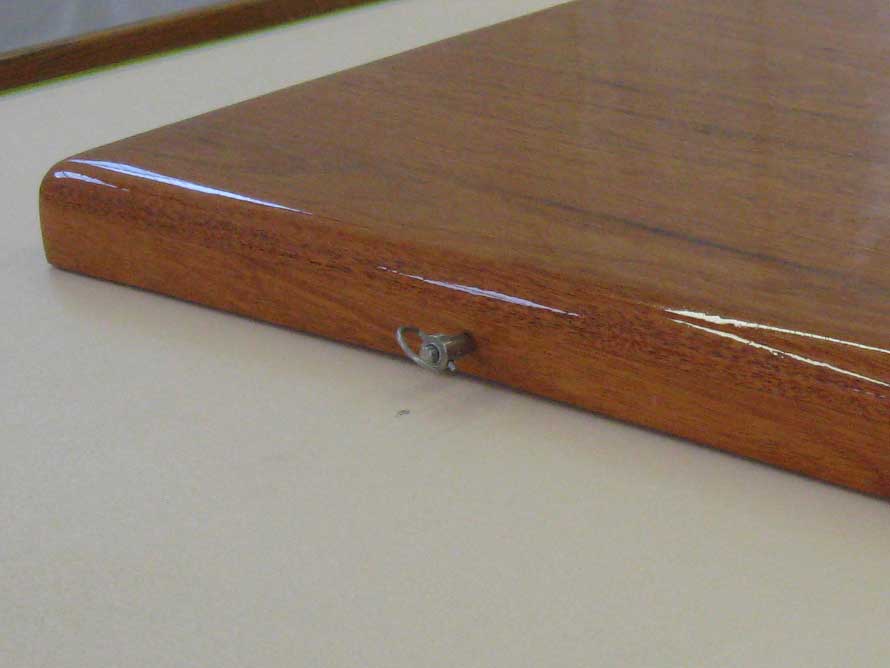
Next, I installed the aft deck hatch and its bronze hinges, along with a self-adhesive silicone gasket inside the hatch to help seal the opening and provide cushioning. To secure the hatch in place against accidental opening, I installed a stainless steel quick-release pin at the forward end, which I simply inserted through a hole drilled through both the hatch and the wooden framework around the opening. The bronze hinges feature quick-release pins that make removal of the hatch for maintenance a simple matter, and the design of the hinges self-limits the opening of the hatch to the position shown. |
|
|
|
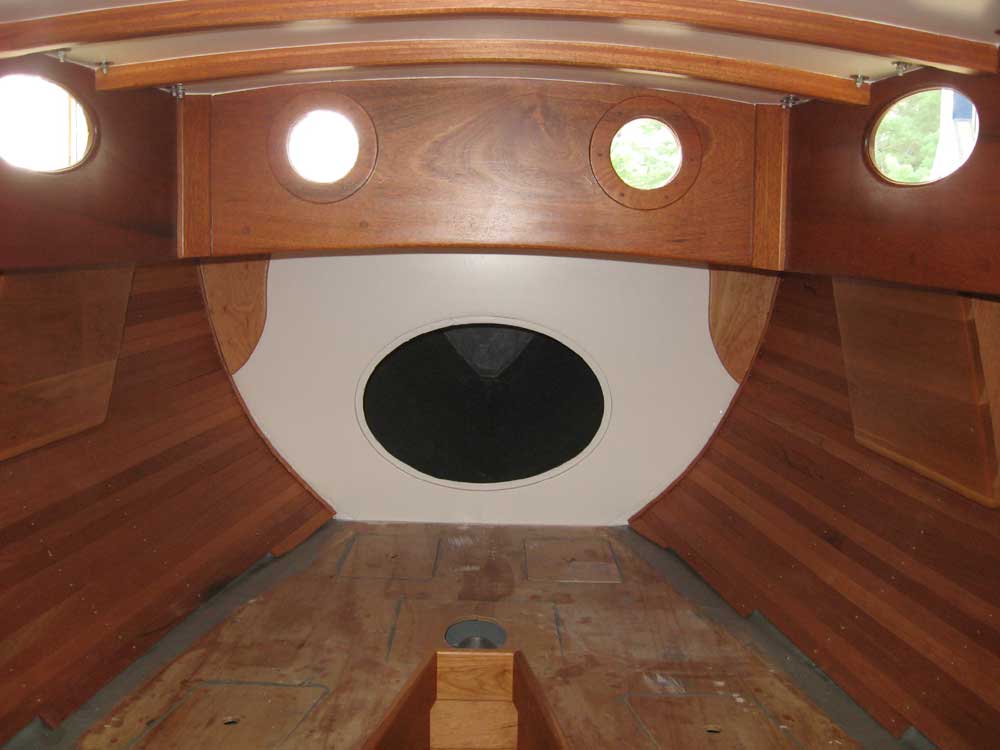
Using a few dabs of epoxy adhesive, along with some hot-melt glue to hold them while the epoxy cured, I secured the decorative knees to the forward bulkhead. Later, the large, solid cherry locker door would really finish off this bulkhead and become a real focal point of the interior. |
|
|
|
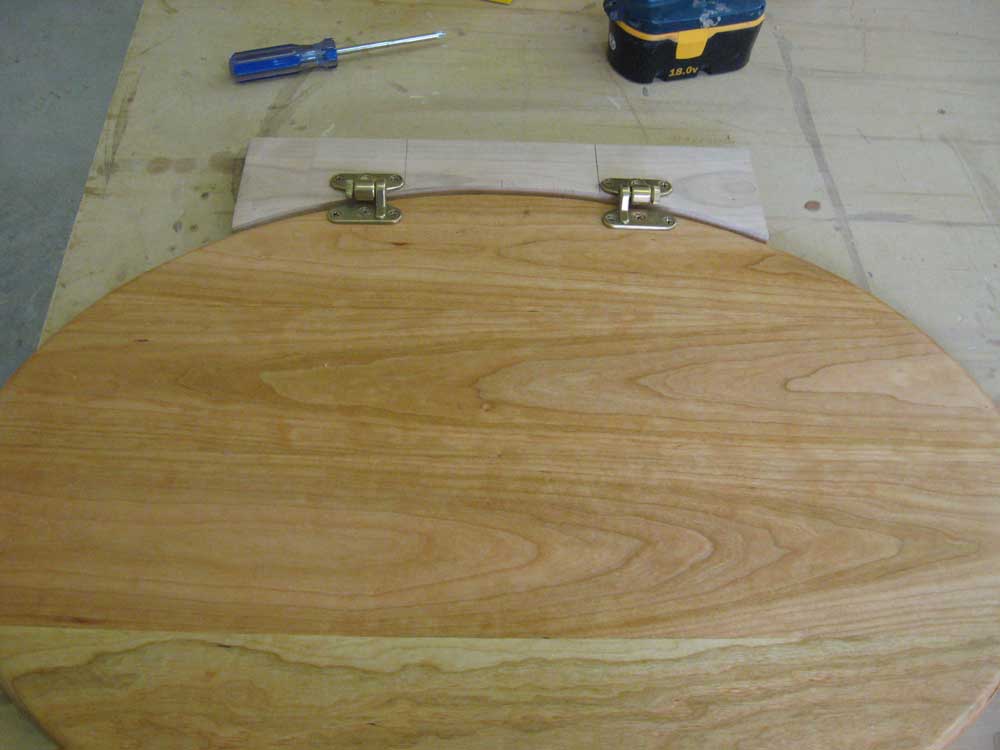
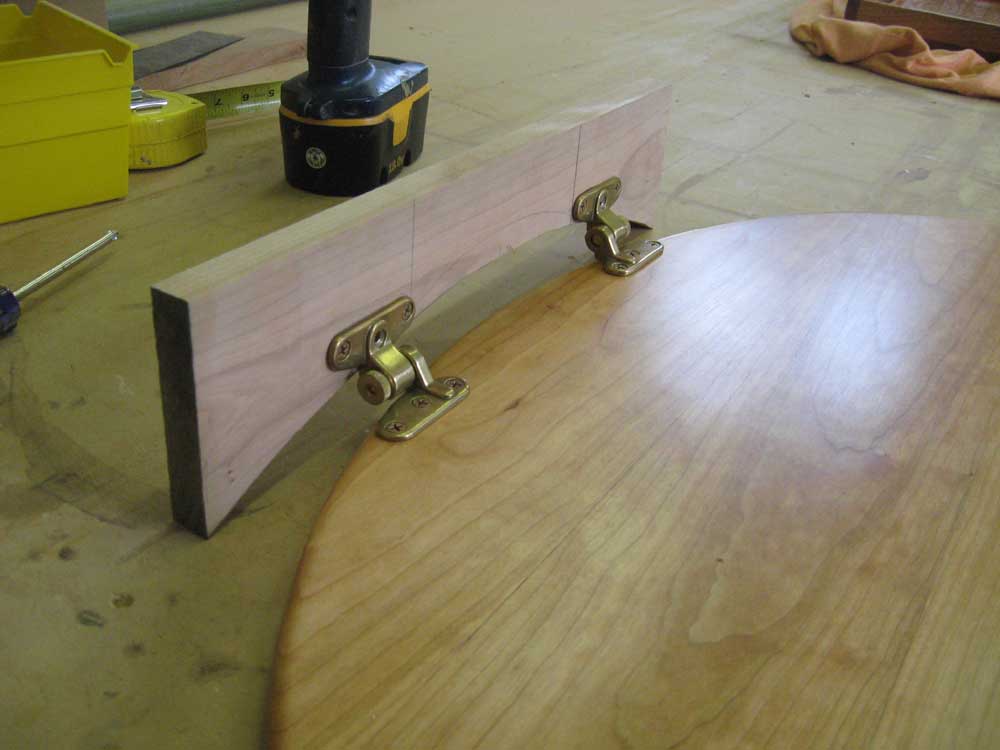
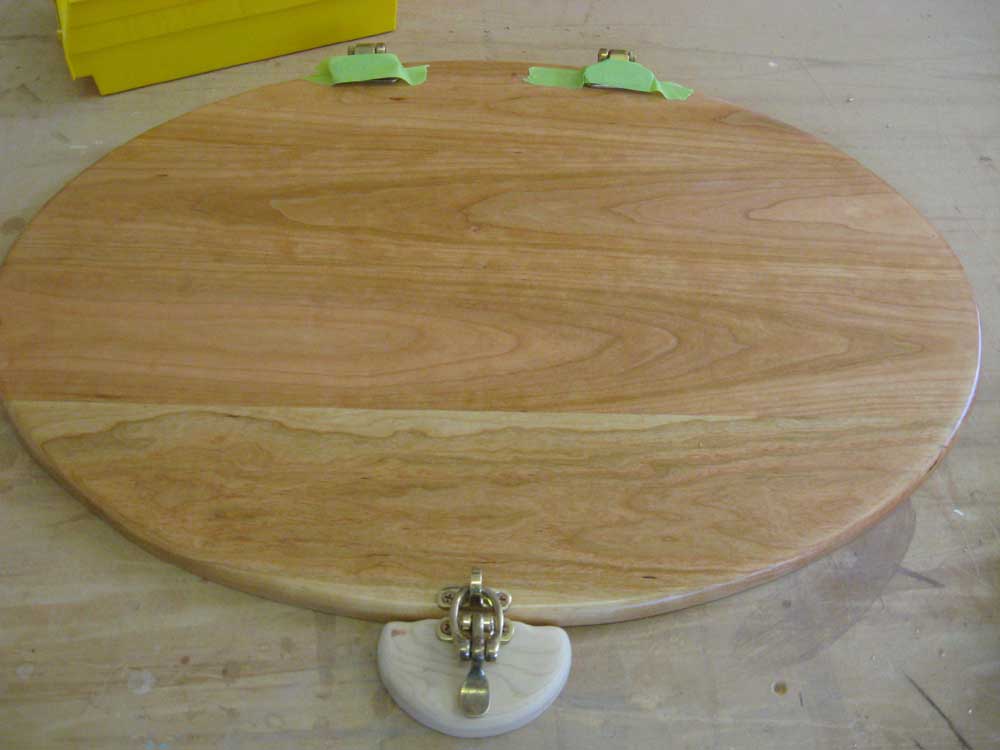
The bulkhead door was next on the agenda. The door was complete and resplendent in its satin varnish, but it wasn't ready for installation yet. Because the door was of an overlay design--that is, it would stand entirely proud of the bulkhead surface--I needed to create some blocks to secure the hinges to the bulkhead, so they'd be at the same height as the door. From some scrap cherry, I cut some pieces with a curve to match the shape of the door at both top and bottom, and then laid out a pair of bronze quick-release hinges at the top edge of the door. Once I had the hinges located and temporarily installed--and I had ensured that they would work properly--I worked up a pleasing shape for the hinge block, and cut and sanded it to the proper shape. |
|
|
|
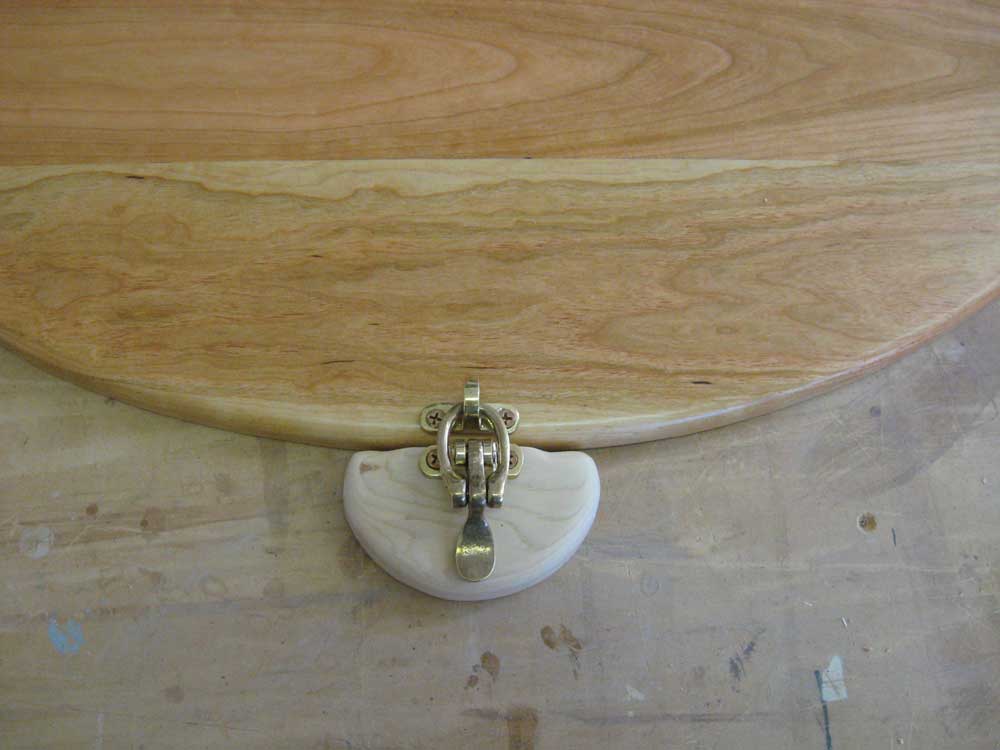
I repeated the basic process at the lower edge, where I planned to install a draw latch that I'd bought for the aft deck hatch, but which didn't work for that as planned. To support the body of the latch, I created another small cherry block. I sent both blocks up to the varnish room to get finished to match the door itself; installation would follow in due course. It occurred to me after the fact that this little block was rather reminiscent, in an abstract sort of way, of the Shields class logo. Completely happenstance. |
|
|
|
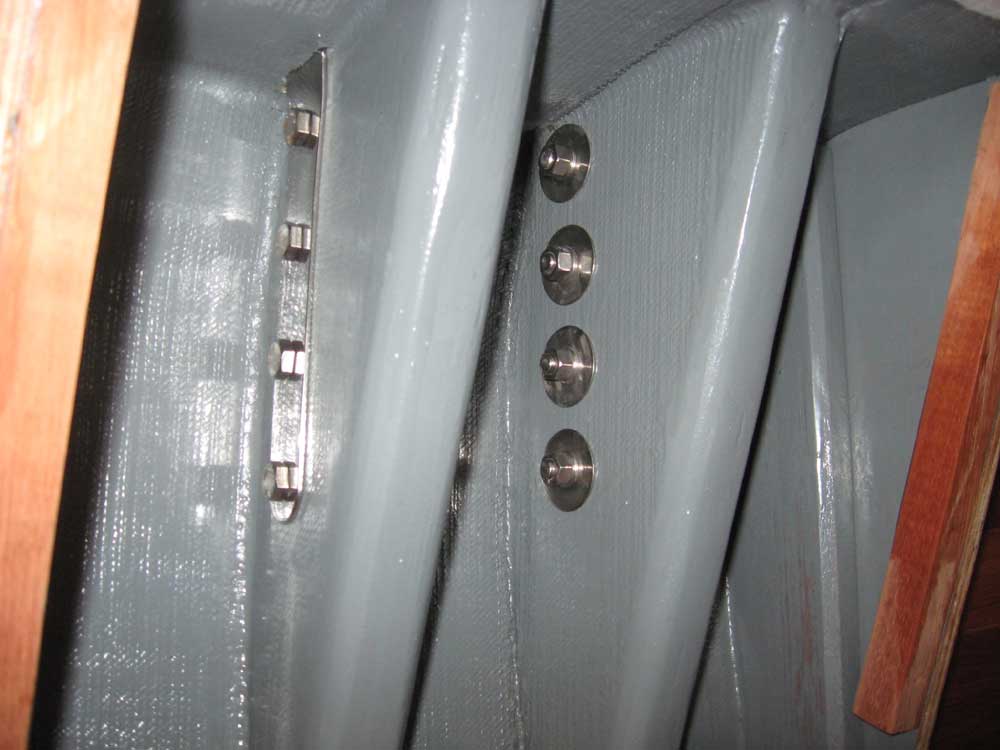
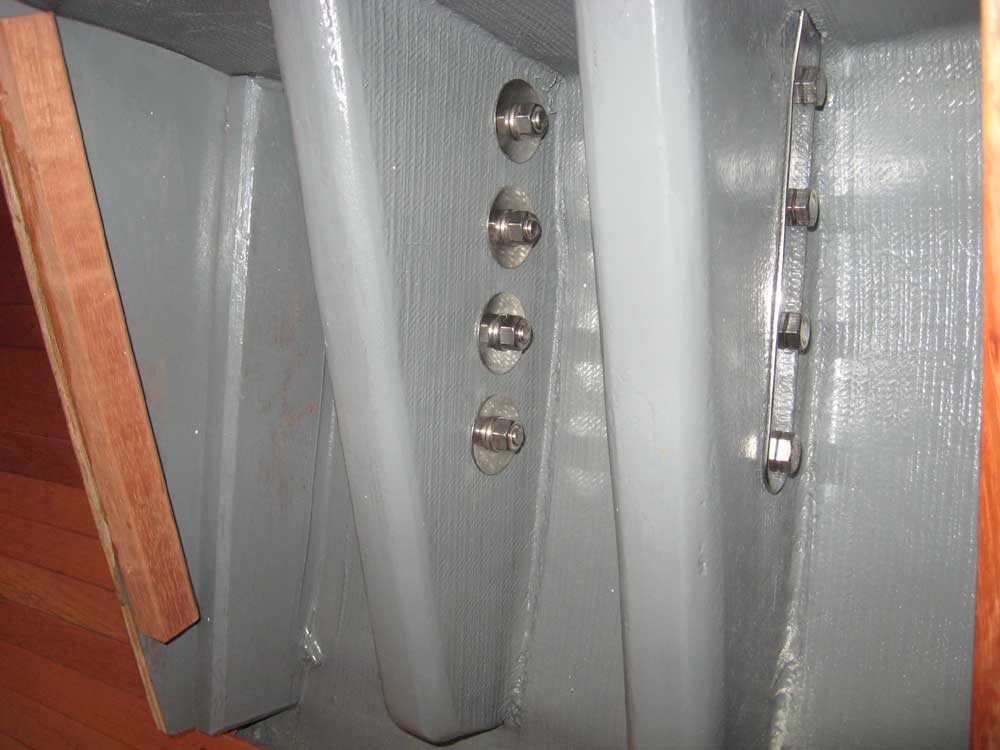
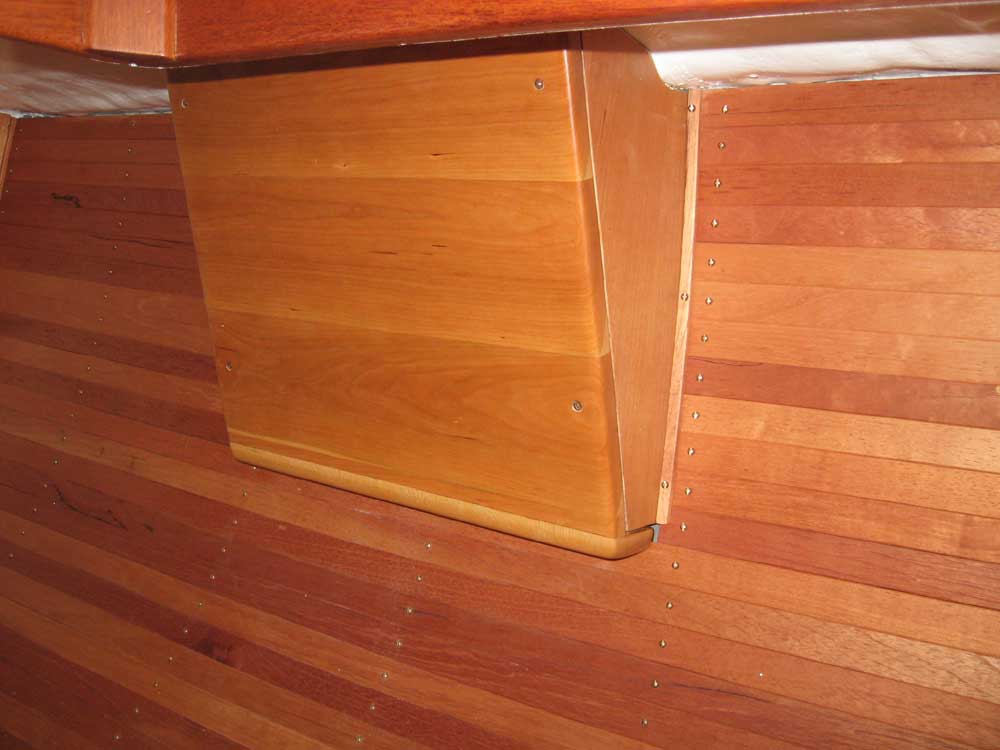
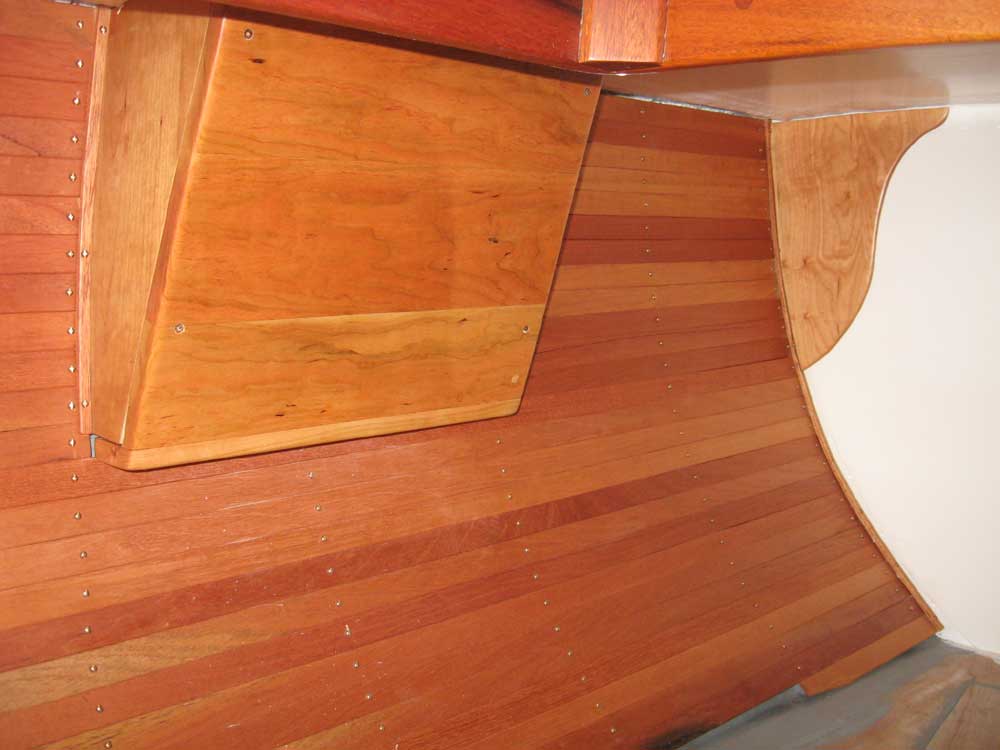
Moving on, I installed the new stainless steel chainplates, bolting them securely and installing the deck cover plates with abundant sealant. With the installation complete, I could finally install the cherry chainplate covers to finish off the interior. Now if someone would only paint the v-berth platform. |
|
|
|
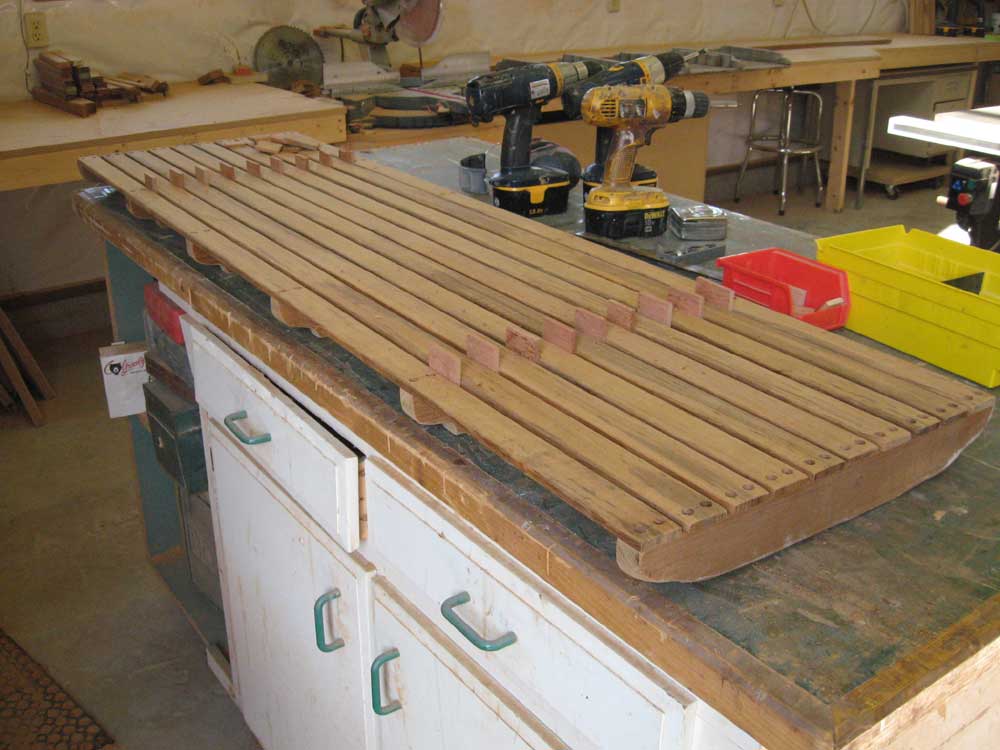
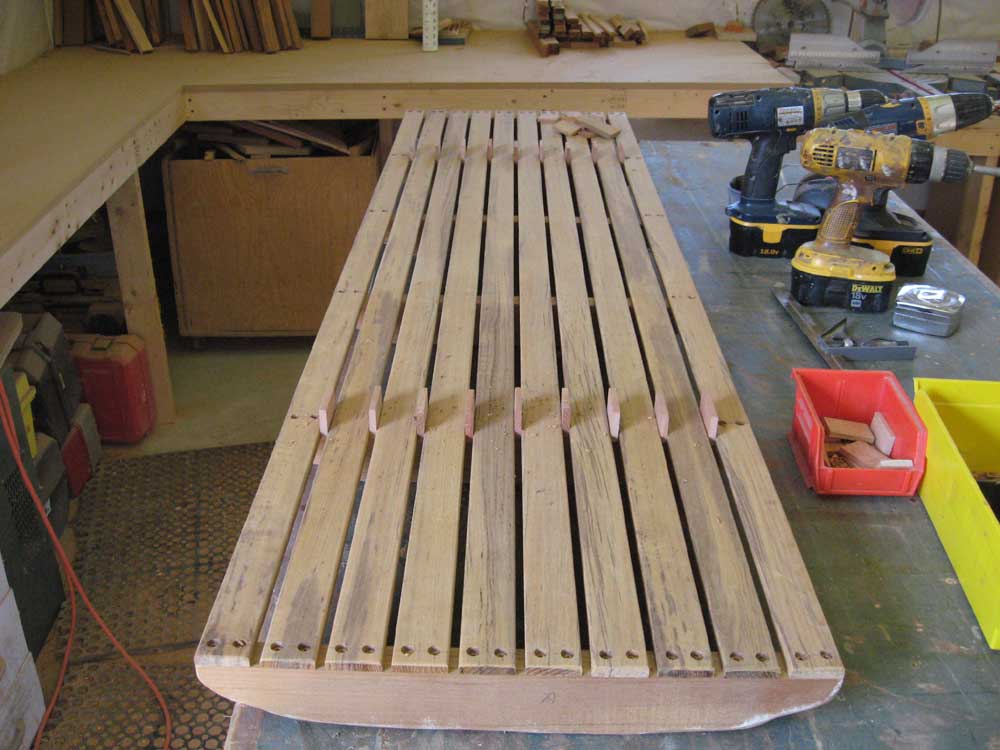
I continued work on the cockpit sole grate. After a few more test-fits and subsequent fine-tuning, I finally got the basic structure to fit, so I went ahead and installed the remaining cross supports and checked the overall fit in the space again. Then, I began to install the remaining 8 slats; happily, the spacing between the slats ended up being 1/4", for which I had a large supply of spacer blocks available to aid in installation. I secured the ends of each strip, fixing them in place, before deciding to move on to other projects and finish up the screwing and plugging over the next day or two. |
|
|
|
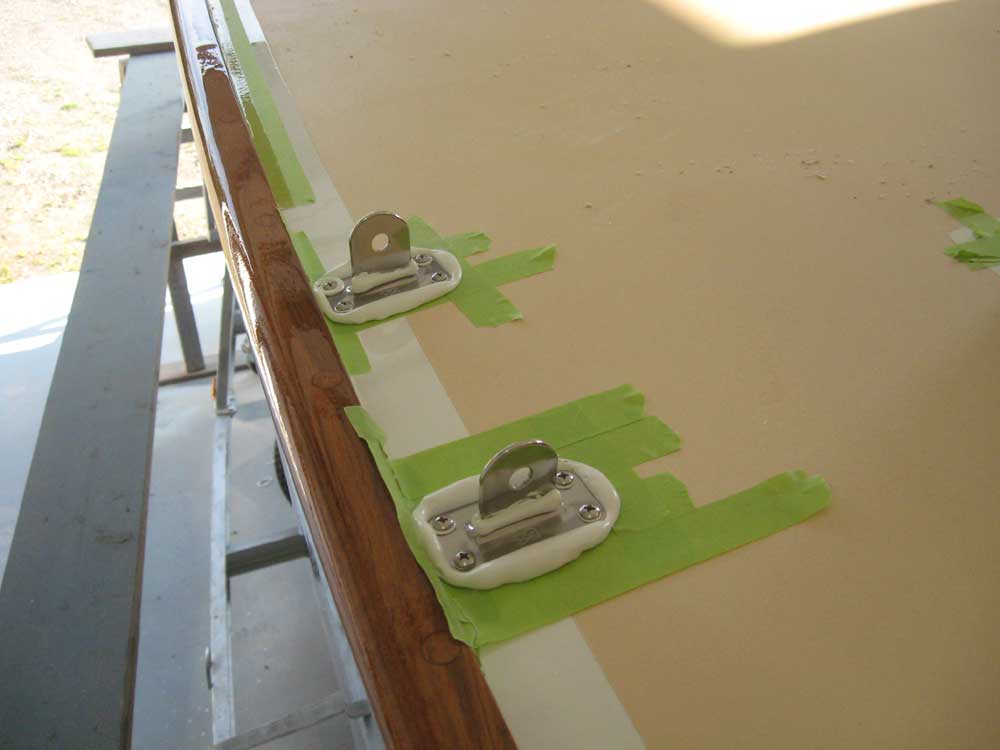
I finished up the day by installing two aluminum jam cleats for the jibsheet winches, aligning them to allow for the proper lead from the winch. |
|
|
|
|
|