| Bolero
Project |
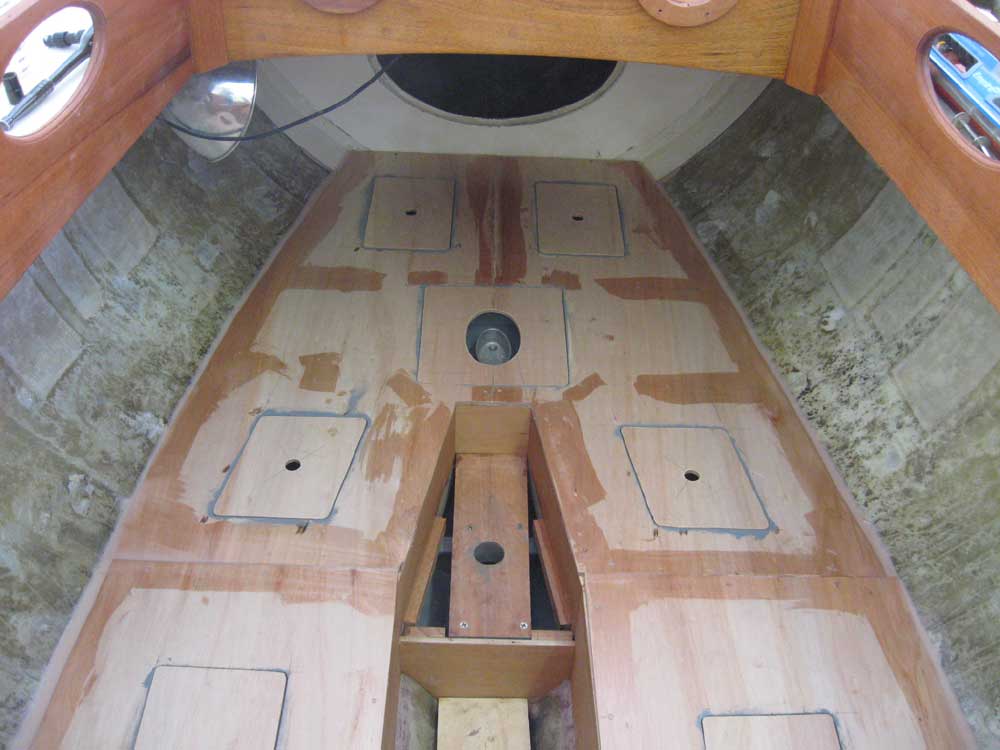
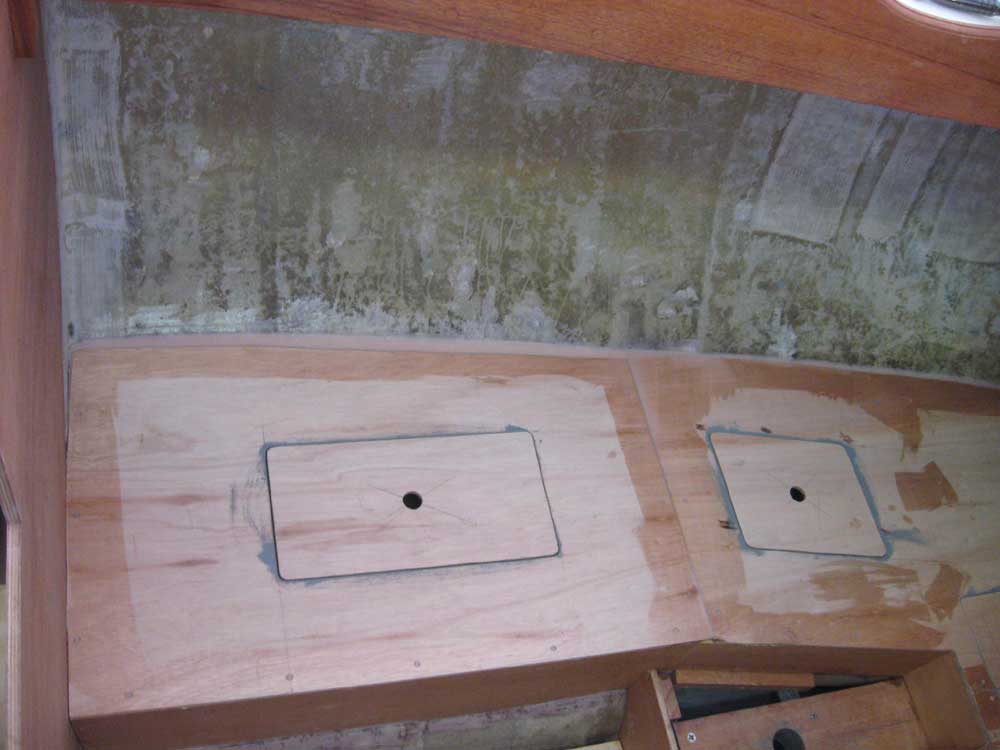
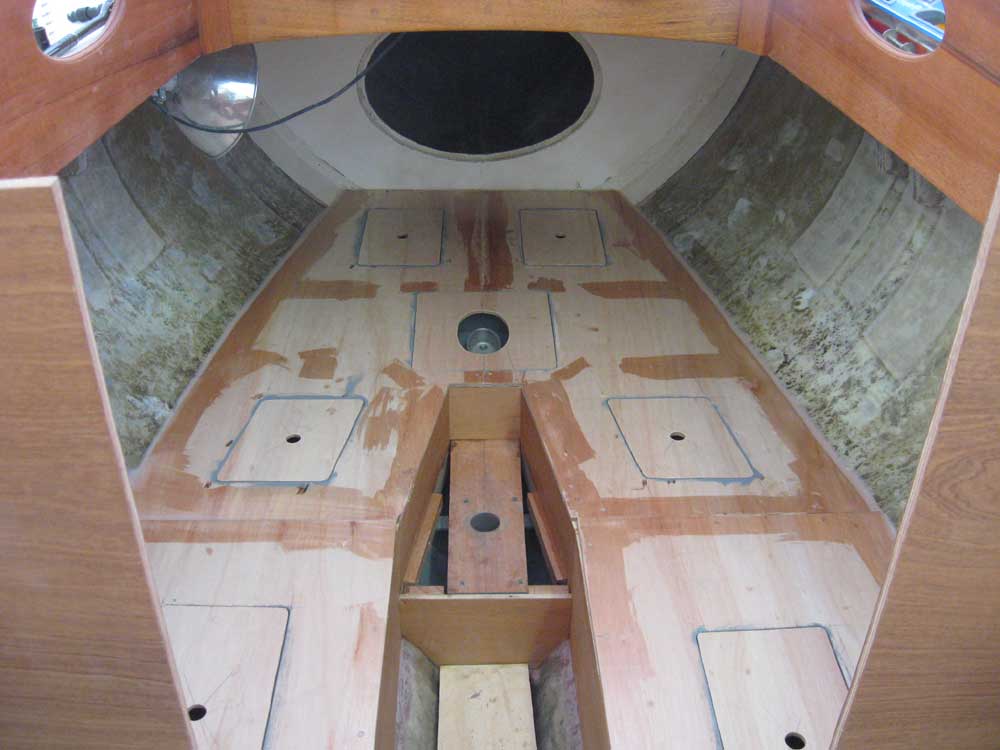
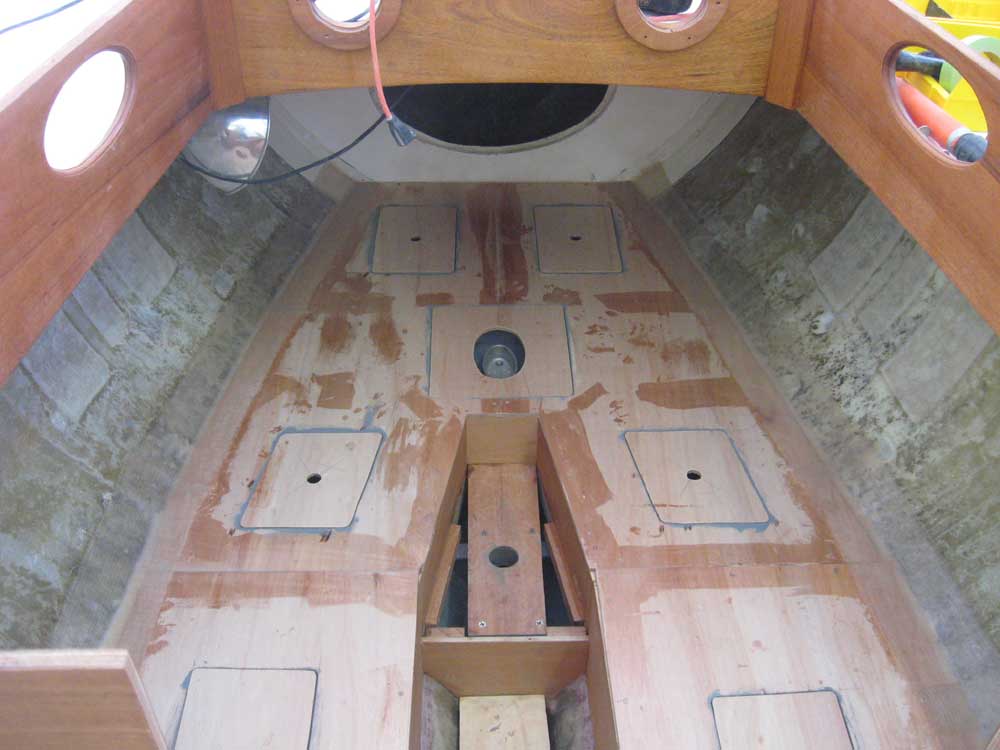
Friday, April 18, 2008 I began today with the final installation of the v-berth platform. I installed the four pieces in a bed of exterior construction adhesive using bronze screws. Apparently I had the final alignment a little different than during my test fits, as the starboard after piece didn't line up correctly; since this misalignment would be hidden by solid trim later, I decided to not worry about it. I knew I should have test-fit all the pieces one more time before applying the adhesive everywhere! Afterwards, I continued the installation with some epoxy fillets around the outer edges, where the plywood met the hull. These filled the gap as needed, adhered the plywood to the hull, and also created a transition for the fiberglass tabbing that I planned to install a little later in the day. I also filled the screw holes and seams as required, as the platform was to be painted (white) later in the construction process. |
|
|
|
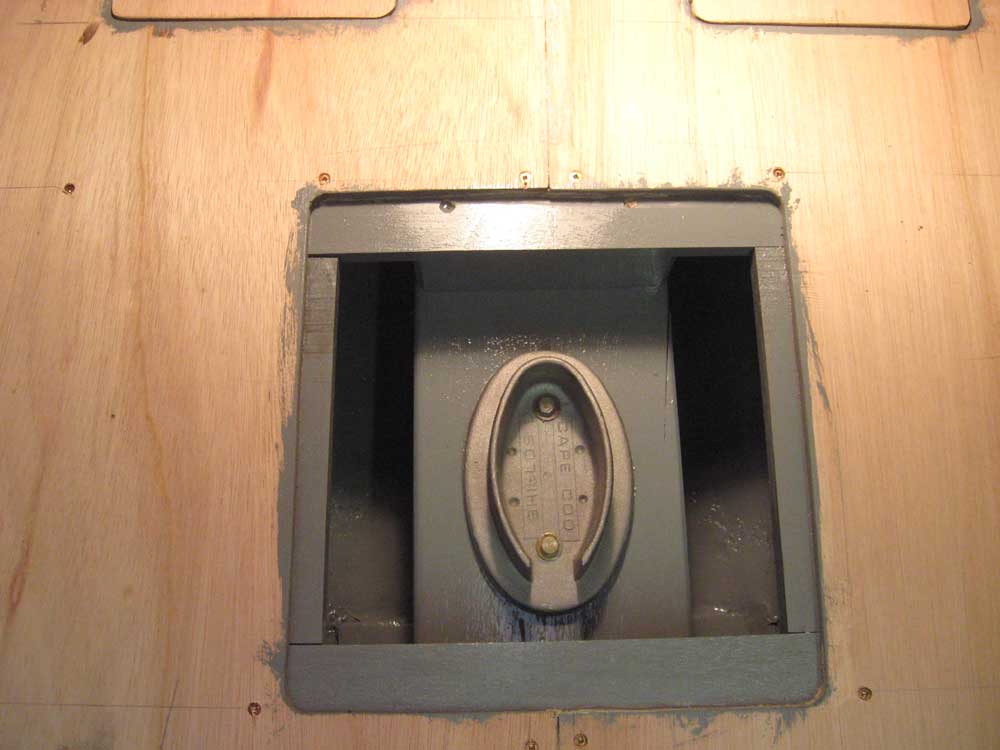
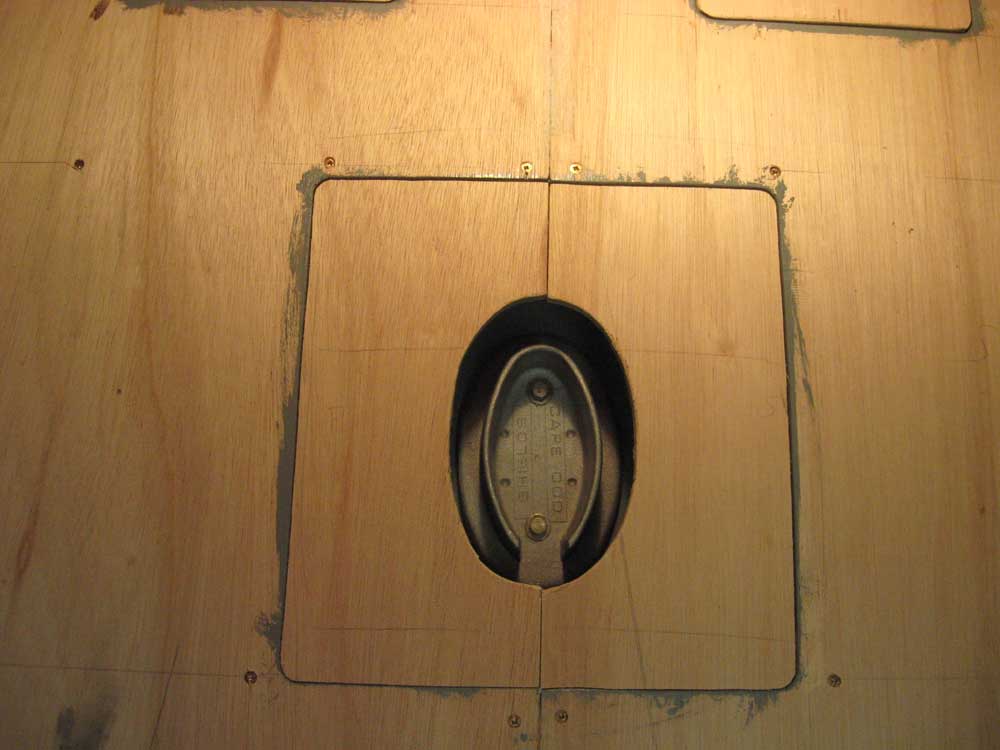
Next, I turned to the removable panels around the mast step. Using the new mast step as a guide, I traced the outline of the base onto the two plywood sections and made the cut as needed; this could always be opened up more if required, but the mast step was larger than the outside diameter of the mast, so I thought this approach would work. I also test-fit the new mast step in the mast to make sure that it fit before I proceeded (it did). One never knows. I installed the mast step with stainless steel lags--2 for now, which should be sufficient anyway, but just in case the step needed to be adjusted later, there were several other dimples for fasteners in the mast step which could be used later. I located the new step in the same place as the old one, give or take the slight differences in the mast step casting design from the old, decrepit one to the new one. I applied some Tef-Gel to the holes through the aluminum step and to the base of the washers to isolate the metallic contact as much as possible. |
|
|
|
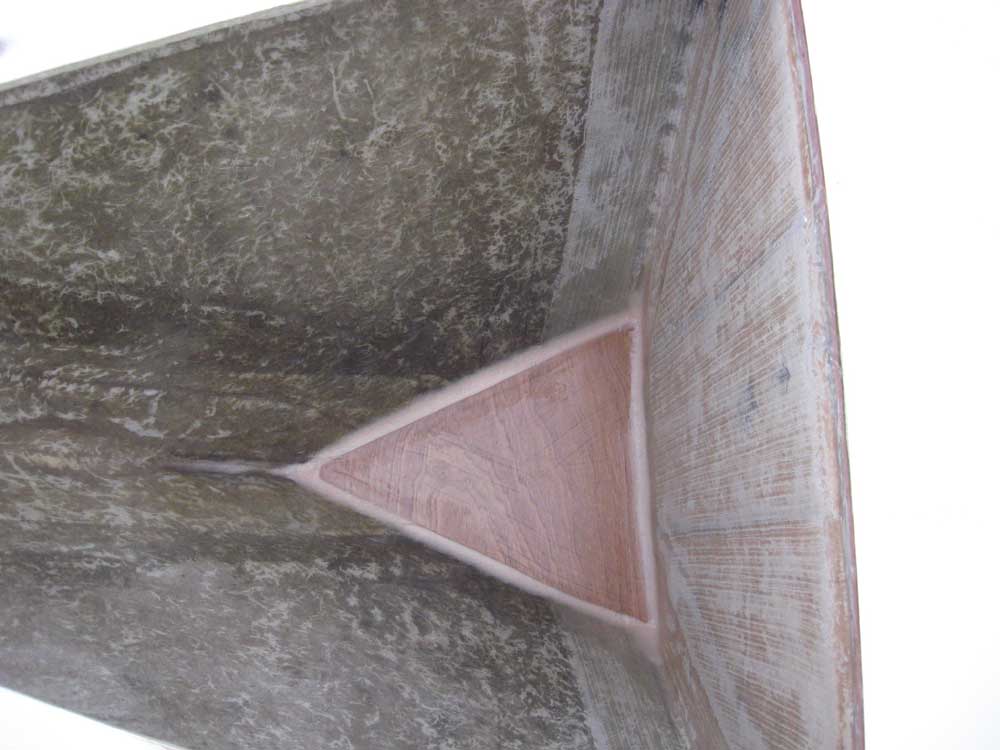
While I waited for the fillets to partially cure, I worked on the anchor well for a while. To allow the well to have drains, I needed to install a floor at some as-yet-undetermined height so that the drains would be located well above the waterline at the bow. The actual bottom of the anchor well as constructed was either right at or even just below the waterline, clearly a poor location for a drain. I needed to determine roughly where to install the floor, and to get to this point I first transferred a rough line to the exterior of the hull that represented the location of the bulkhead; I used a straightedge to mark the top edge of the hull in line with the bulkhead, and then transferred the line down with a level. Good enough for what I needed. |
|
|
|
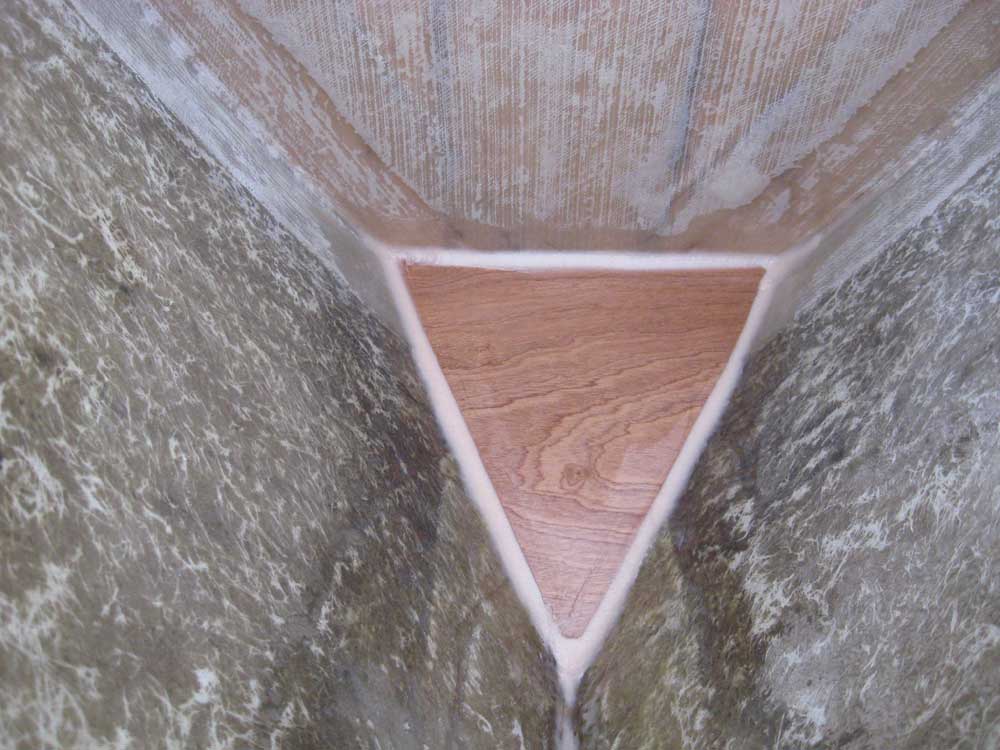
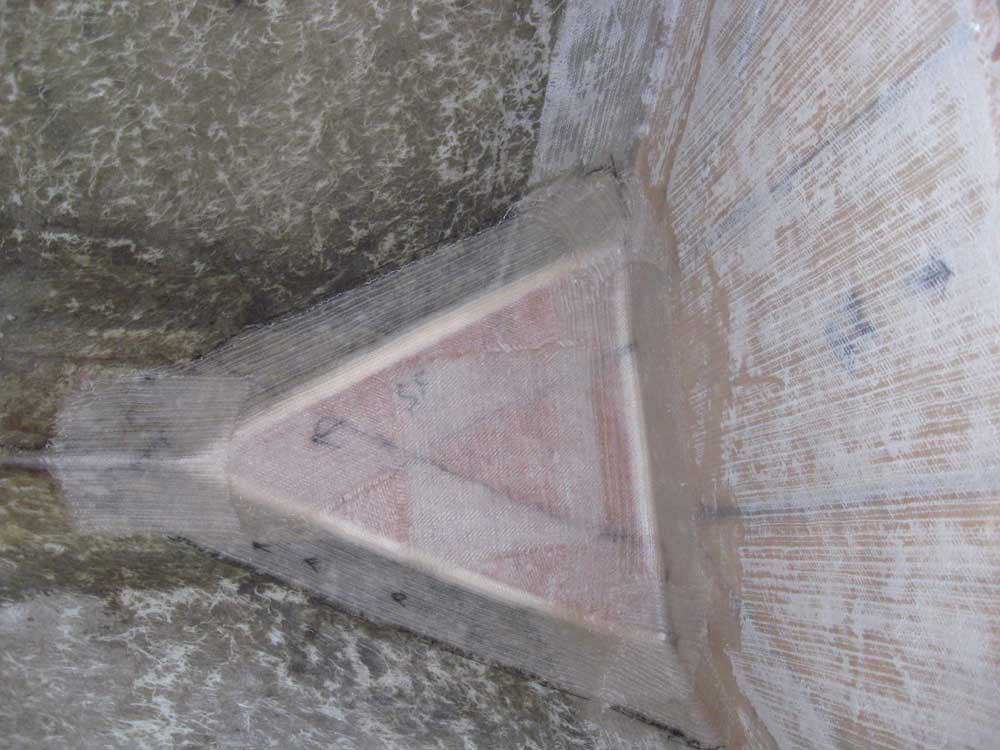
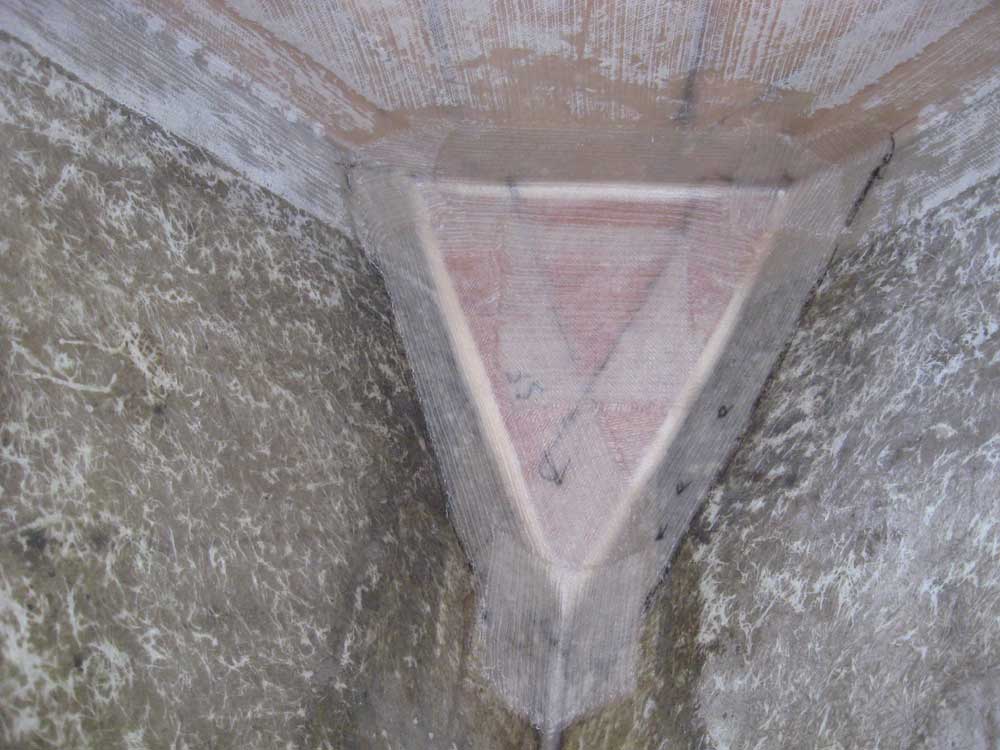
I wanted the drains (one on each side) to be at least six inches above the waterline, so beginning with that criteria I made some rough measurements (by rough I mean holding a straight tape measure basically plumb and eyeballing the measurement back to the flared hull some distance beyond) and transferred the measurement to the inside of the anchor well, starting with my 6" minimum. This seemed low, so I raised my mark inside the boat by a couple inches and then drew a level line across the anchor well bulkhead, signifying the aft end of the new floor. Next, I made some basic measurements for a piece of plywood for the floor: the aft width and the centerline length. The piece would be triangular in shape, so this was all I needed. I planned for the floor to slope aft a bit so that water would naturally run to the drain locations. I cut out the plywood shape and test fit it in place; it fit well, and the forward edge was higher than the aft by a slope of a bit more than 1/4" per foot, which was adequate. I made some reference marks inside the hull, and then vacuumed and solvent-washed the area thoroughly. Then, I installed the plywood base (after coating the bottom side, which would never be seen again, with epoxy) in a bed of thick epoxy, and formed fillets all around, ensuring that I had solid and continuous coverage at all the edges and corners to promote watertight integrity. |
|
|
|
After lunch, it was time to install tabbing on the v-berth and in the anchor well. I applied a layer of 6" biax tabbing to the v-berth edges--an unremarkable process--and then cut and installed 6" tabbing in the anchor well, adding small pieces in the corners and center section of the floor to ensure 100% fiberglass coverage and ultimate watertight integrity. |
|
|
|
|
|