Lively Heels 5

< Back to Lively Heels

Monday

I had my trusted upholster make up a new filler cushion to fit in the required space, and with this now complete, along with the minor work I’d had to do on some of the trim pieces from last time, I made a quick trip to the boat to deliver the new cushion and finish up the installations.

I also finished up the trim on the nearby companionway.  When the ladder unit is properly secured with the four thumbscrews that attach it to the structure beneath, the seam between the trims would become tight; for these photos, I just placed the ladder assembly in place loosely.

0600 Weather Observation:  23°, clear.  Forecast for the day:  Sunny, 40°

Lively Heels 4

< Back to Lively Heels

Thursday

With the milling and varnish work complete, just a few details remained before I was ready to return to the boat for the final installation.

The new fiddles for the U-shaped original dinette were to be removable, so that there’d be no hard spots between the cushions when the area was converted in to a full-size berth, but were still needed for looks and to help hold the cushions in place during normal configuration.  I also decided to make the fiddle on the outboard side of the table removable.

To hold the fiddles in place securely, while keeping them readily removable, I chose stainless steel dowel pins.  Into each of the fiddles, I drilled 1/4″ holes for the pins, then glued them in place with epoxy, leaving about 1/2″ – 5/8″ of the pins protruding below the fiddles.

On the tabletop, I aligned the fiddle and its new pins over the top and drilled holes for the pins, using the next size larger drill bit to keep the fit tight, but not so tight that the fiddles couldn’t easily be removed.  Note that in these test-fit photos, I did not push the fiddle all the way down, as the pins were just freshly glued in with epoxy here.

Finally, I installed the top end of the table pedestal to the center of the underside of the table with six #12 screws.

A few days later, back at the boat for the final installation, I got started by clamping the three pieces of the support cleat assembly in place beneath the opening in the settee.  Everything fit well and as intended.

To secure the cleats, I drilled and countersunk bolt holes through the settee and through the cleats beneath:  three locations on each of the short sides, and four on the longer center piece.  I installed the cleats permanently with glue and 1/4″ flathead bolts.

To finish off the opening and cover the exposed plywood end grain, I cut and installed cherry trim that I’d milled and pre-finished for the task.

Now I could test-fit the table in place.

After determining the center of the opening, I located and installed the table leg base.

To finish up the installation, I marked and drilled holes in appropriate locations to accept the dowel pins from the removable cushion fillets.  I had to trim the ends of the long center piece, which I’d made too long, which meant that I had to bring this piece back to the shop so I could smooth and refinish the ends as needed, but otherwise the fillets worked well.  I took detailed measurements of the opening so I could have a filler cushion made to suit.  Fortunately, I even had offcuts of the original fabric on hand for the job.

Now I turned to the companionway area.  The slim trim I’d made for the threshold fit once I cut it to length, but I found that I needed to make relief cuts on each end to accommodate the thickness of the paneling in the pilothouse and allow the center portion–in the companionway opening itself–to extend fully through the opening.  I didn’t have the tools I needed to make these cuts properly on site, so I noted the details and brought the trim back to the shop.

The corresponding piece for the top of the ladder assembly fit once I’d cut it to length and fiddled around a bit, and I glued it to the top of the plywood backing, pinning it with some brads till the glue cured.  This piece was designed to butt up flush with the 1/4″ thick threshold.

I’d return once more to bring back the modified parts and complete the installation, as well as to deliver the filler cushion once completed.

Total time billed on this job today:  3.5 hours

0600 Weather Observation:  25°, clear.  Forecast for the day:  Mainly sunny, high around 50°, increasing clouds late in the day and light rain overnight


Lively Heels 3

< Back to Lively Heels

Over several days, I applied three base coats of gloss varnish and a final coat of rubbed-effect satin varnish to the table and related trim pieces.

Later, I turned over the table top to expose the bottom side, where I’d already applied two base coats, and applied a coat of the satin varnish there as well.

Meanwhile, I worked on another small project for the boat.  The original trim piece I’d built at the companionway between the pilothouse and main cabin had never worked well and was ill-conceived.  I’d built a simple transition that overlapped the top edge of the removable companionway ladder assembly, but the problem was that when the ladder was removed, the thin trim overhung too far, and this resulted in it cracking and breaking.

I removed the old trim piece and made some measurements for replacement trim.

My initial idea had been to cut down the top edge of the ladder assembly a bit and mill a single piece of trim with a thicker, heavier overhang, but back at the shop this seemed overly complicated and unnecessary.  Instead, I milled a 1/4″ thick strip of cherry to the 1-1-2″ width required to cover the plywood subfloor in the pilothouse.  This trim would no longer overhang the top of the companionway ladder.

Instead, I trimmed the top edge of the plywood backing for the ladder, removing some additional trim that I’d originally installed there, and milled a solid, heavier piece of trim to cover the plywood end grain and meet up with the pilothouse floor level.

Over several days, I built up base coats of gloss varnish, then the final satin coat on these small trim pieces.  Final installation would come after a trial fit next time I was back at the boat.

Total time billed on this job today:  2.5 hours over several work sessions

Lively Heels 2

< Back to Lively Heels

Friday

In addition to the support trim for the table top when installed in the down position, I needed a few pieces of fiddle trim to replace the original trim.  The new trim would be removable for when the dinette was converted to a full-size berth, but would still be needed at other times to hold the cushions in place.  I milled up the pieces I needed, referring to my measurements for lengths.  I also prepared two long pieces of simple 1/4″ wide trim that I would use to cover the plywood end grain in the dinette opening once the main trim was installed.  I edge-milled as needed and sanded all the trim pieces smooth through 220 grit.

The table top blank required a few additional milling steps.  I planned to install one fiddle at the outer edge, needed to hold the filler cushion in place when in use, but the owner thought it’d be best to leave the remaining three edges un-fiddled.  However, we did elect to mill some little recesses to hold pens and the like, so now I set things up to mill these with my router and a sign-making bit I had that would make the appropriate profile.

After determining where I wanted the grooves, and measuring the router and bit as needed, I clamped on a straightedge at an offset (in this case it was 3-3/4″ from the edge of the table) against which to hold the router and mill the grooves in a straight line.  Then I routed the details on the three sides of the top.

Afterwards, I milled 1/4″ roundover details on the four bottom edges of the table top and on the top outer edge, where I planned the fiddle.  For the inner three top edges I switched to a 1/2″ roundover bit for a smoother profile.  Once I’d routed all the edges, I sanded the whole tabletop to 220 grit.

Finally, after solvent-washing, I applied a sealer coat of varnish to all sides of all the new trim and table top.  I’d continue building up the varnish over the next few days before switching to rubbed-effect varnish for the final coat to match the existing interior finish.

Total time billed on this job today:  2.25 hours

0600 Weather Observation:  30°, partly clear.  Forecast for the day:  Sun and clouds, windy, around 34°

Lively Heels 1

< Back to Lively Heels

Thursday

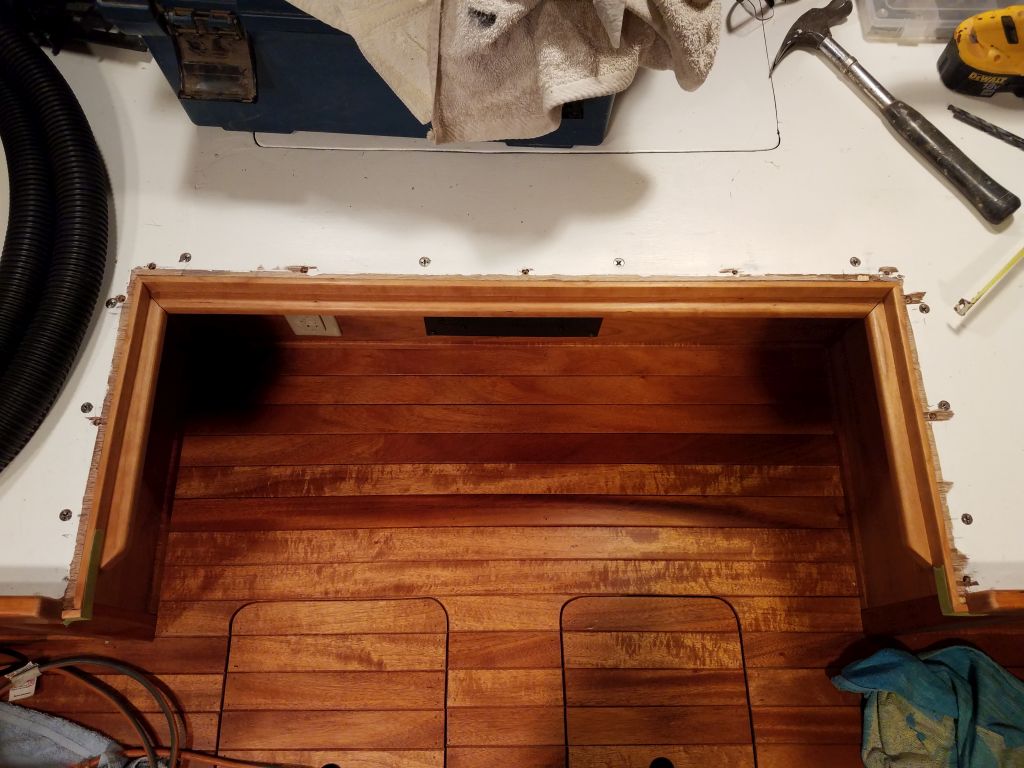
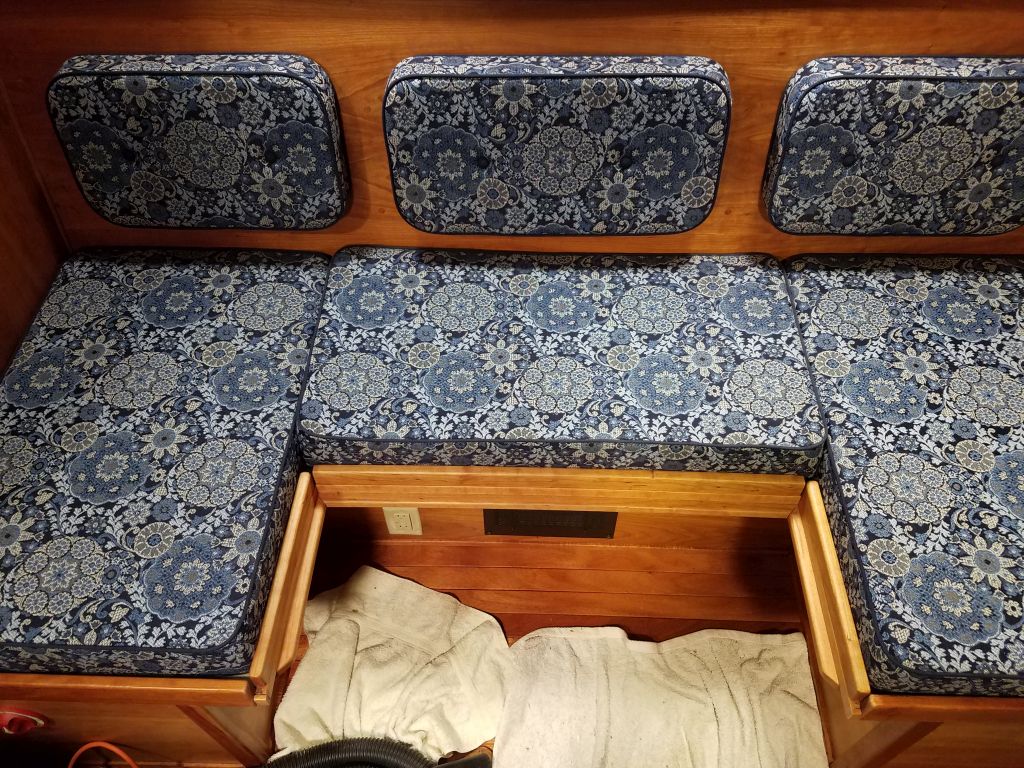
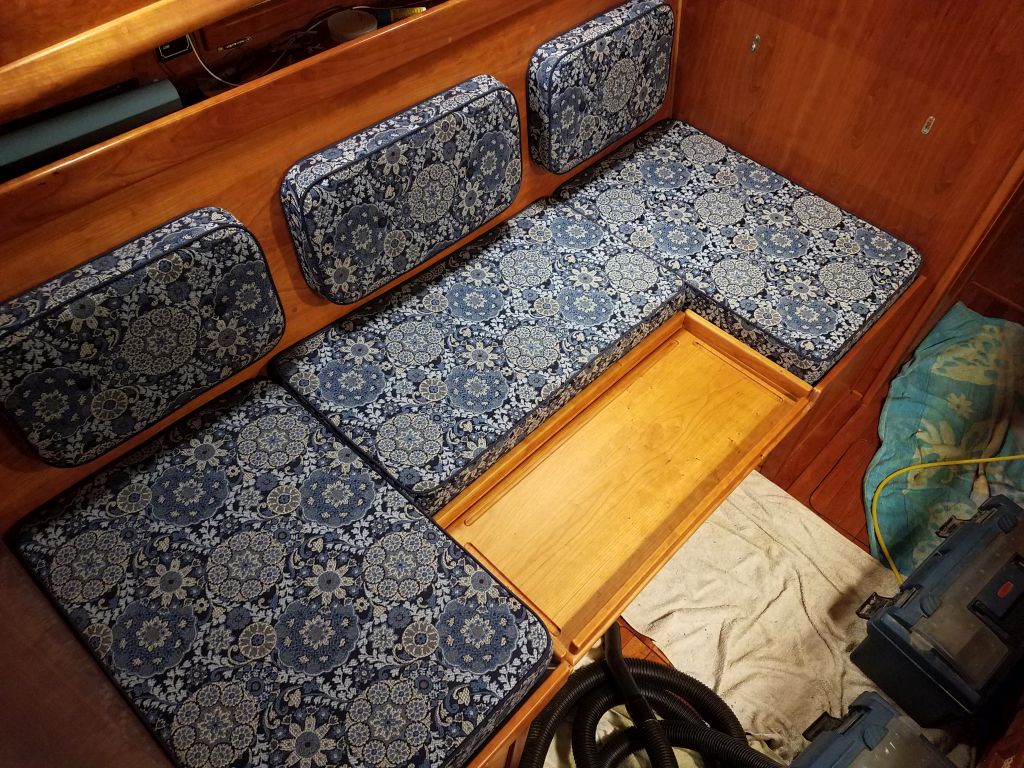
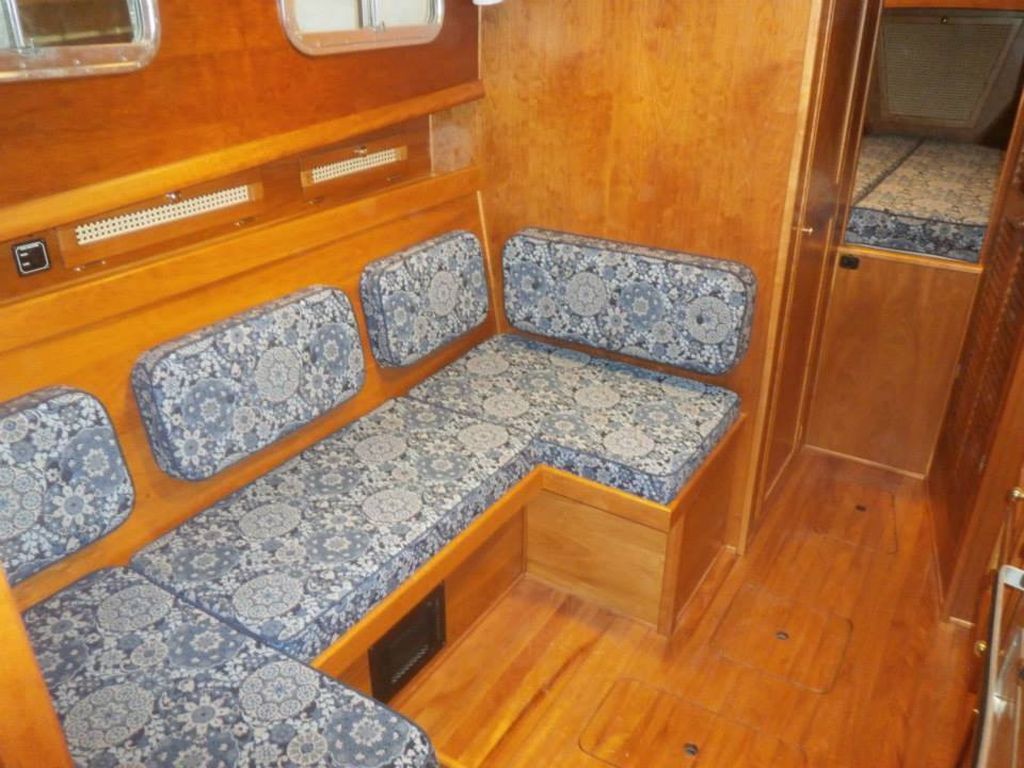
Back in January, I visited Lively Heels in the owner’s storage building so I could discuss with him the addition of a dinette table and possible conversion to a full-size berth.  The existing space had been constructed to allow for a table with a 3-sided dinette seating area, but the table had never been installed.

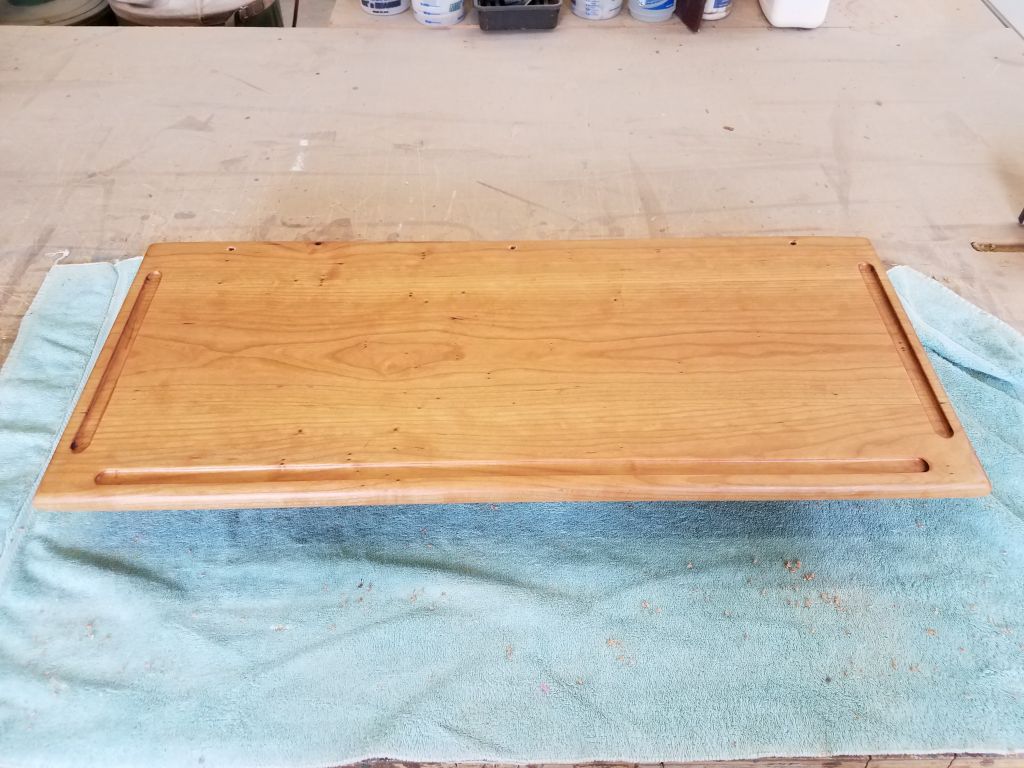
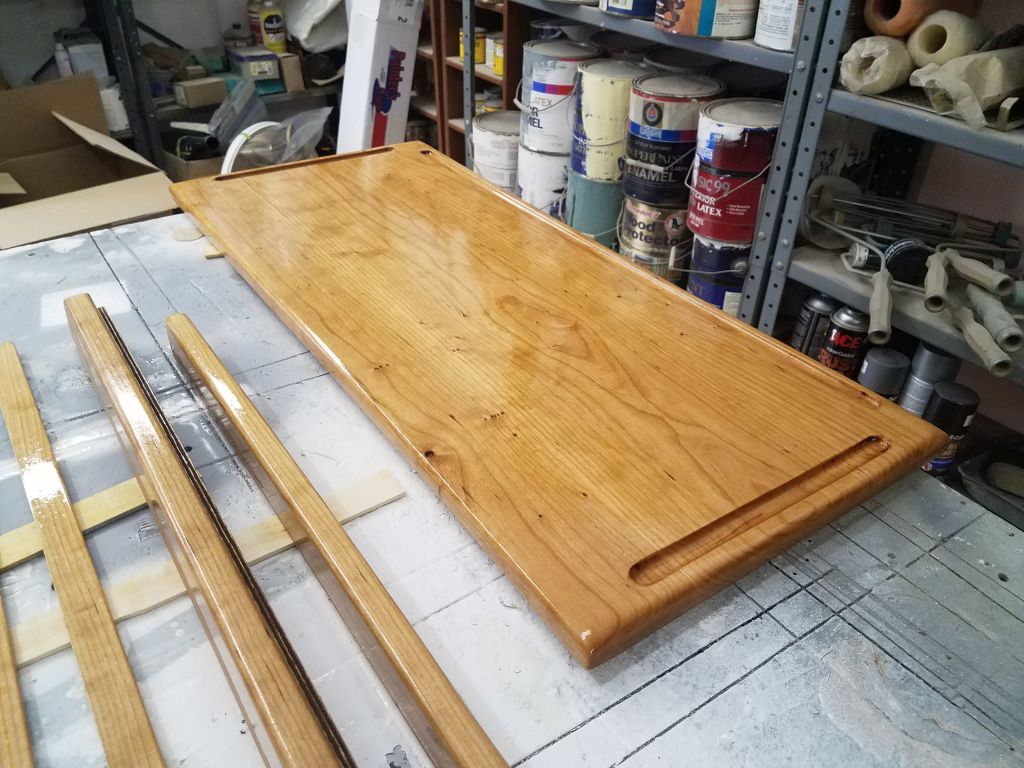
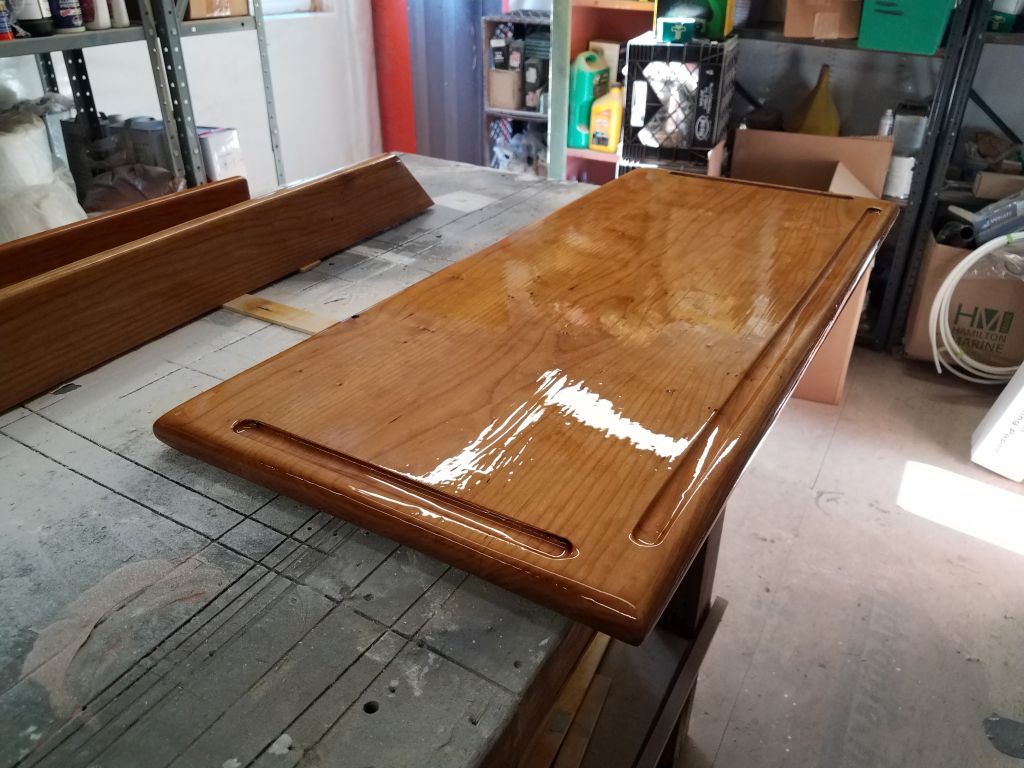
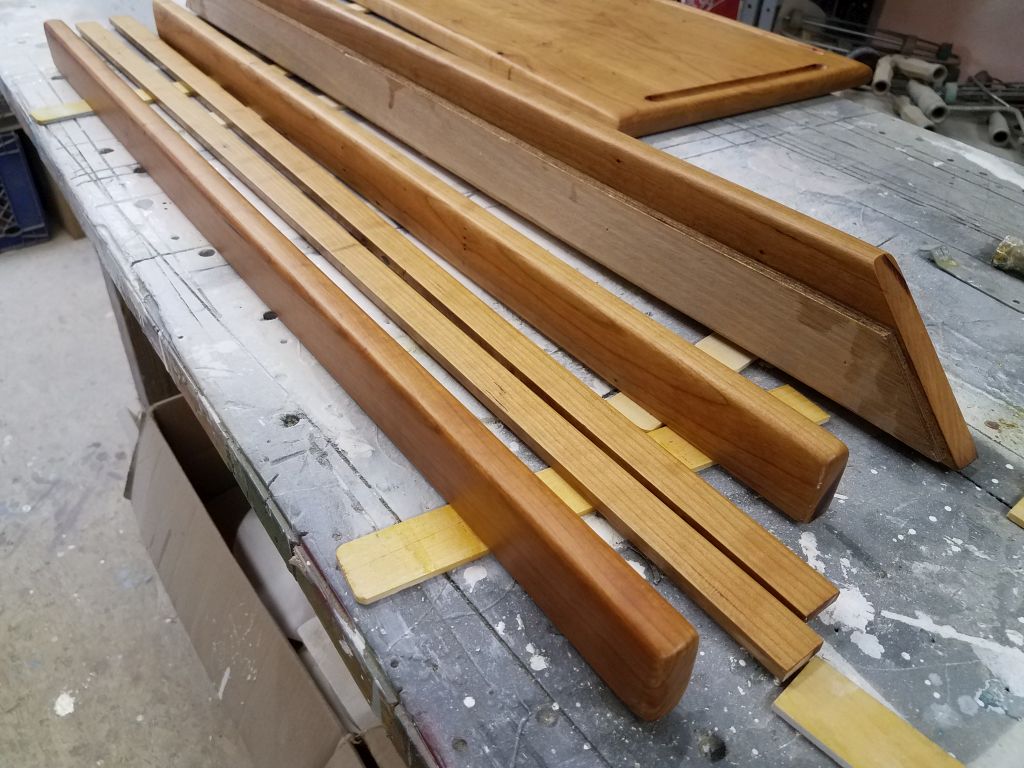
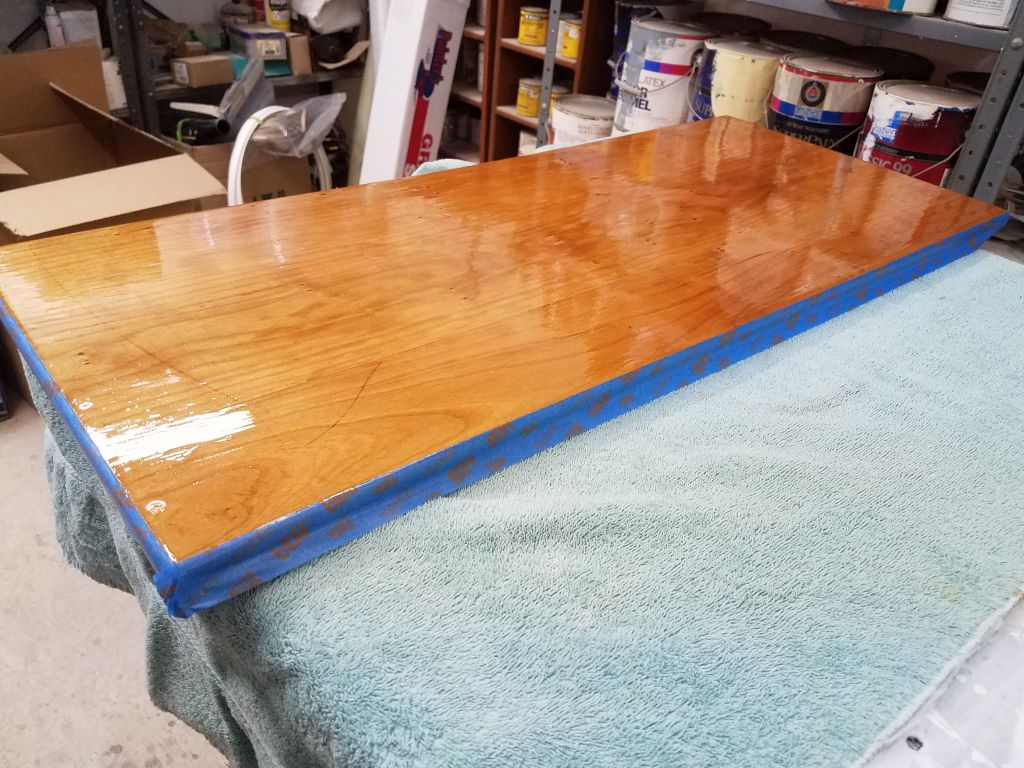
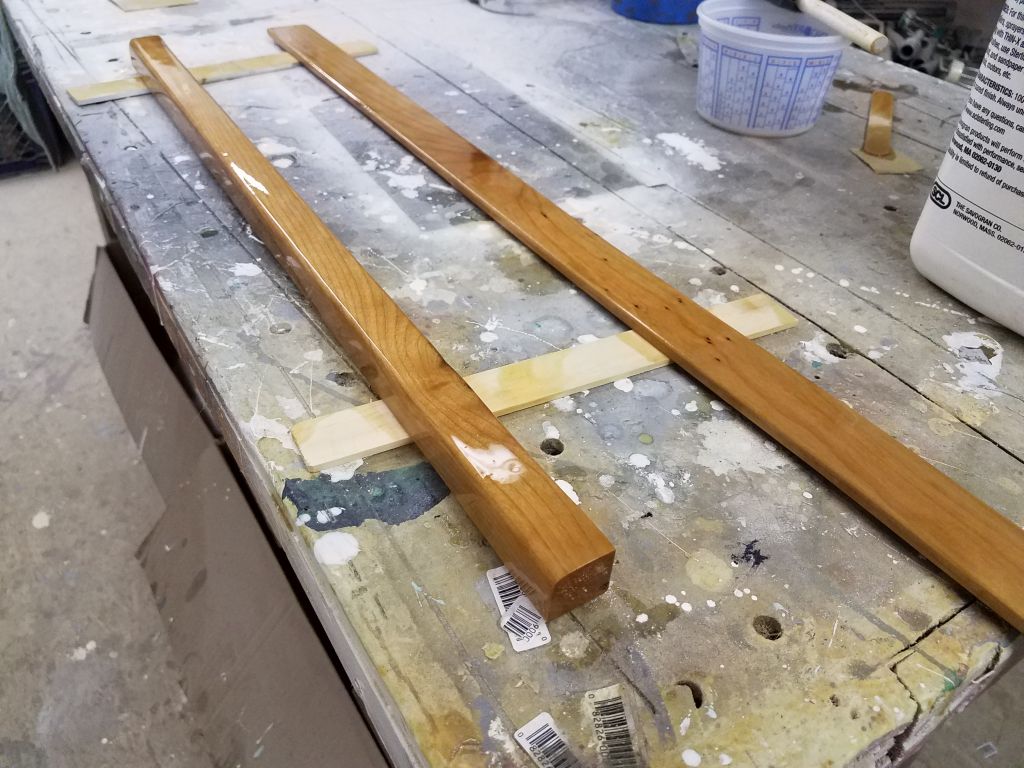
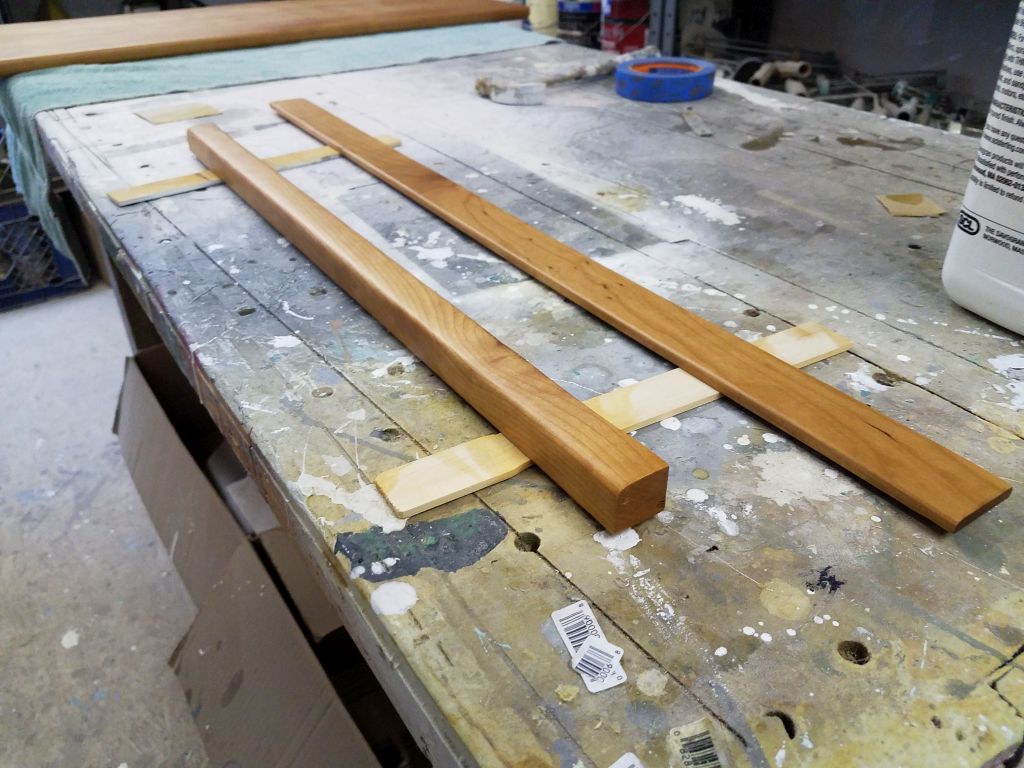
The outcome of our discussion at the time was that a basic pedestal table, sized to fit the footwell opening in the existing dinette, was the best option for the space and for the owner’s needs.  At the time, I took some basic measurements of the space and noted the details, and later, back at the shop, I spent a few hours preparing and dimensioning some raw cherry stock to glue up a blank for the new table top, along with some pieces sized for the trim I thought I’d need.

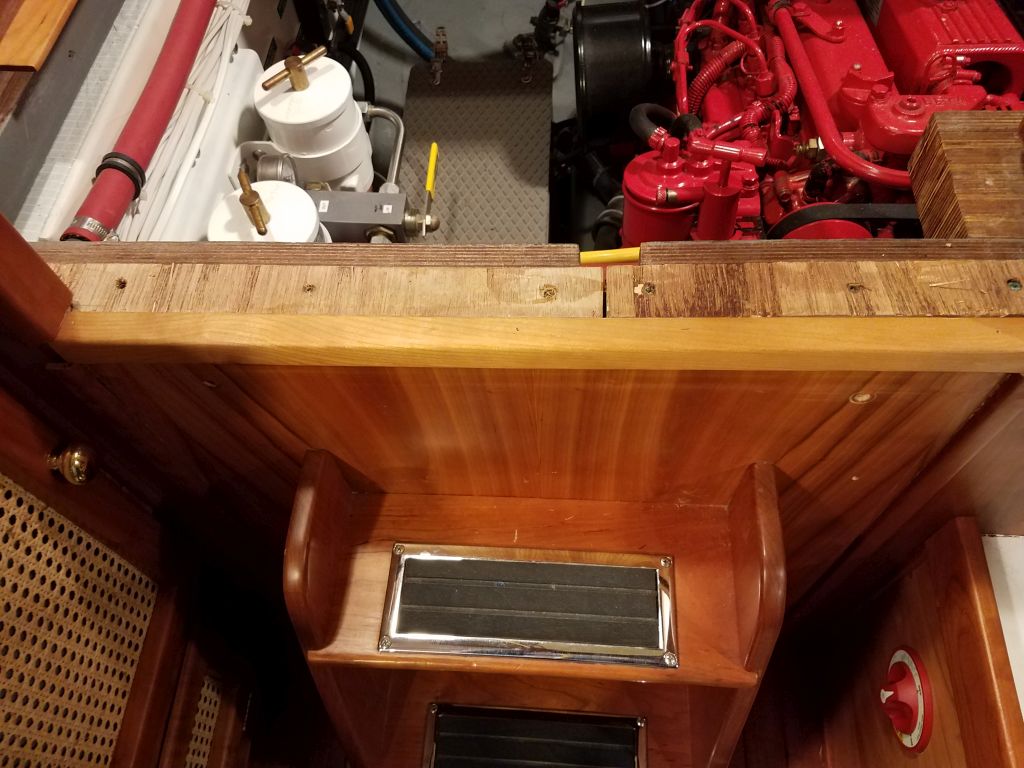
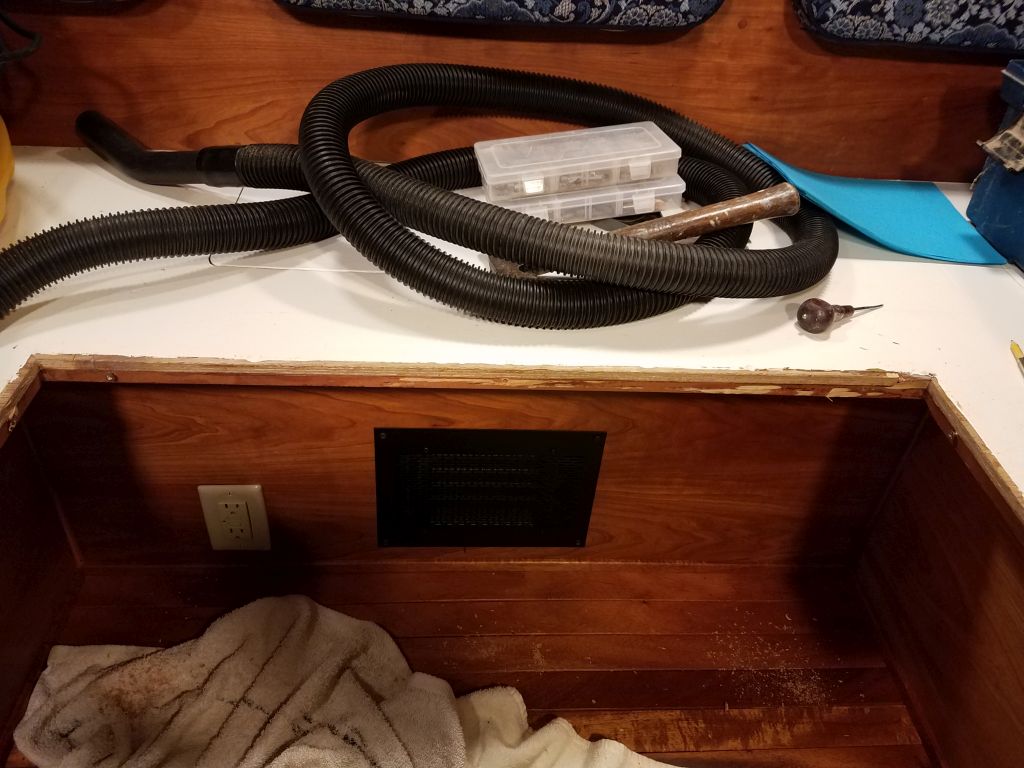
The table was to be removable and serve double duty as the platform for a berth filler cushion that would make the dinette into a larger lounging or sleeping area.  Standard table pedestals have traditionally left much to be desired in terms of strength, looks, and durability, so finding a decent yet simple pedestal for this application was an important task.  Complicating the installation in this specific case was the fact that the center of the existing dinette footwell, where a pedestal foot might be located, was directly over some beams that supported the cabin sole (I knew this because I built the interior originally some years earlier), and this obviated the use of any sort of flush or insert-type pedestal base.

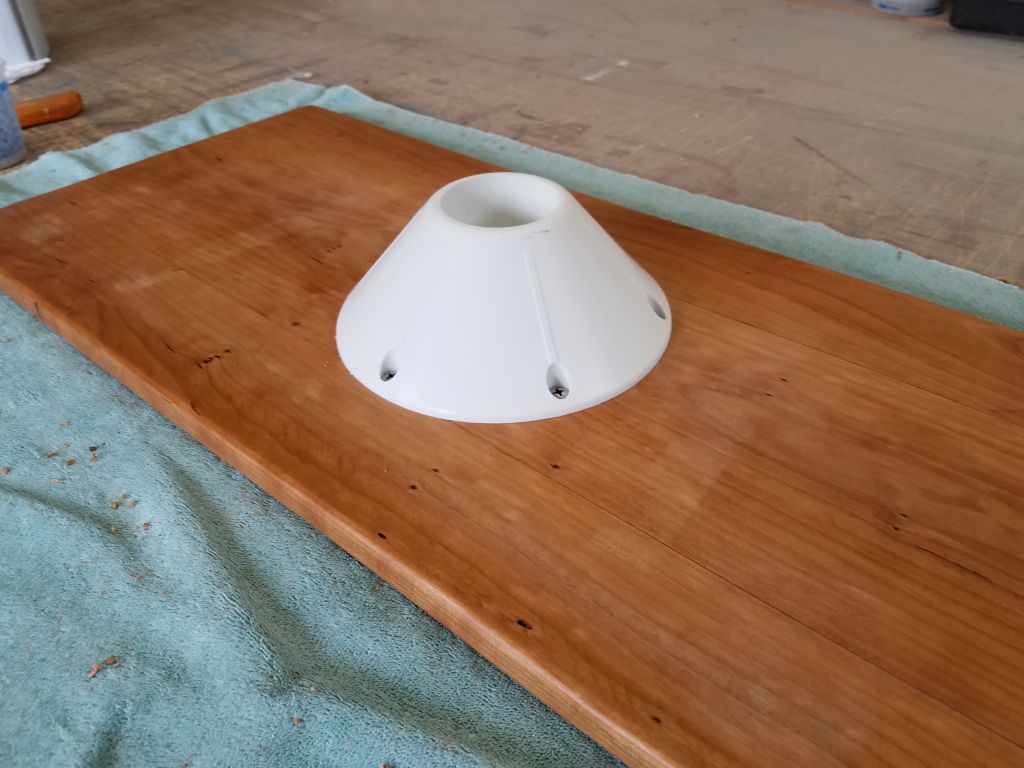
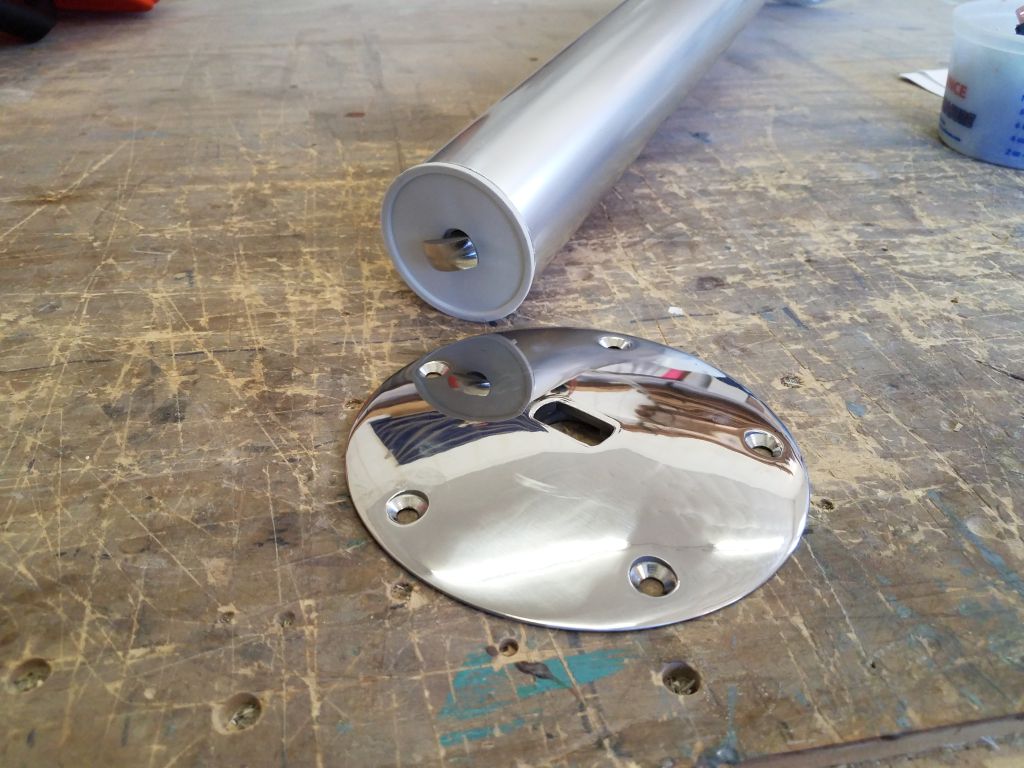
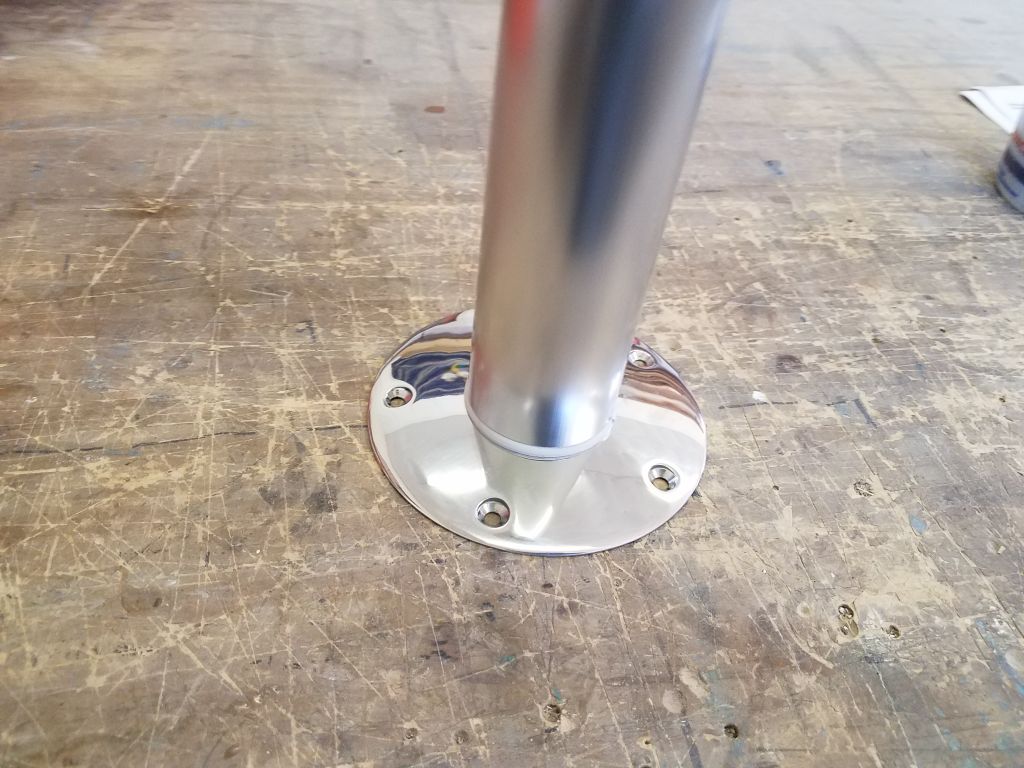
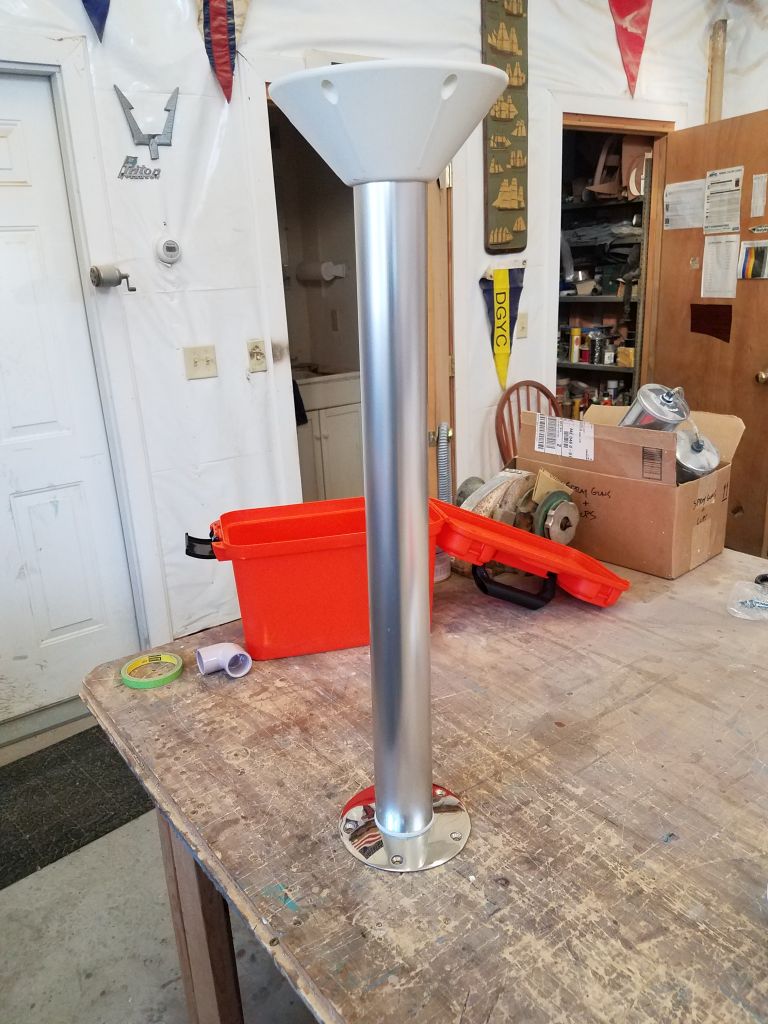
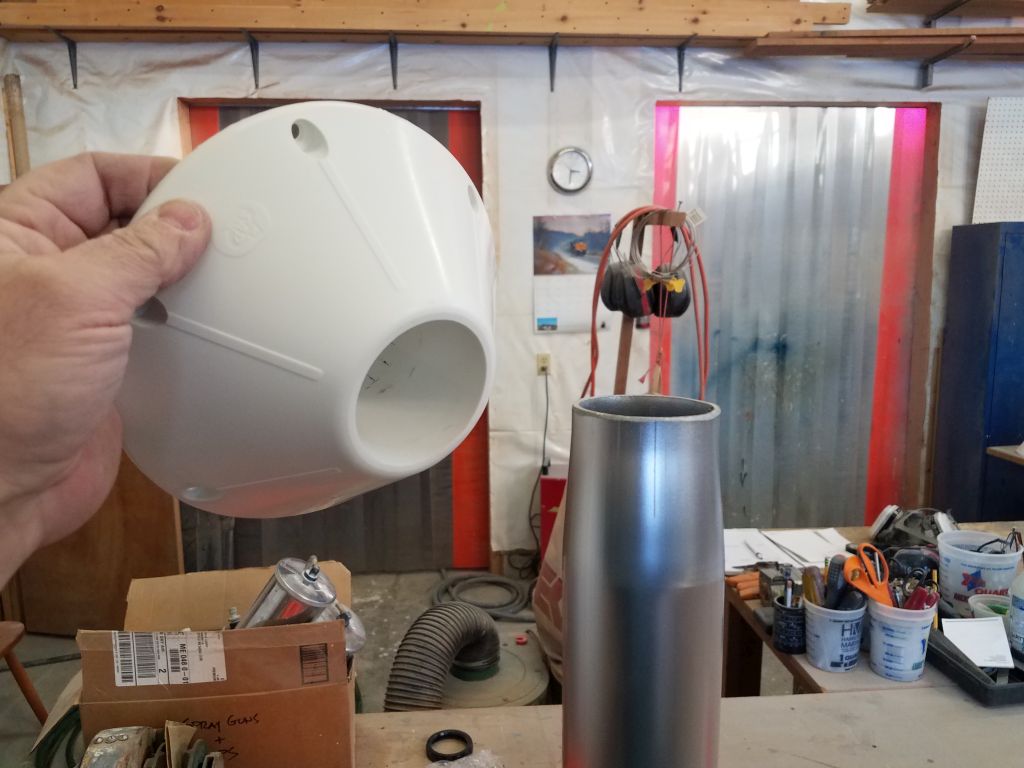
After some searching, I found a pedestal that featured an aluminum leg that fit into a neat-looking nearly flush surface-mount base.  Intrigued, I ordered the pedestal so I could inspect it firsthand.  The base itself, made of stainless steel, was very low profile–a plus for this space since we didn’t want a bulky pedestal base in there–and had what turned out to be a highly effective means of securing the table leg tightly.  The top of the assembly was a plastic piece that would be secured to the table, and fit over a tapered section of the leg for a tight friction fit.

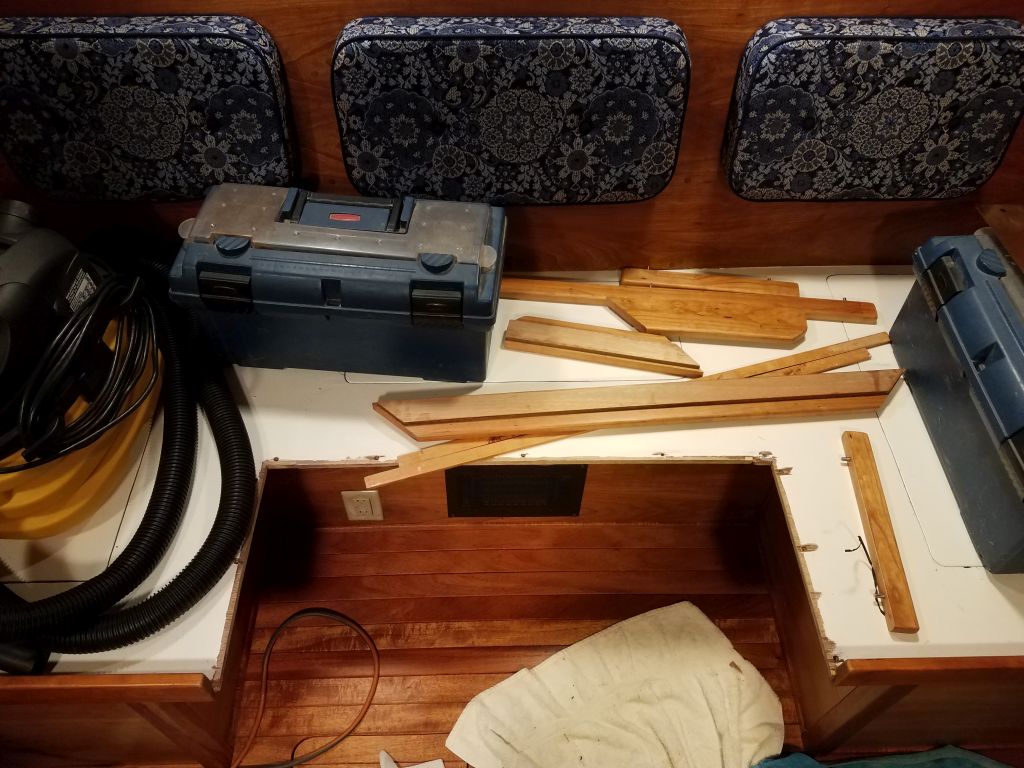
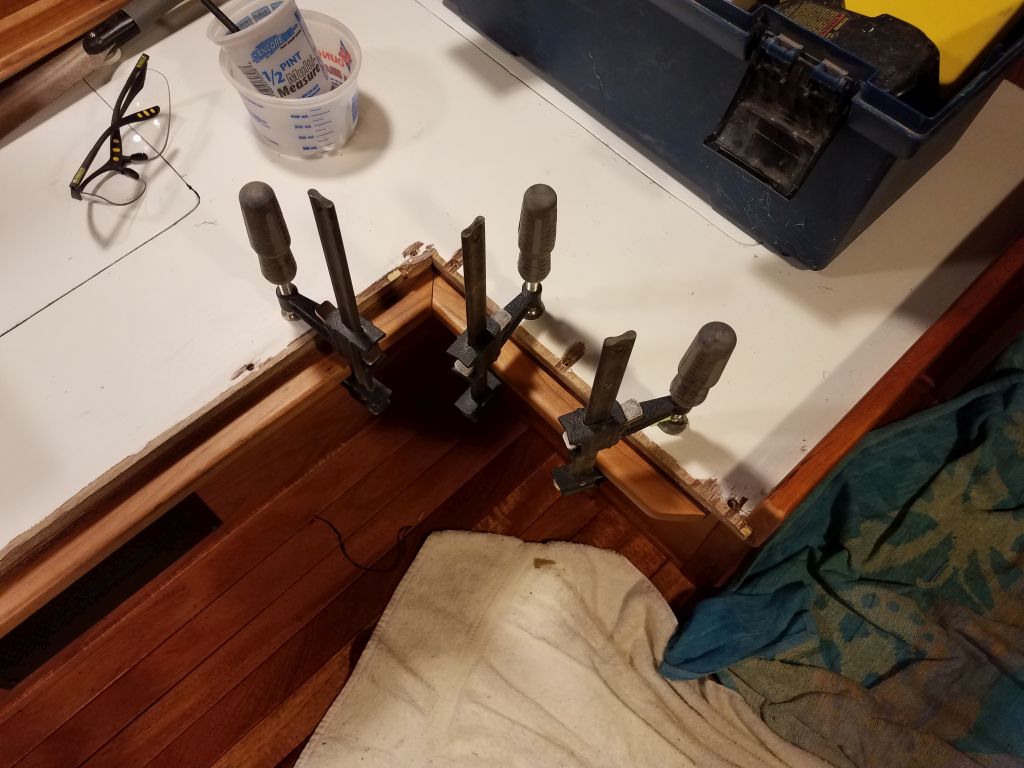
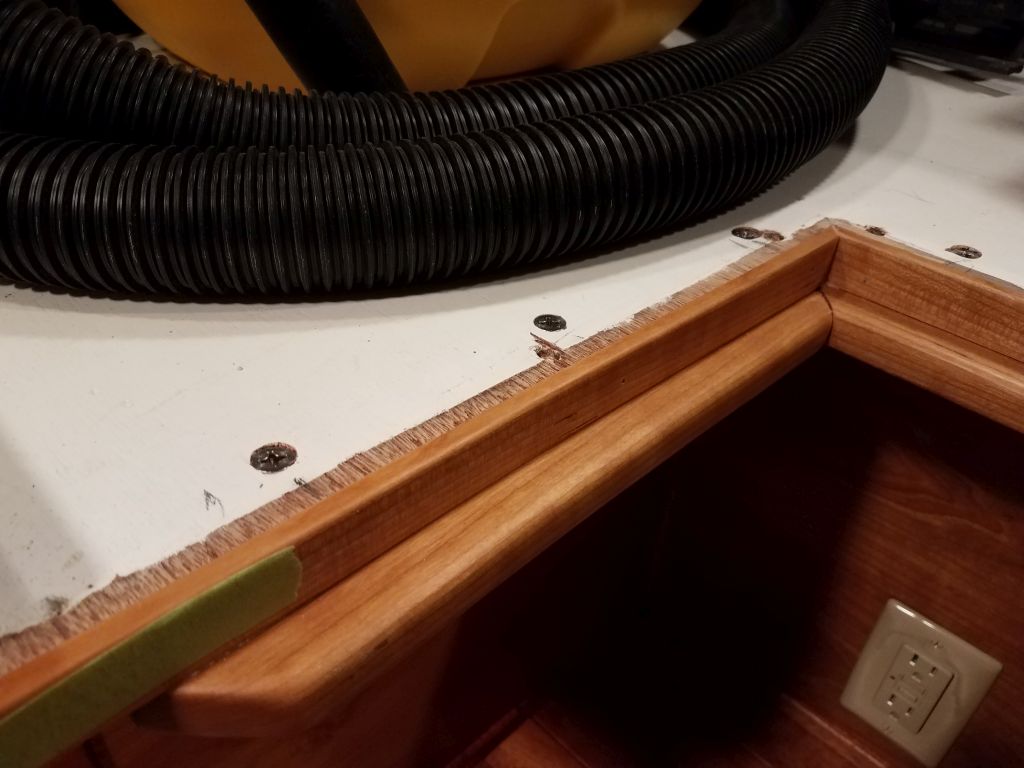
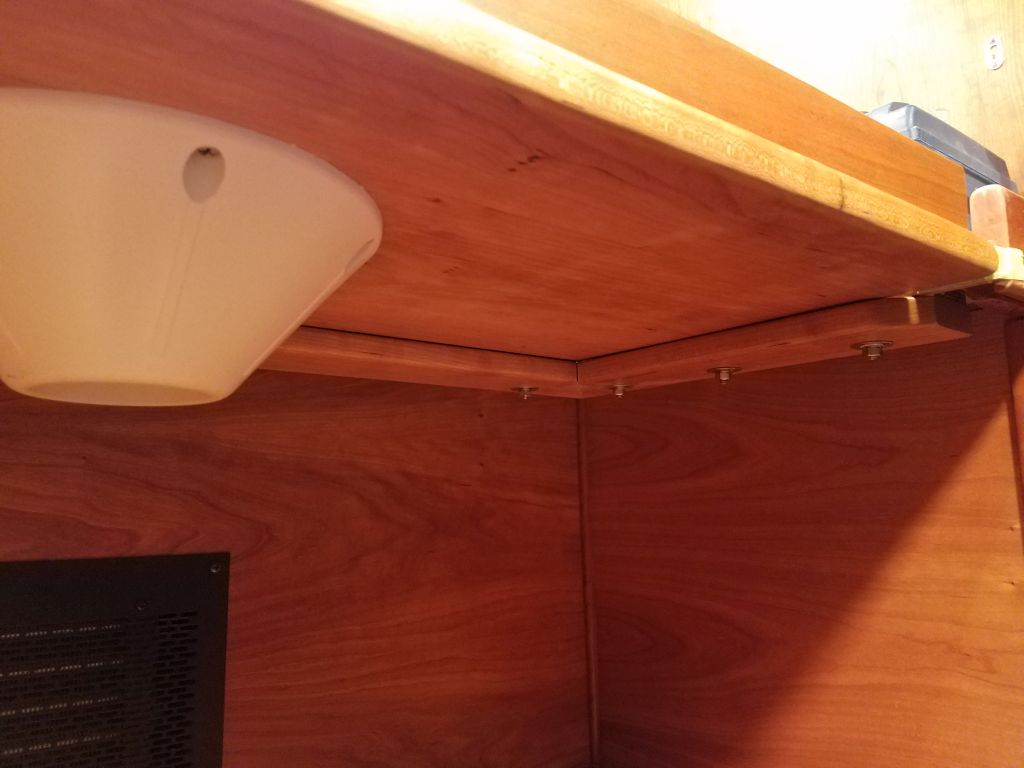
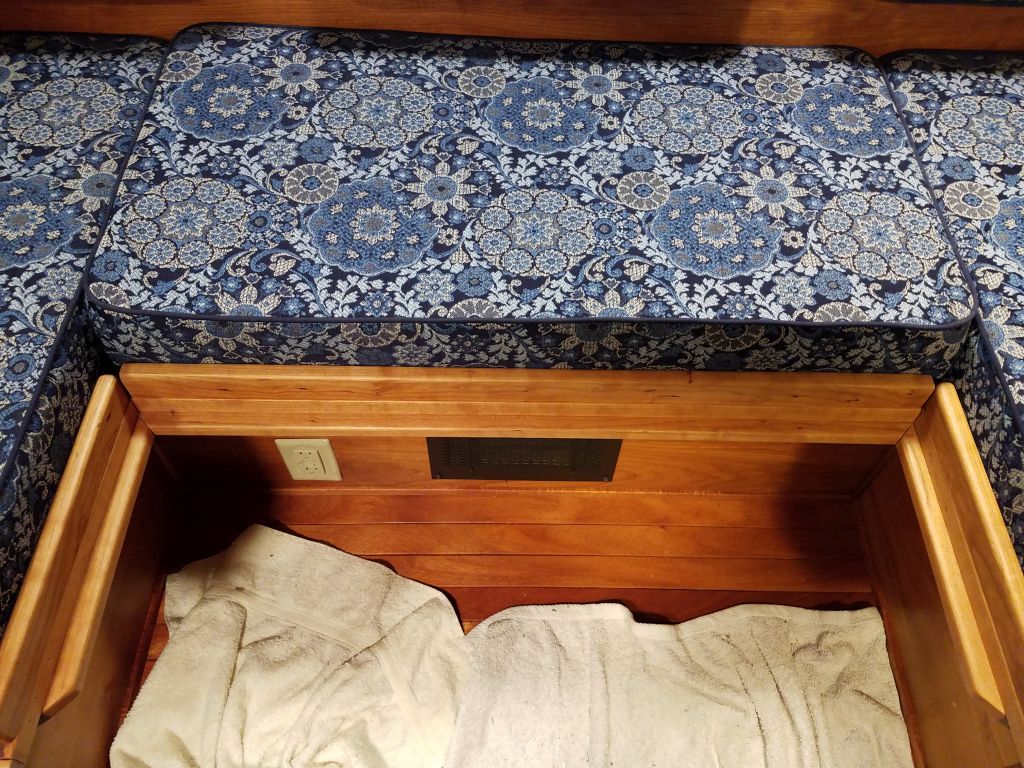
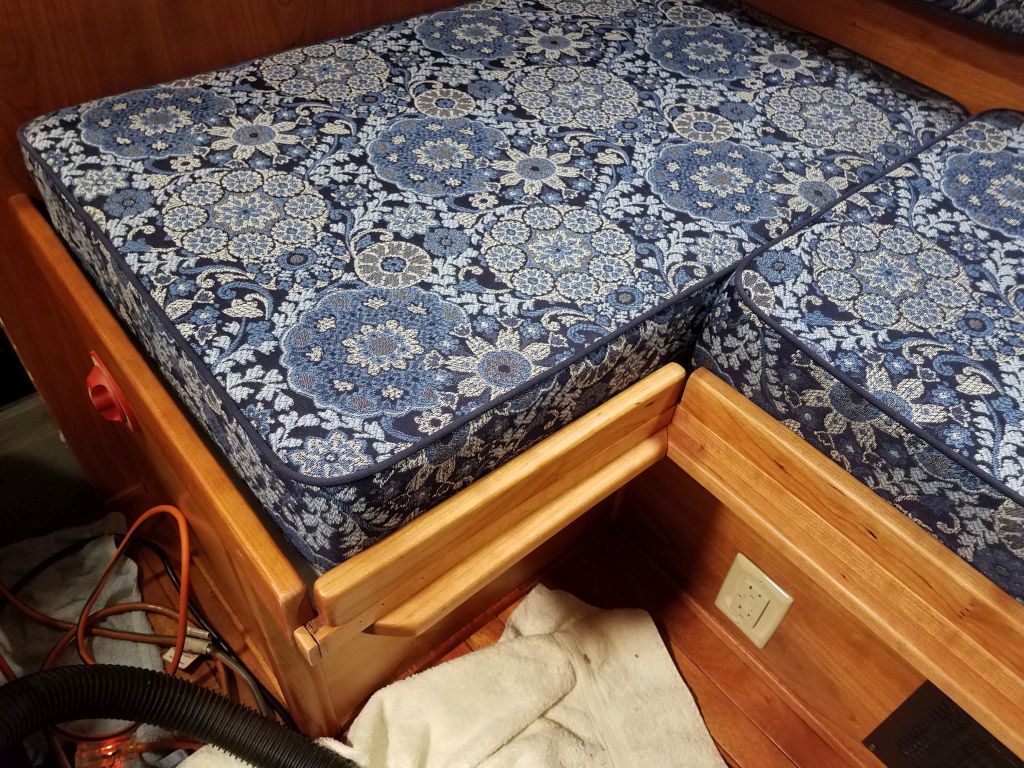
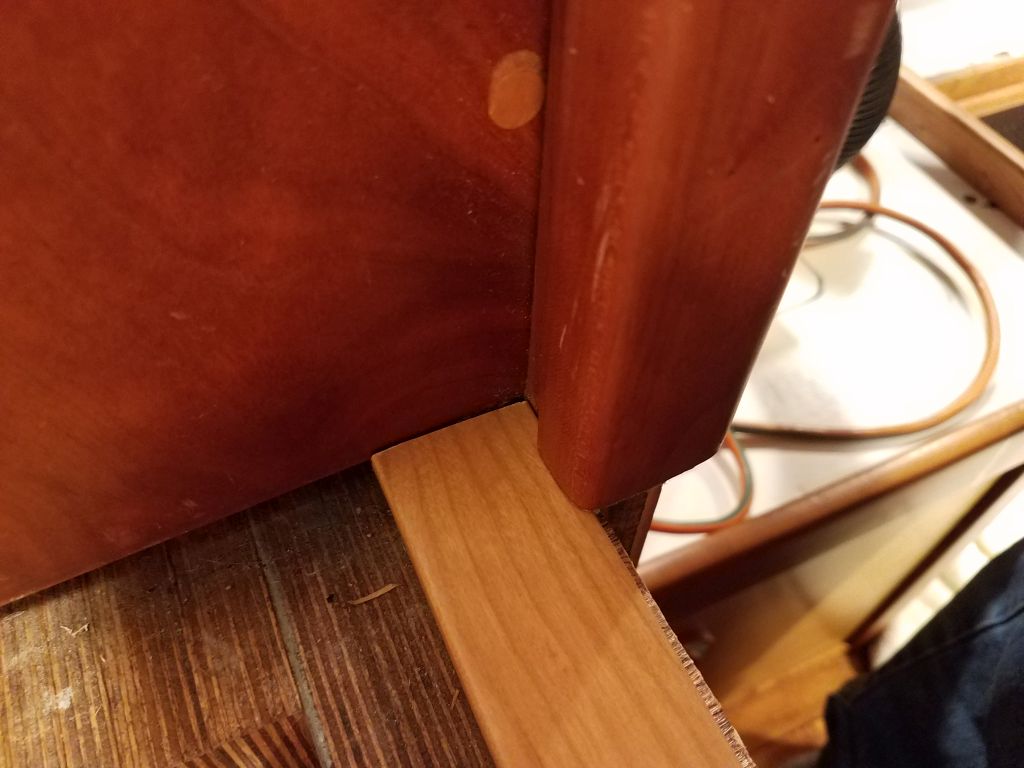
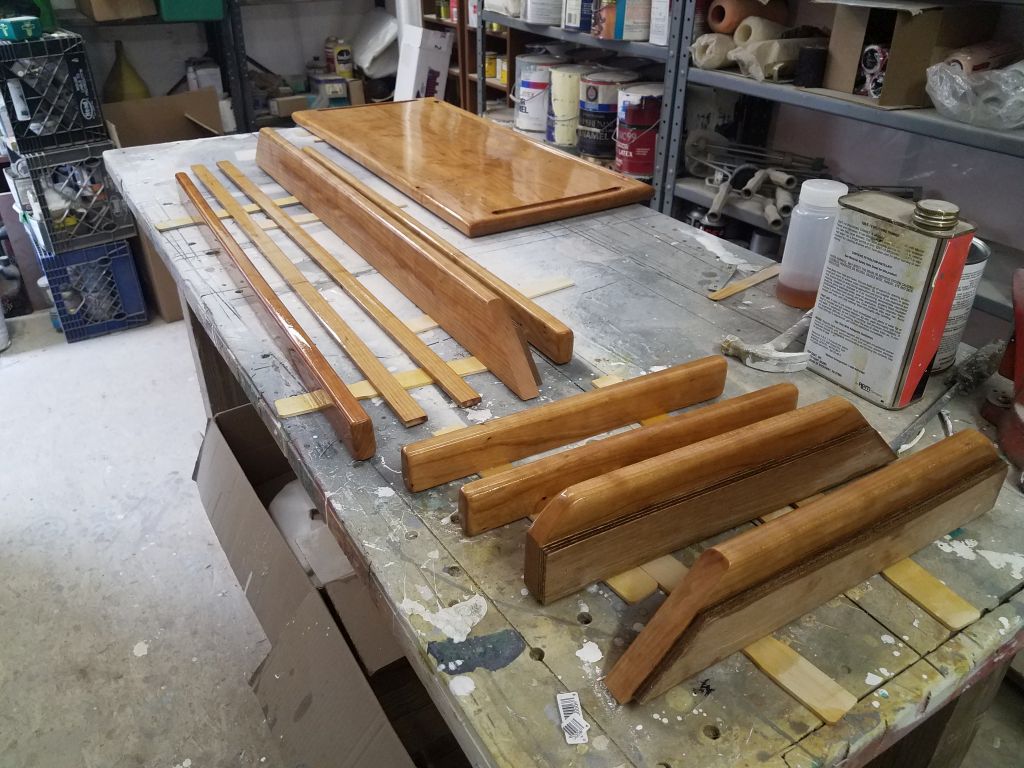
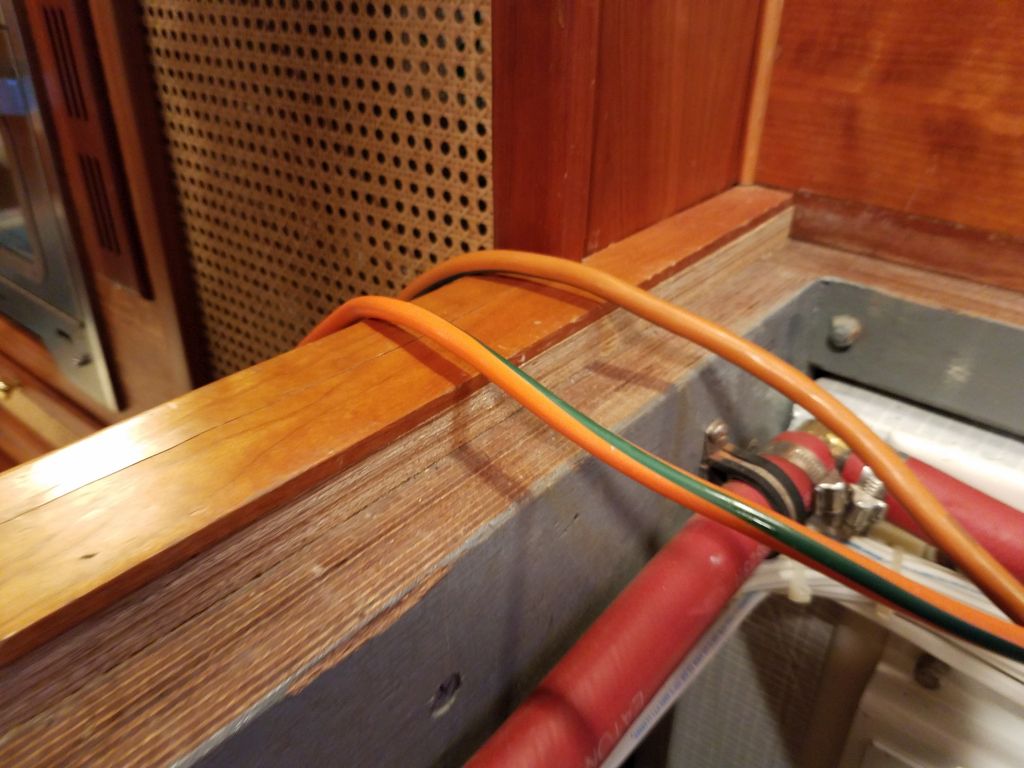
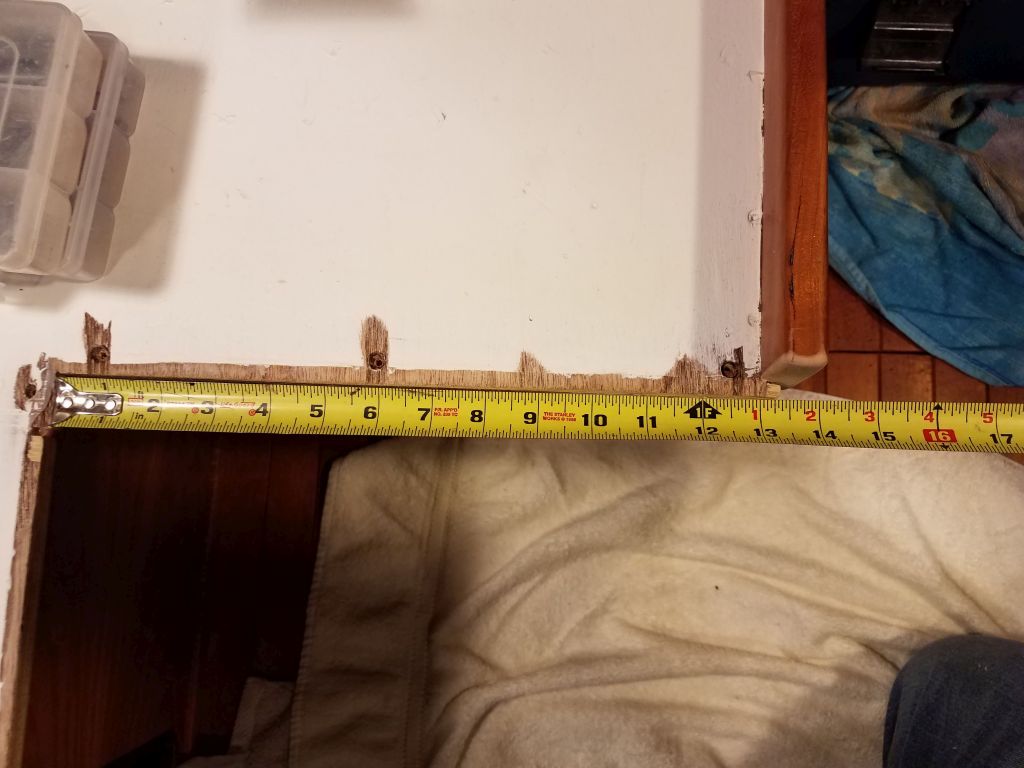
Later, after various scheduling and weather-related delays, I returned to the boat to prepare the space for the new work.  My task this day was to remove the existing fiddles from around the space, which would reveal the true size and shape of the opening that I needed to fill, and allow me to determine the various new trim profiles I needed to make up.

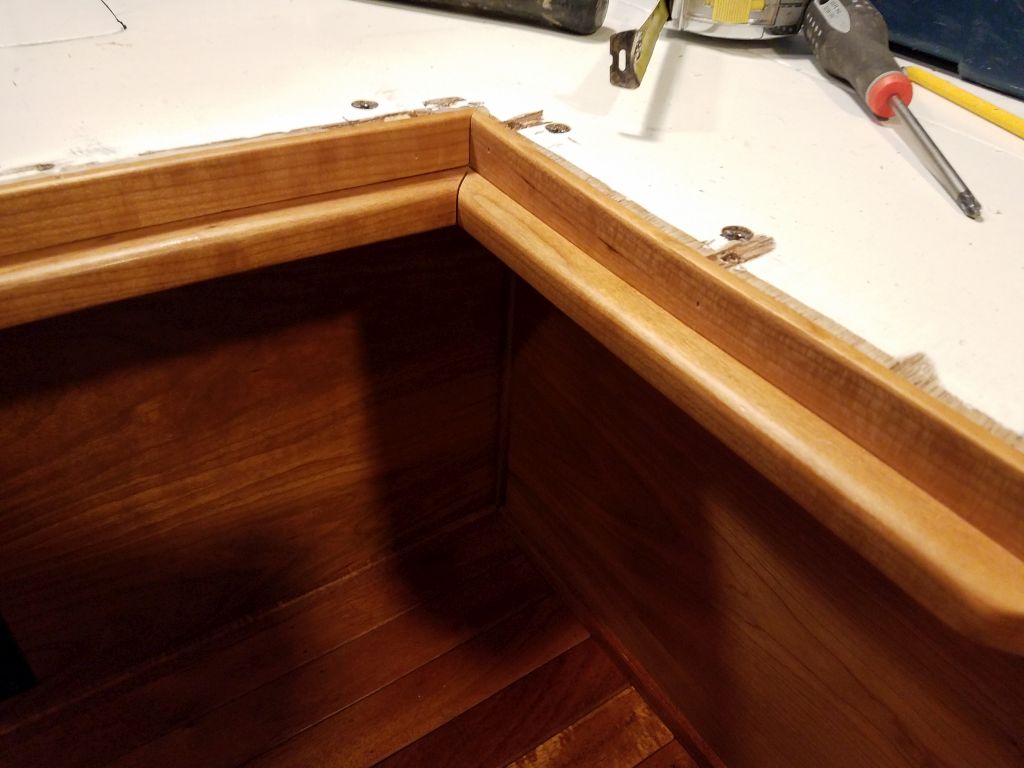
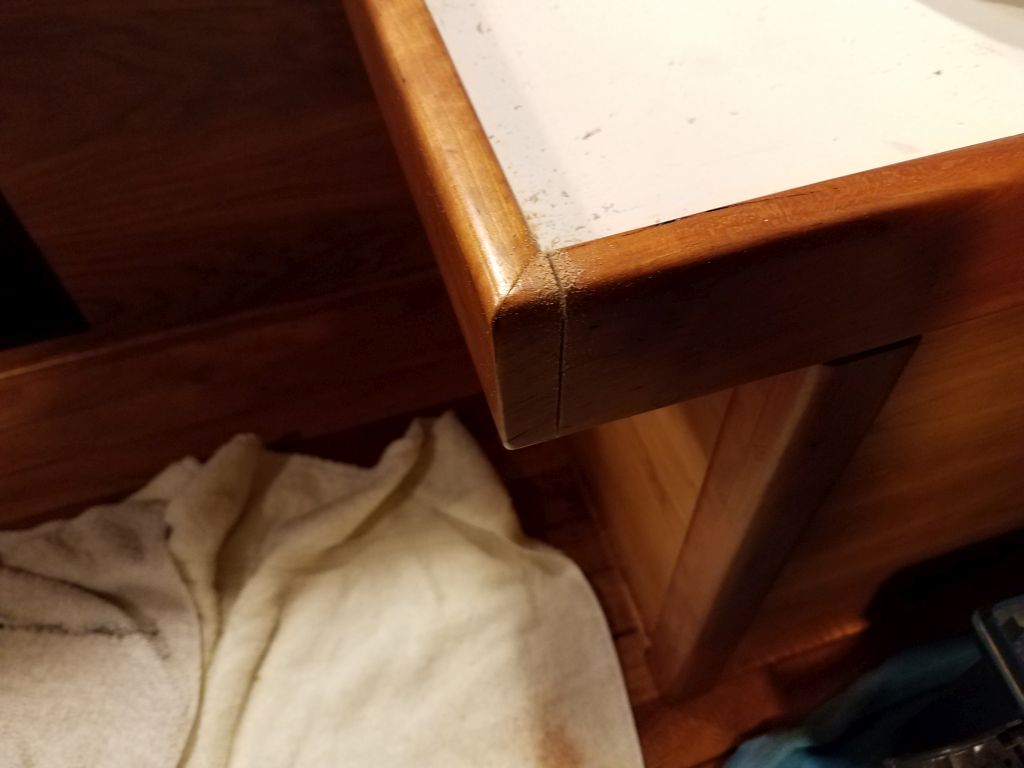
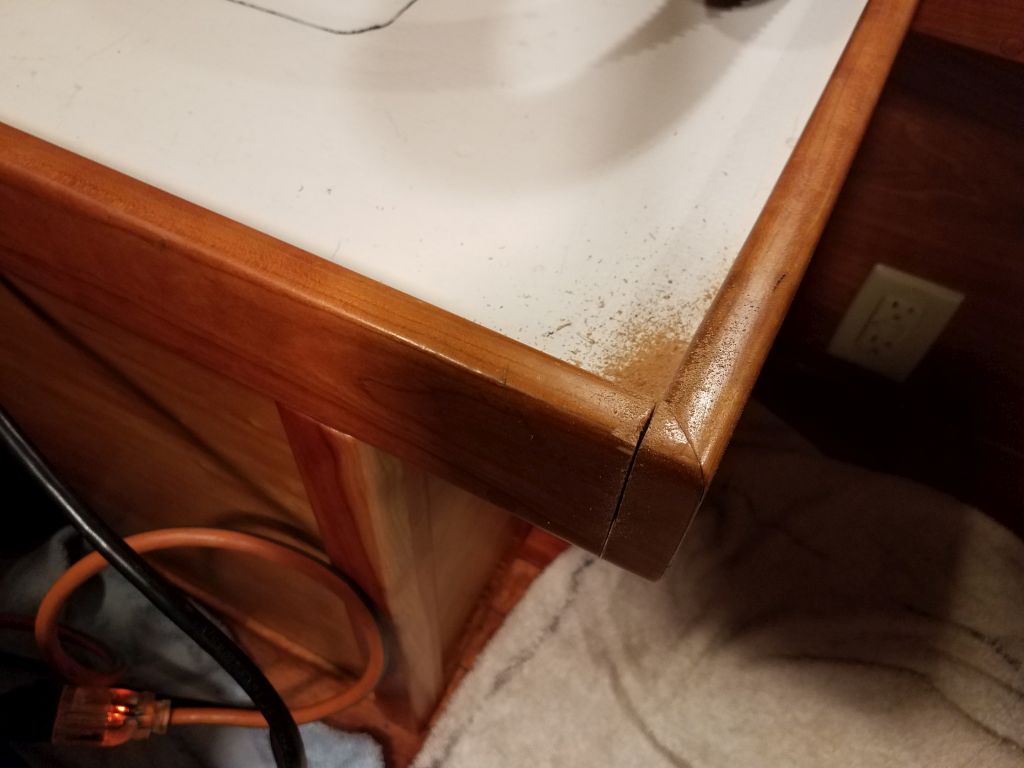
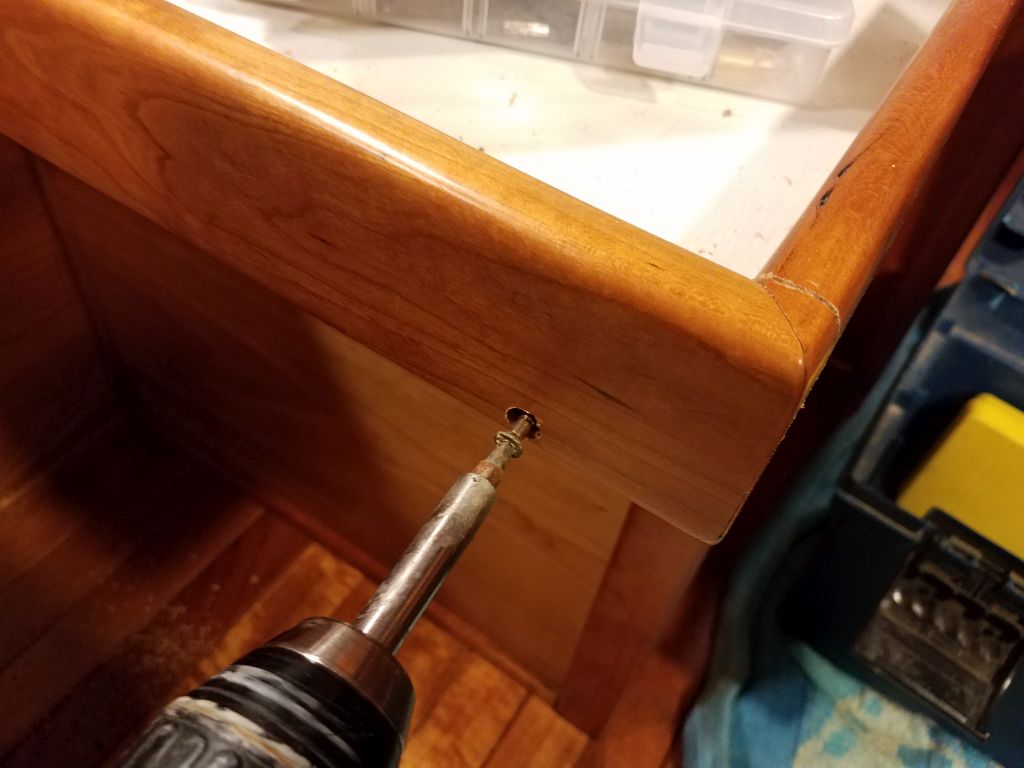
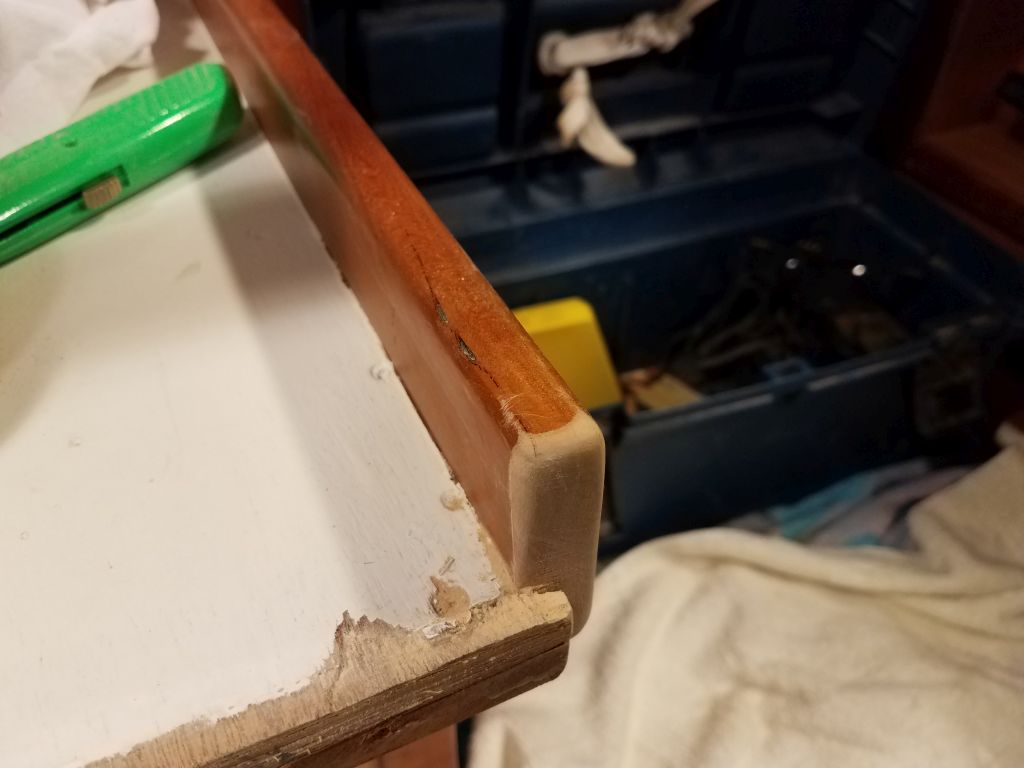
The existing cherry trim was mitered at the outside corners, so to make a clean end for the side trim that would remain in place, I cut through the trim just outside of the dinette area and existing miter cut.

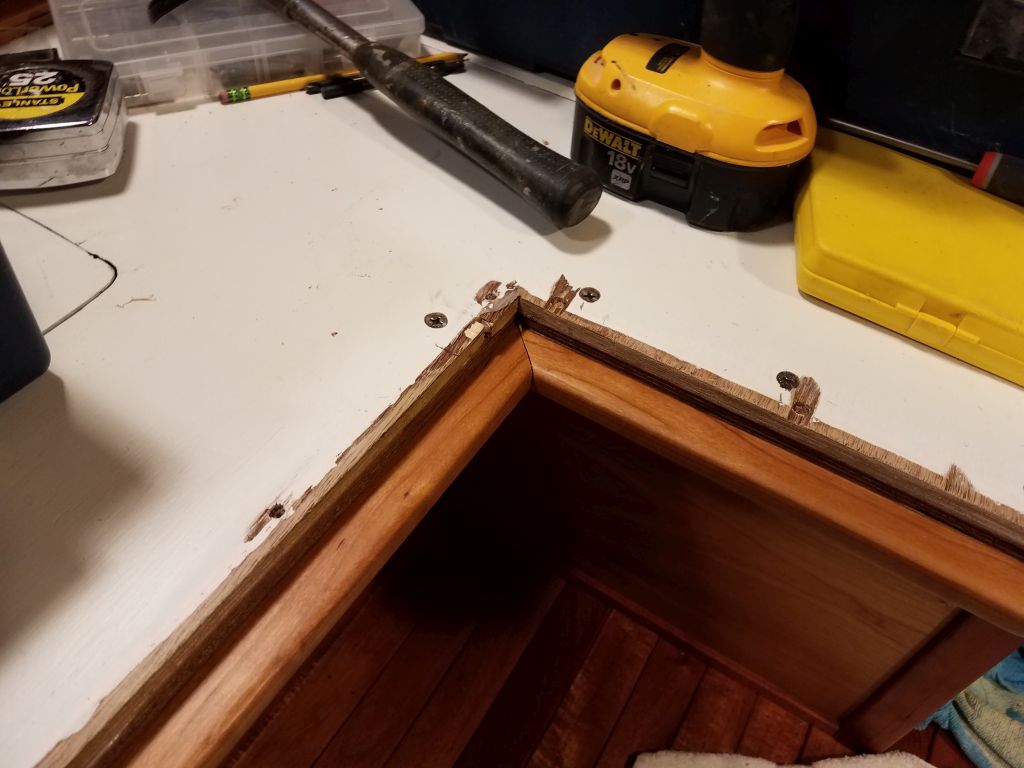
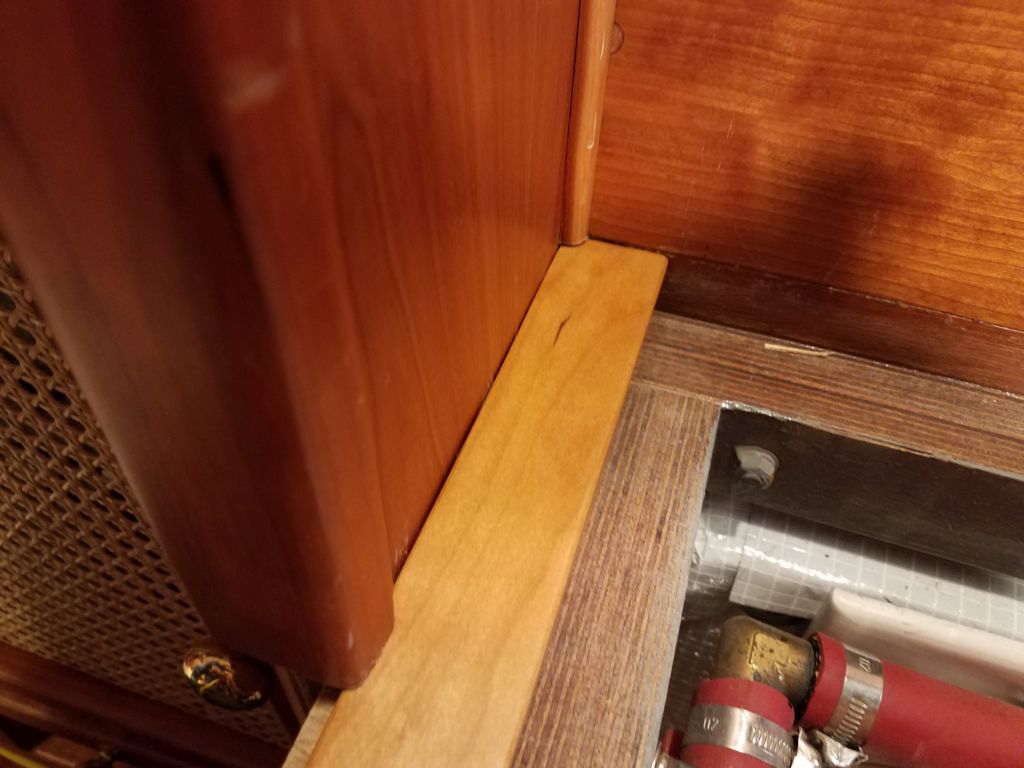
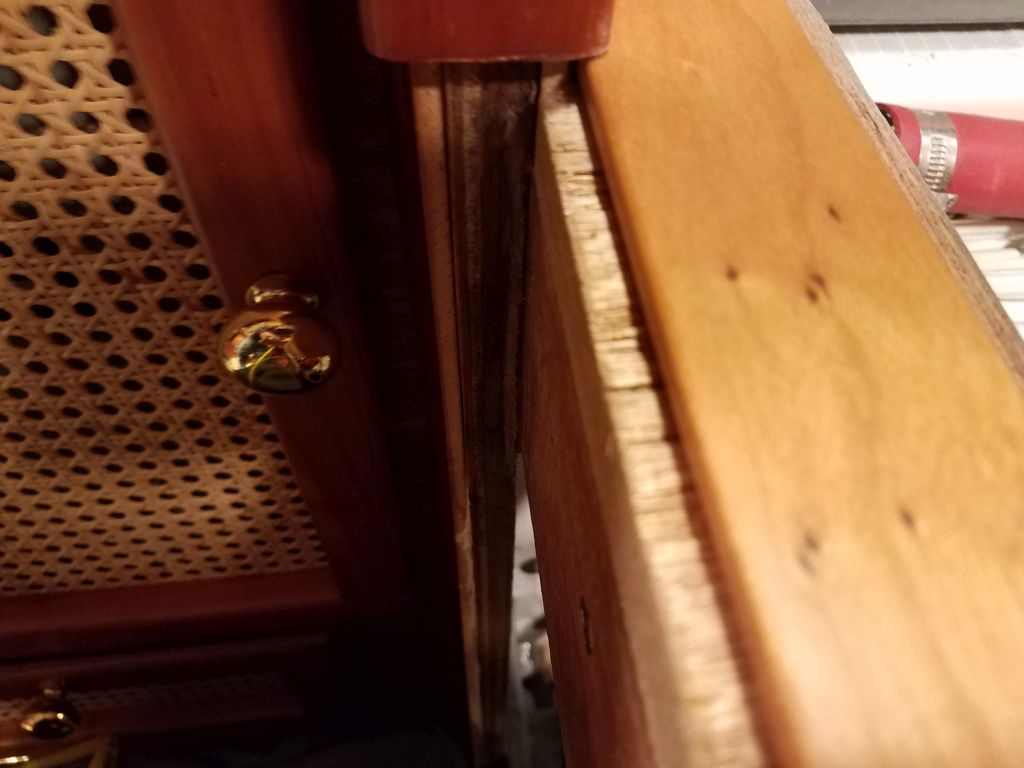
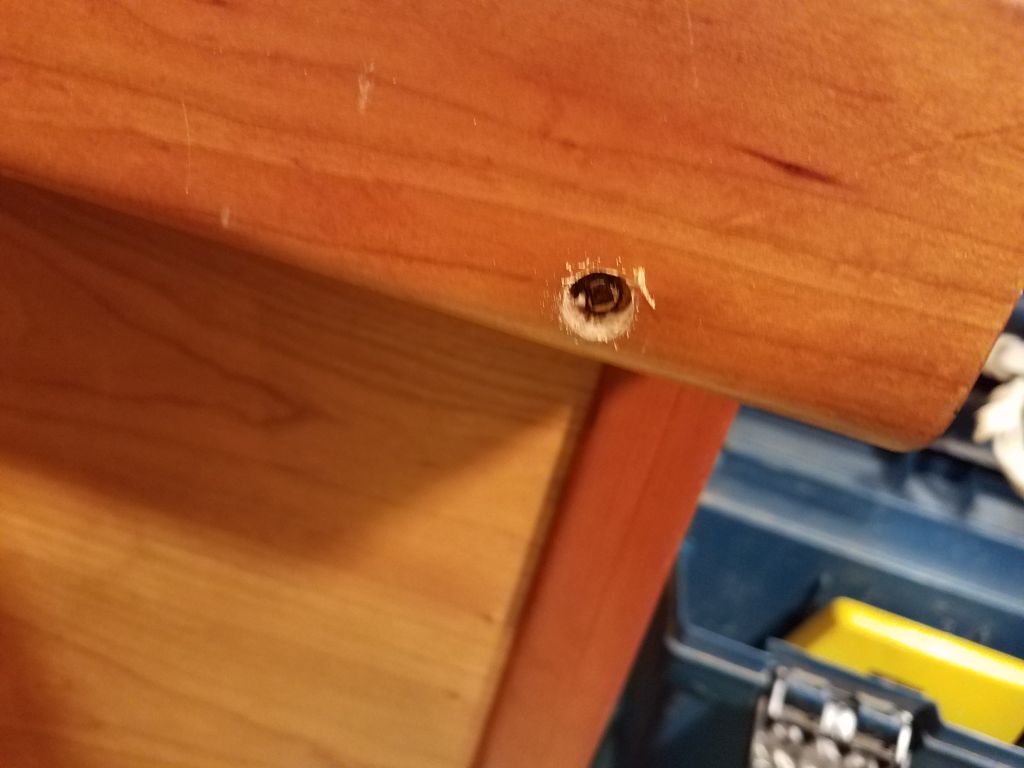
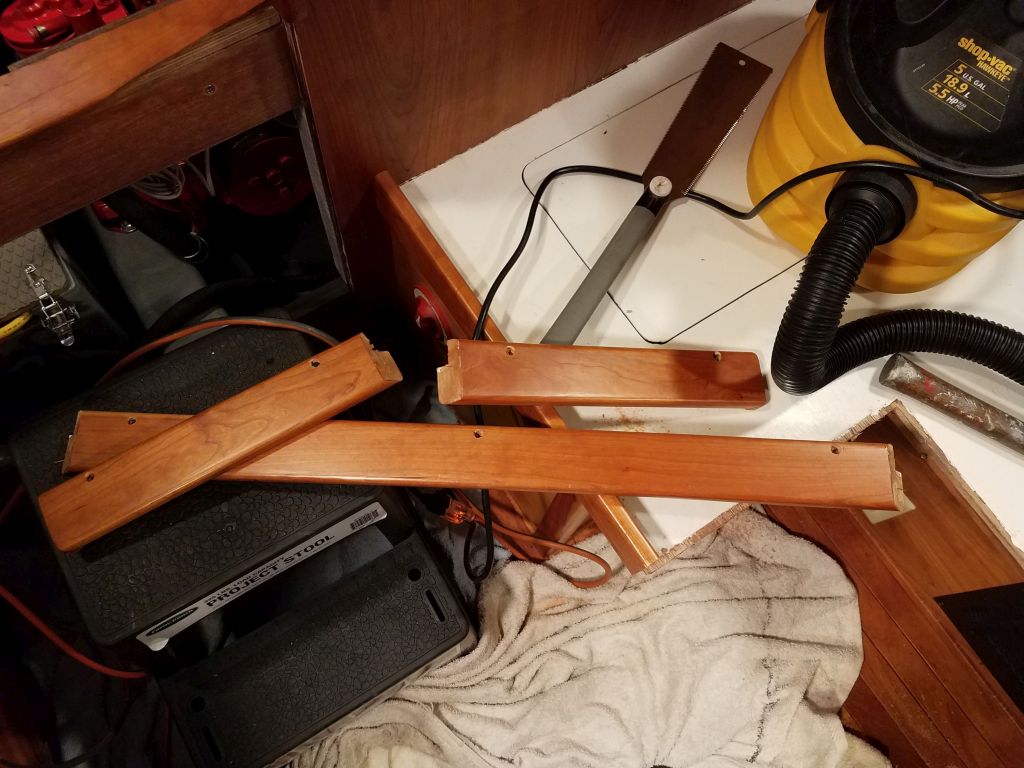
Next, I drilled out the bungs hiding the fasteners securing the fiddles in place, and removed the screws.  The fiddles were also glued in place, but with some care I was able to remove the pieces with minimal damage, so hopefully I could repurpose some of the hardwood later.

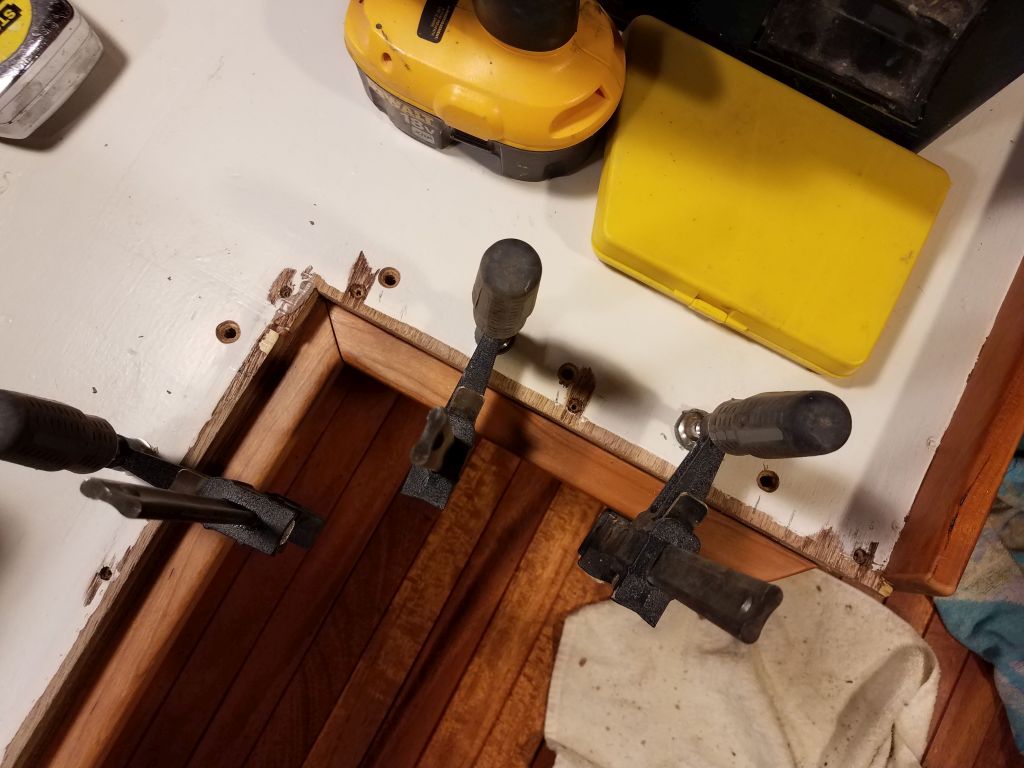
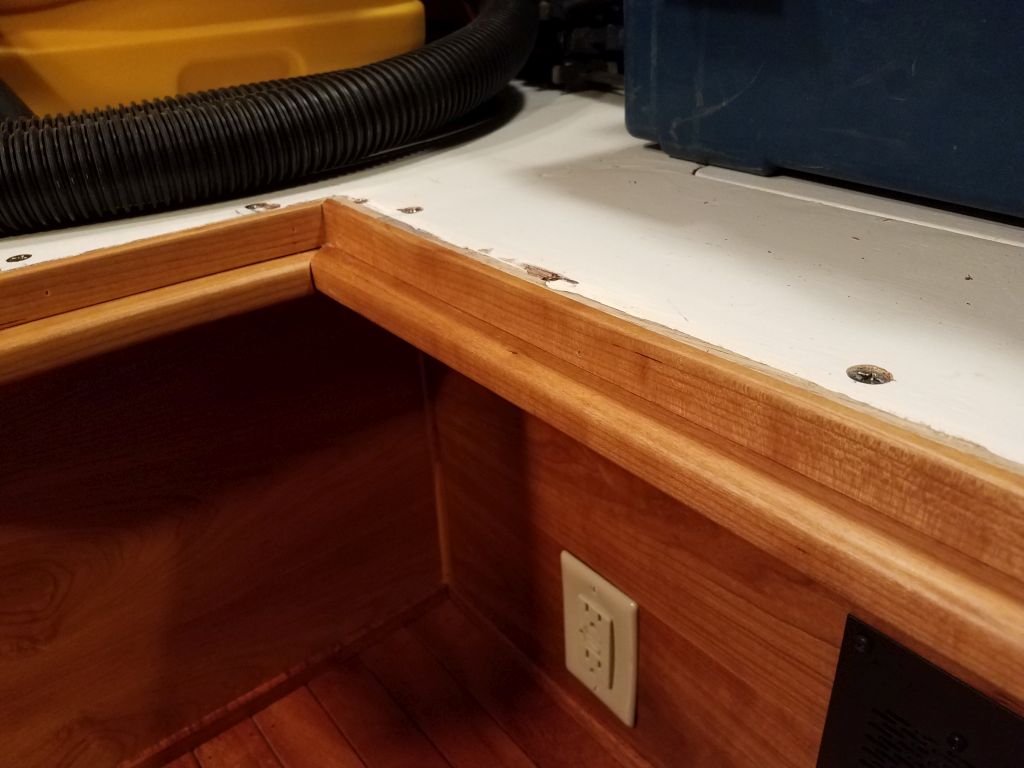
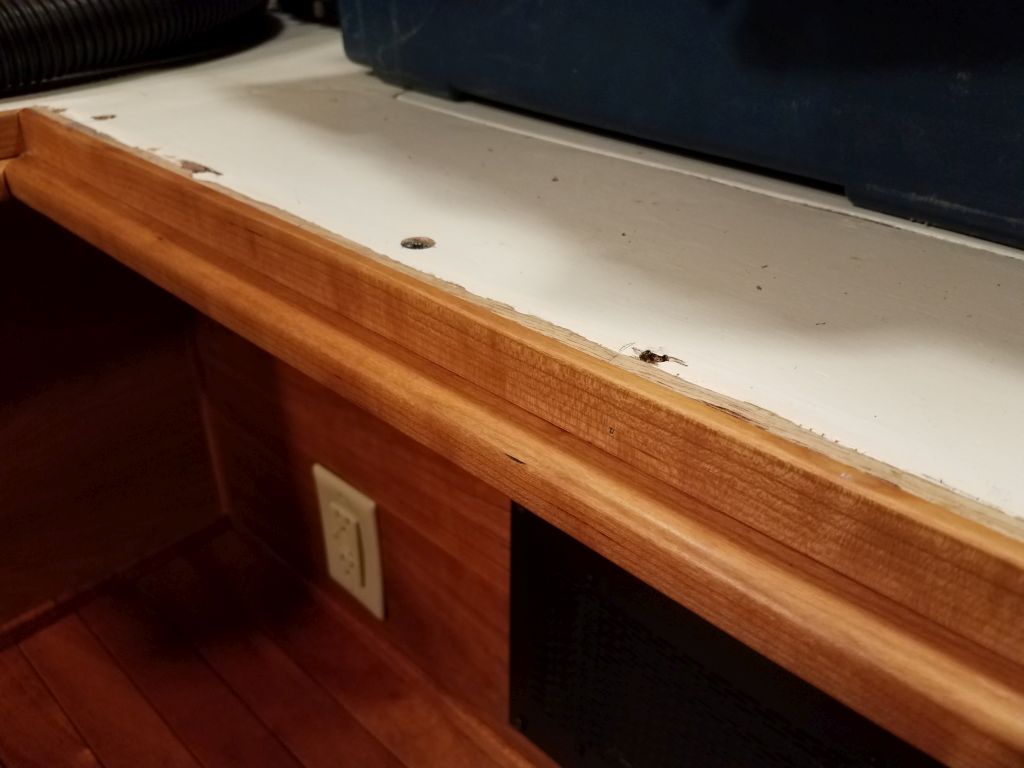
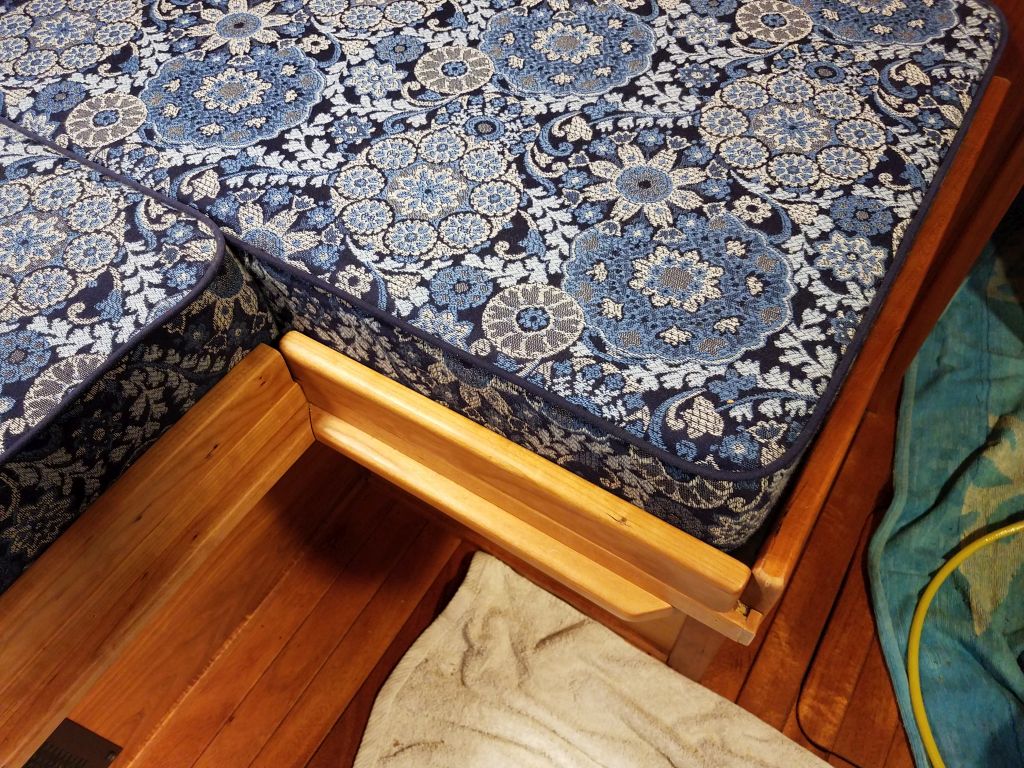
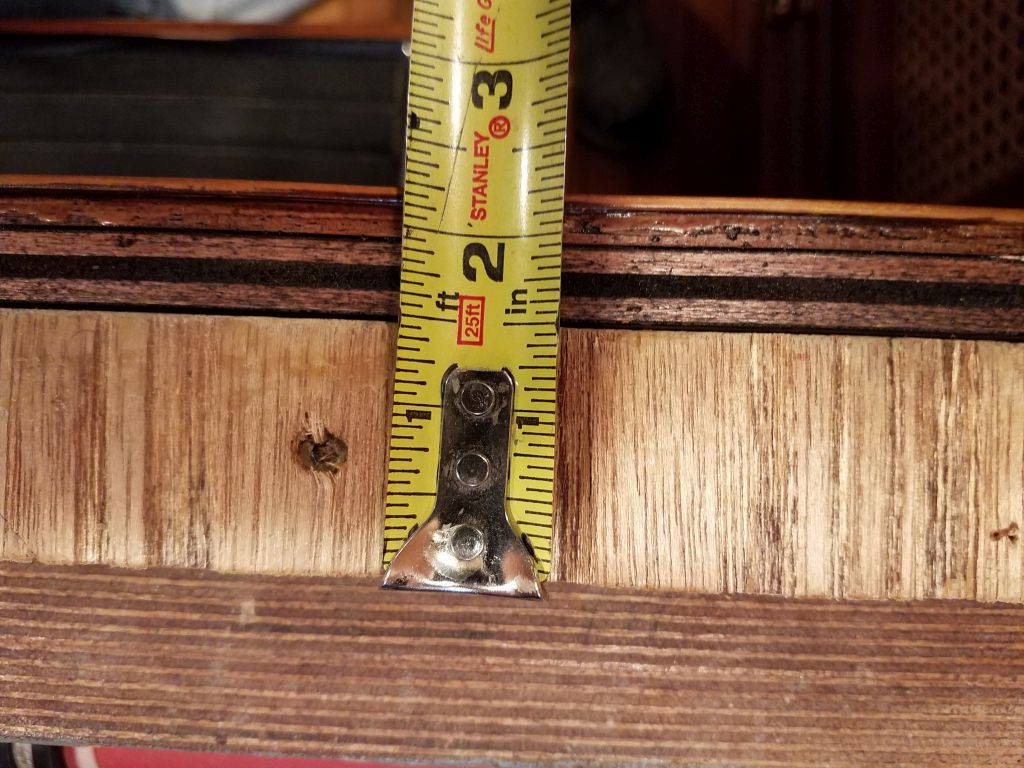
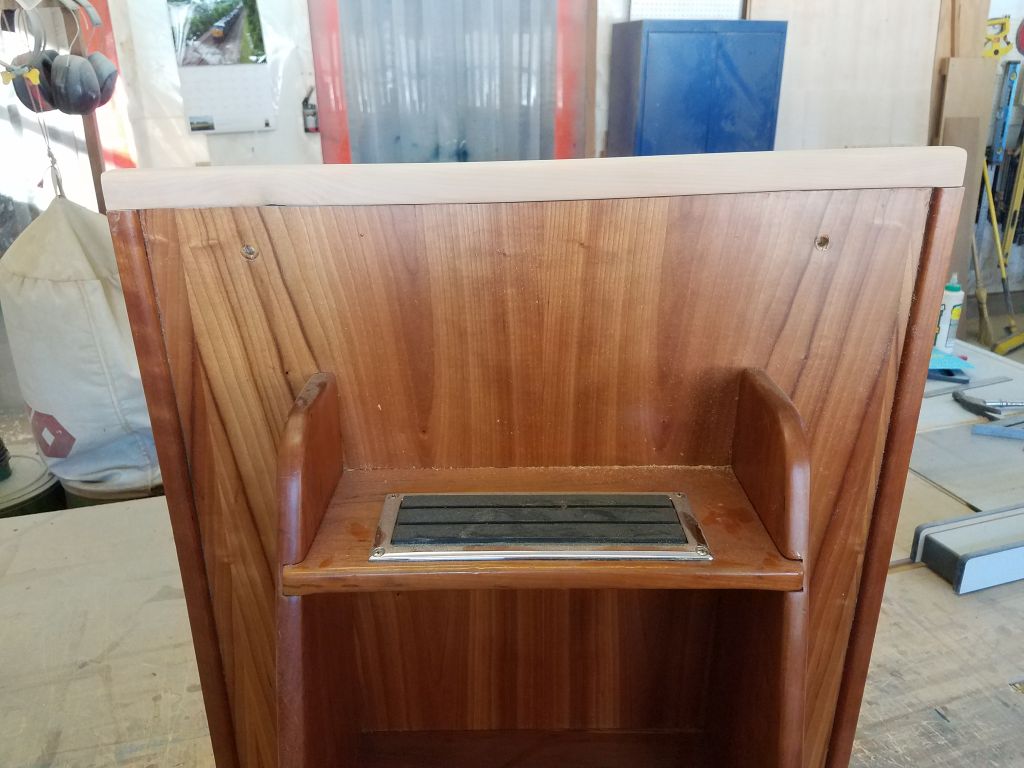
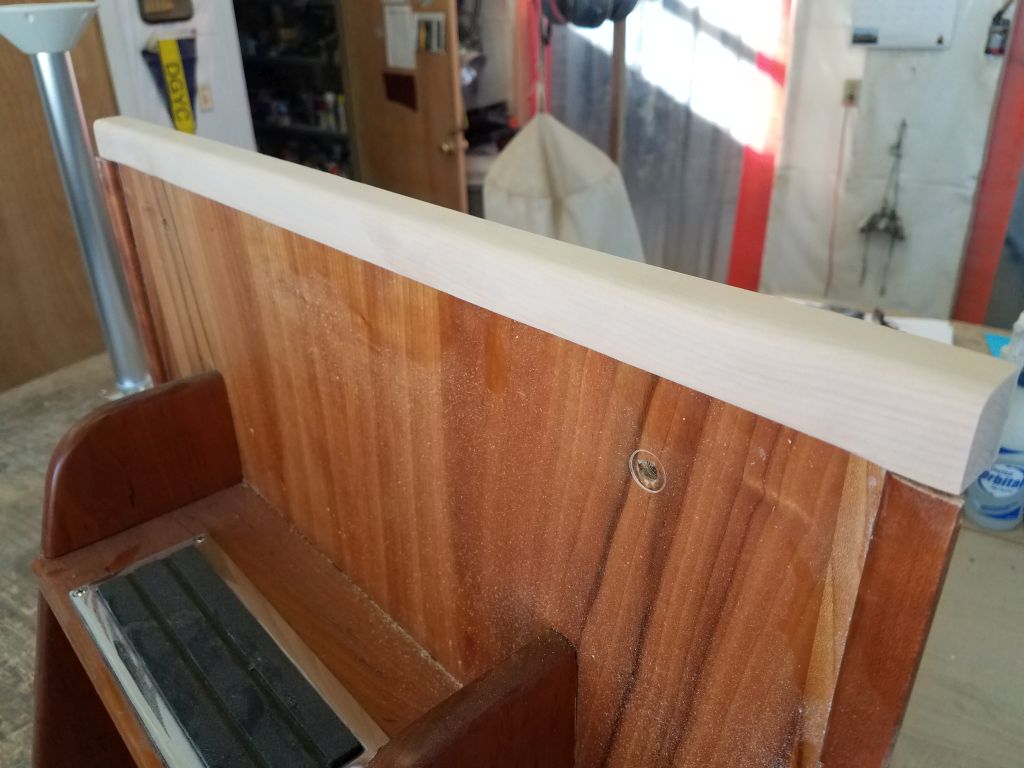
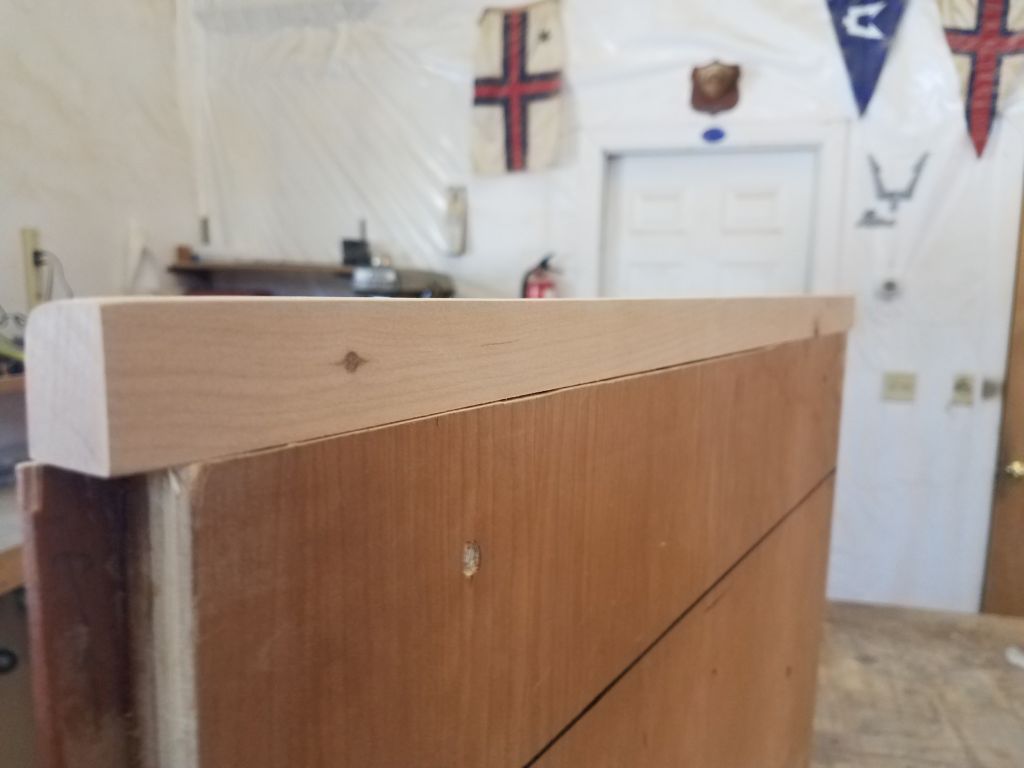
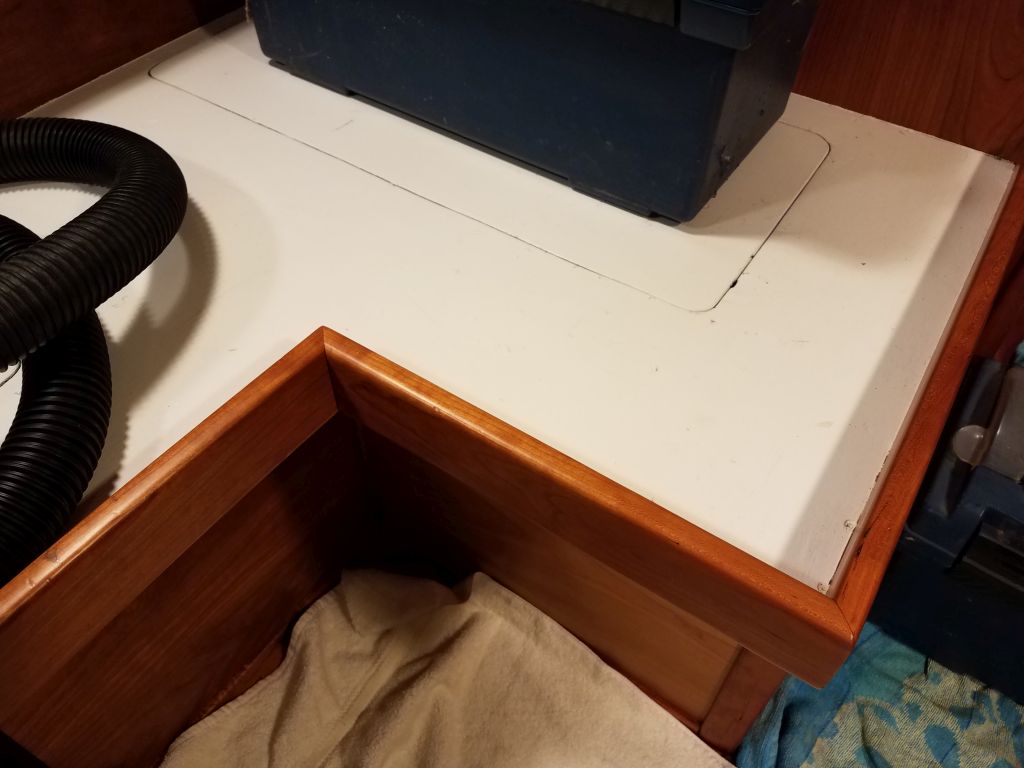
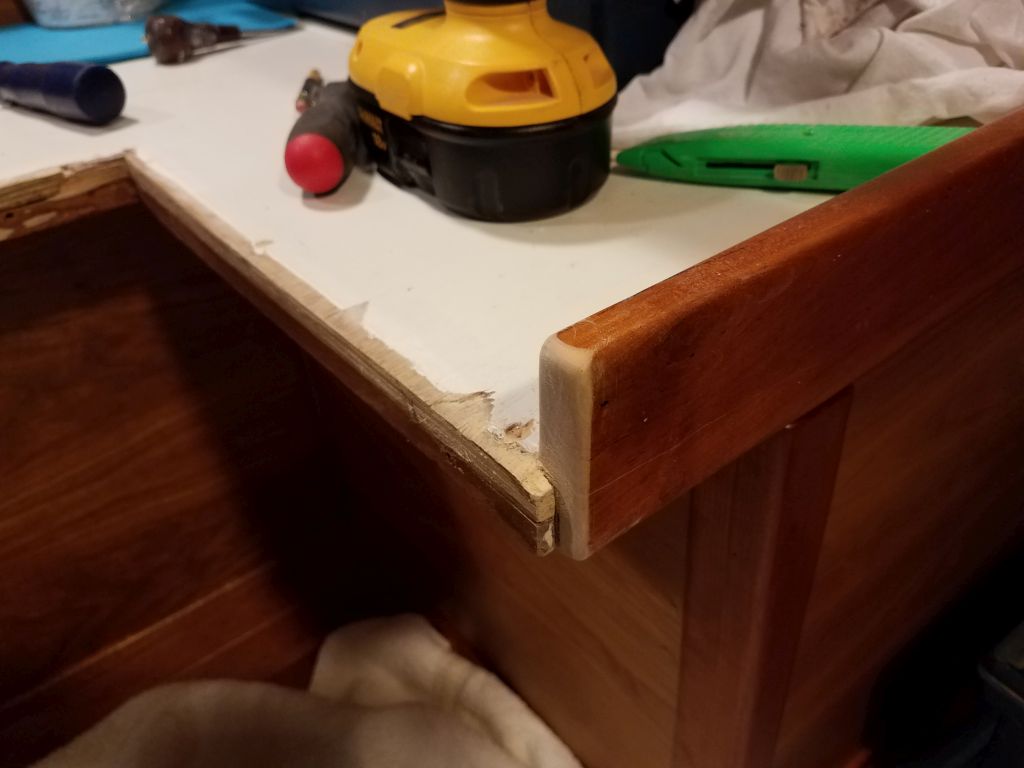
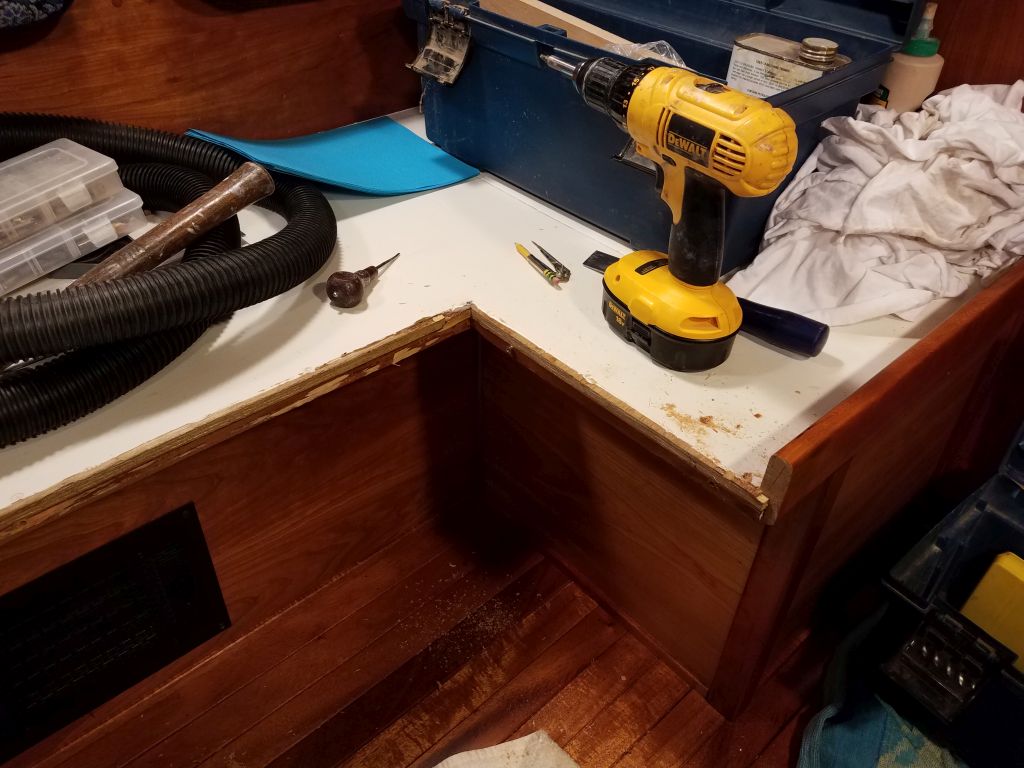
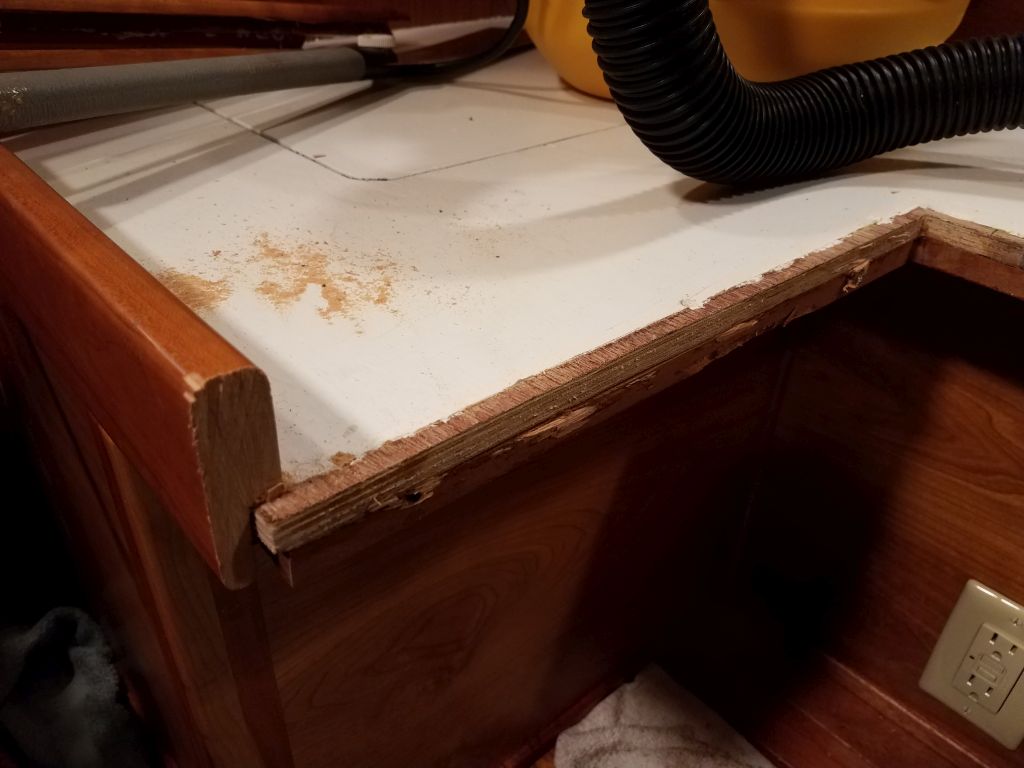
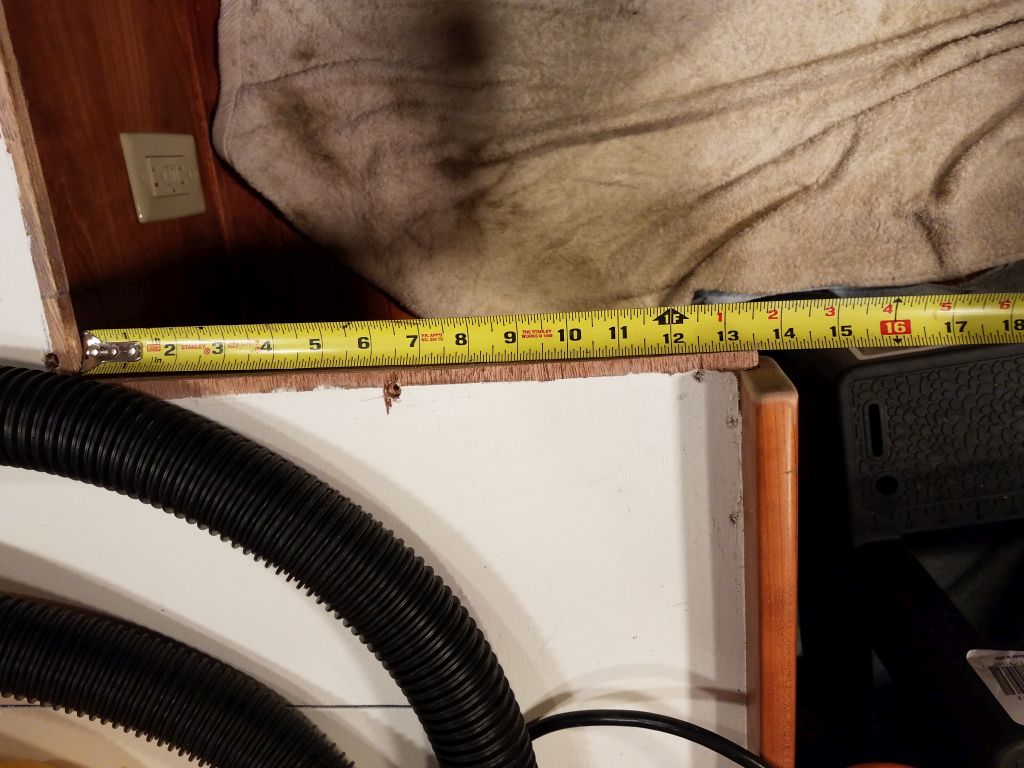
During the original construction, I’d installed a hardwood cleat beneath the plywood settee overhang to support the fiddles.  This was secured with glue and more screws.  The screw heads on the settee were filled with paint, so I chiseled out the cleats from beneath and then used locking pliers to unwind the screws enough till I could grab and remove them from above.  This left me with just the overhanging plywood settee top, which is what I wanted and would provide the clean start for the new trim.  At this stage, I also sanded clean and rounded the edges of the remaining fiddles at the sides of the dinette, and applied a coat of varnish over the raw wood.

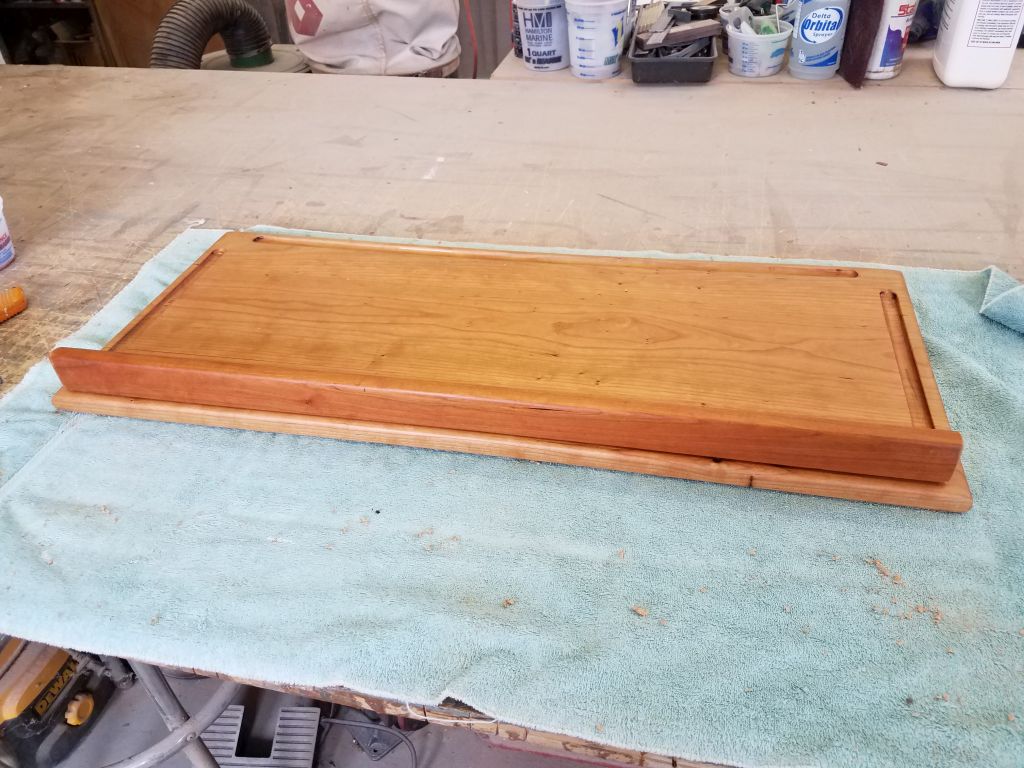
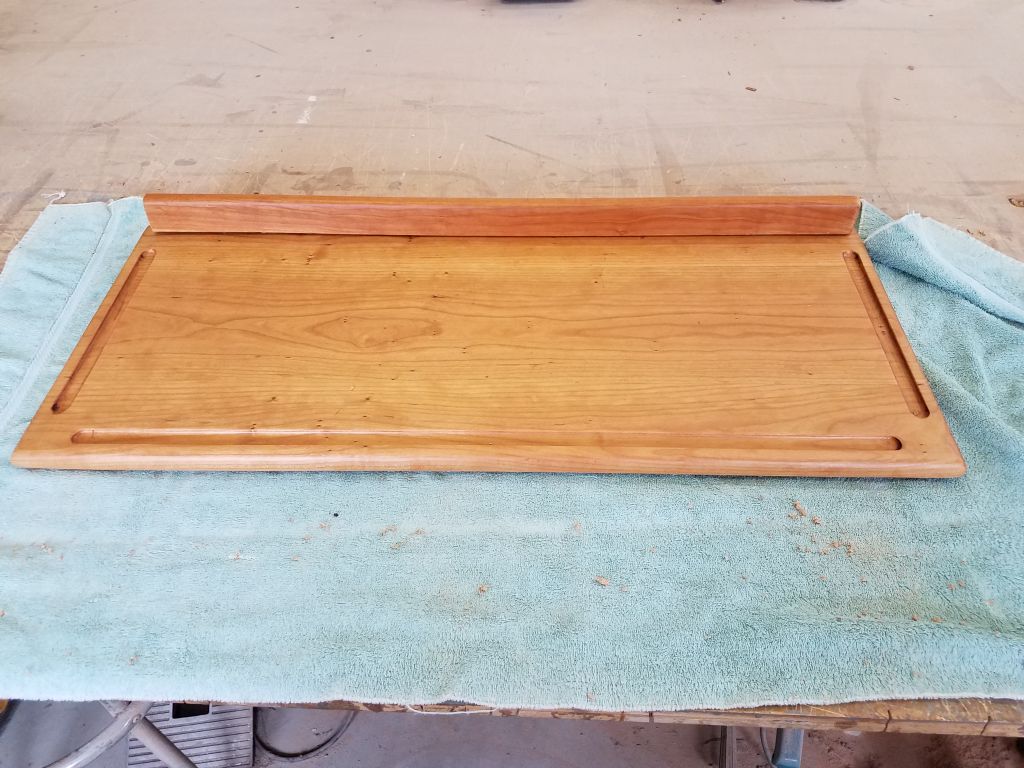
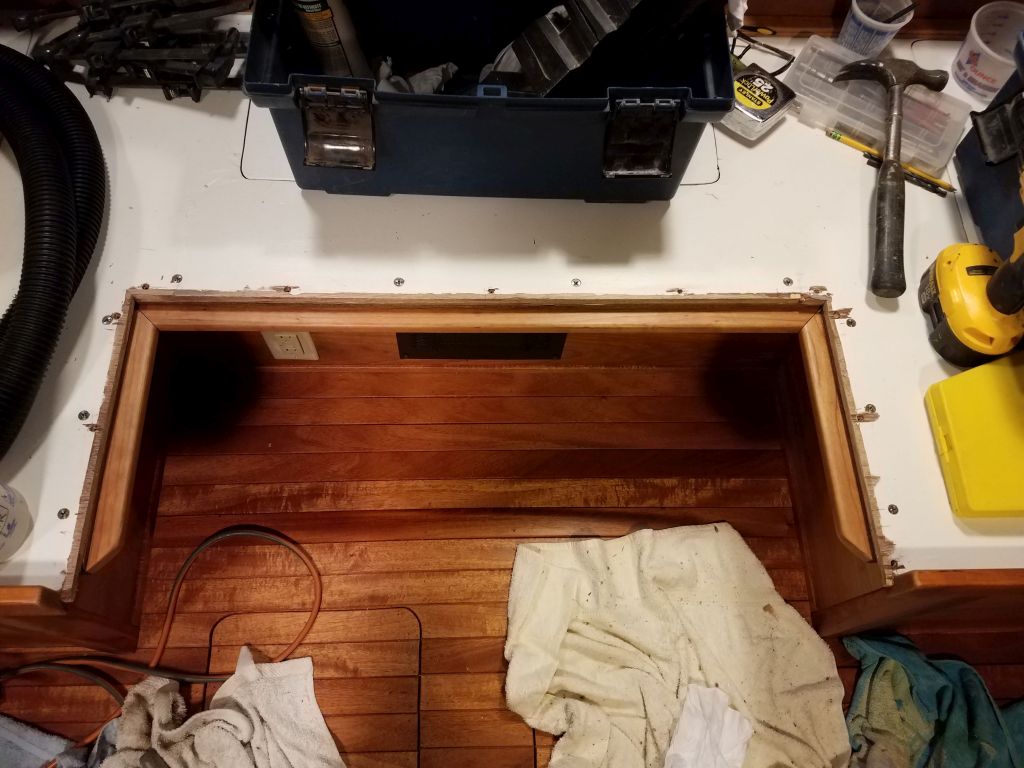
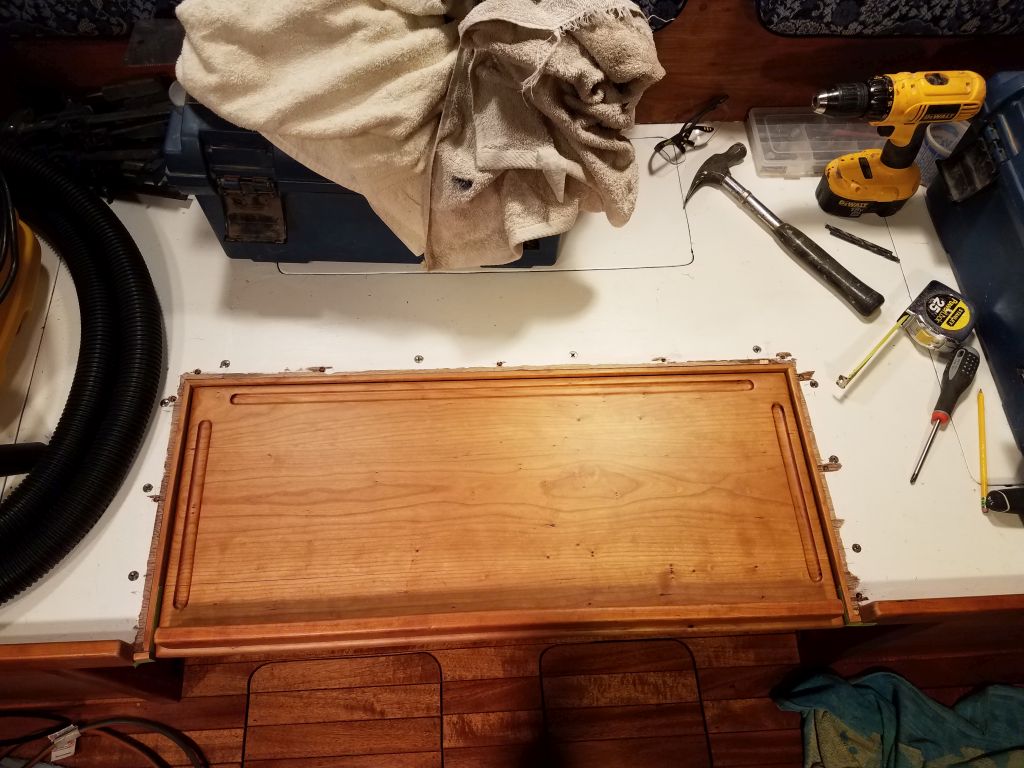
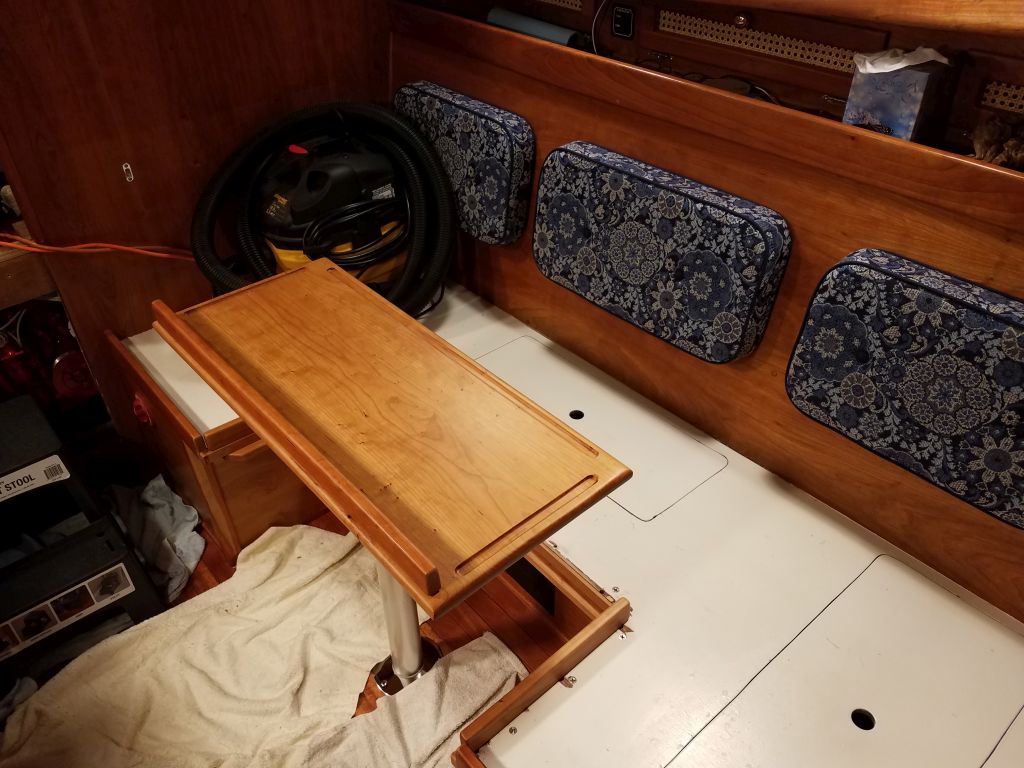
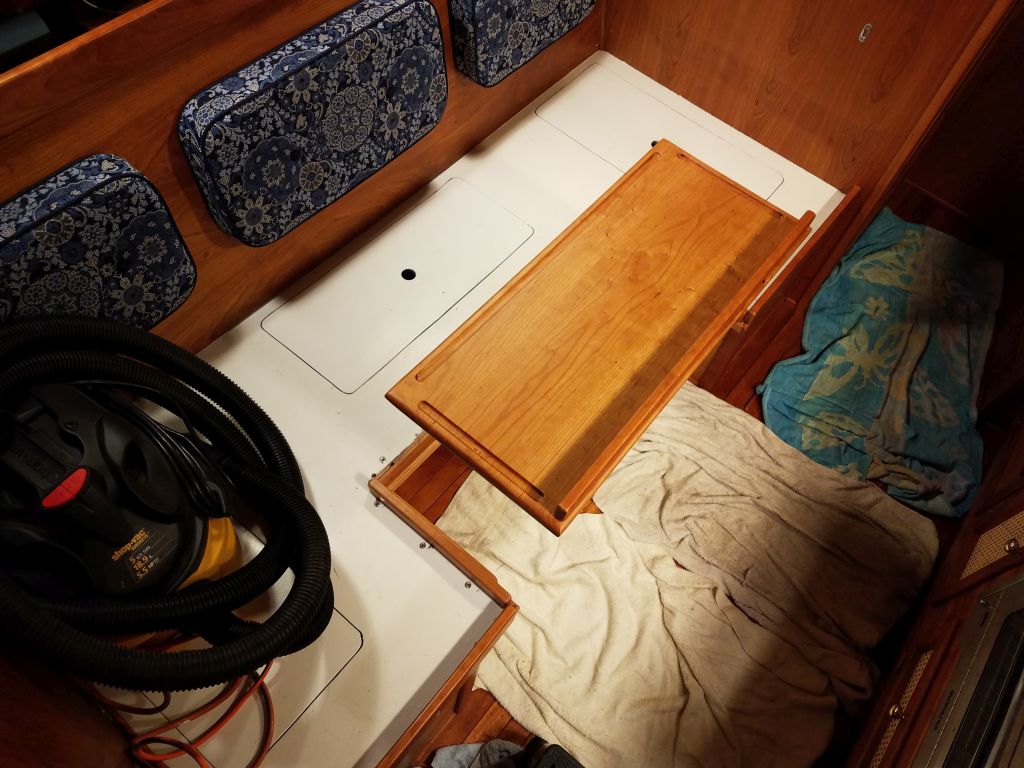
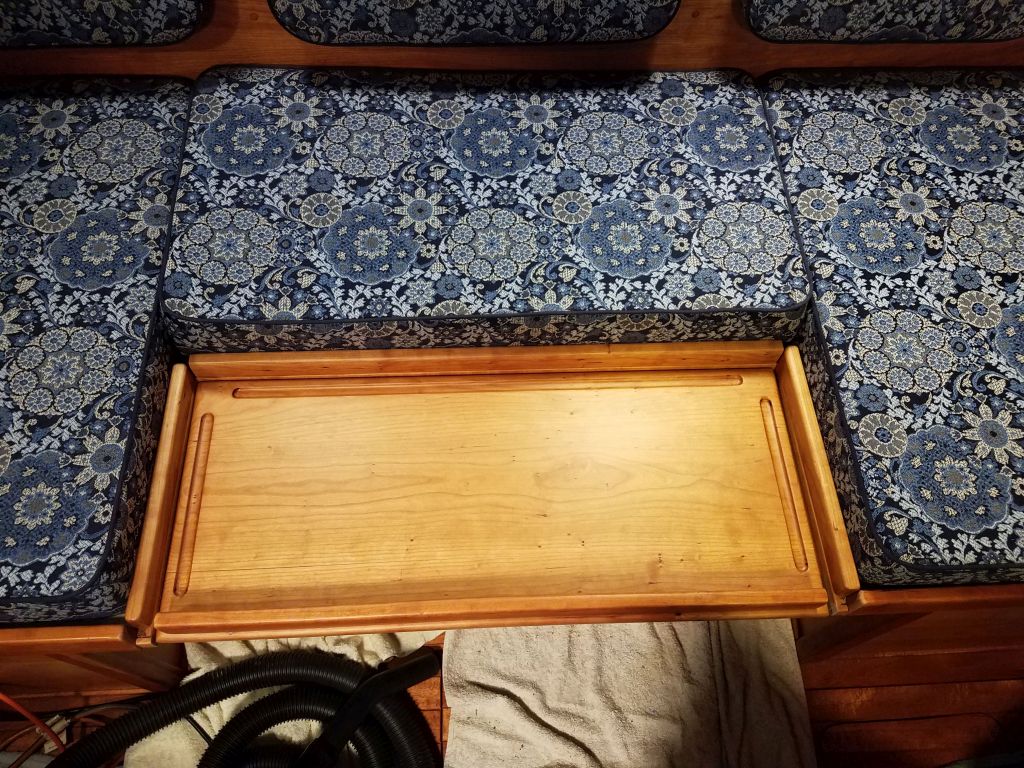
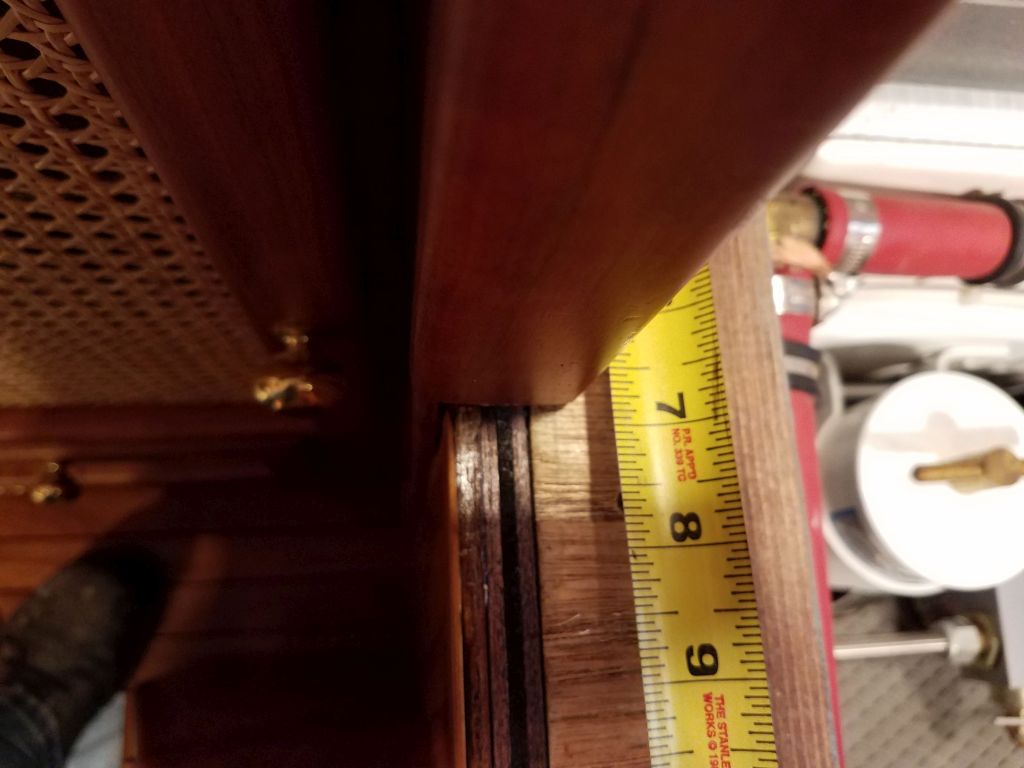
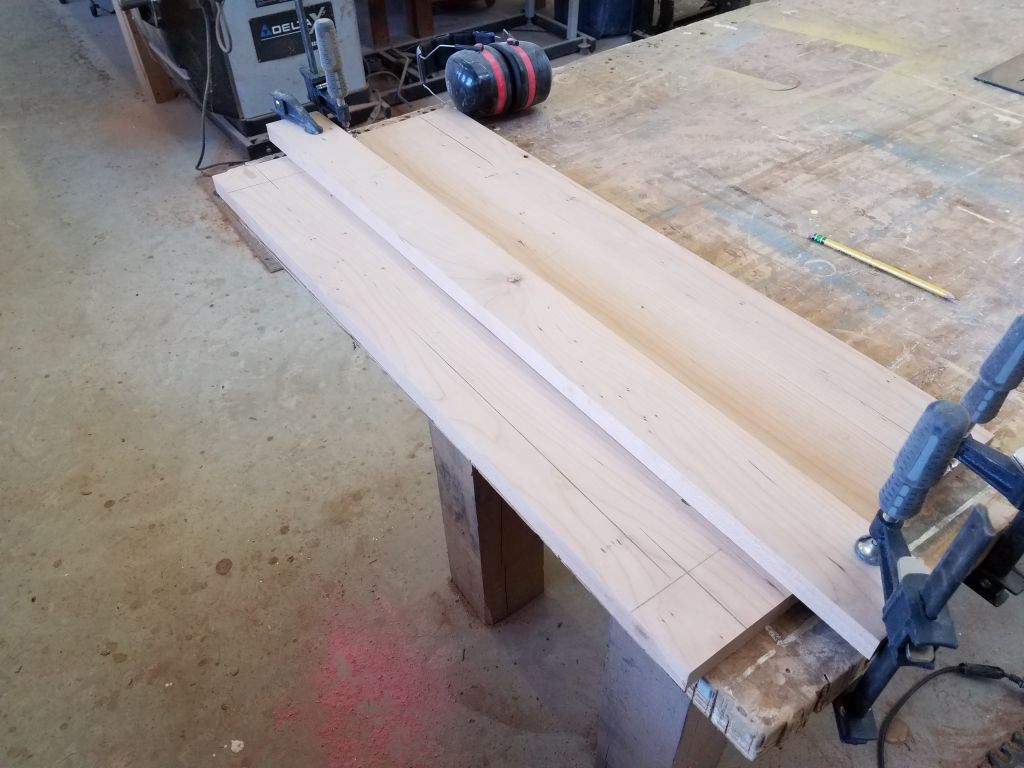
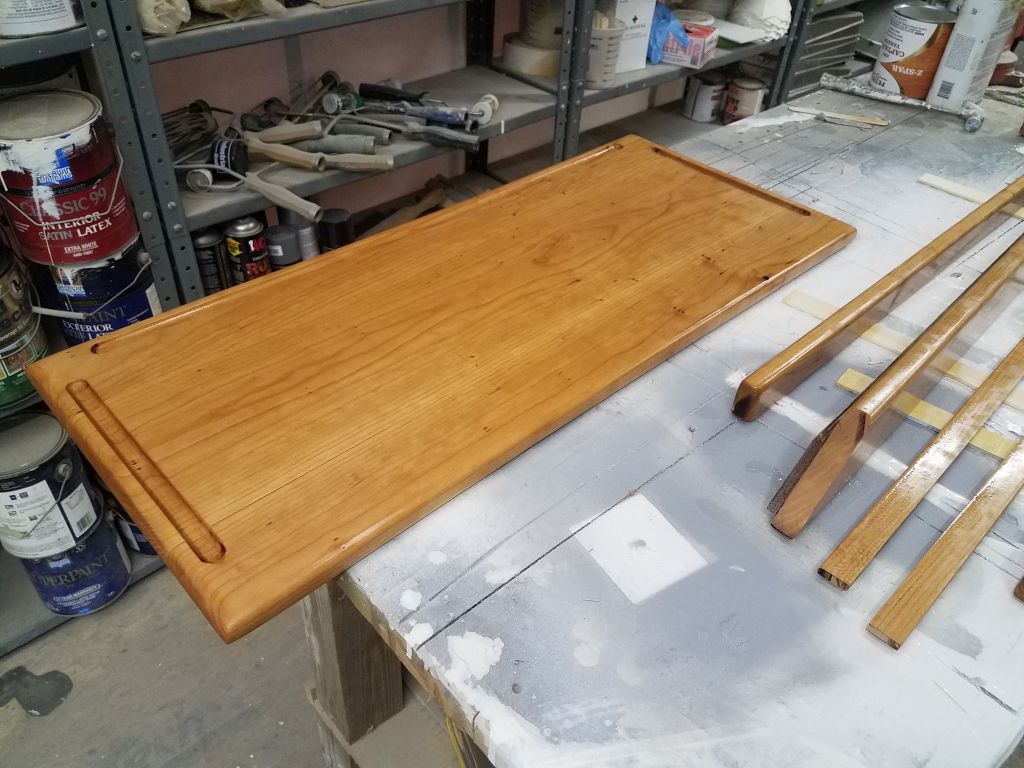
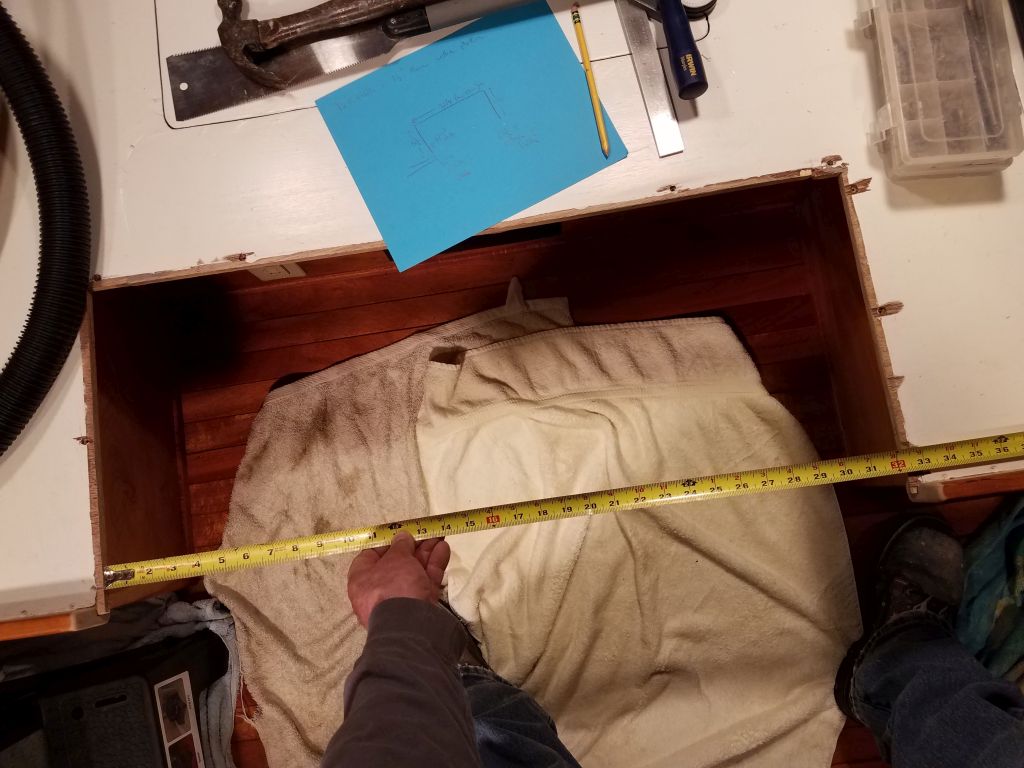
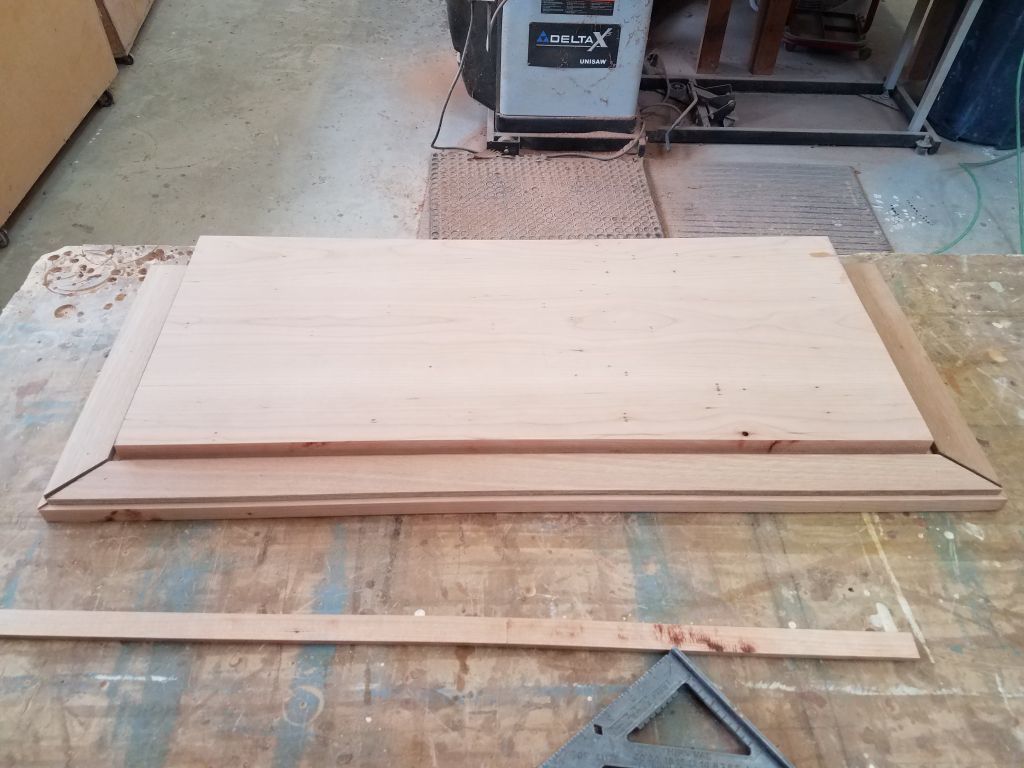
I made various detailed measurements of the opening for my future reference in building the new trim.  The trim would have to support the table top flush with the settee when lowered to the berth position, and also needed to cover the now-exposed plywood settee edge.  I planned to run the trim back beneath the existing overhang to give it plenty of strength, but I hadn’t worked out all the details of how I’d mill it just yet.  To give myself an accurate template of the exact opening, I laid the table blank across and traced the outline on the bottom side–the easiest way I could come up with to document the real space.

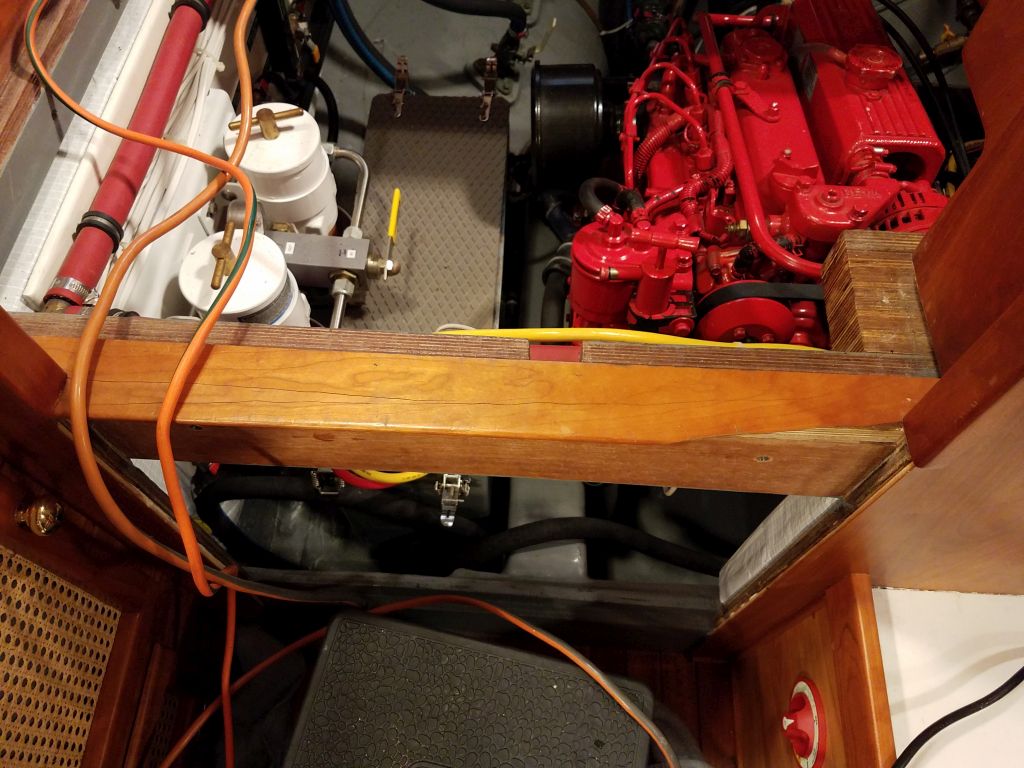
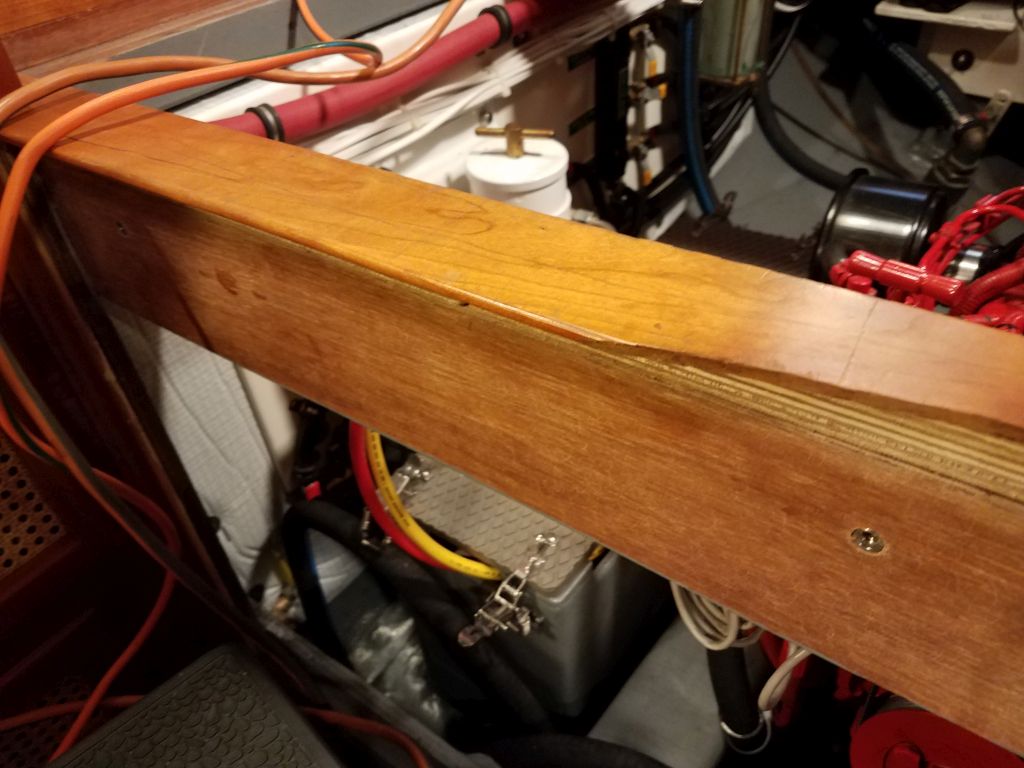
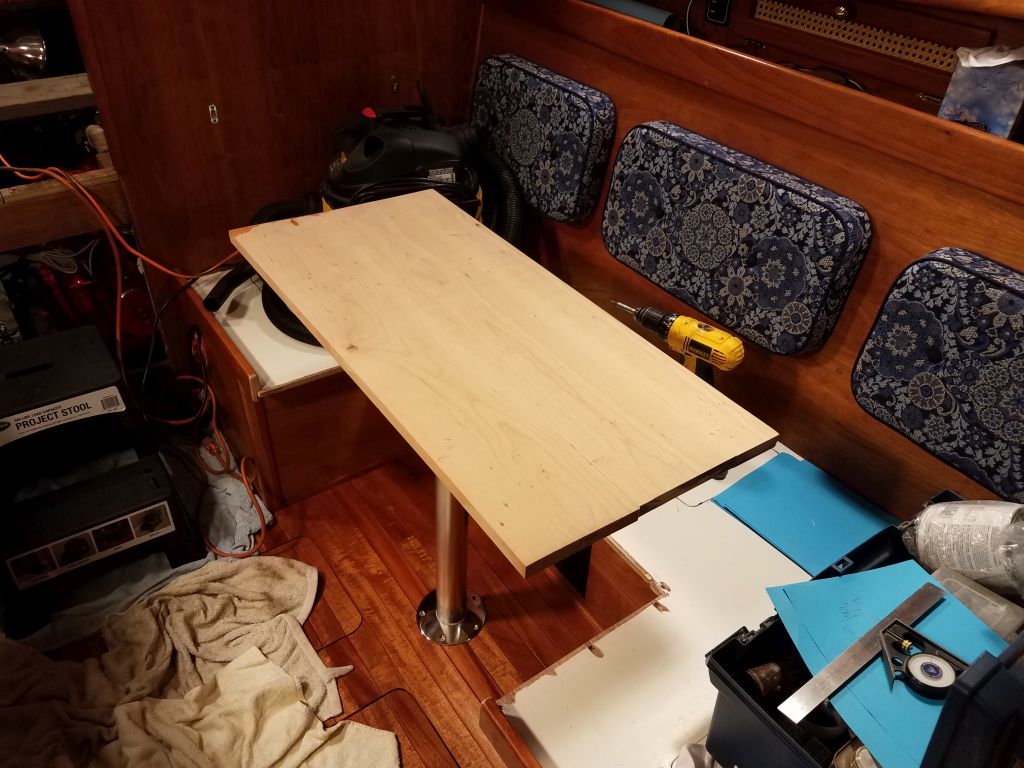
For visualization purposes and to ensure the table leg was the desired height, I set up the leg and table top, giving a sense of how it would work later, even though the table was still an oversized and incomplete blank at this point.

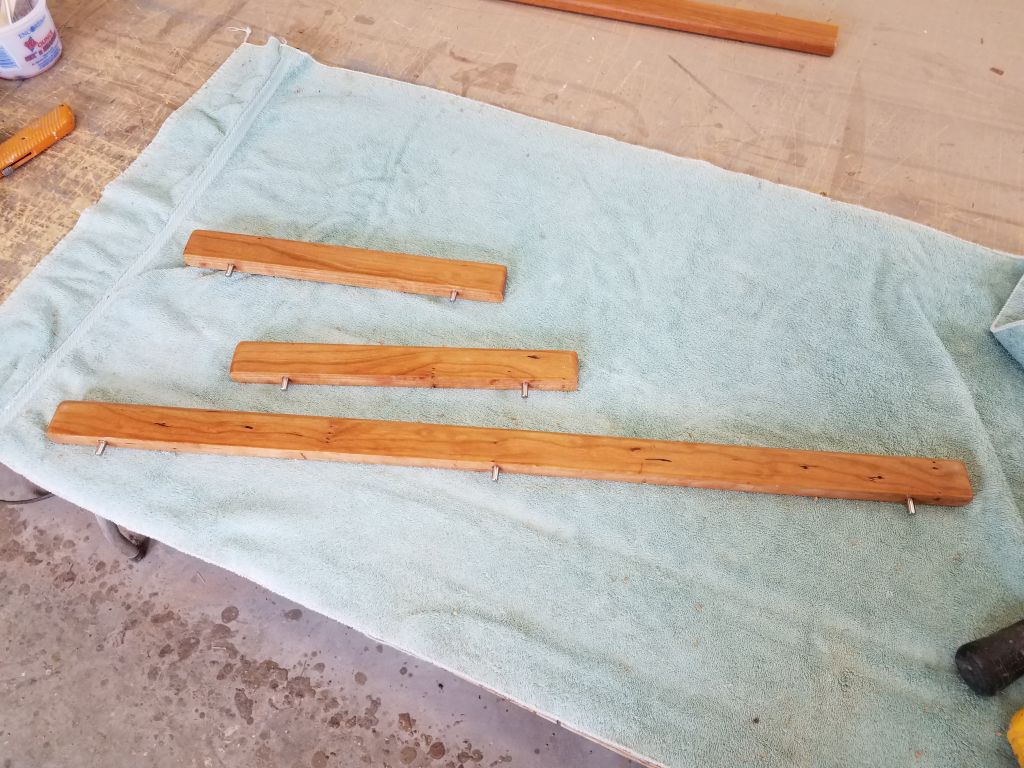
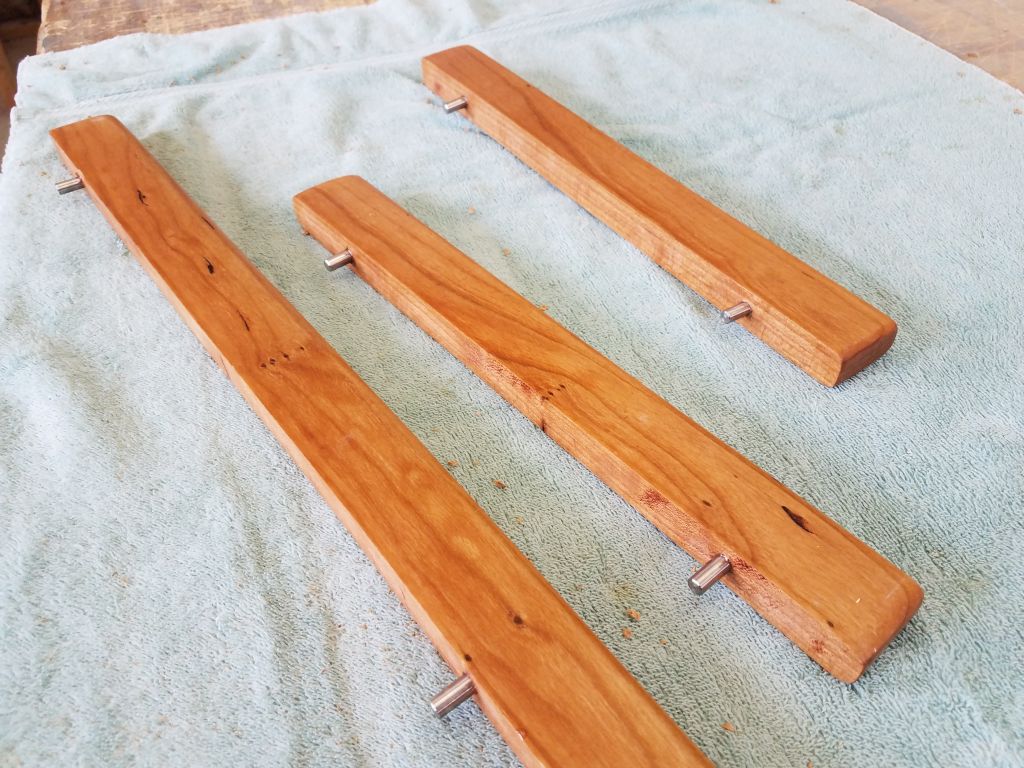
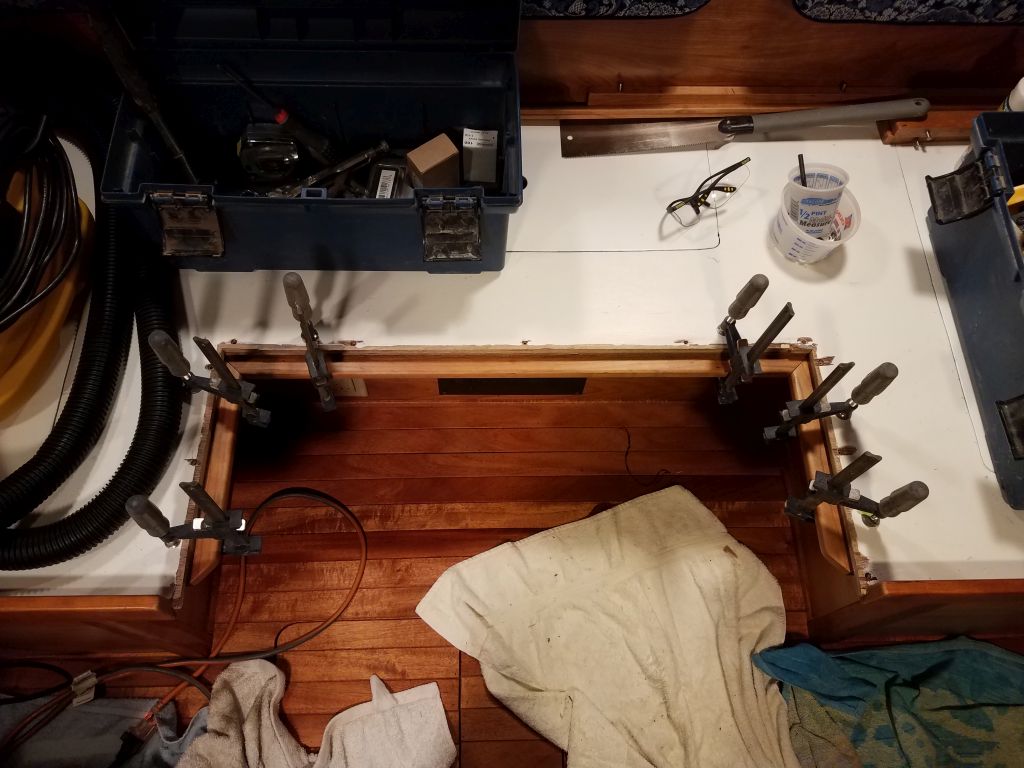
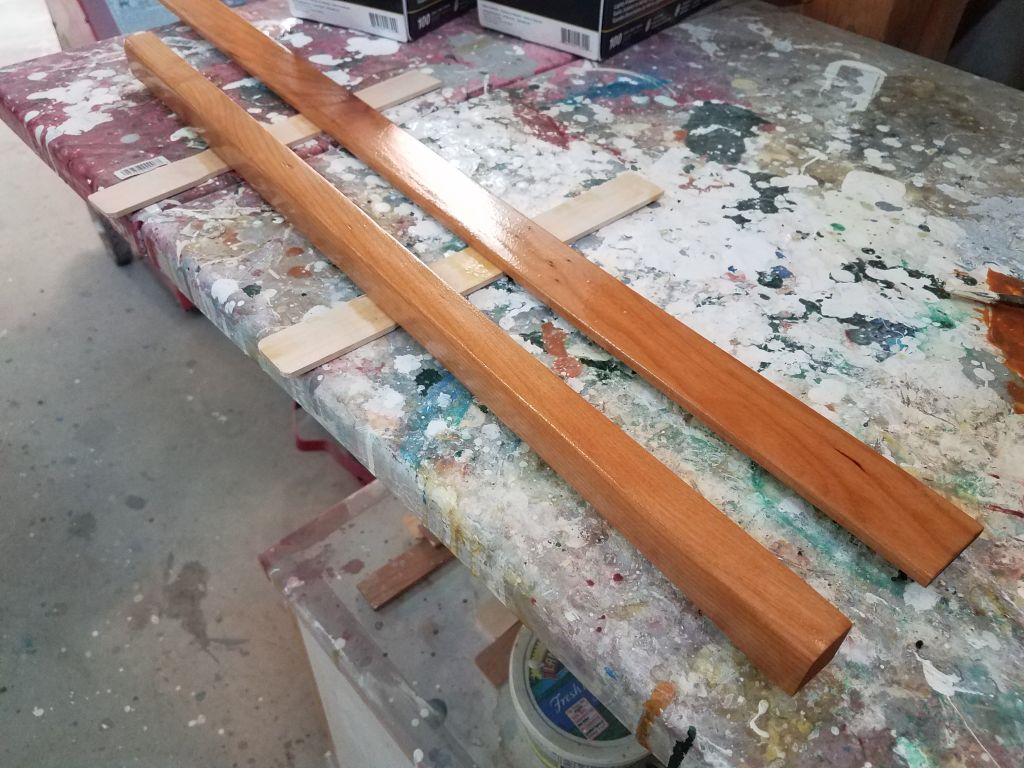
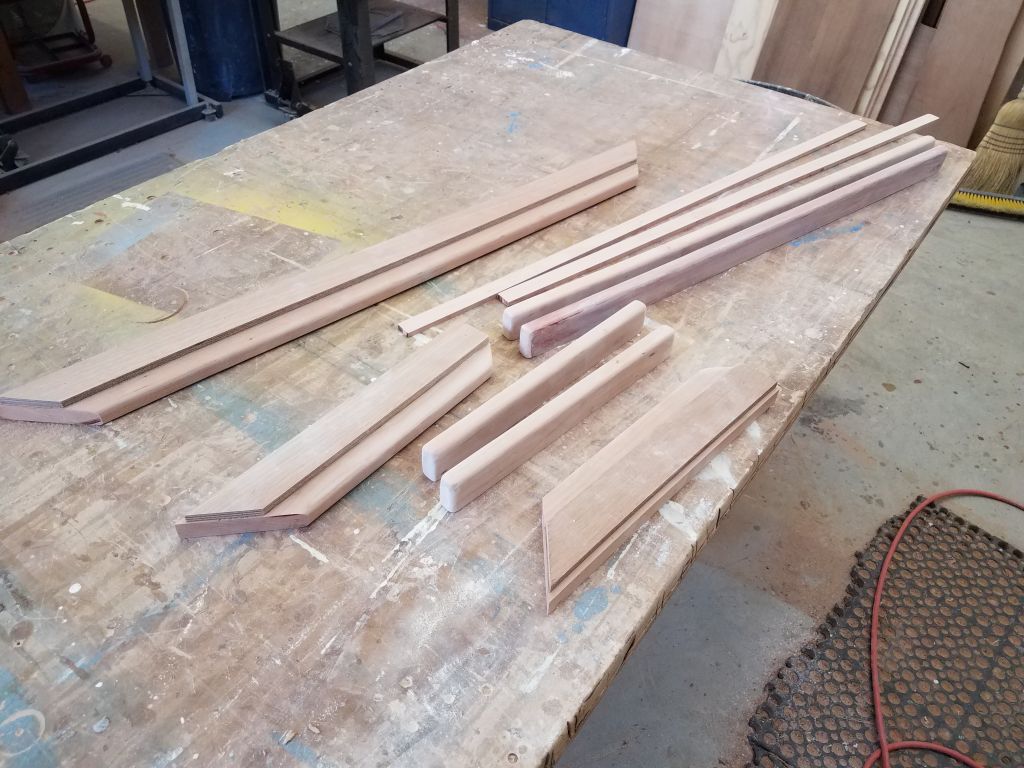
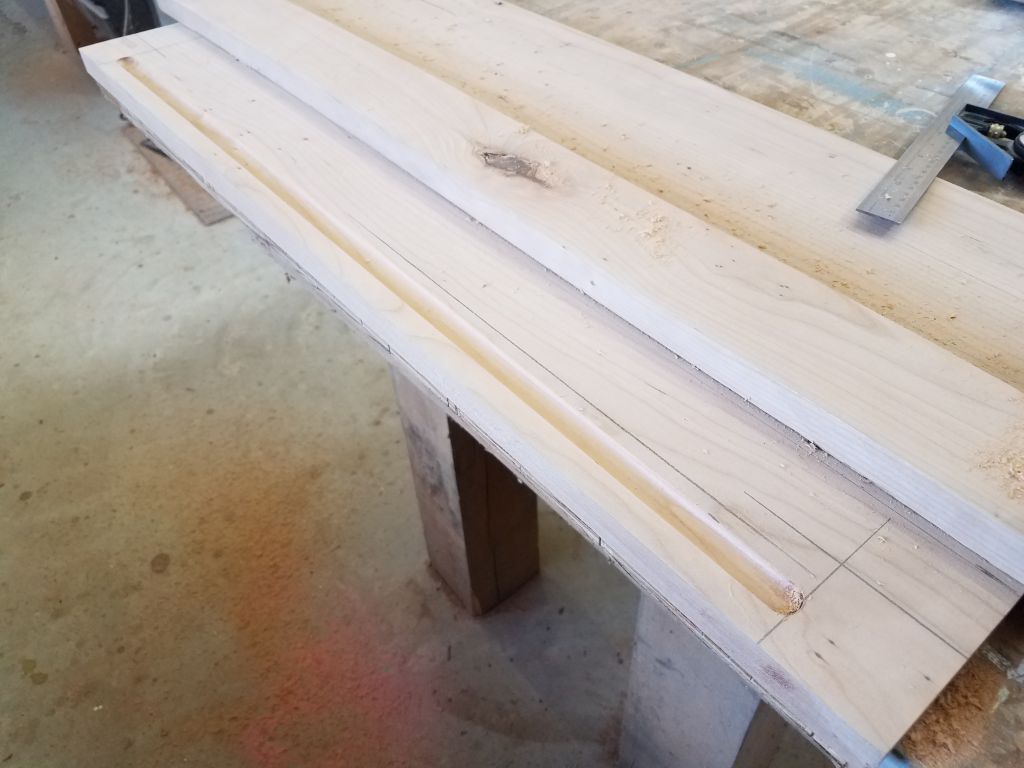
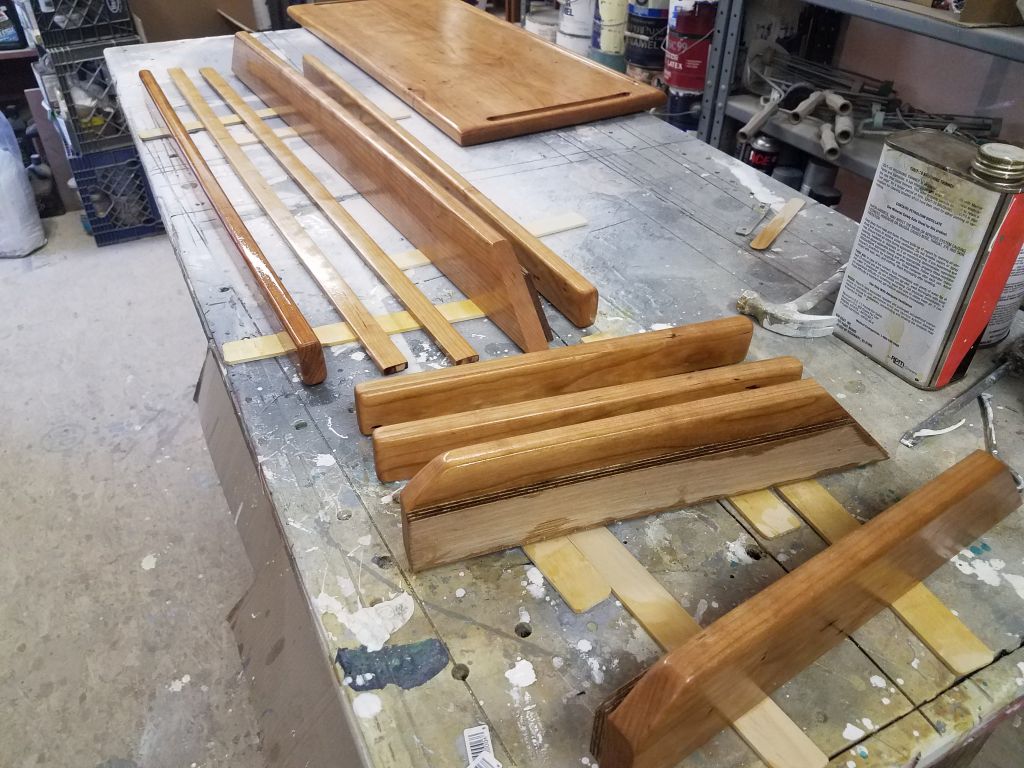
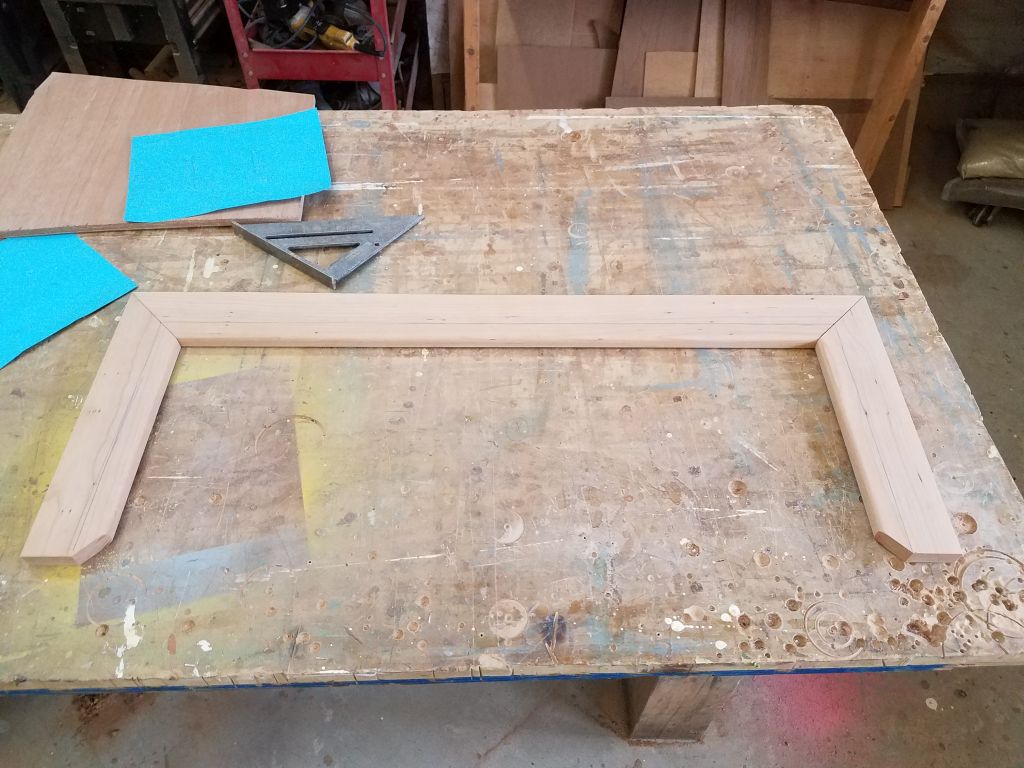
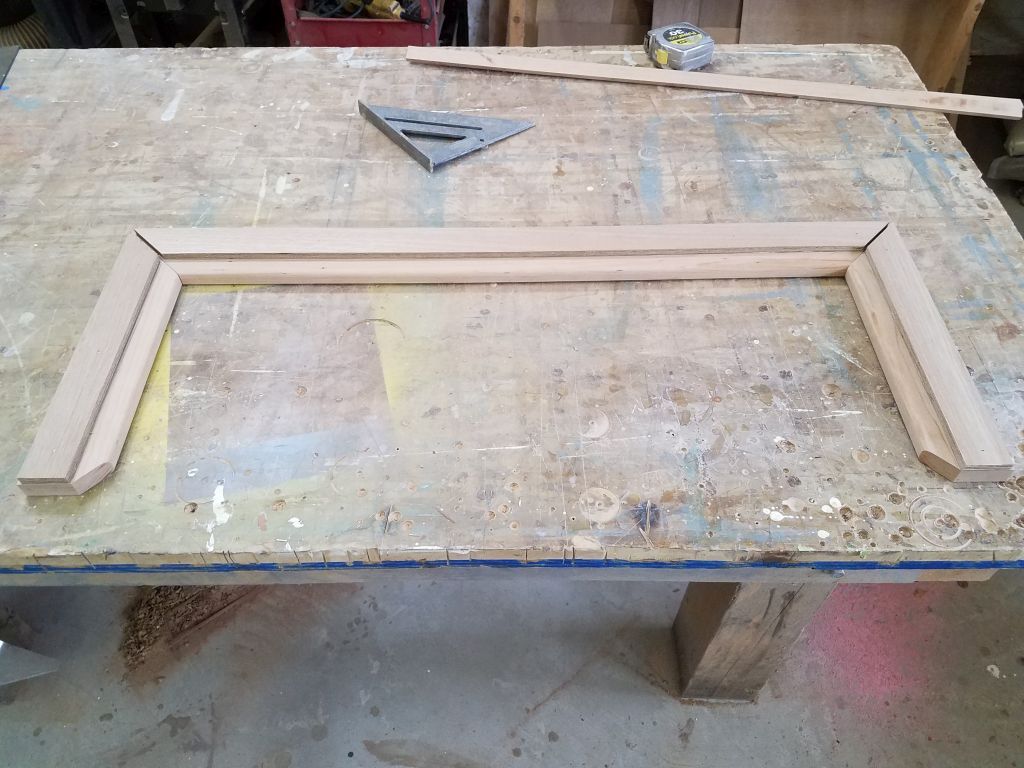
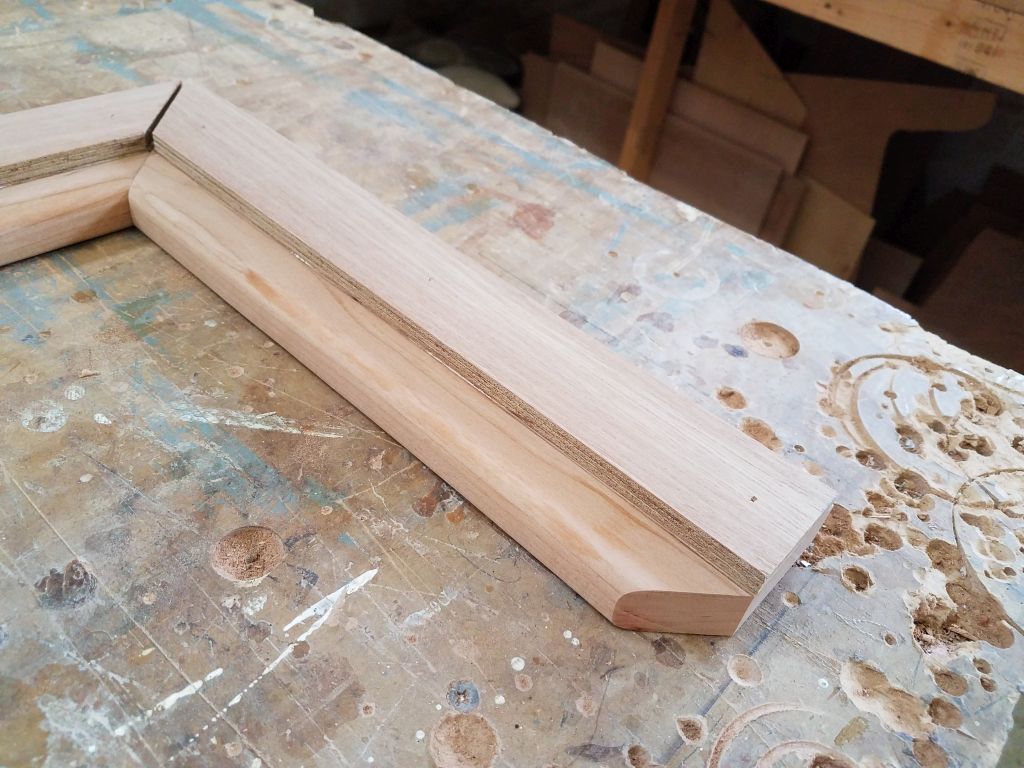
Back at the shop later in the afternoon, I got to work on the details.  For the main support trim, I planned to use some 3″ wide cherry that I’d milled and sanded to a rounded profile on one edge.  Allowing for a 3/4″ flat to support the table, plus 1/4″ vertical trim that would eventually hide the plywood edge on the settee, this would give me 2″ of wood to extend beneath the overhang for support; I could glue and bolt it in place for high strength.  Using the measurements I’d taken earlier, along with the table template, I prepared three sections of this trim that would fit within the existing opening.   I left the side pieces a bit shorter than the actual opening so they wouldn’t project too far and run into some existing cleats, and beveled the outer edge so there wouldn’t be a sharp corner to catch clothing or legs or whatnot.

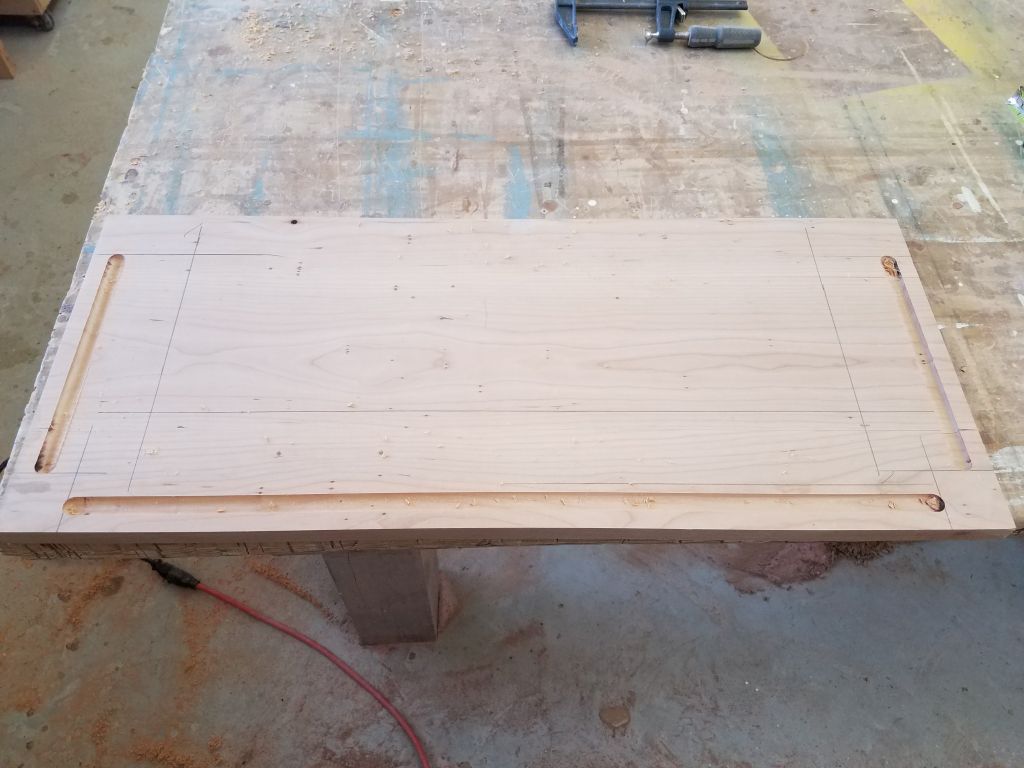
To lower the bearing surface enough so that the 7/8″ thick table top would fit flush when lowered to berth height, I added a plywood strip which, along with the 12mm thickness of the settee, would lower the installation accordingly.  The plywood would not be seen in the final installation, and I secured it to the cherry with glue and brads.

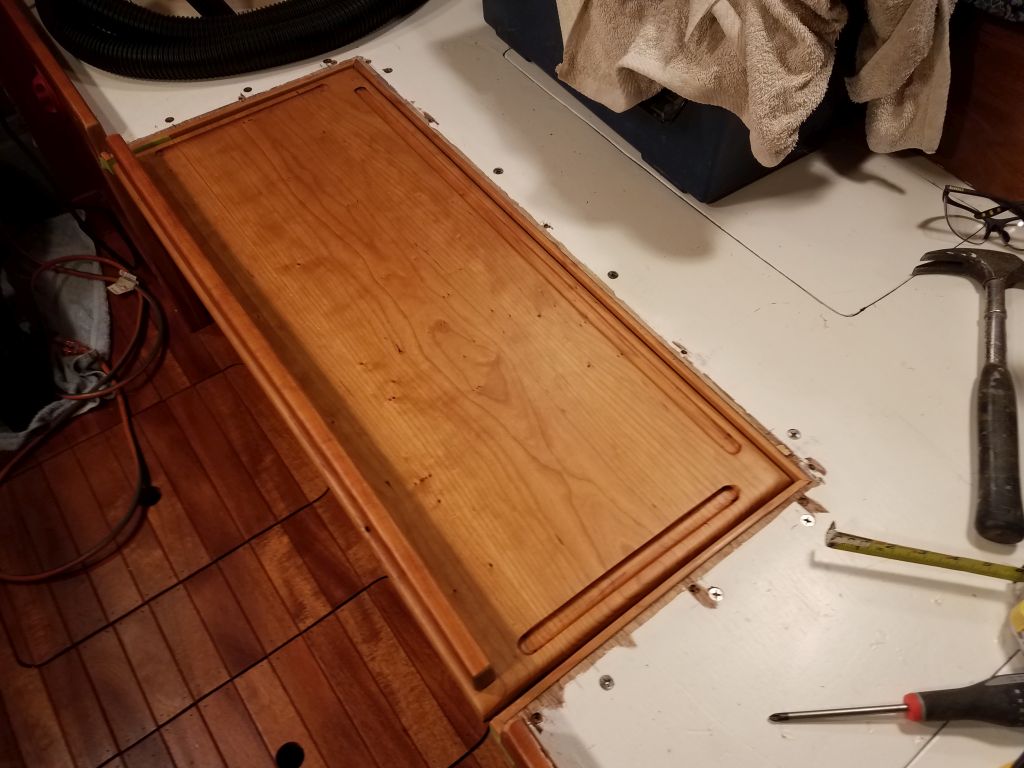
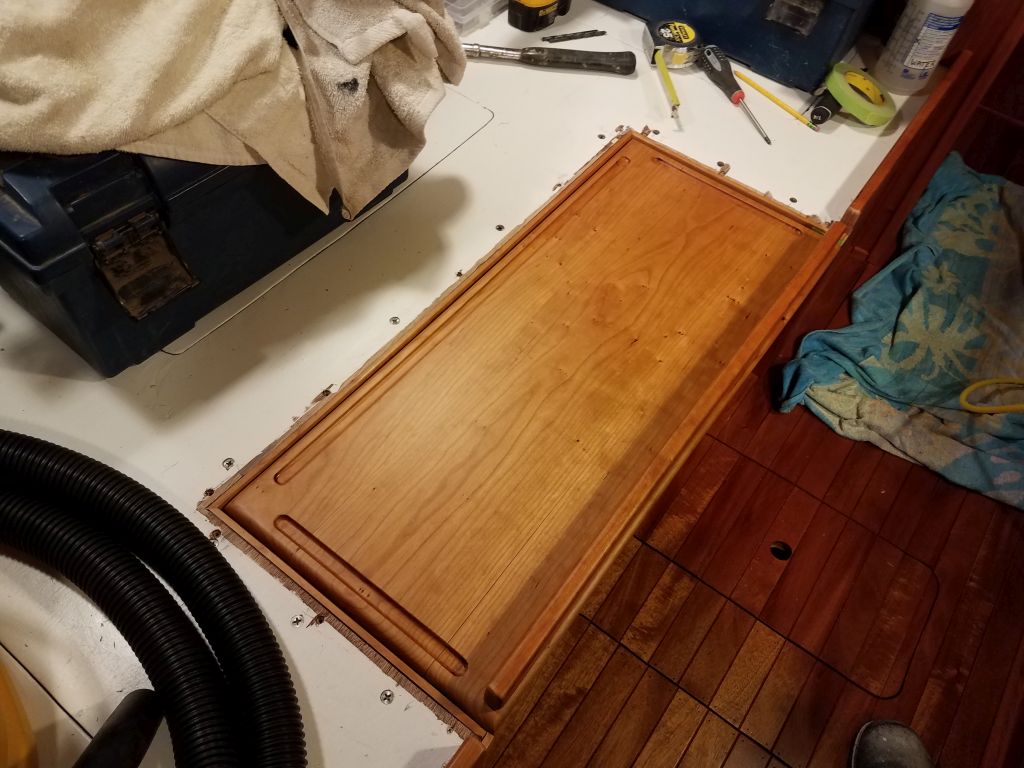
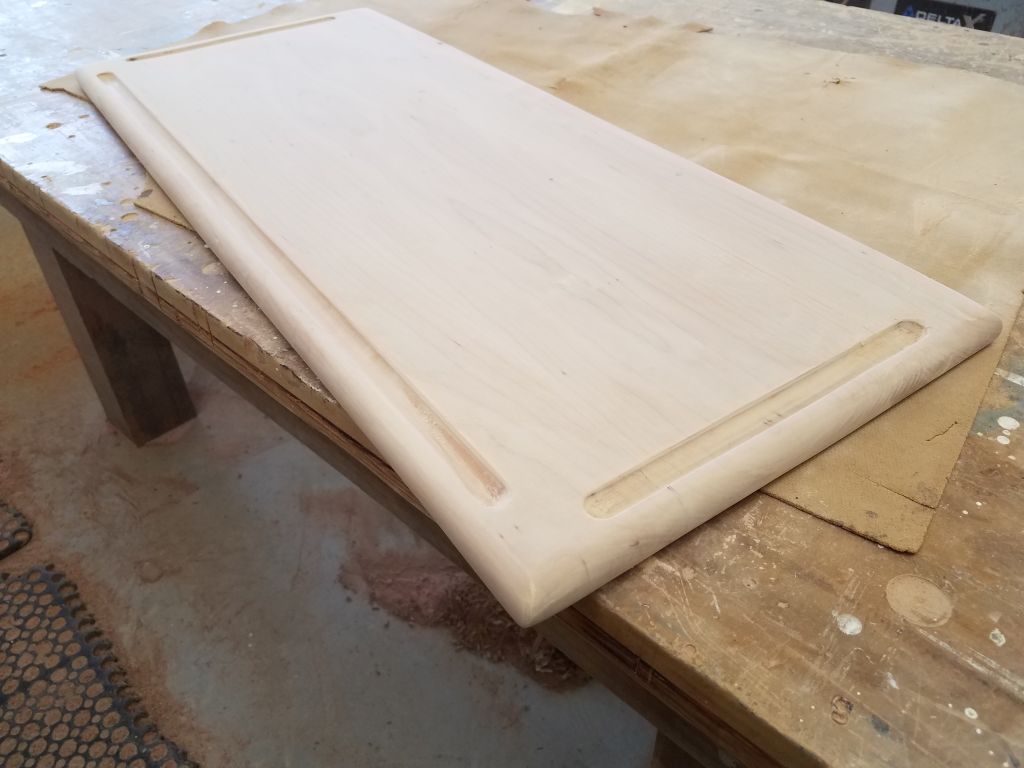
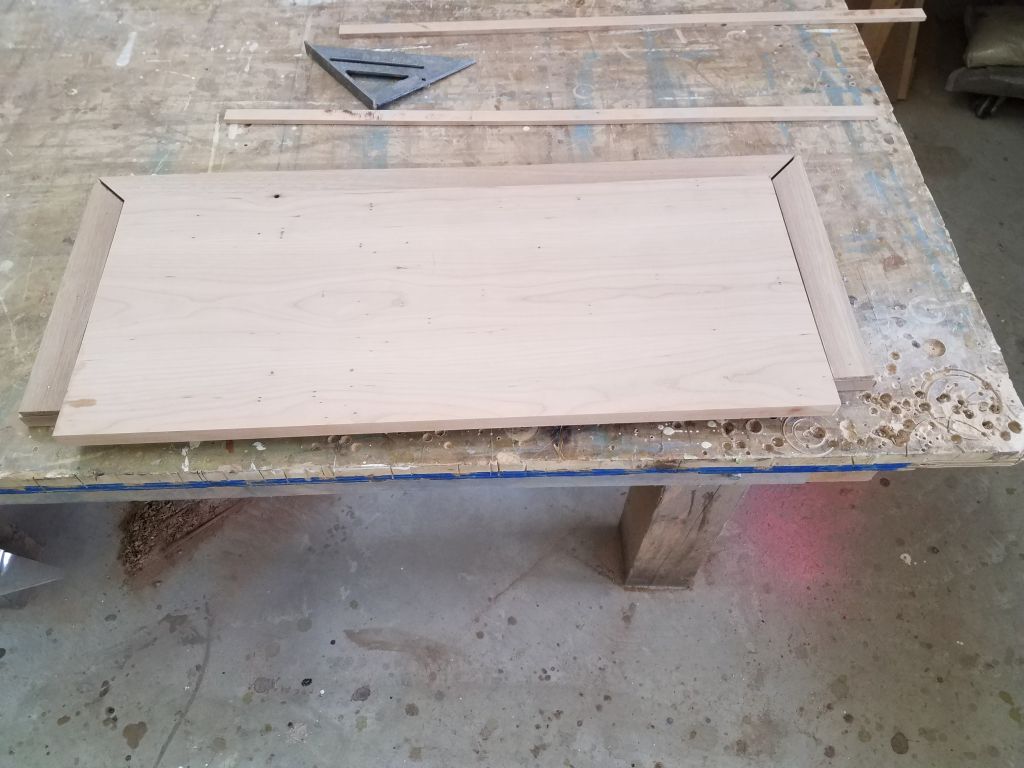
Allowing for the additional edge trim, and some space for a realistic fit, I cut down the table blank to its final size, bringing work for the day to a close.

Total time billed on this job today:  3.75 hours (plus 4 additional hours to date for the  preliminary boat visit and stock dimensioning time in January and February)

0600 Weather Observation:  26°, snow shower.  Forecast for the day:  Becoming mainly sunny, low 30s