
110 Cookson Lane | Whitefield, ME 04353 | 207-232-7600 | tim@lackeysailing.com
Snow Lily | Friday, May 31, 2013
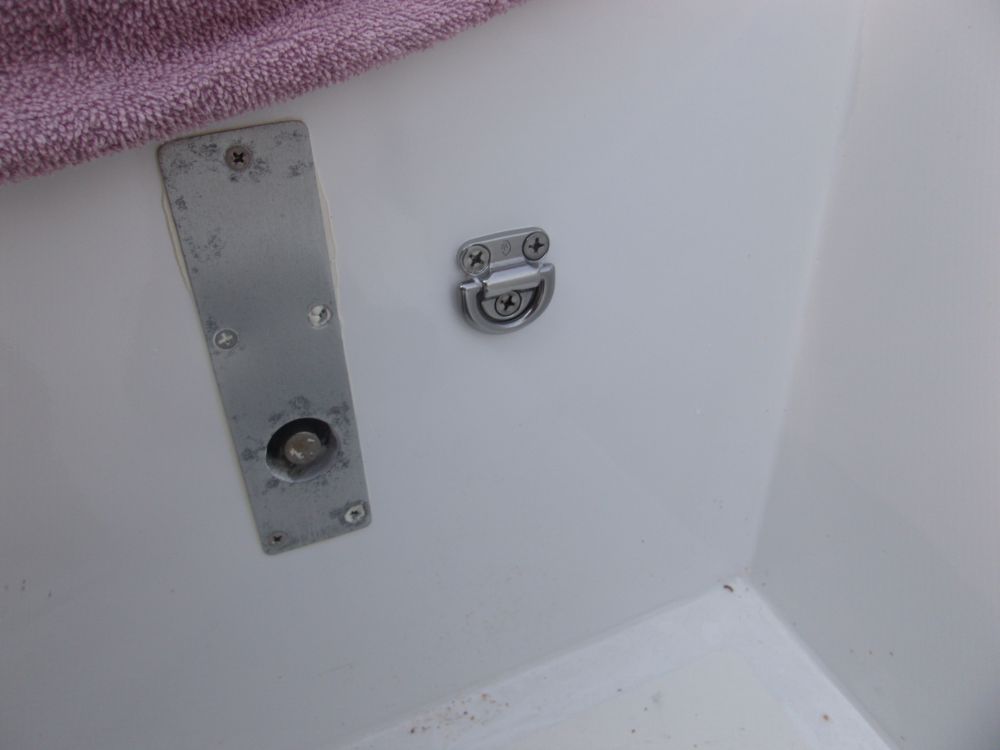
Before getting back to the wiring tasks ahead, I quickly installed a folding padeye in the cockpit, which the owner requested for a harness or what have you. I located it near the centerboard winch on the forward end of the cockpit, where it was accessible from the companionway and most of the cockpit itself, and installed it with three 1/4" bolts, sealant, and a fiberglass backing plate with large washers.
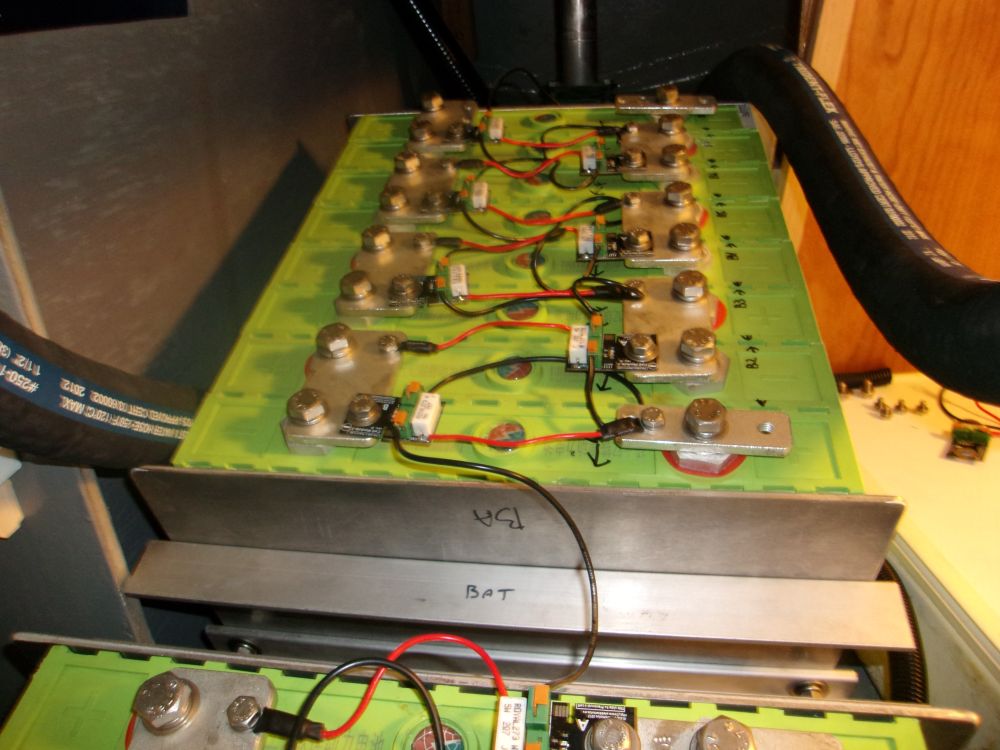
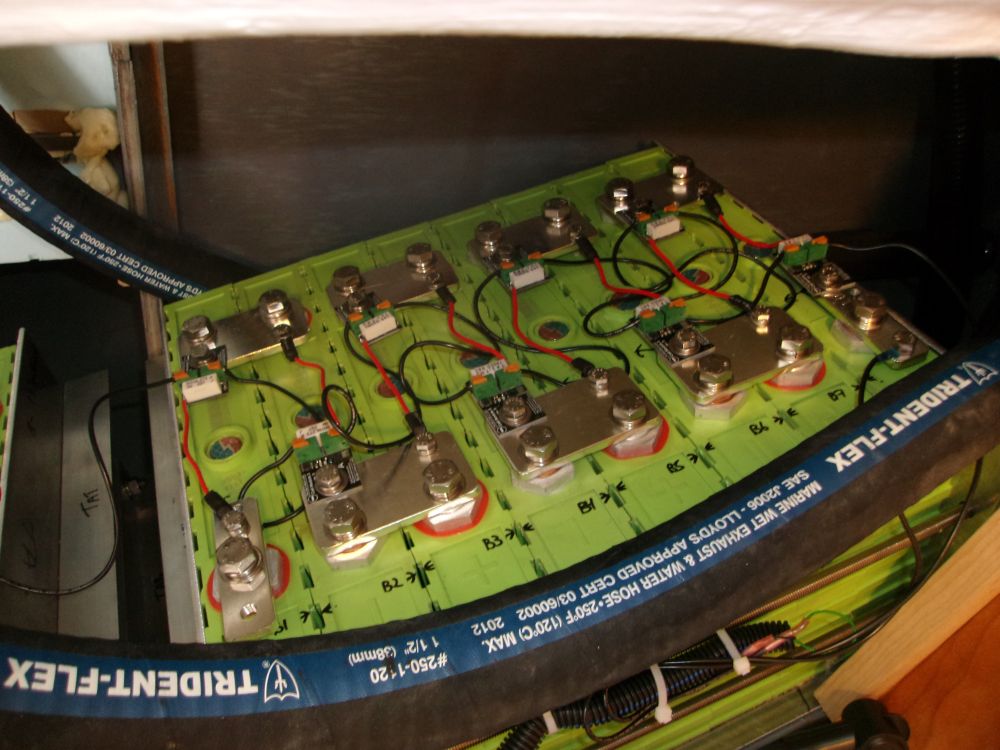
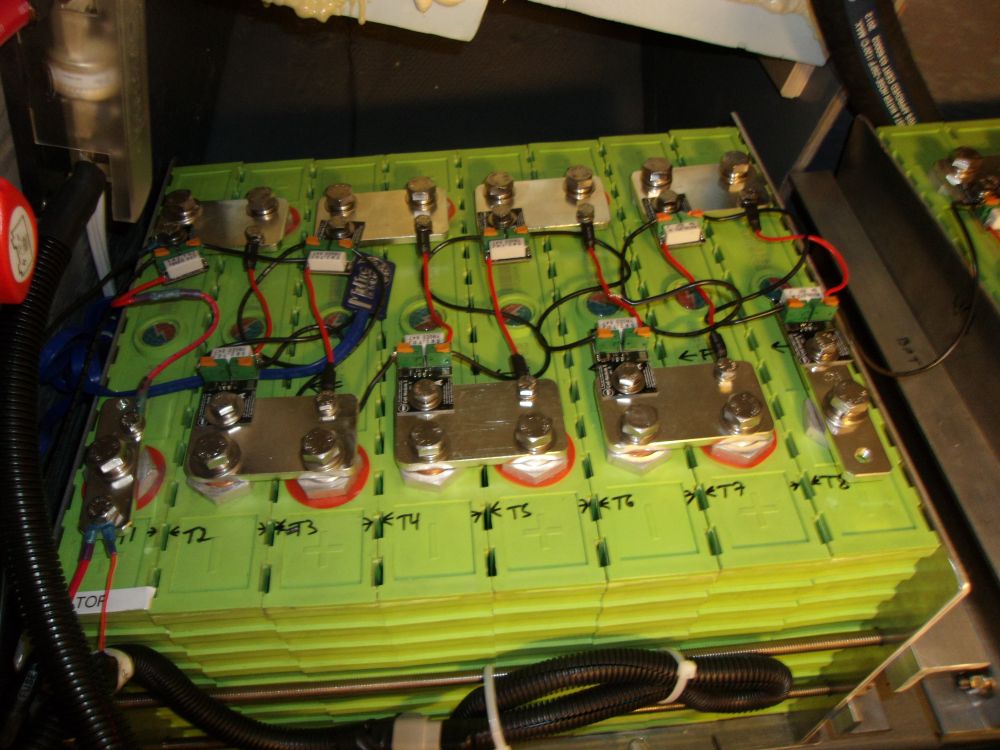
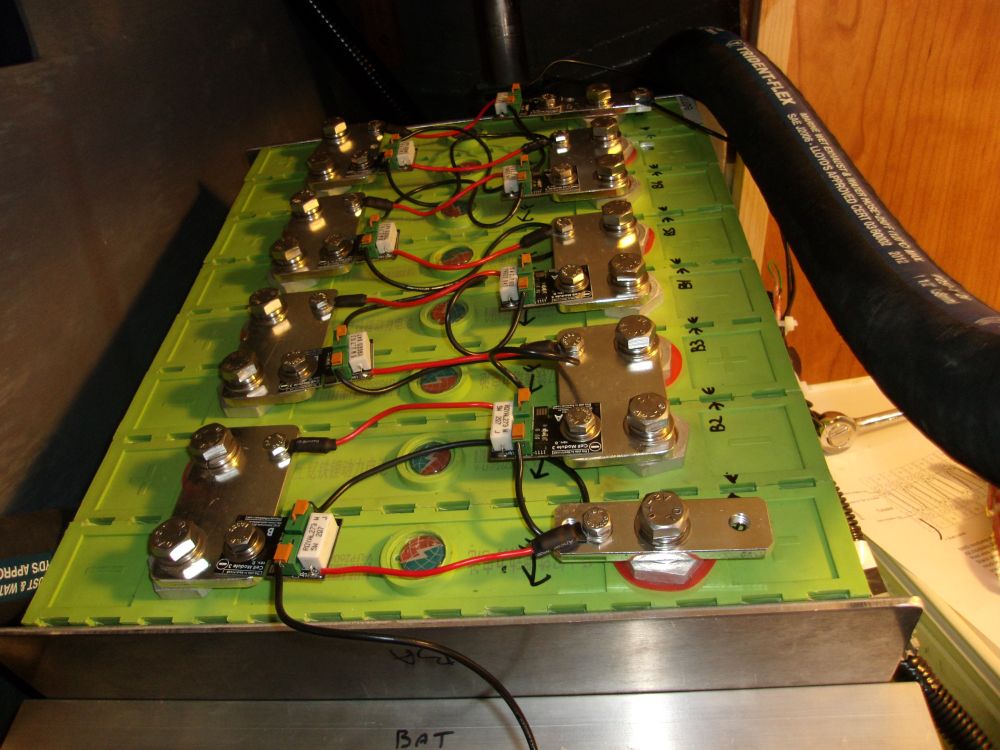
Next, I installed all the tin-plated copper buss bars to interconnect the individual cells in the two battery banks. Then, following a wiring diagram for the BMS (battery management system) modules, I installed the modules and their wiring, a rather fussy job in the tight (and, on this day, very hot) space. The larger flat, blue cable with its rectangular flat end was a battery temperature sensor connected to the solar controller. It was supposed to be self-adhesive, but didn't stick to the batteries at all, so I'd come up with some other way to hold it in place.
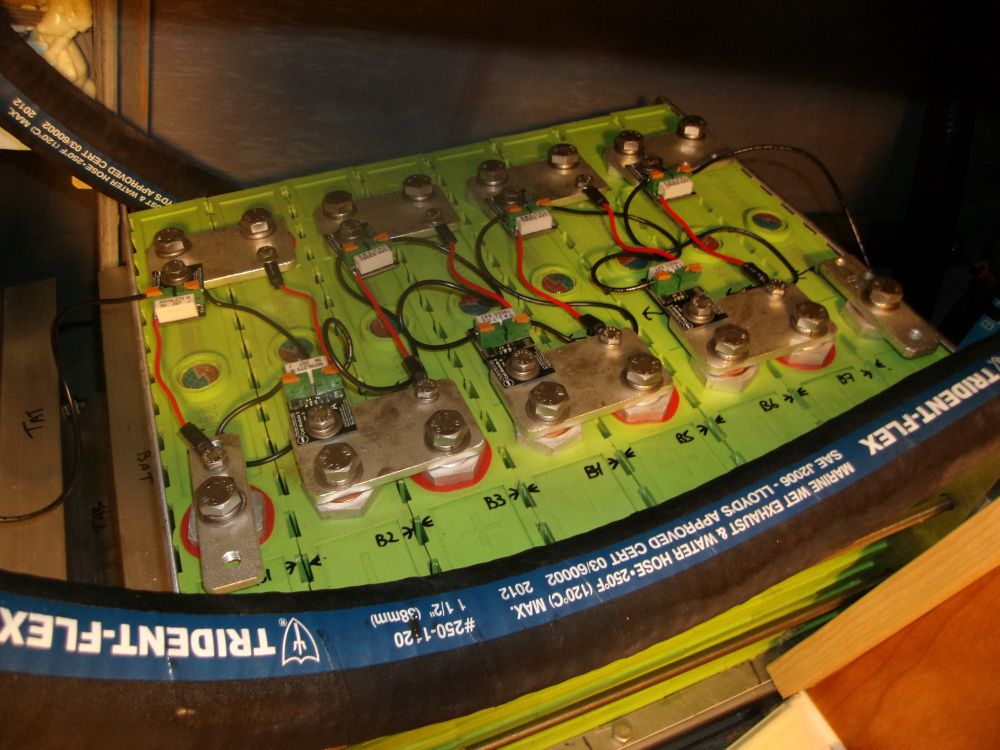
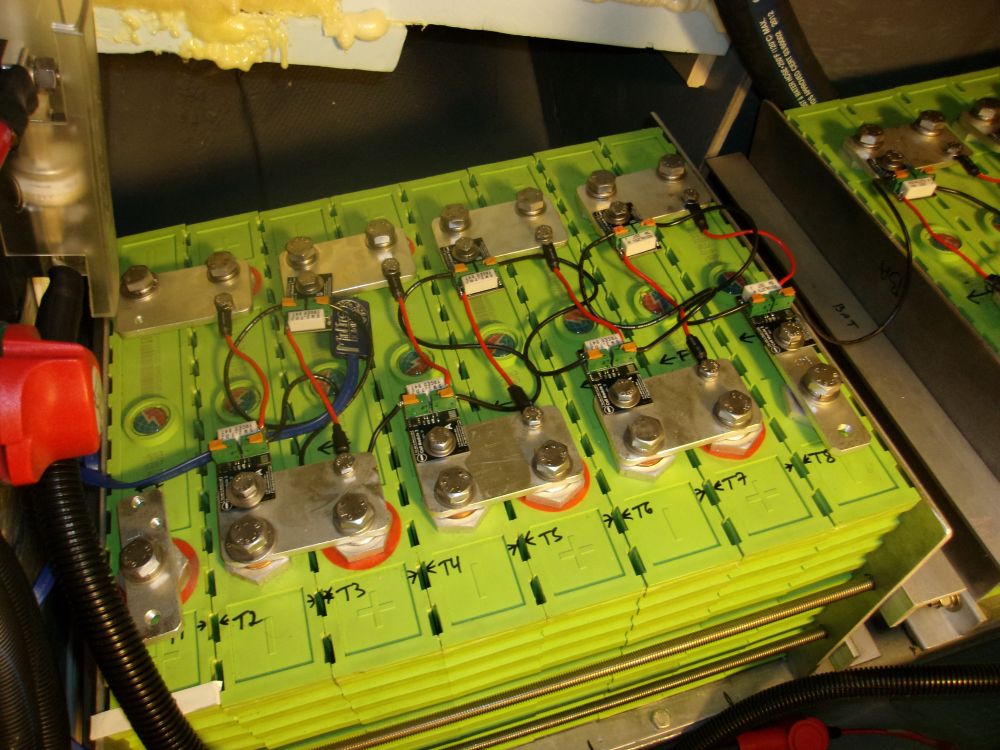
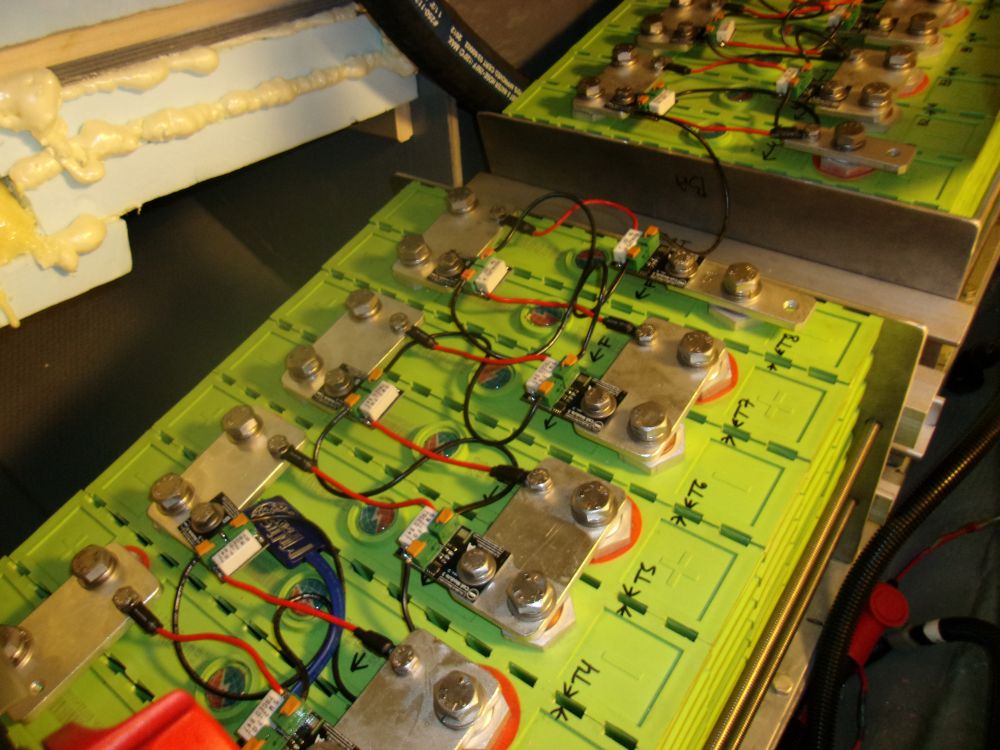
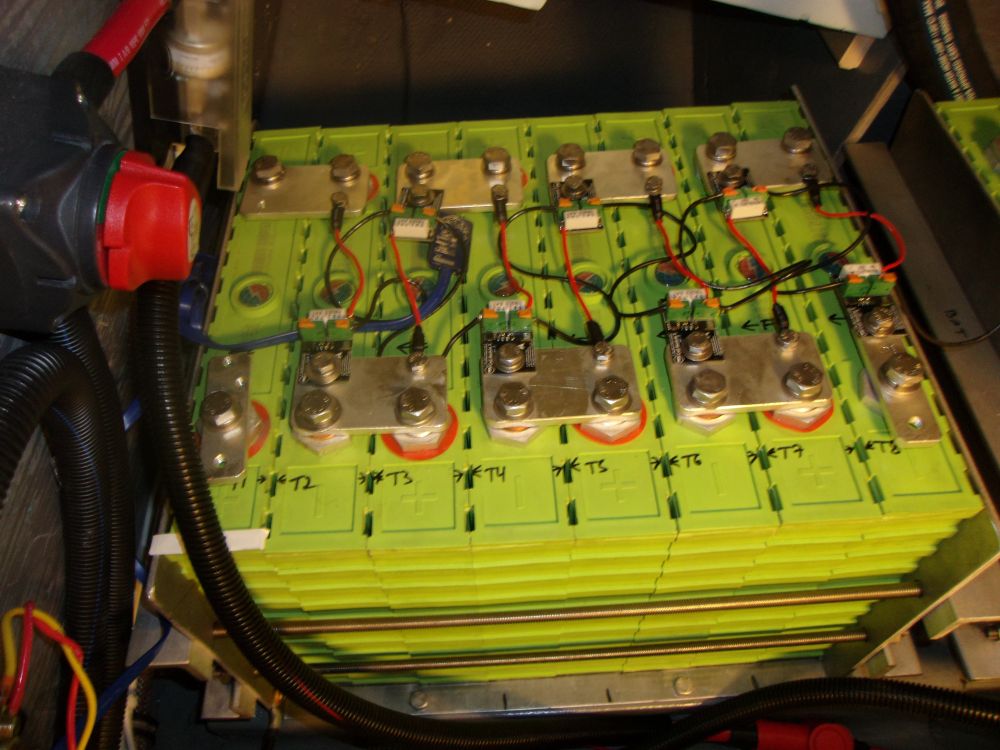
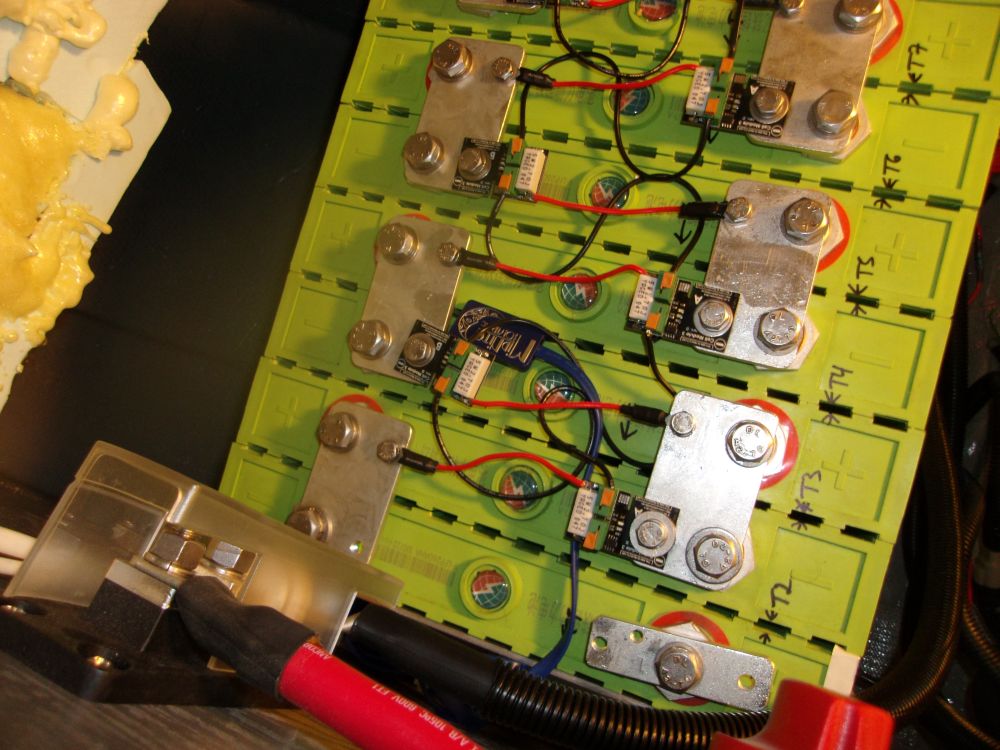
I had some questions about the two final (end) BMS modules, which according to the instructions were supposed to be marked "top" and "bottom" accordingly, while the two remaining modules I had on hand were not so marked. So after a conference with the owner, and some additional research on his part, eventually I got the answers--and revised wiring plan--I needed to install the last two modules and make the final wiring connections, both to the adjacent cells and to the wiring harness stemming from the BMS control box in the electrical locker. I had to extend several of the wires since the pre-made harness didn't quite accommodate the realities of the installation environment.
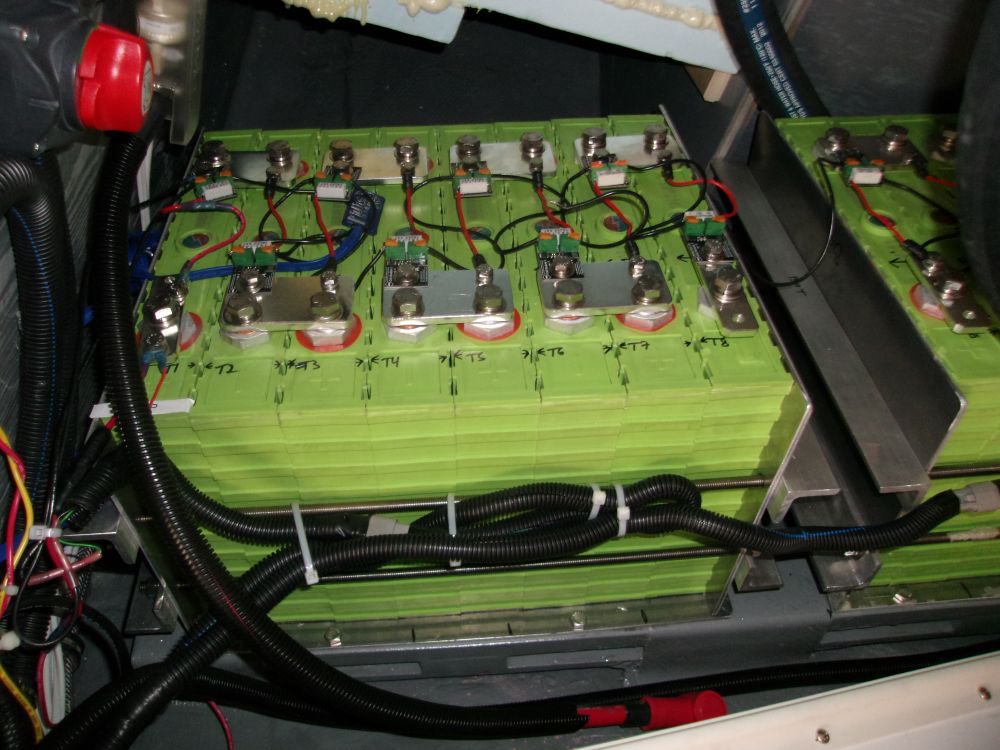
Before I could make the final connections that would empower the system, I needed some additional 2/0 cable to run between the two banks; I'd used up my final length of red cable the day before, so ordered additional for the last connection. Then, I'd simply connect the positive and negative cables to the appropriate terminals, and, with any luck, the system would become operational.
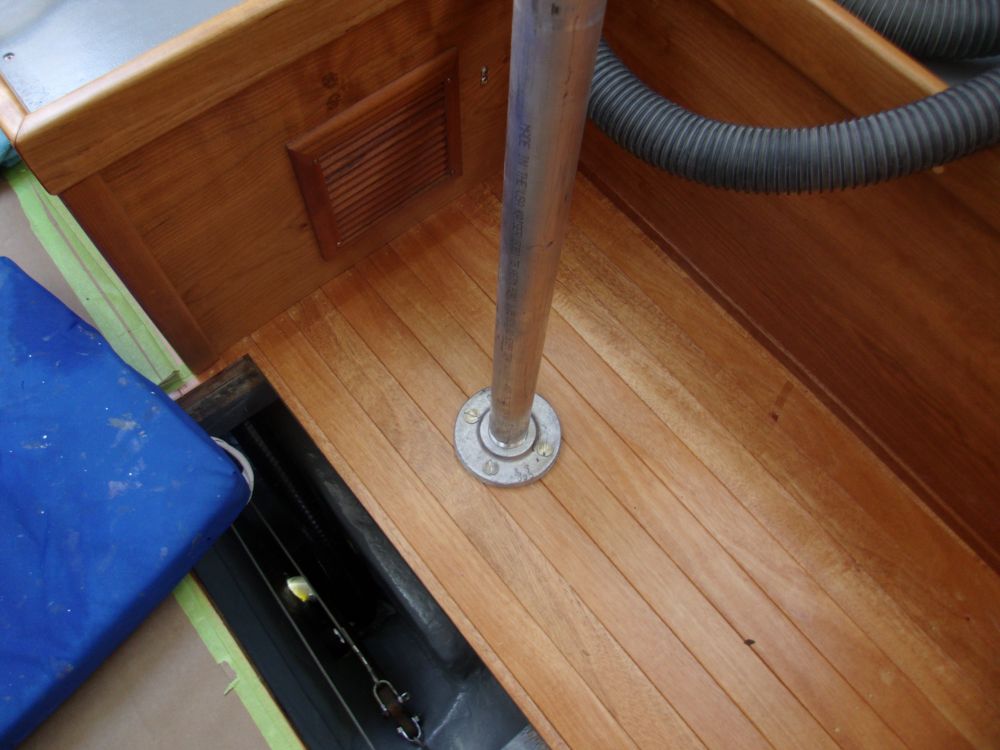
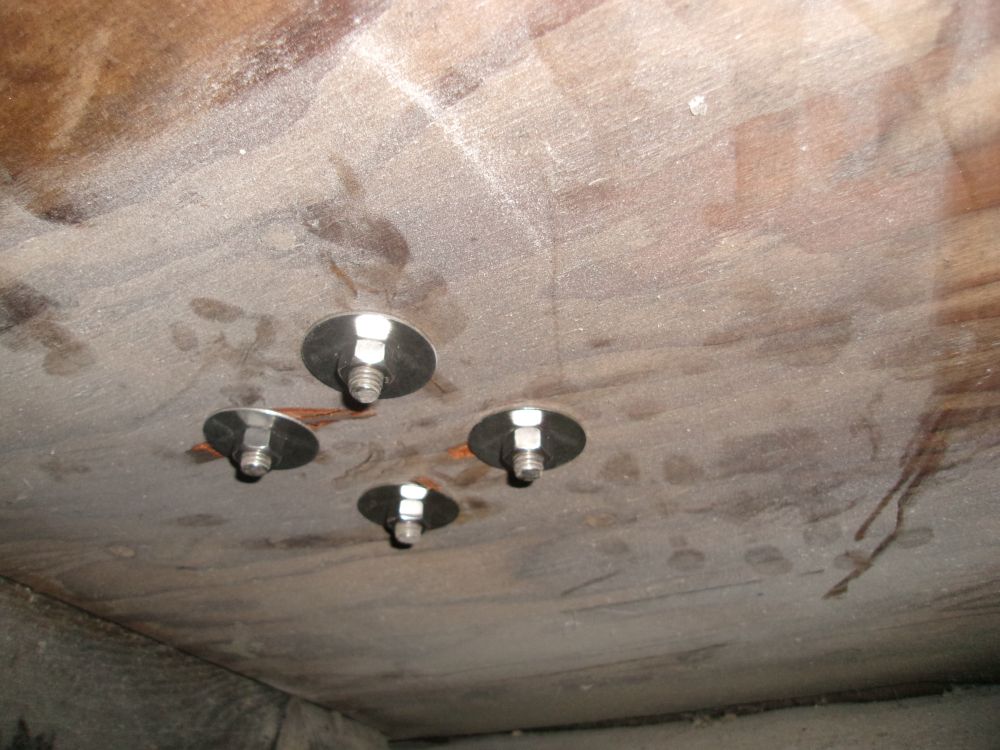
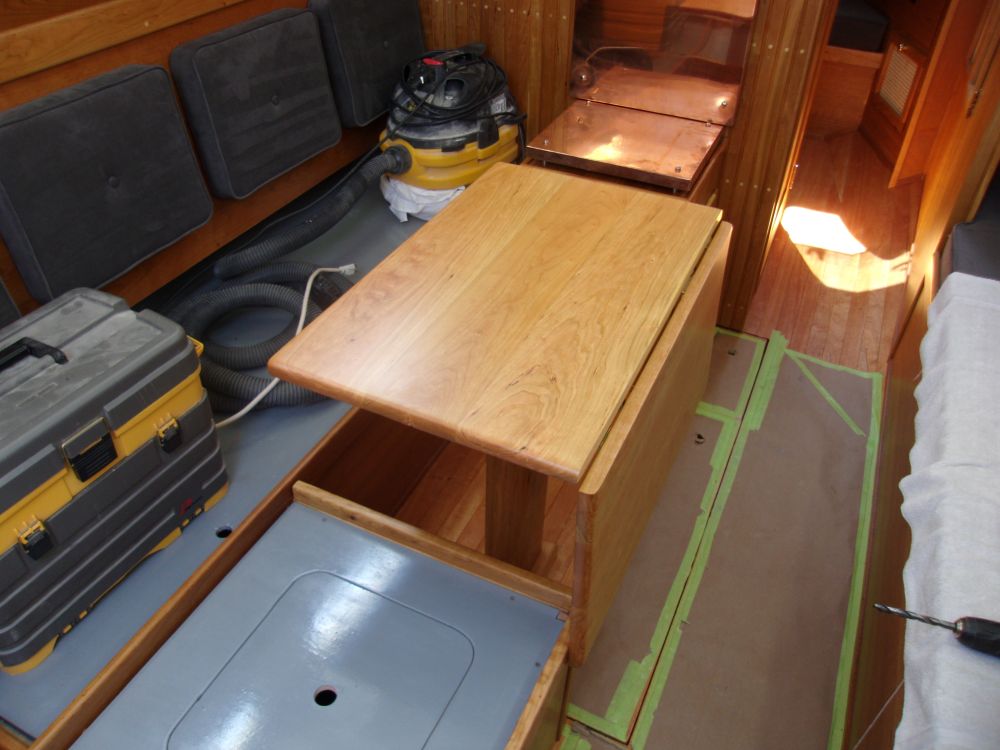
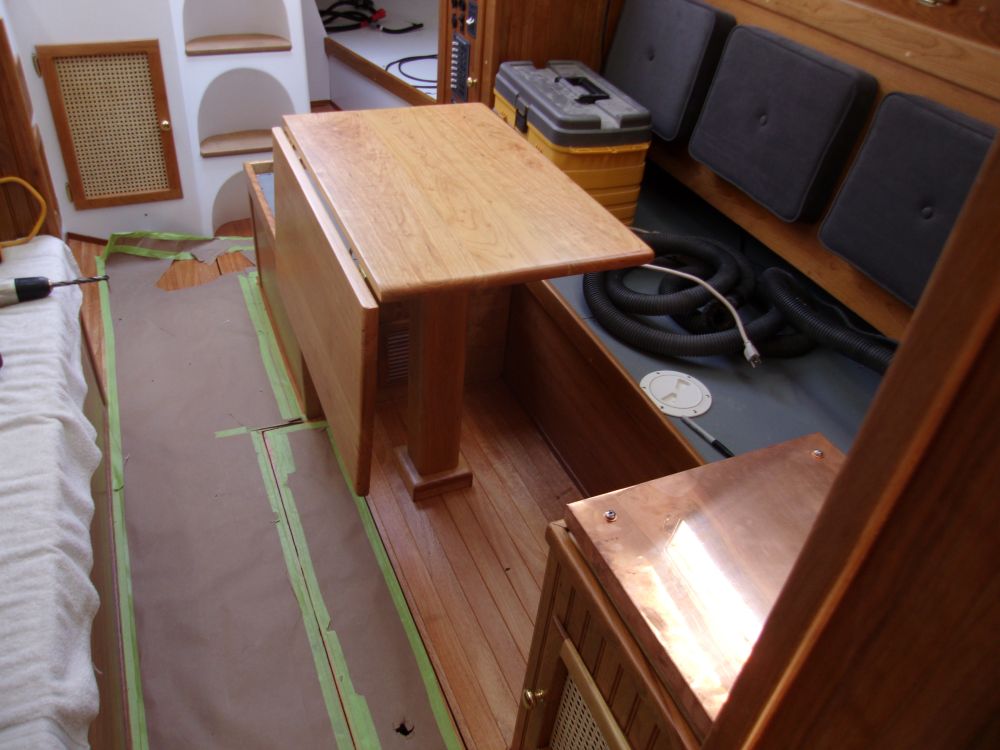
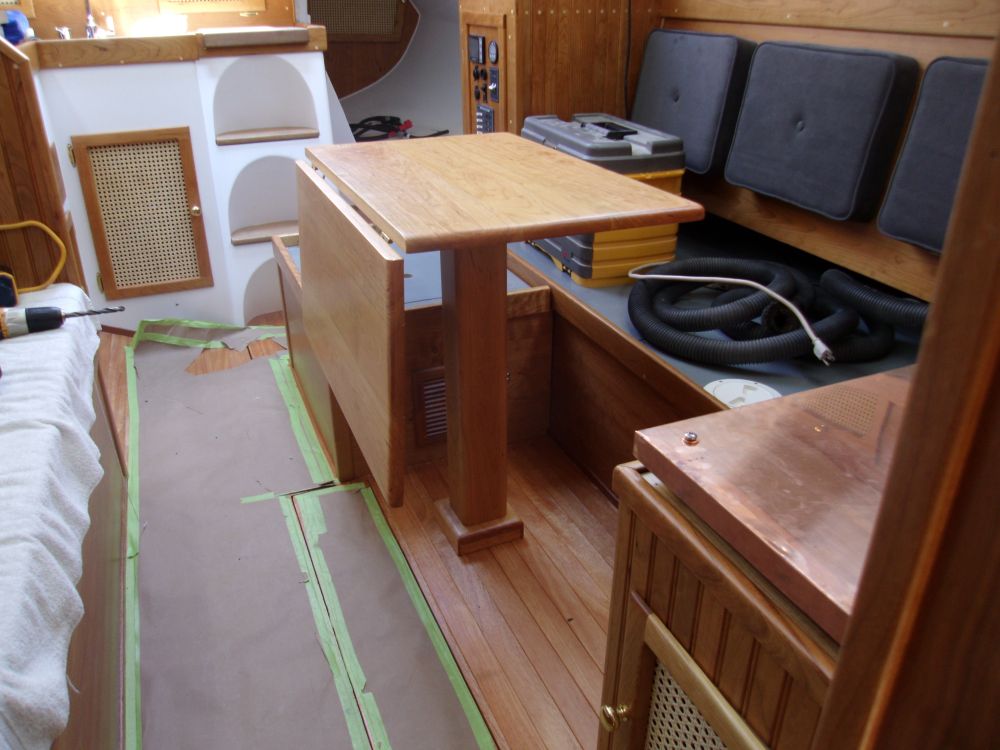
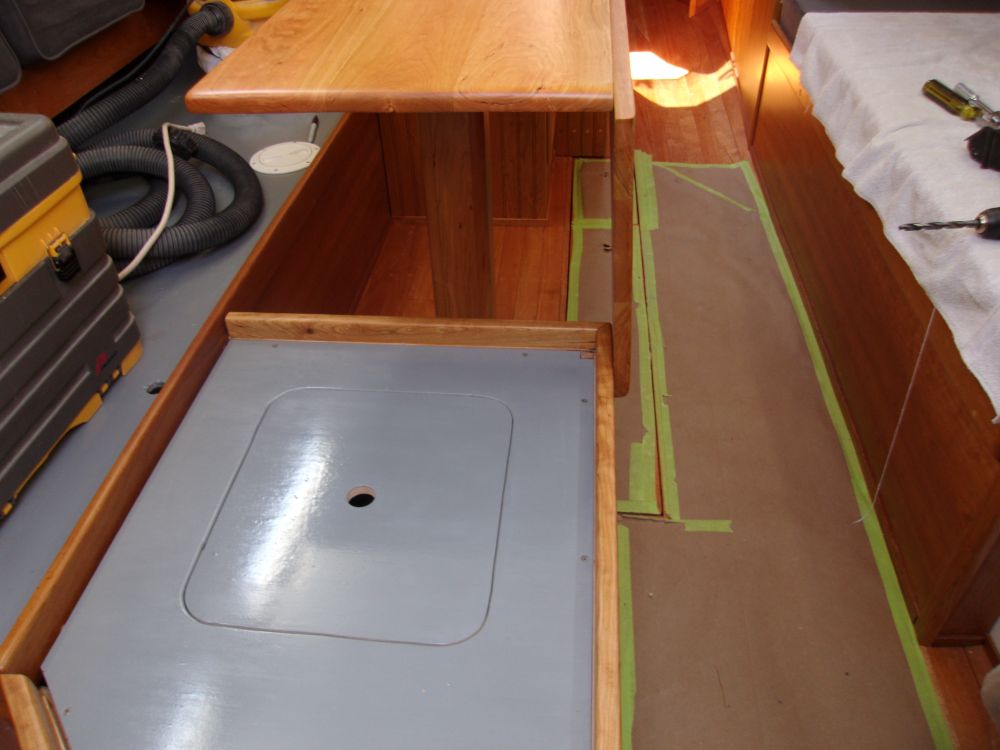
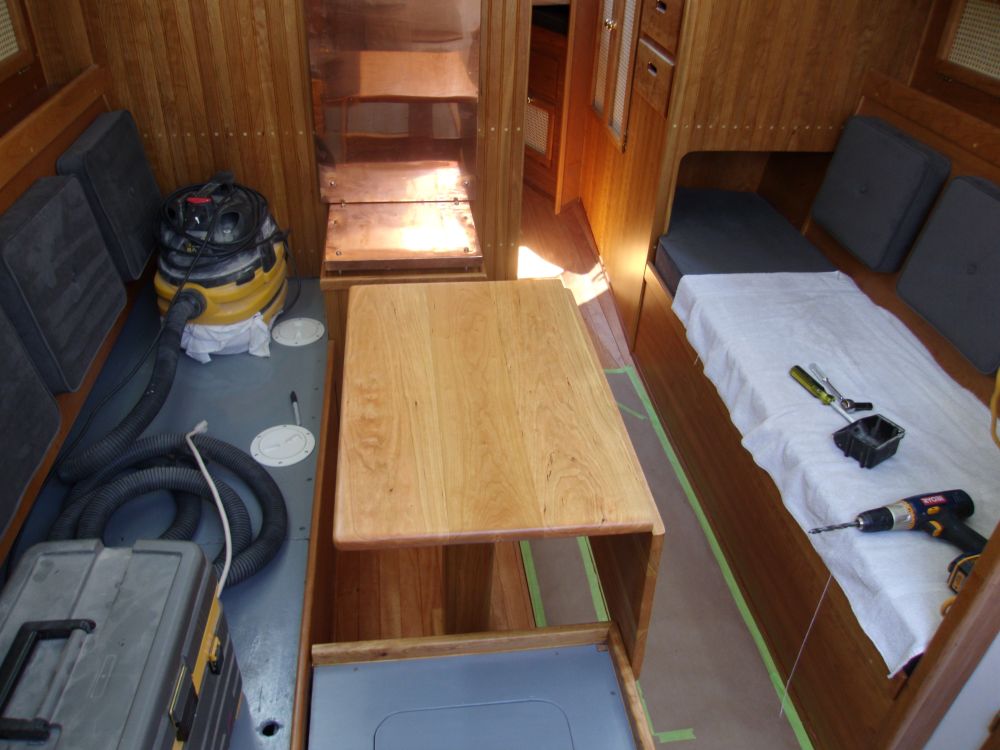
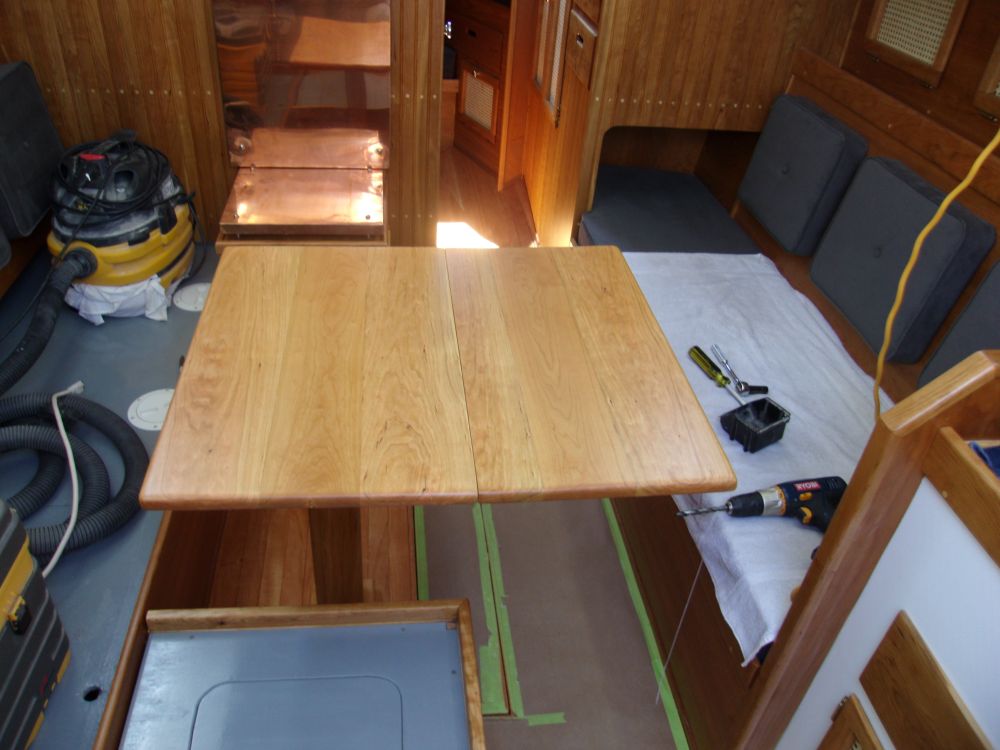
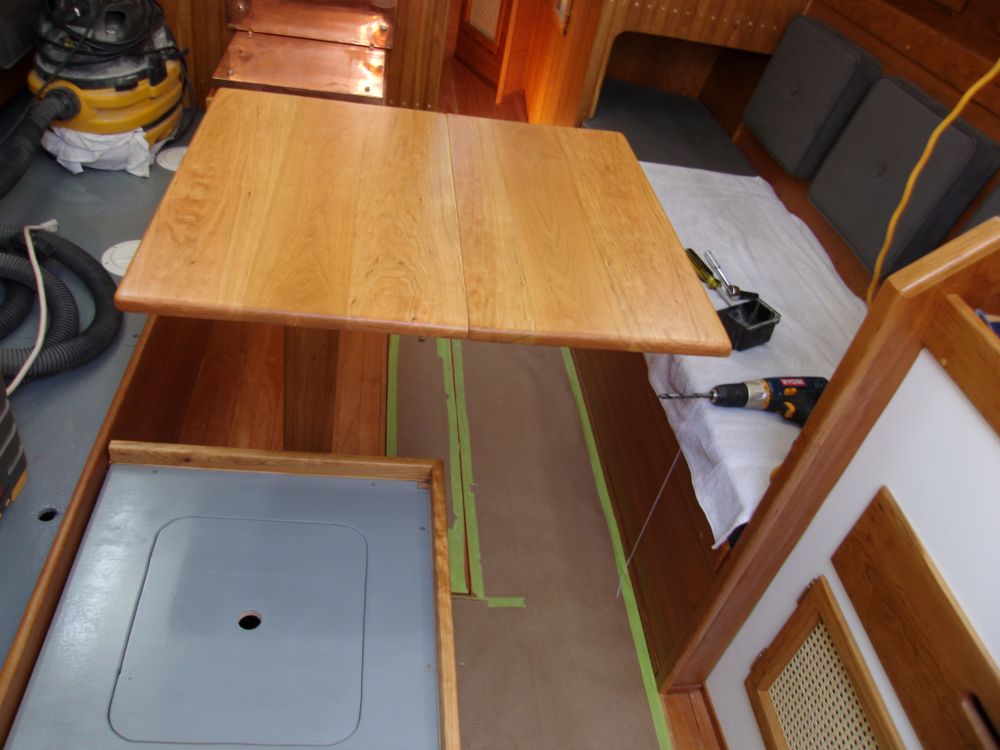
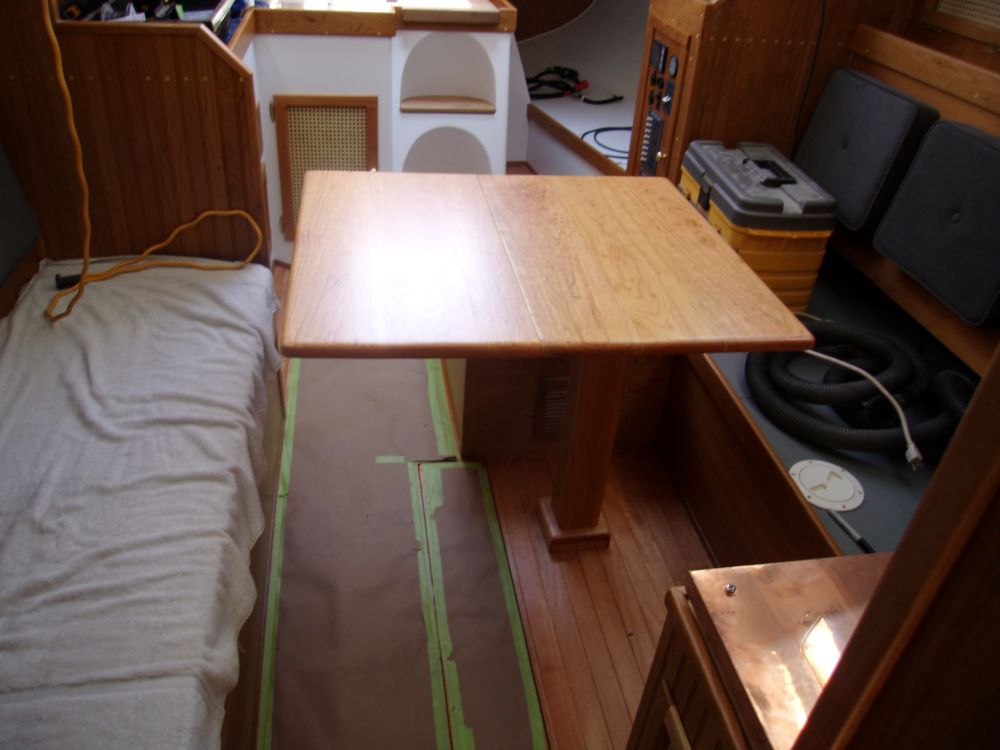
Meanwhile, I completed the saloon table installation. After determining the mounting location, leaving a passageway at the forward end between the woodstove cabinet and the table, I bolted the base flange to the cabin sole with bolts and large washers. Then it was a simple matter of slipping the wooden leg over the aluminum, and threading in the table top. The drop leaf ended up perfectly positioned against the forward corner of the engine box, which would give me a good way to secure it.
Total Time on This Job Today: 5.5 hours
