
110 Cookson Lane | Whitefield, ME 04353 | 207-232-7600 | tim@lackeysailing.com
Snow Lily | Wednesday, May 15, 2013
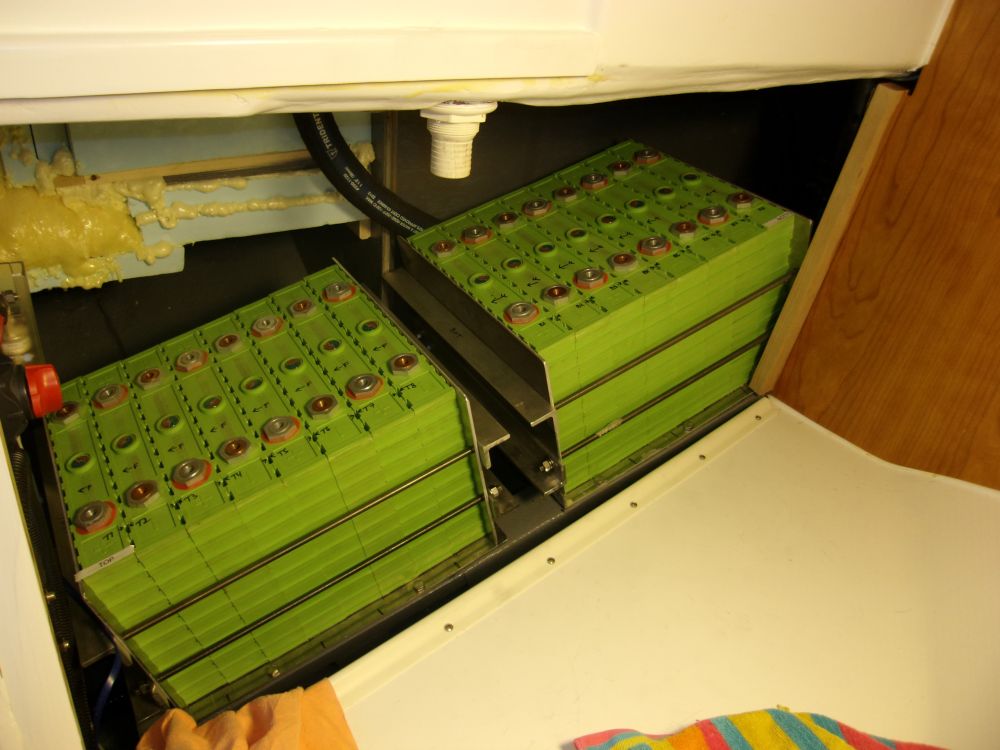
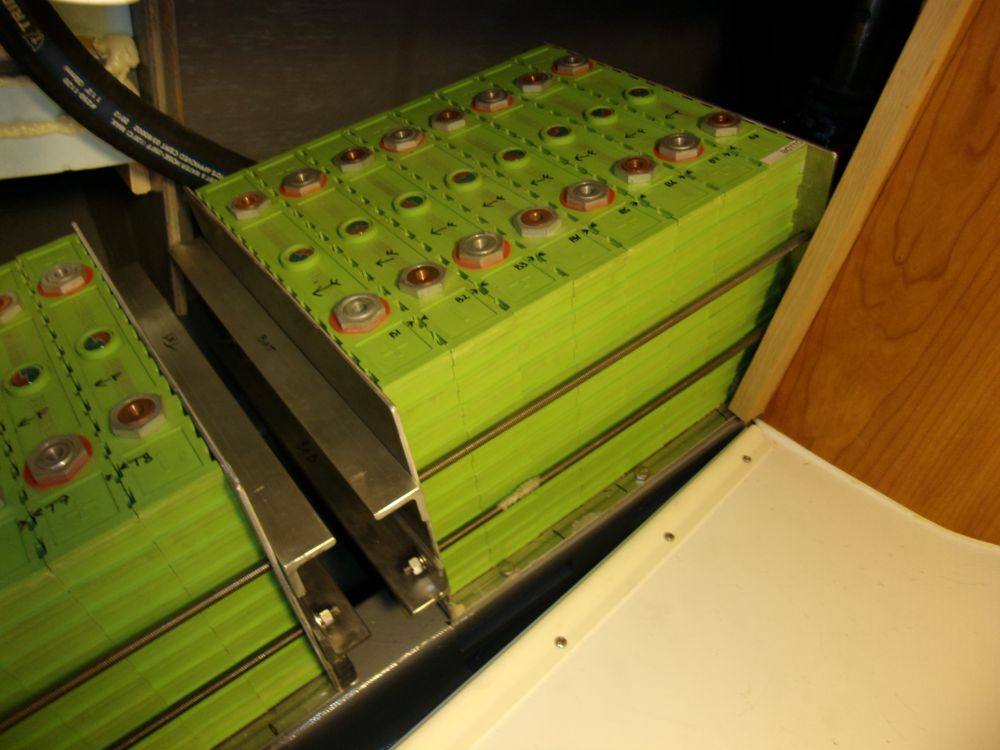
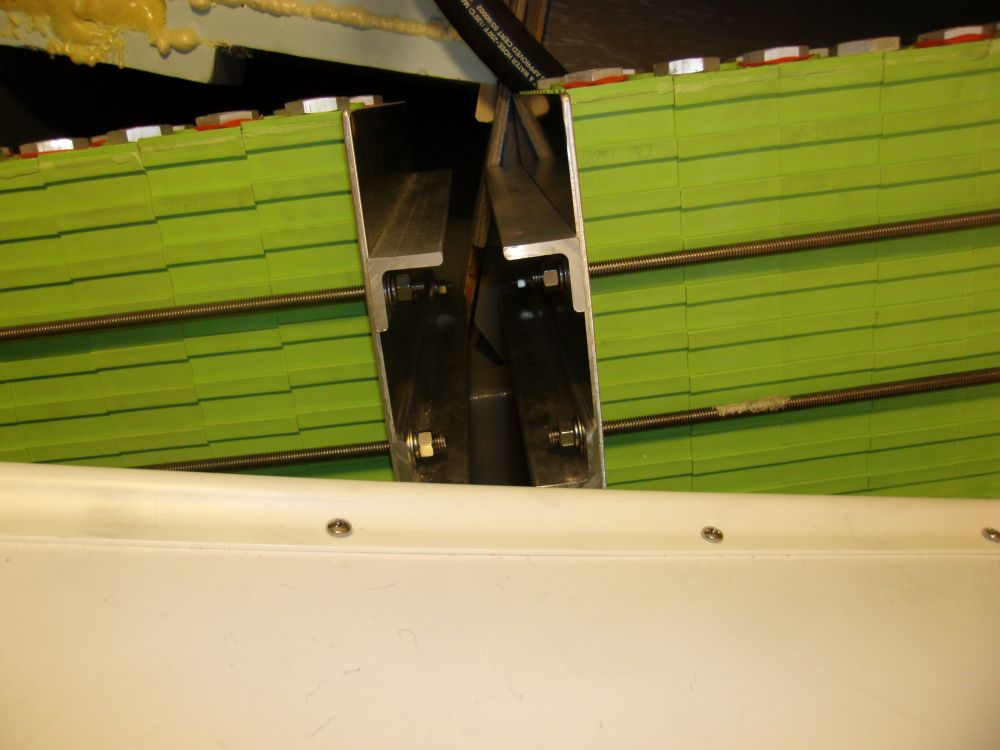
First thing, I continued work on the batteries, wanting to get the remaining eight cells installed. After lugging them all up on deck, I installed them in the after battery support, then installed the threaded rods and clamps to tightly secure and compress them together. I found it necessary--or at least extremely helpful--to remove the panel from the starboard cockpit locker for access to that side of the after bank, since overhead clearance was getting tight back there.
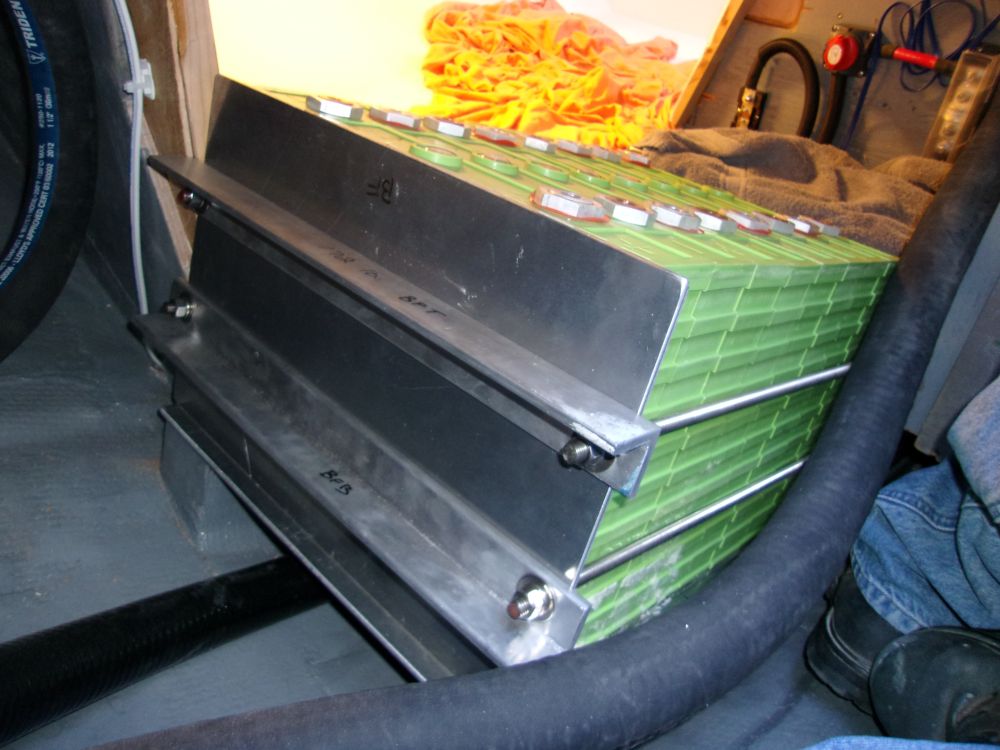
Afterwards, I reassembled the locker panel, and resecured the port scupper hose, which I'd once again removed for battery installation. I'd have to reassess the position of these hoses, and at a minimum add some chafe gear, but for the moment what mattered was having the hose attached, since the boat was outdoors with showers in the forecast. The port hose is still disconnected in these photos.
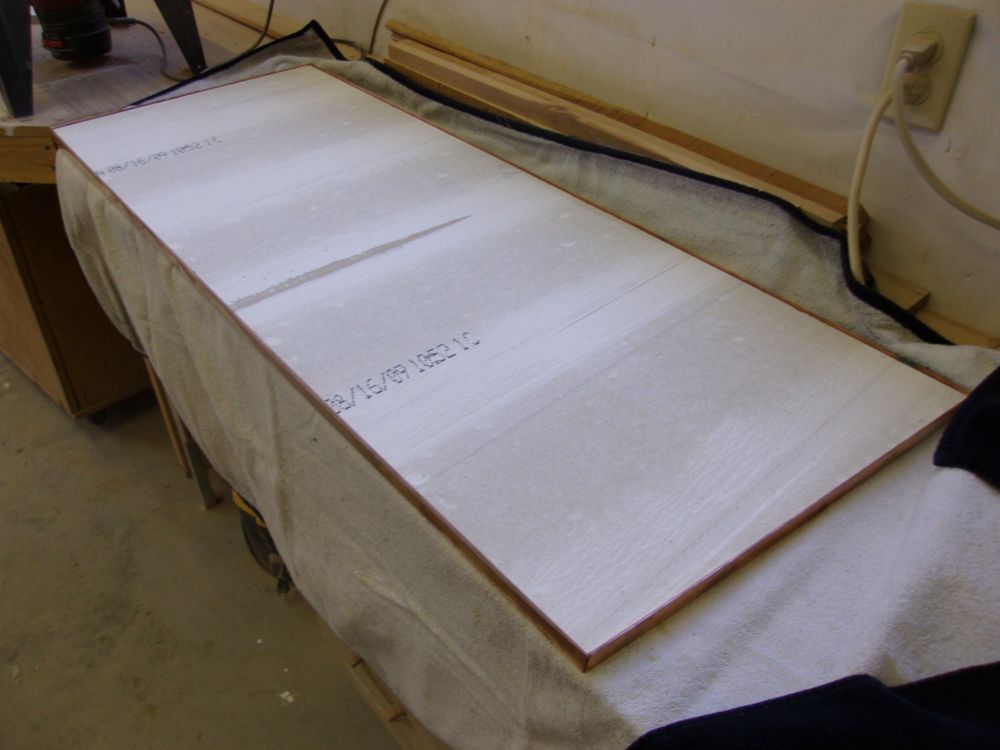
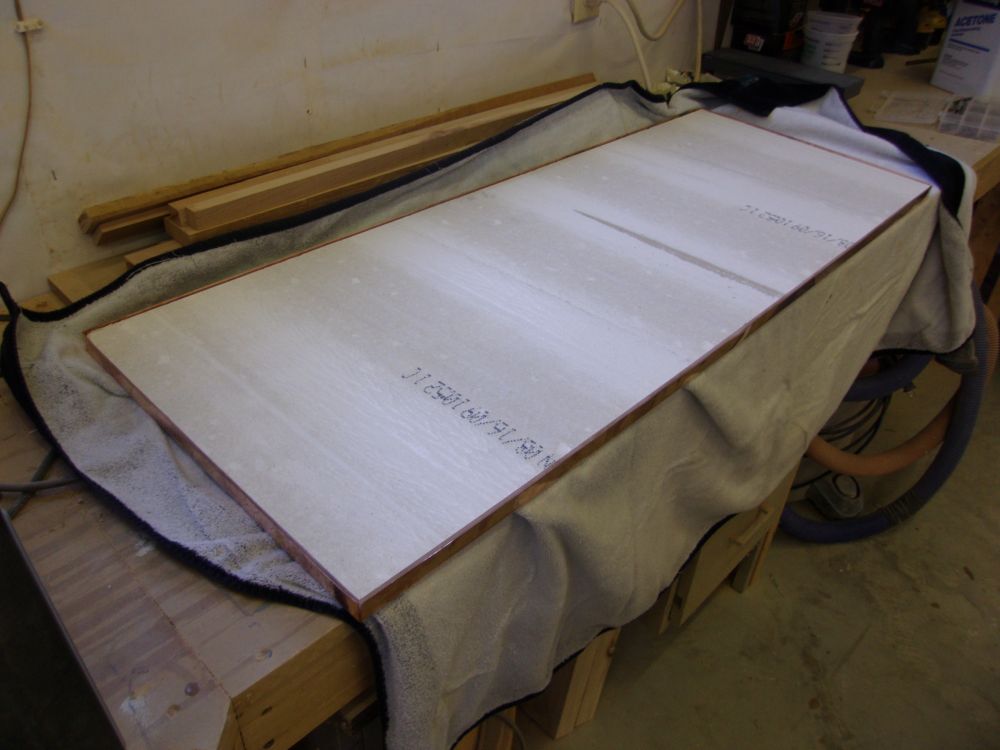
With the copper sheet metal now on hand, I could mate it with the fireproof millboard insulation, the next step before installation. Cutting the millboard was easy, and I used dabs of polyurethane adhesive to hold it to the inside of the large bulkhead sheathing more for the sake of convenience during installation as anything; I set it aside for the adhesive to cure. I ordered various spacers and fasteners that I'd need to attach this to the bulkhead.
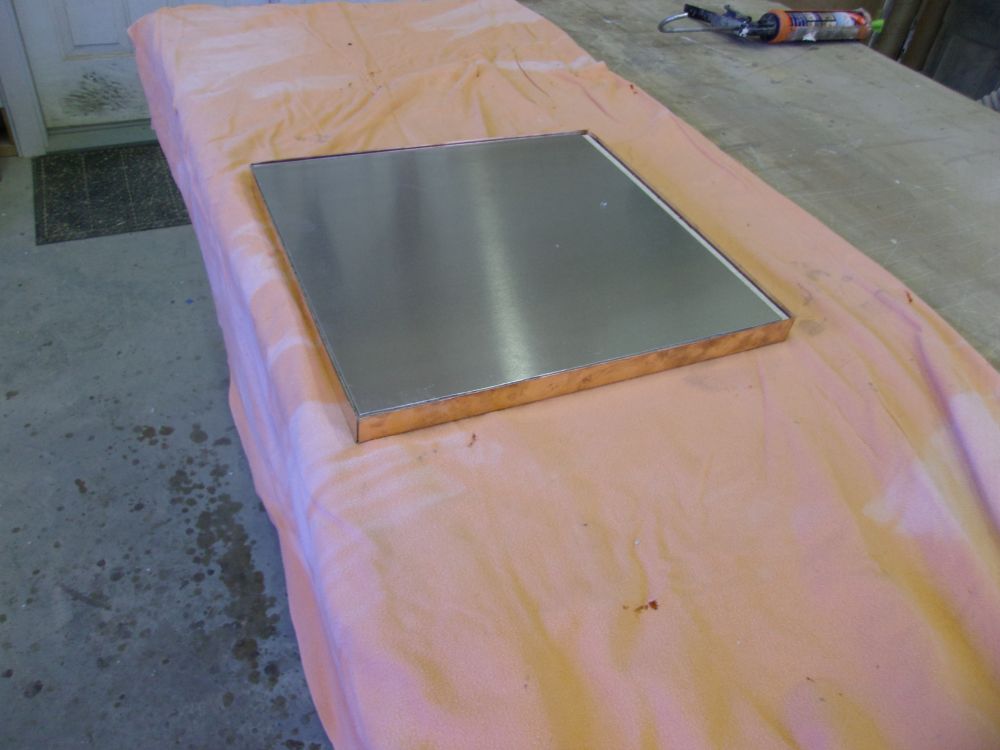
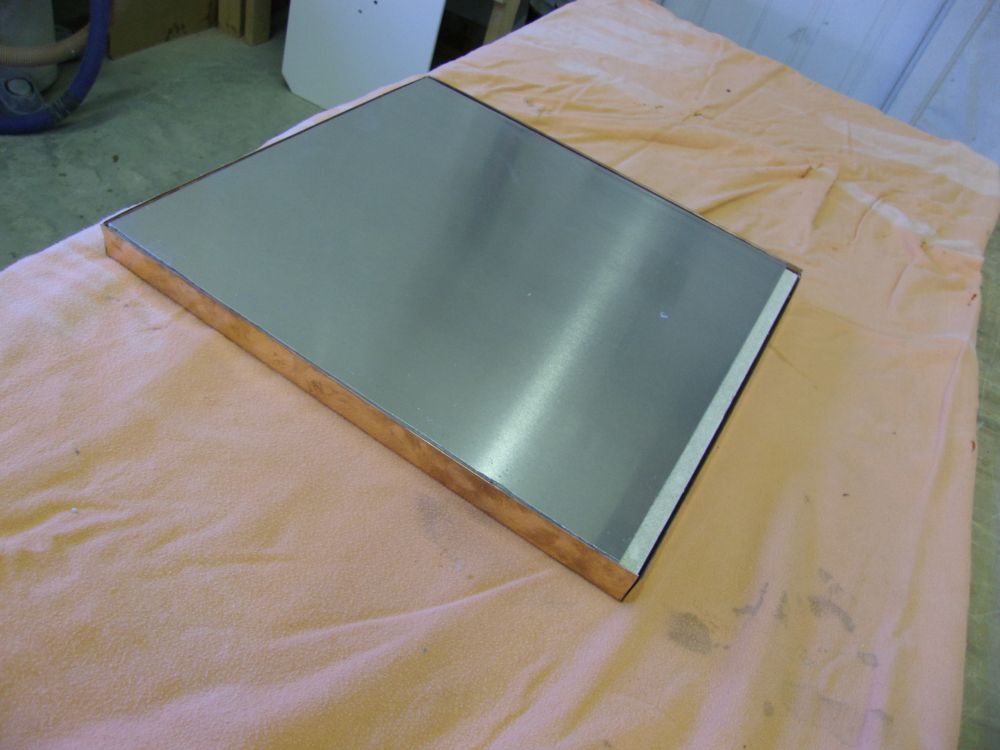
The base, upon which the stove would sit, also required heat shielding and an air space beneath, but since this platform also had to support the weight of the stove--and the millboard was nonstructural in nature--I obtained two 1/8" thick aluminum plates to sandwich the insulation and add compressive strength to the assembly. After cutting the millboard as needed for the base, I secured the various pieces together--copper shielding-aluminum plate-millboard-aluminum plate--with more of the adhesive and set the assembly aside.
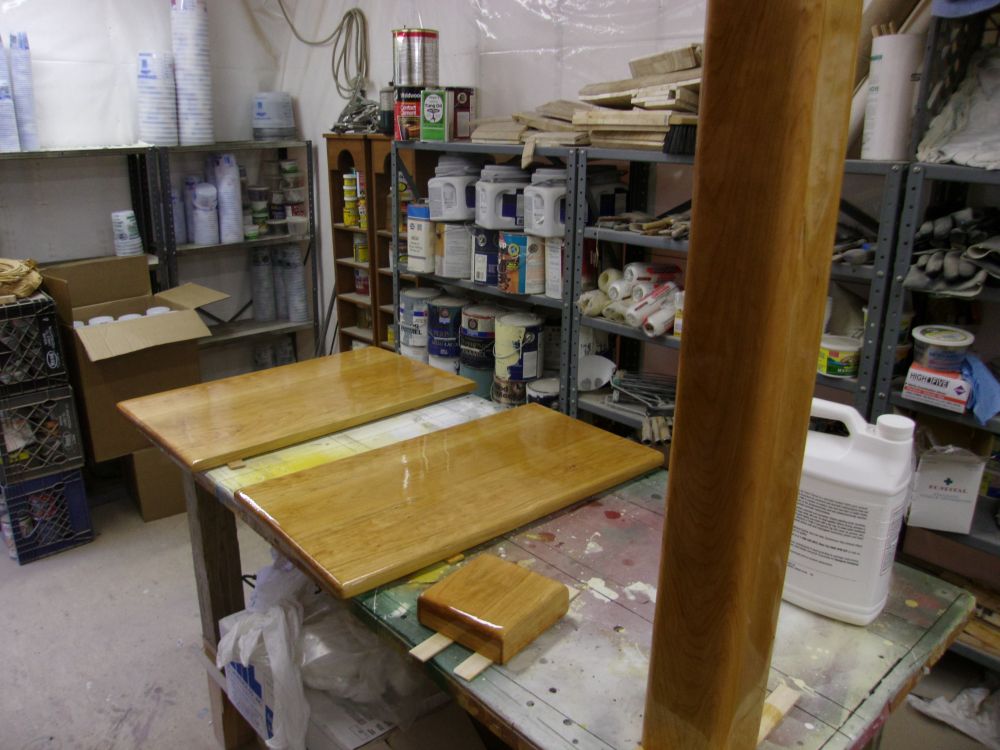
Later, back in the varnish room, I applied another coat to the components of the interior table.
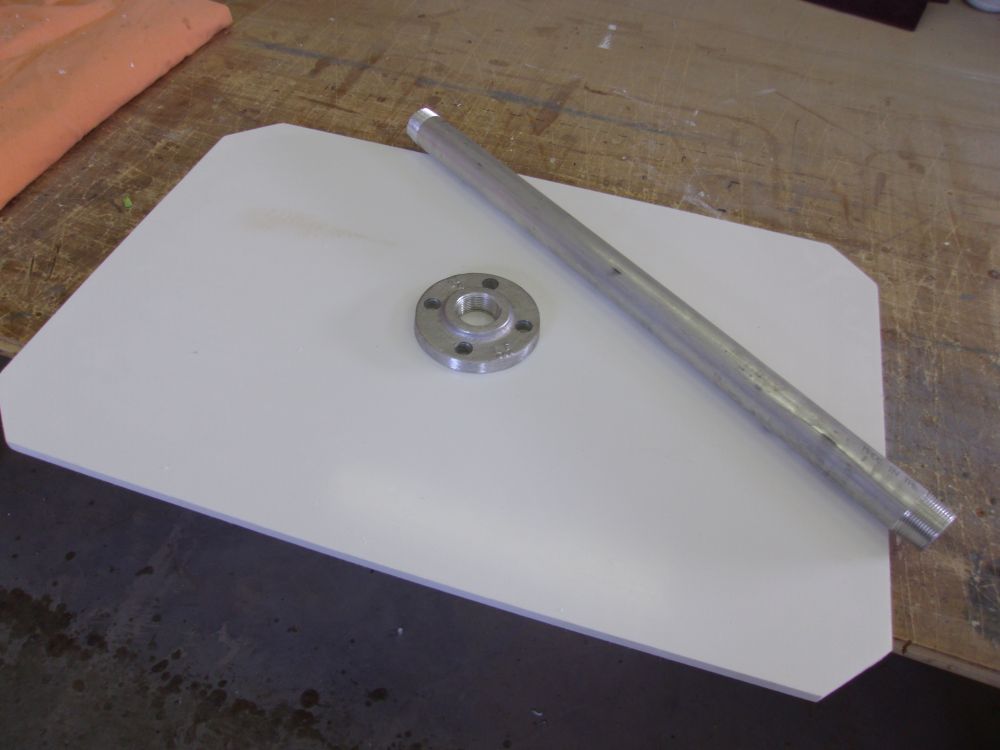
I laid out the center of the cockpit table and, using the threaded flange as a guide, drilled for the four bolts that would secure it. I'd planned to wrap this up, but discovered I didn't have a countersink with a large enough diameter for the flat head machine screws (to recess them flush with the top), so I held off. Meanwhile, after determining the height of the table up in the cockpit, I cut a length of threaded pipe to the correct size and threaded the cut end.
Total Time on This Job Today: 5 hours
