
110 Cookson Lane | Whitefield, ME 04353 | 207-232-7600 | tim@lackeysailing.com
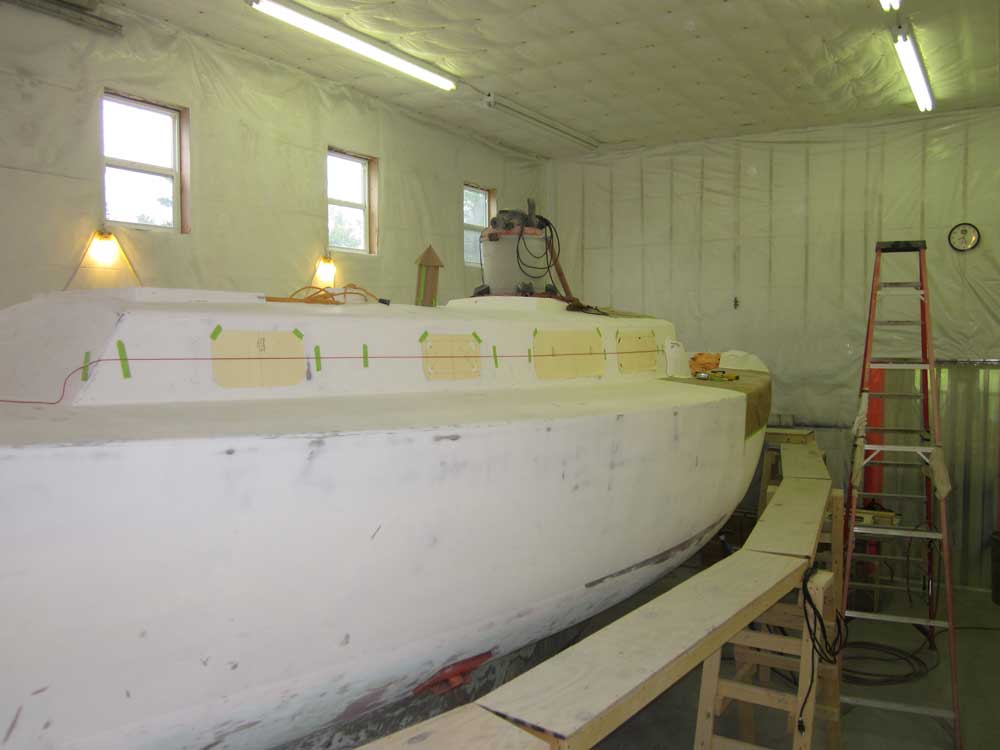
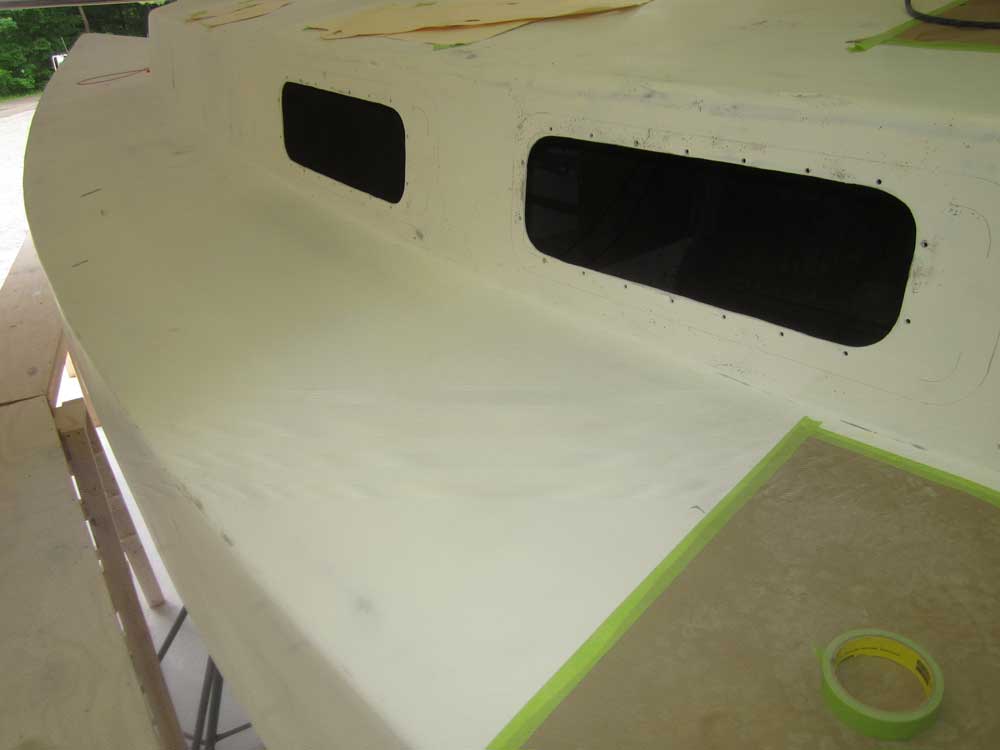
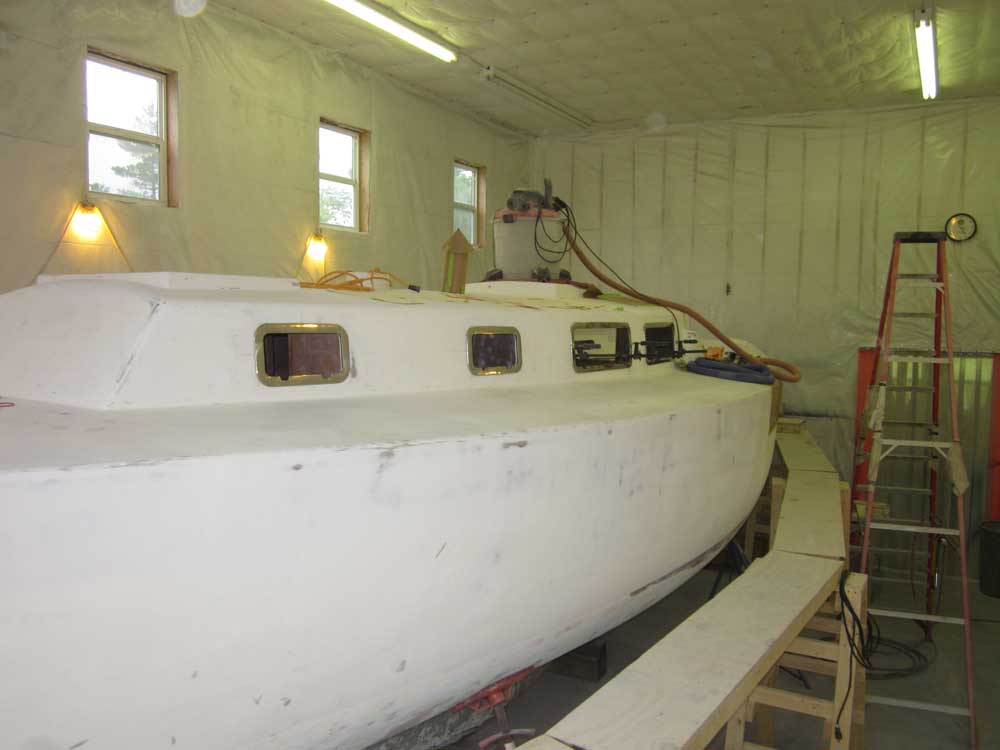
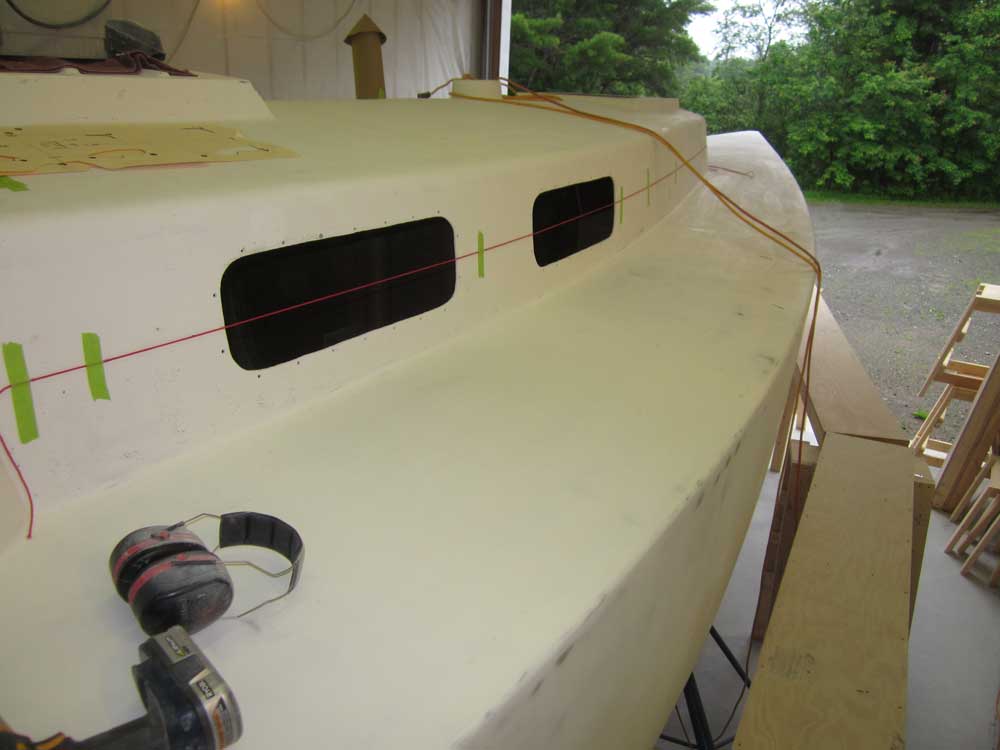
I spent the day on final layout for the new ports, and then began the first steps of installation--though actual installation of the ports would not happen for some time. However, I wanted to be sure to turn around the installation template quickly, and now was a good time to get the rough holes cut--and this would also bring more light into the forward part of the boat, which had been fairly dark since I patched the old port openings a while back.
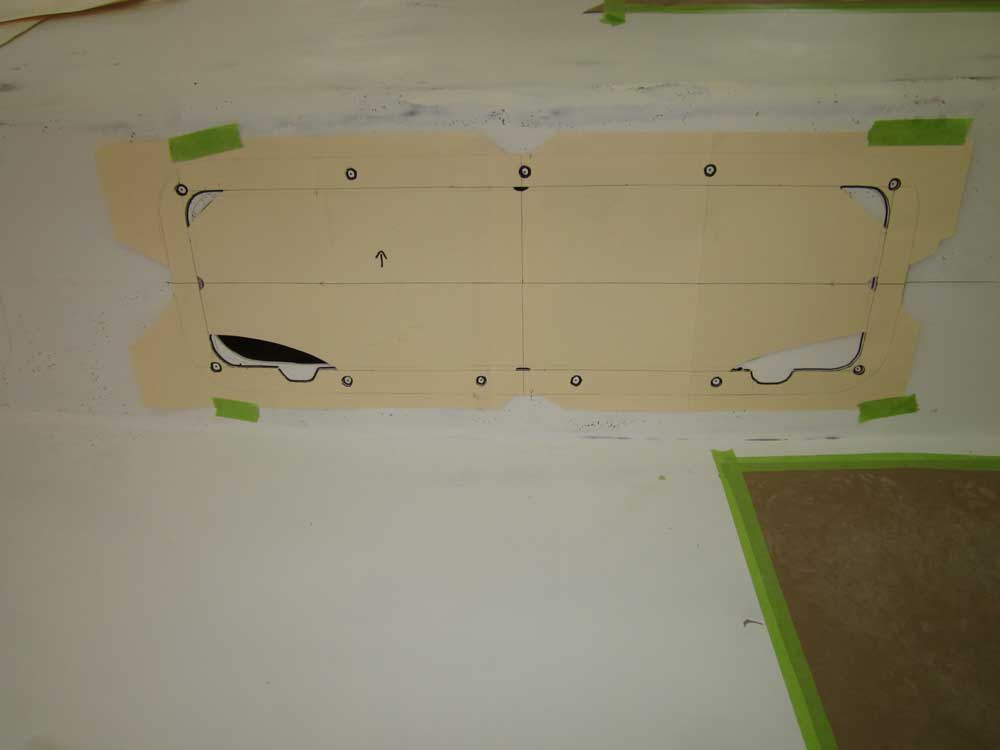
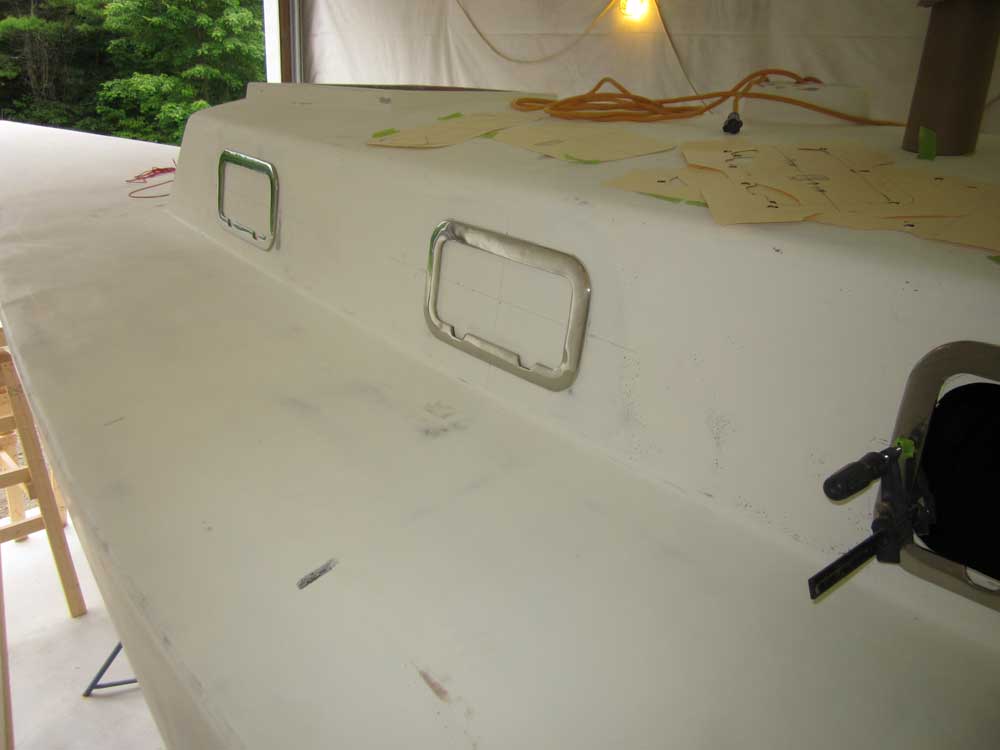
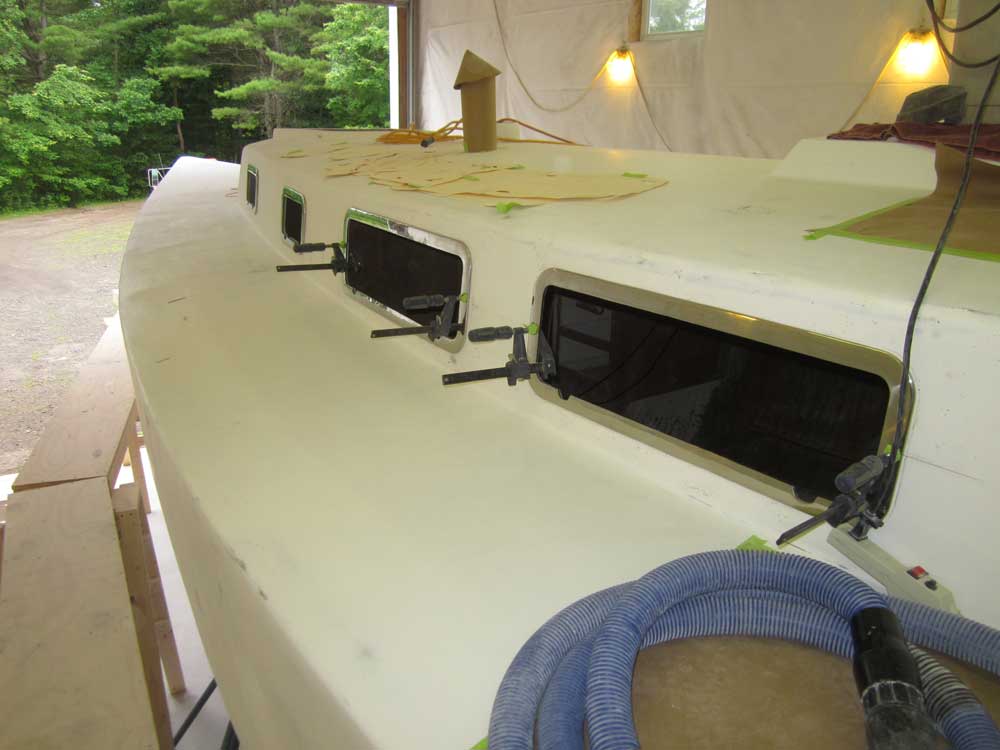
Working off the central layout line I'd created last time, I used cardboard templates of the ports that I'd made several weeks ago (from published measurements of the ports) to fine-tune the position of all four ports on the port side. I began on the port side since I could get better views of this side from a distance, while the starboard side was too close to the shop wall. After some minor adjustments, I settled on the final location for the ports, and used the initial templates to make some reference marks for all four to help in positioning the final templates and making the cuts later.
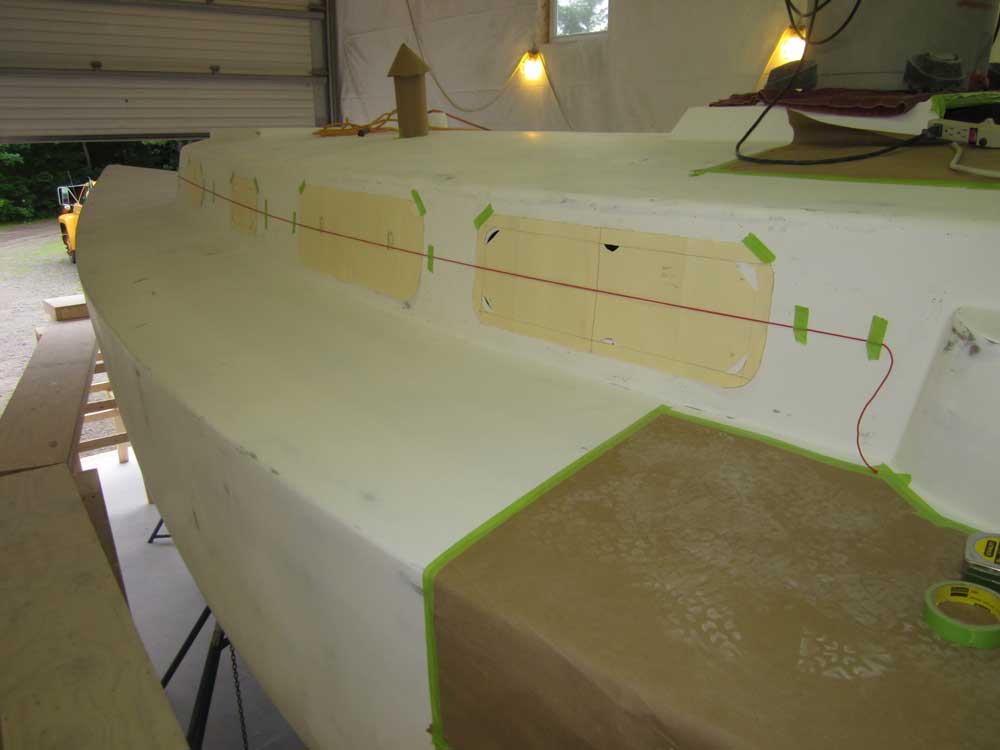

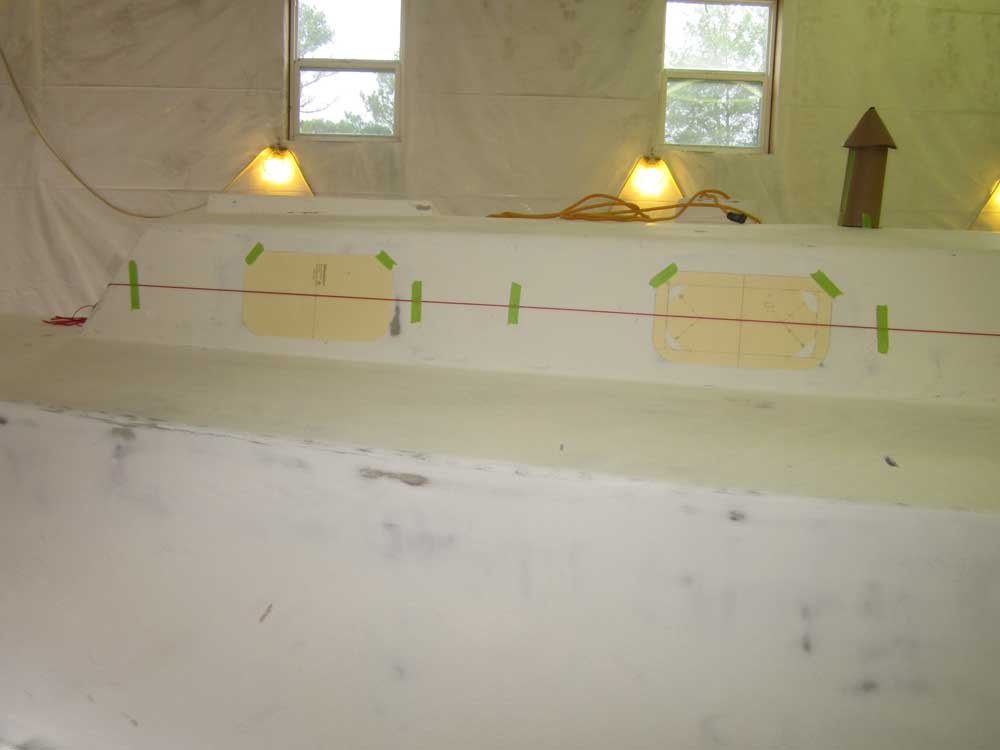
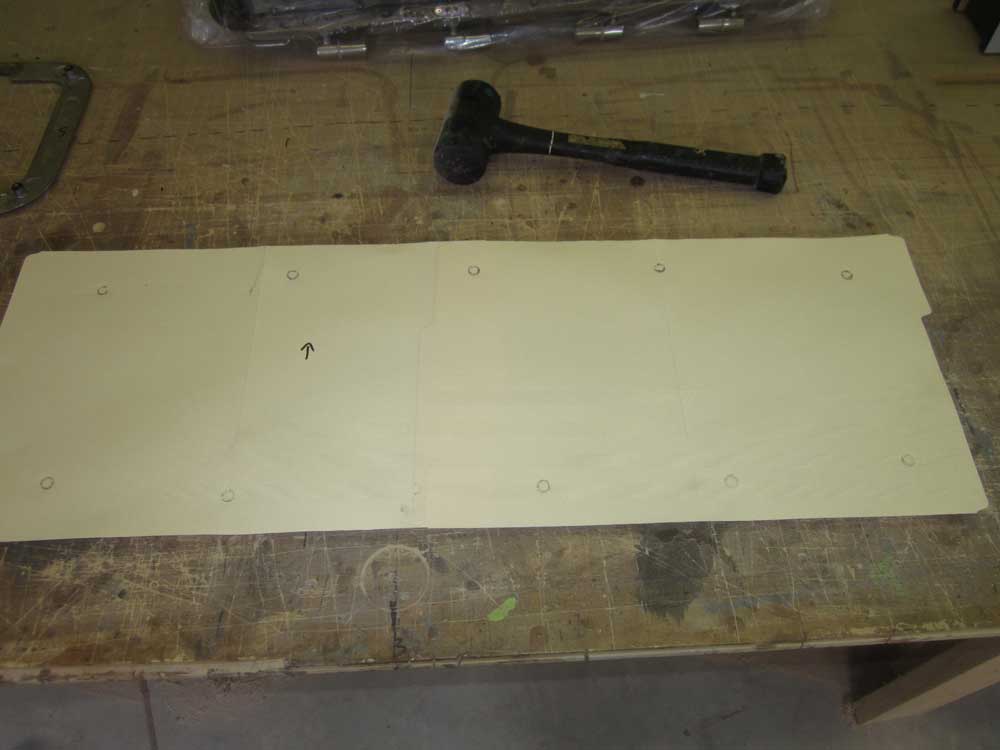
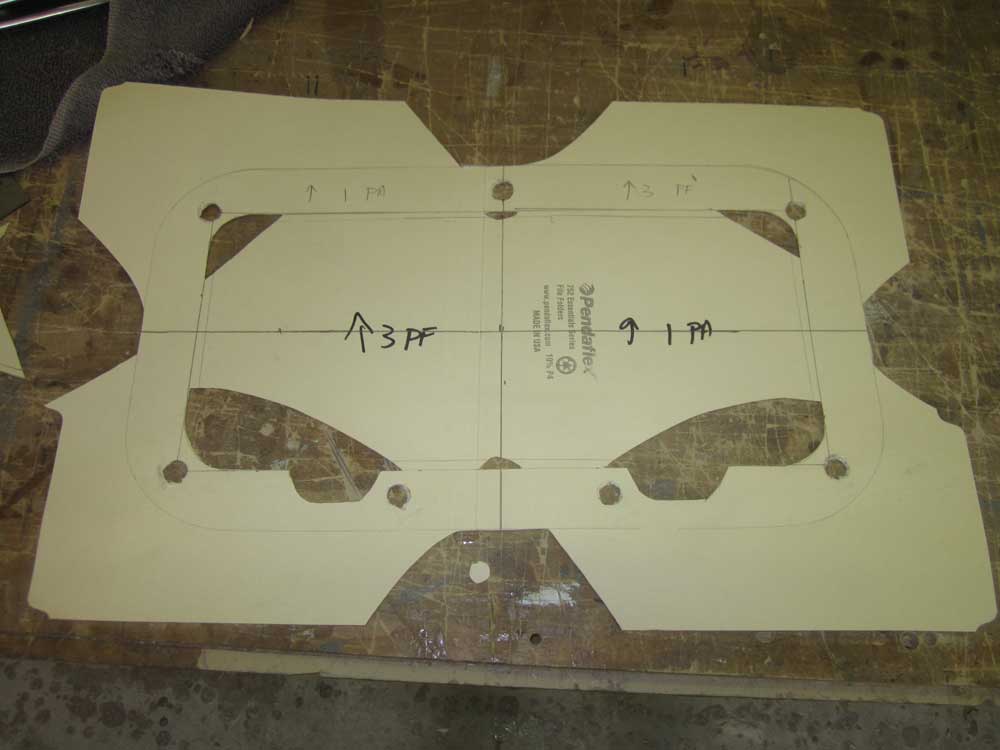
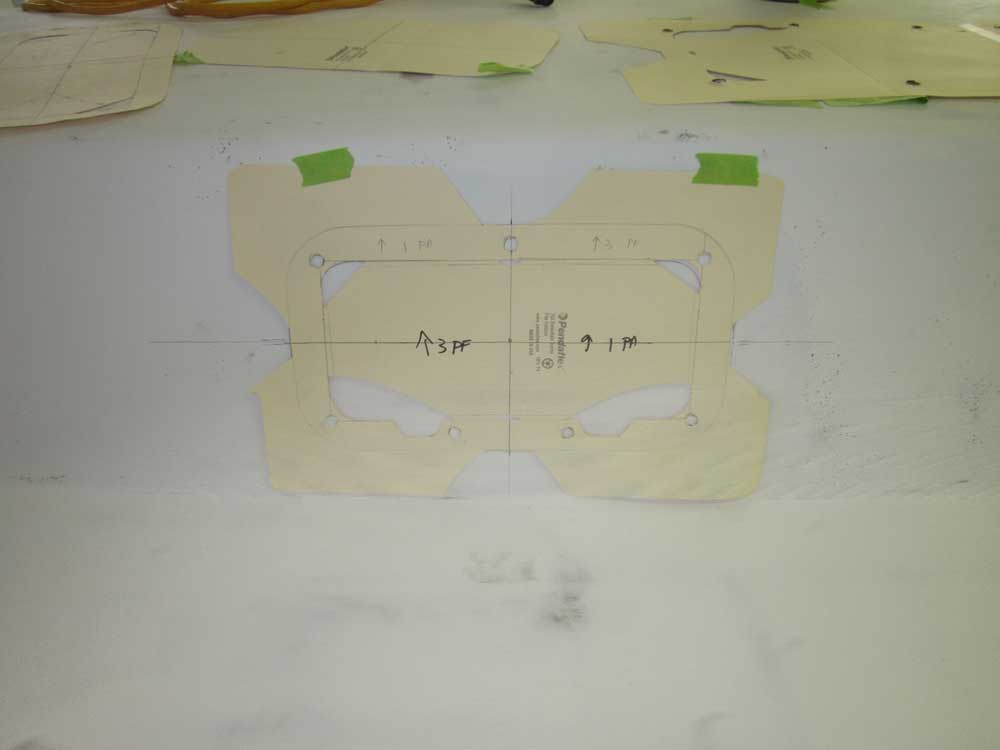
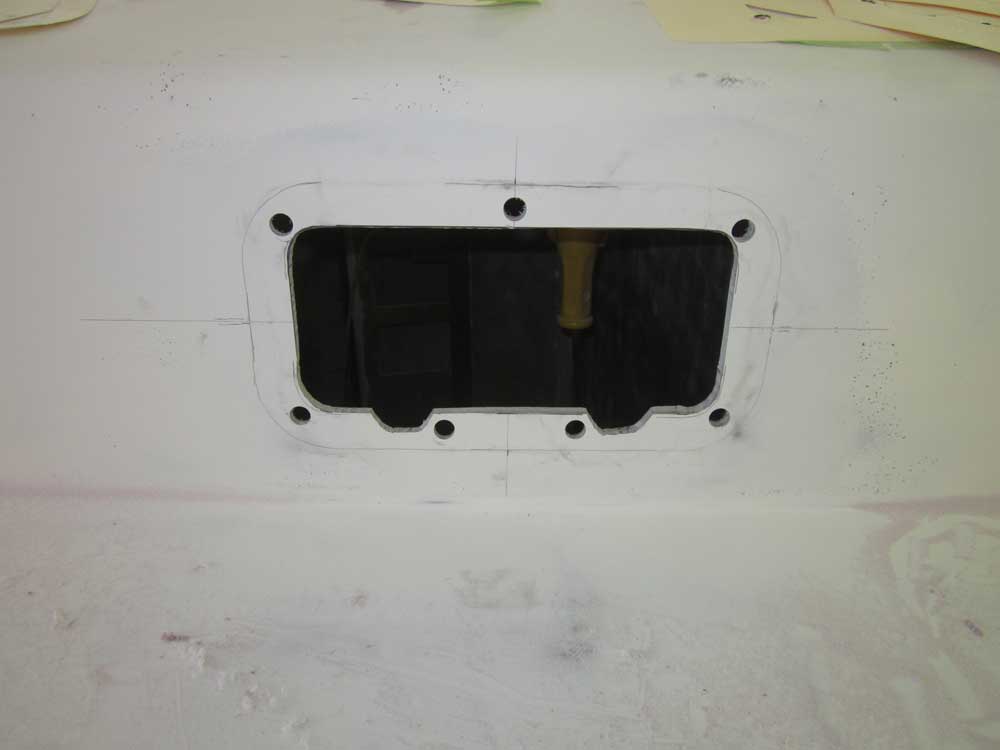
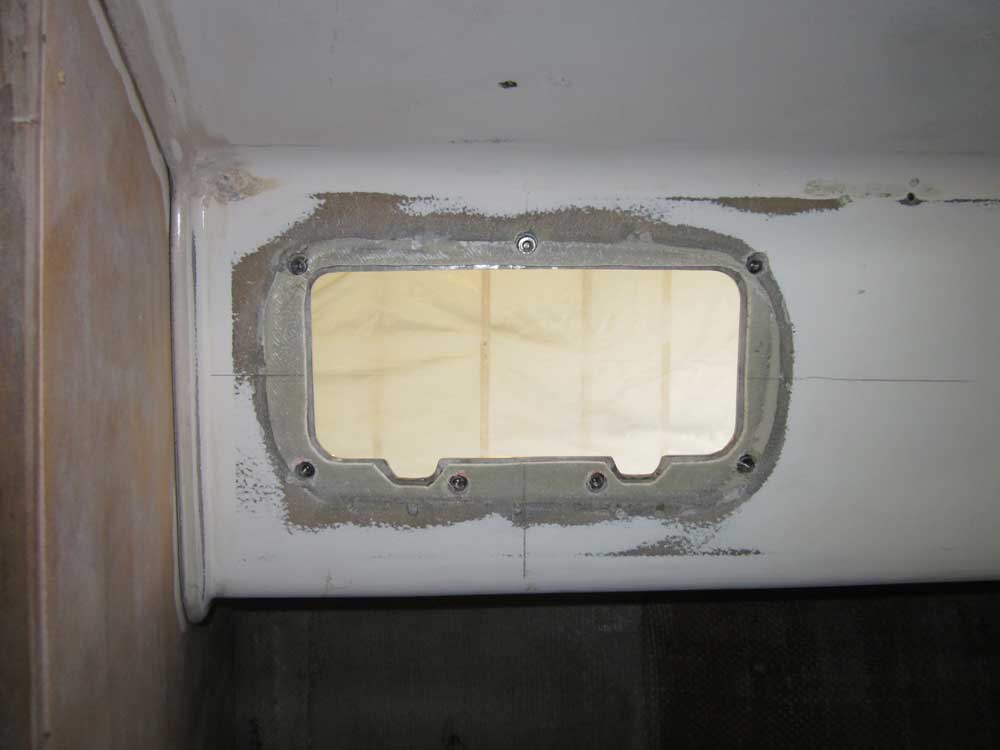
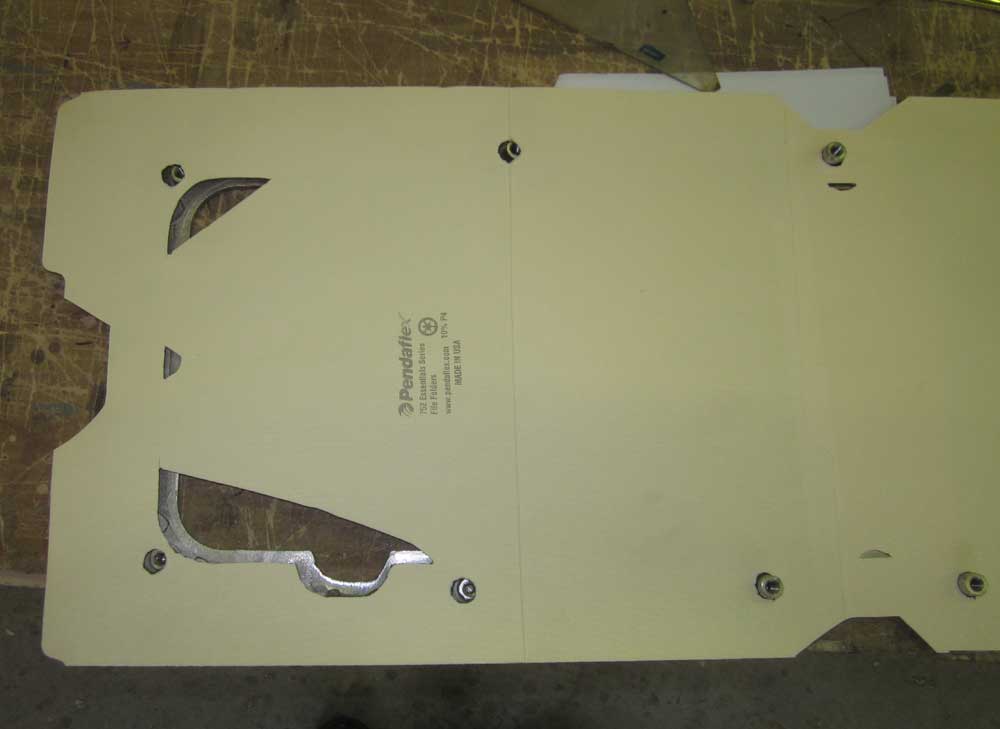
We'd requested an installation template for both sizes of ports from New Found Metals, but could only get the 5x12 template within a timely manner, as the 7x26 templates were out on loan somewhere and not forthcoming. So to begin, I followed the directions on the NFM website to create a cutting template for the larger ports, using the trim ring to mark the stud locations on the back side, and then tracing around the trim ring itself to mark the edges of the opening. For cutting, I created a second line 3/16" outside of the center opening to allow room for sealant and for the port body itself. I only cut out the rounded corners and the gutter openings from the template so it would retain structural integrity.
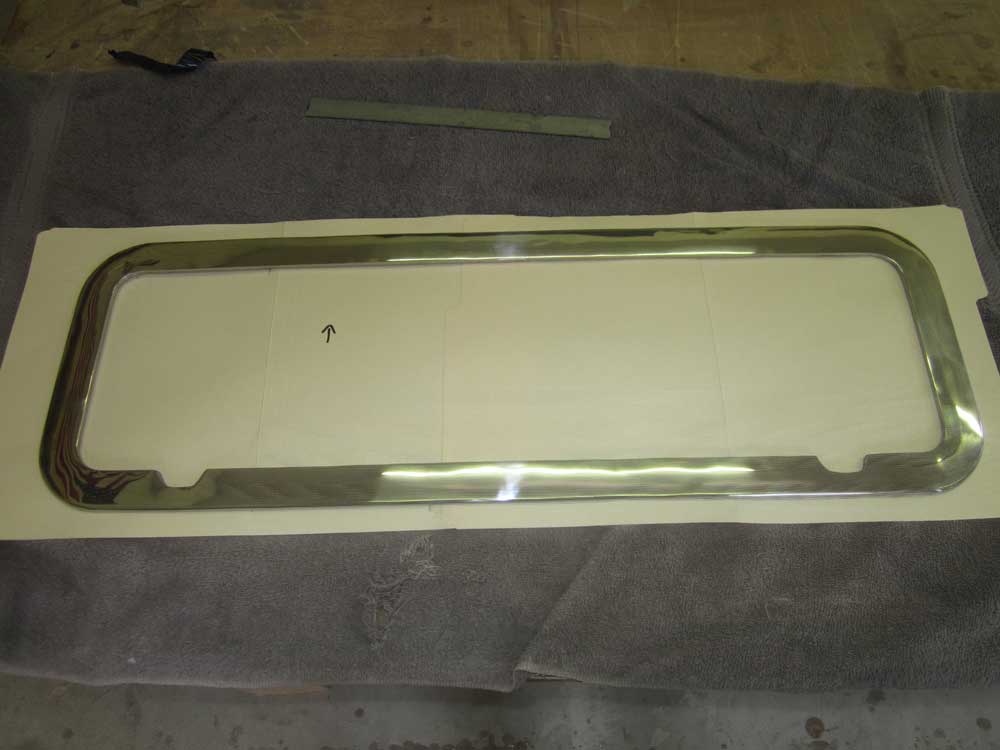
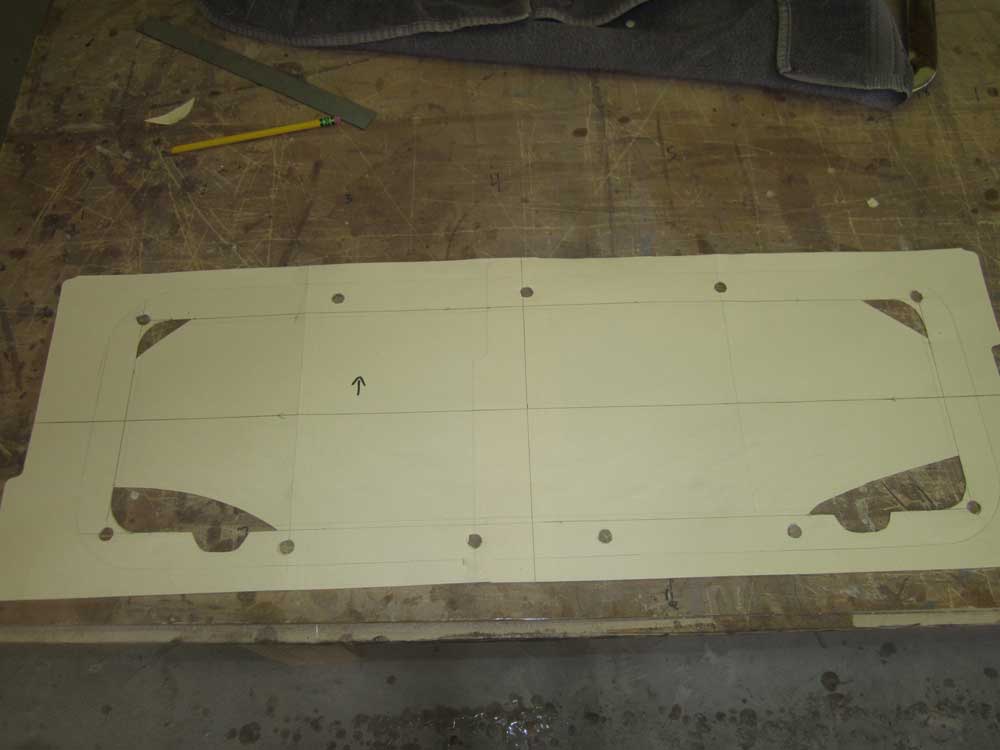
I positioned the template over one of the existing large openings according tot he alignment marks I'd made earlier, and traced around the cut lines as needed once I'd positioned it correctly. Then, I moved it to the next opening and repeated the process. At each stage of layout, I viewed the area critically from several different locations to ensure things were aligning the way they were supposed to.
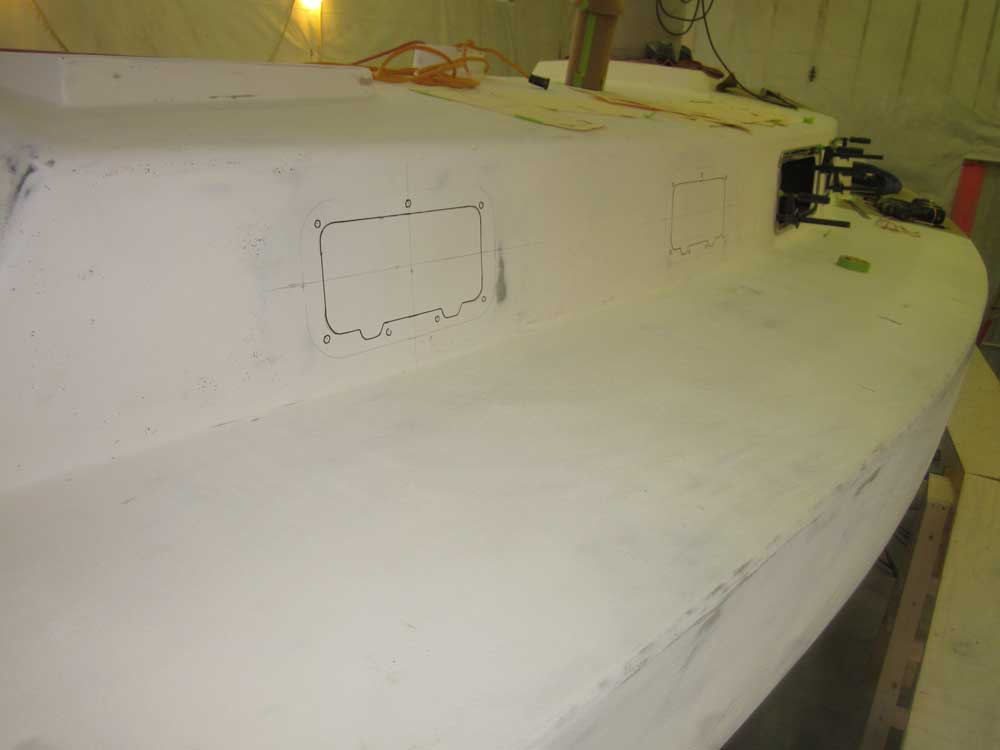
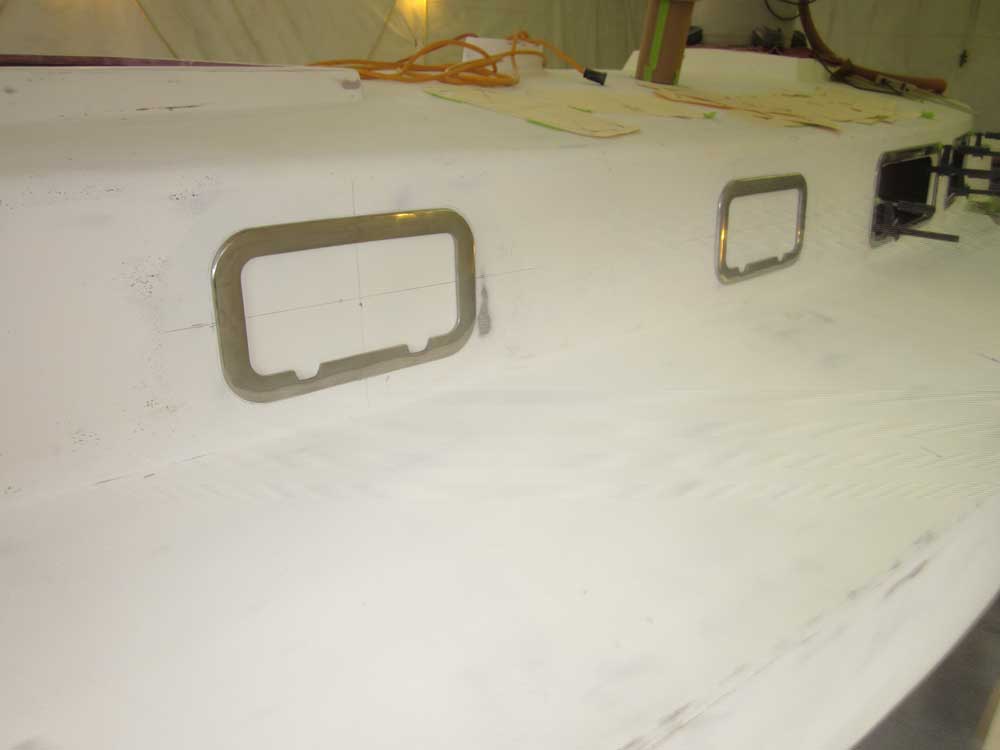
Before cutting out any of the openings, I wanted to temporarily install the trim rings to give me a good sense of the positioning for real; it'd be easy enough to make minor adjustments if necessary as long as the openings weren't cut. To do this, I had to drill the side of the cabin for the trim ring studs, which protruded from the back of the trim rings. NFM, and other information available online, suggested a need for a special counterbore tool and two-step drilling process using drill guides, templates, and so forth, but as it turned out, none of this was necessary in this installation--which was a good thing, since I'd not received the counterbore tool as originally ordered anyway.
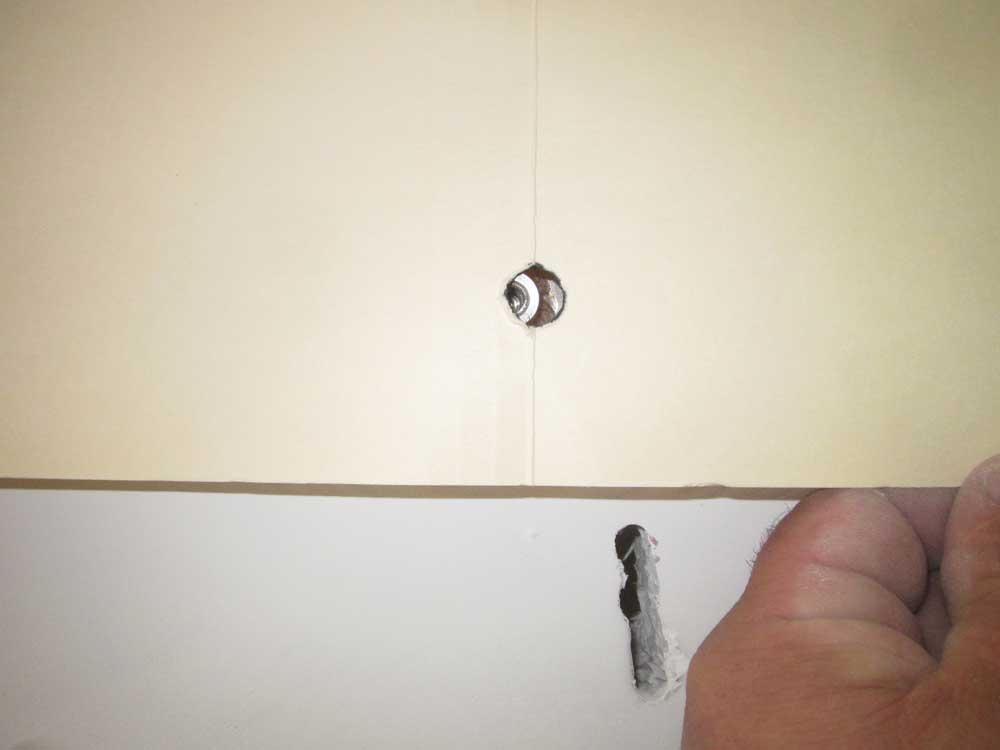
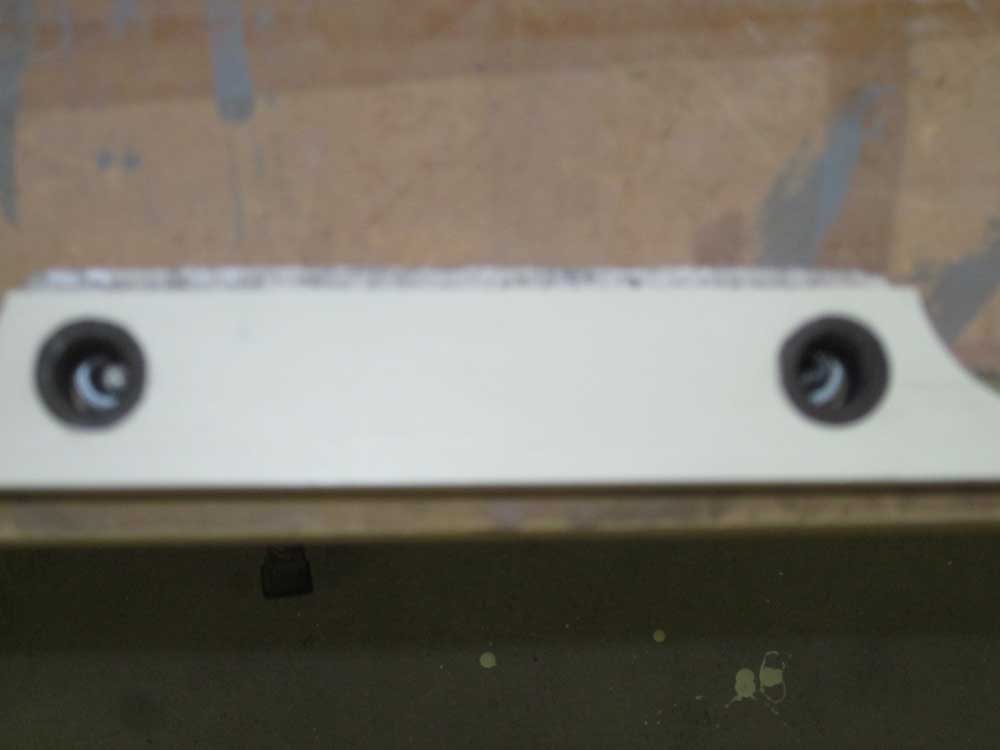
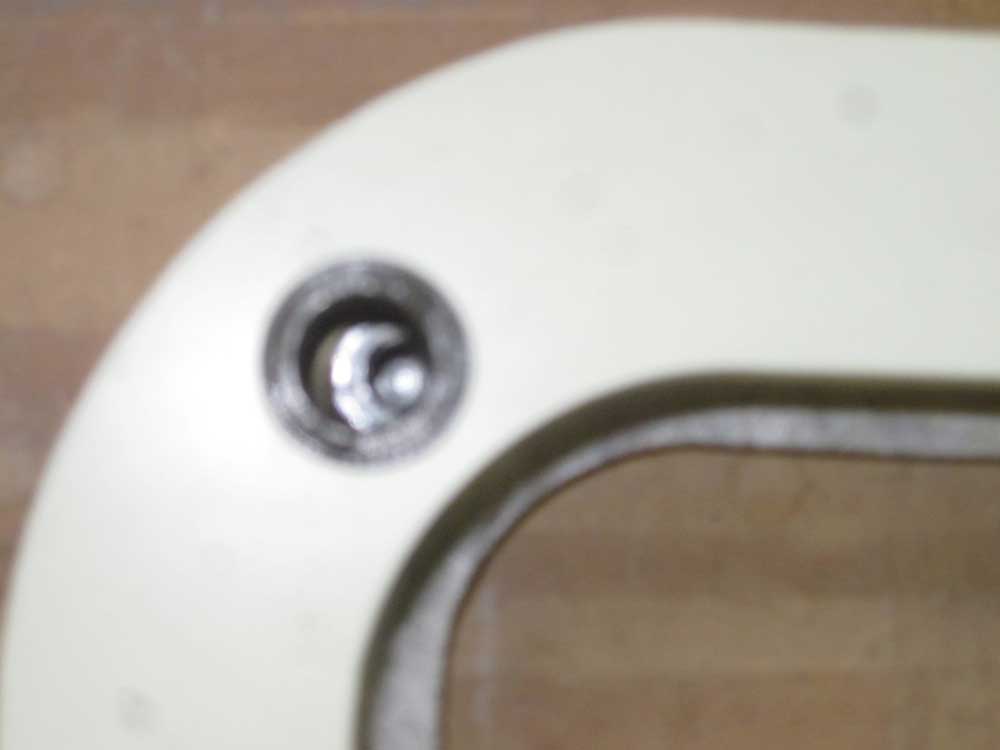
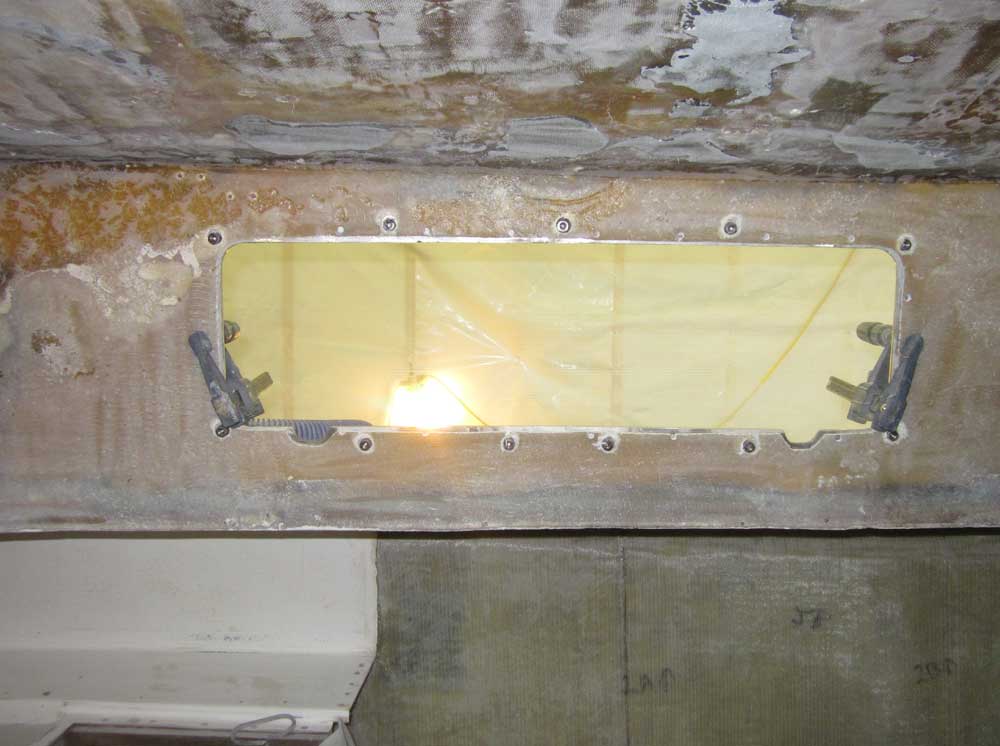
After review of the installation procedures, I realized this tool would have been useful only in a thick (i.e. cored, or solid wood) cabin trunk. For a thinner installation like on the Tartan 34, with only 1/2" finished cabin trunk thickness (including the yet-to-be-installed interior wooden liner), all that was needed was 5/8" diameter holes drilled all the way through, which allowed space for the mounting studs and, eventually, sealant. Having determined this detail, I prepared the stud holes around the opening, drilling through with a carbide Forstner bit at the centers of each marked location.
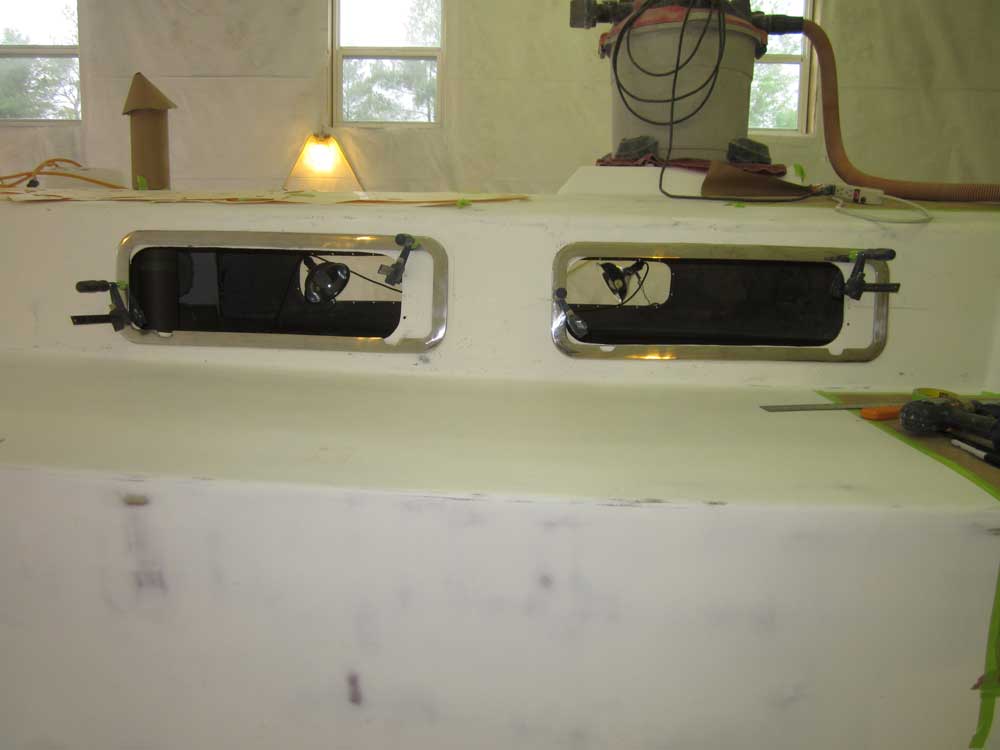
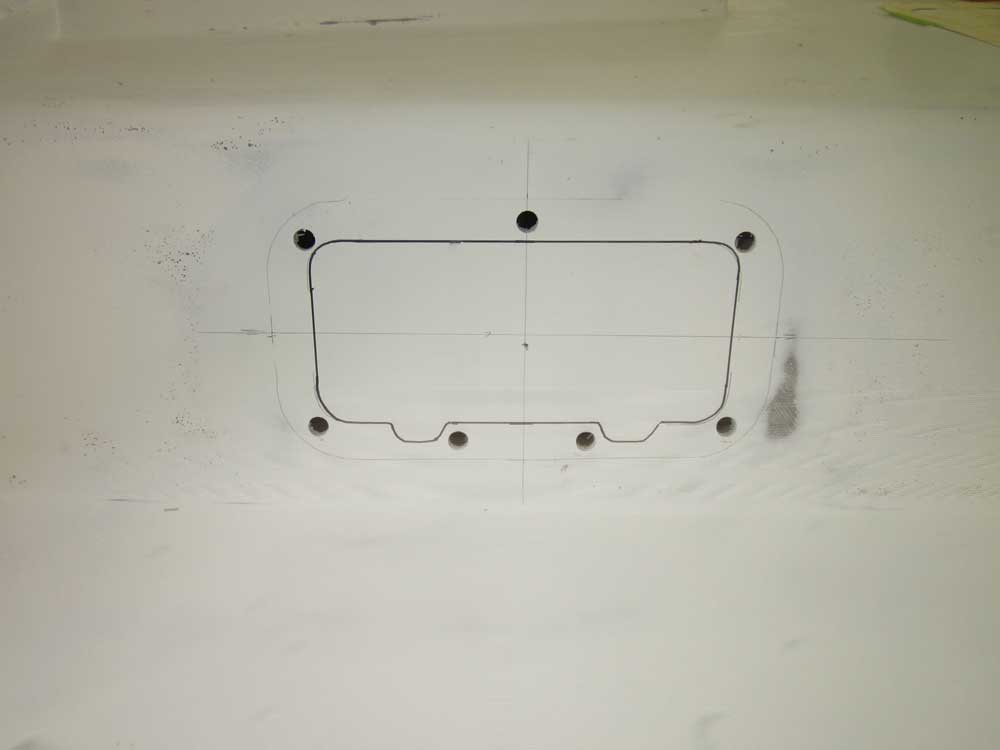
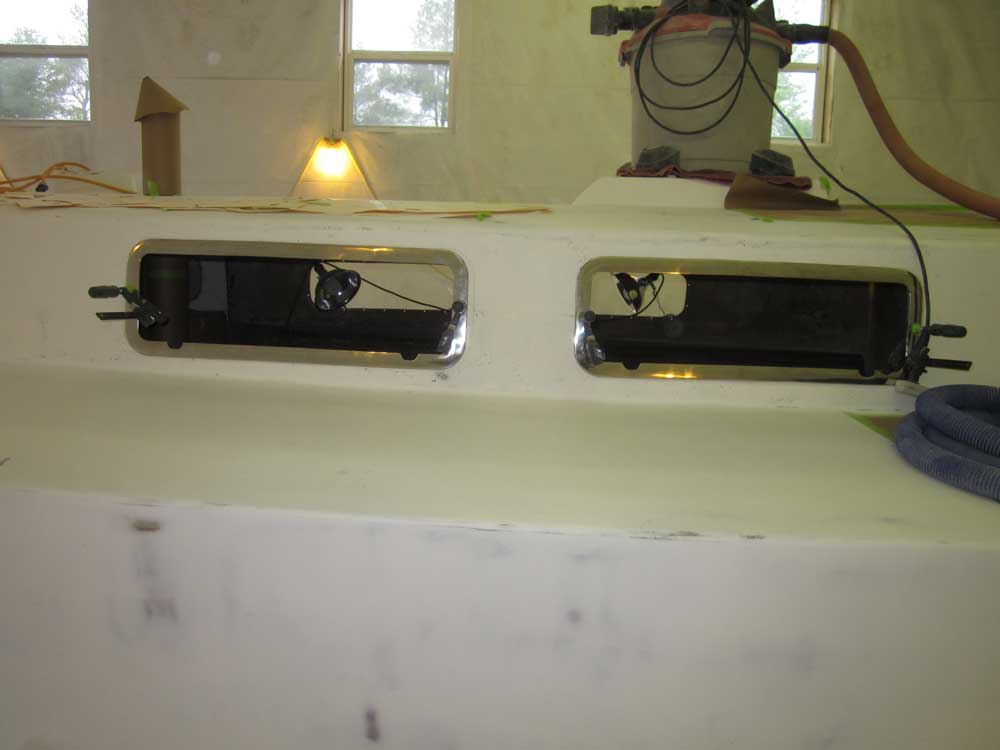
Next, I could clamp the trim rings in place to simulate the final installation and check the overall alignment before continuing onwards. The first (aft) trim ring fit well, as I'd made the mounting template directly from this ring. However, I discovered that the stud locations on the second trim ring for this side were slightly different at the after end, causing a partial misalignment of the drilled holes. Now, all the ports came with a printed warning that each port body and trim ring should be kept together as a matched set, which I understood and took all steps to ensure (marking each set with indelible marker in addition to the stamped numbers from the factory). However, I was surprised that the studs' locations might vary this much from port to port, particularly when changing the position of the screw holes would be impossible if I'd been using a NFM-supplied drilling template. This foreshadowed another issue that I'd discover in the near future.
In any event, with some slight enlarging of two of the holes I was able to fit the second trim ring in place, and I'd learned a lesson that I needed to check the template against the remaining two (starboard) large ports before using it in each case.
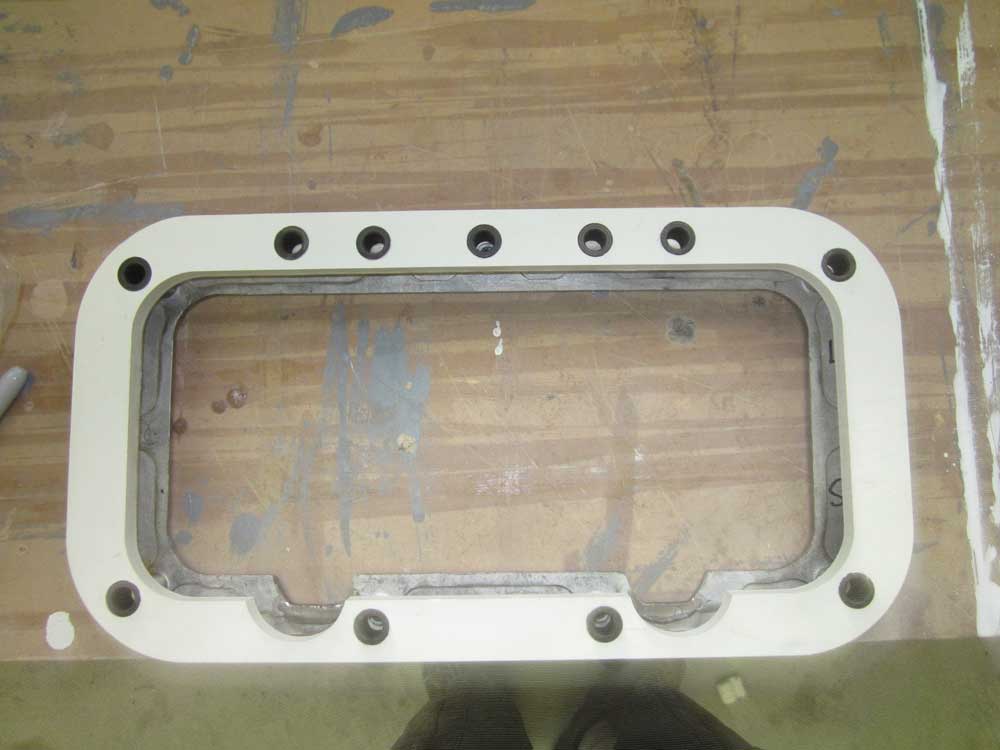
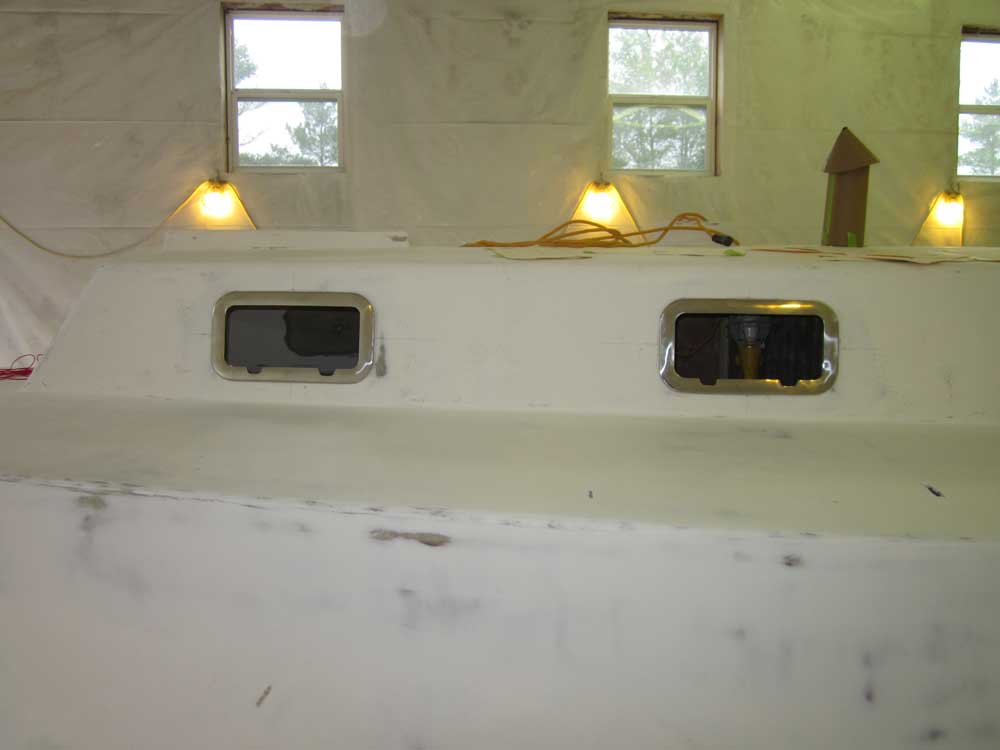
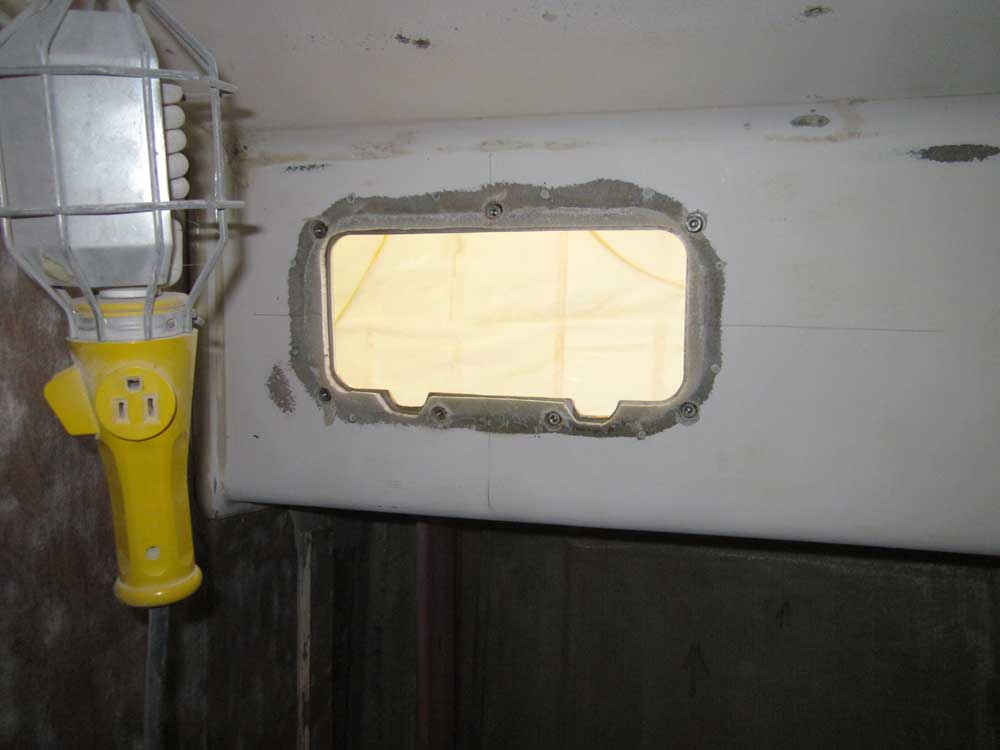
Next, I turned to the two forward ports on this side. For these ports, I had the NFM-supplied (for a fee) template, which was designed to be the correct size for use as a router guide for the large hole, and also incorporated drilling guides for the stud locations.
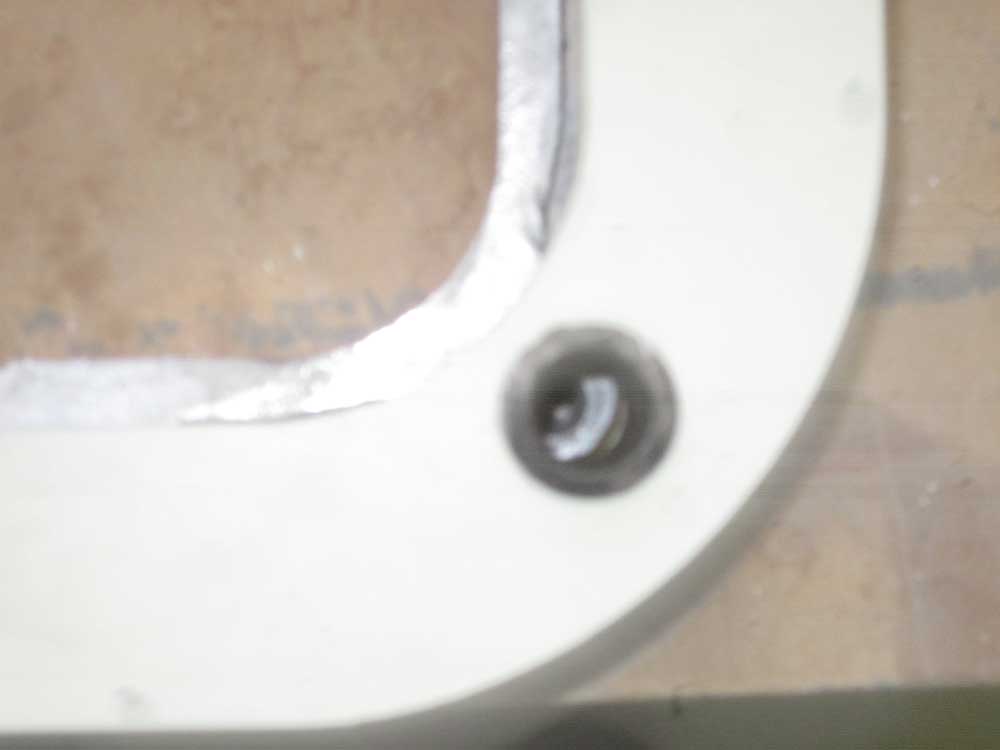
Testing the template over one of the 5x12 trim rings, I discovered that the drill hole guides were quite significantly misaligned with the actual studs on the trim ring--in fact, on all four trim rings, though these four trim rings were more or less consistent with each other. The misalignment was significant, and had I not checked it and proceeded with simply relying on the template, I could have ended up with a mess. I checked the template against all four 5x12 ports and found it similarly misaligned, which meant that either the template had been incorrectly constructed, or the ports were being built to a different standard.
I arranged the template according to how it would go on the boat if I were to actually use it in this case, i.e. mounted on the outside of the boat with the protruding drill guides facing outwards, but also for argument's sake tried the template flipped the other way, which didn't improve the alignment either. The actual trim ring didn't match the template, at least insofar as the mounting stud locations. Other aspects of the template appeared to be fine.
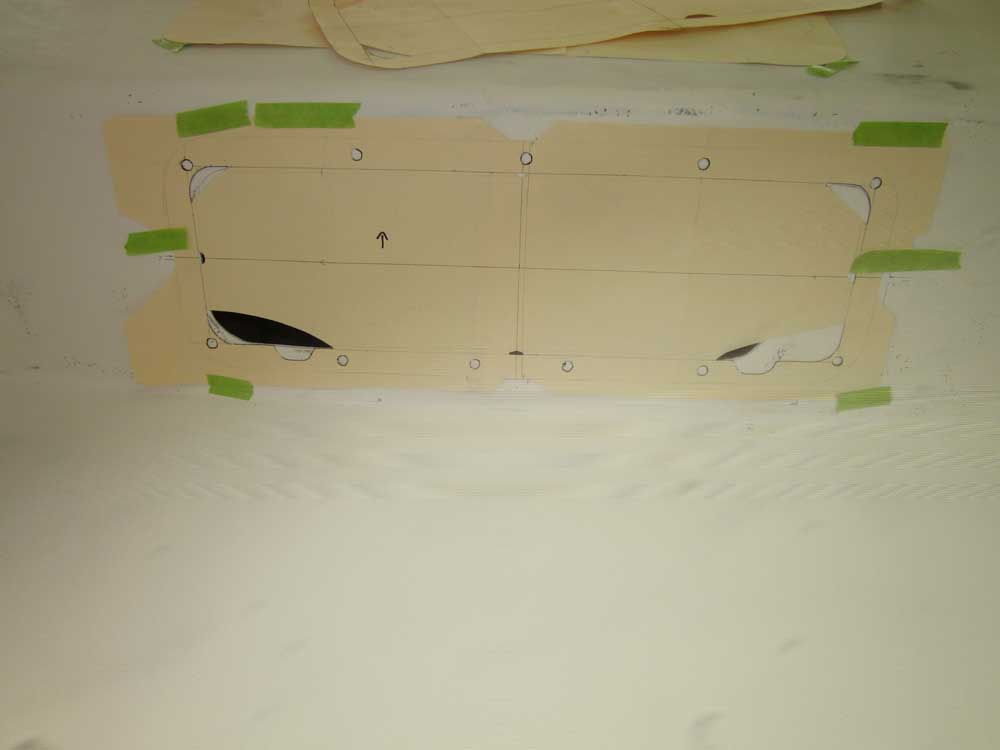
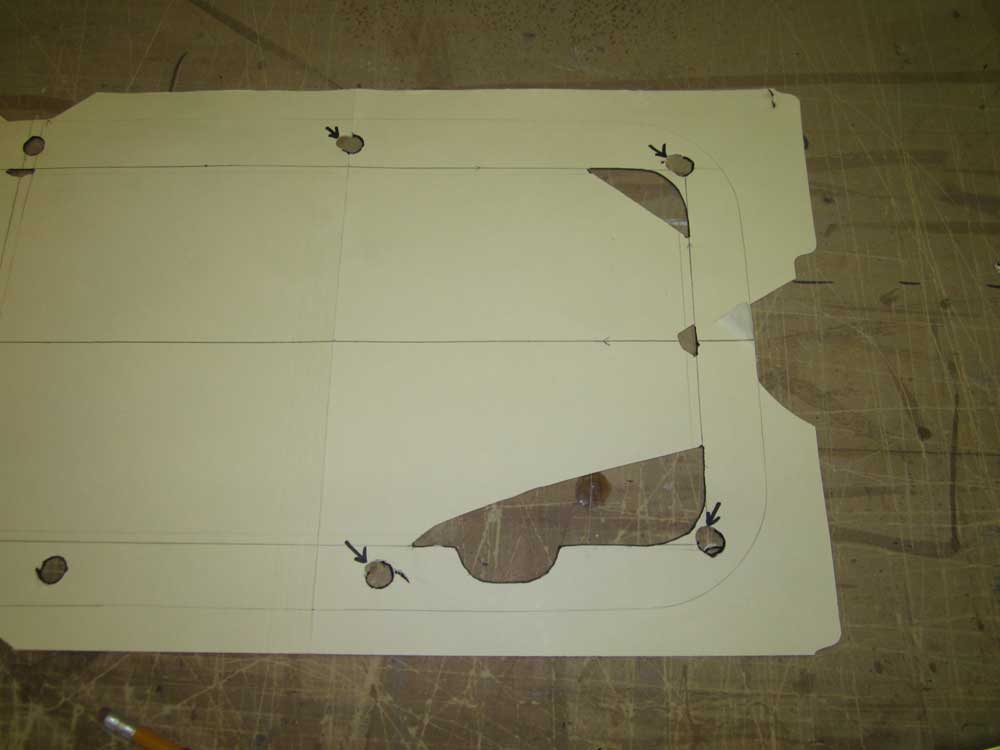
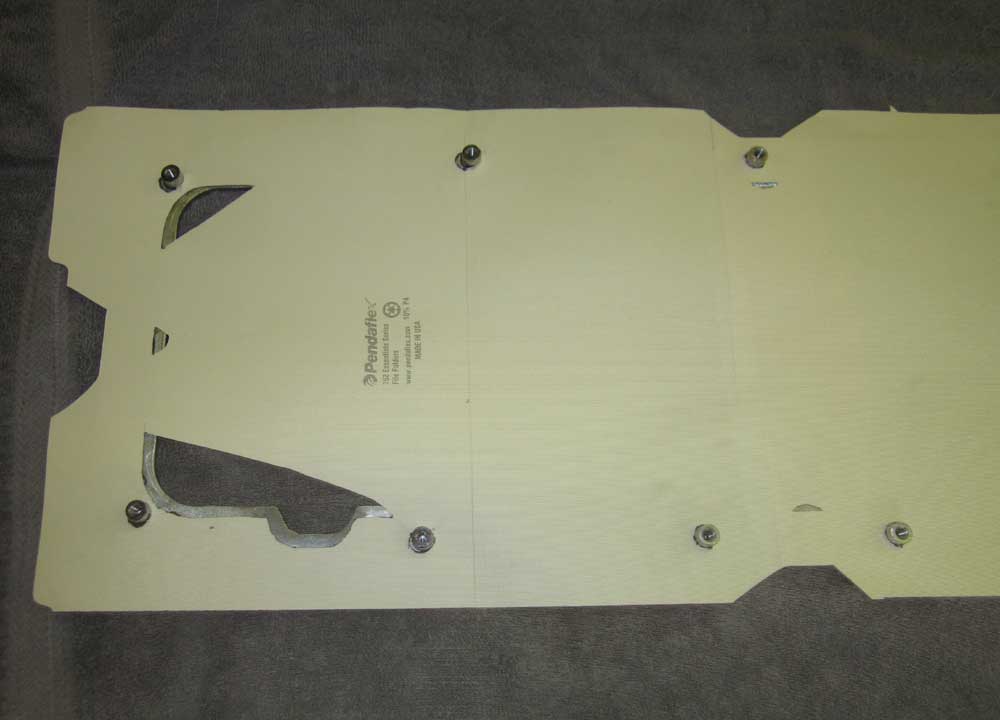
This was fine, actually, since I'd now determined that for my purposes, it was just as easy--and perhaps even easier--to create and use a paper template. Also, my desire to pre-install the trim rings before actually cutting the opening required drilling the stud holes first, and this was straightforward on this particular boat. To that end, I made a cardboard (manila folder) template of one of the 5x12 trim rings, just as I'd done with the 7x26 earlier, and then tested the template against the other three units: all were consistent with one another and with the new template, so I could use this for all four openings and hole locations.
I laid out and marked the two forward ports' locations using the new template, then drilled the stud hole locations so I could temporarily fit the trim rings to inspect the entire layout before making any cuts.
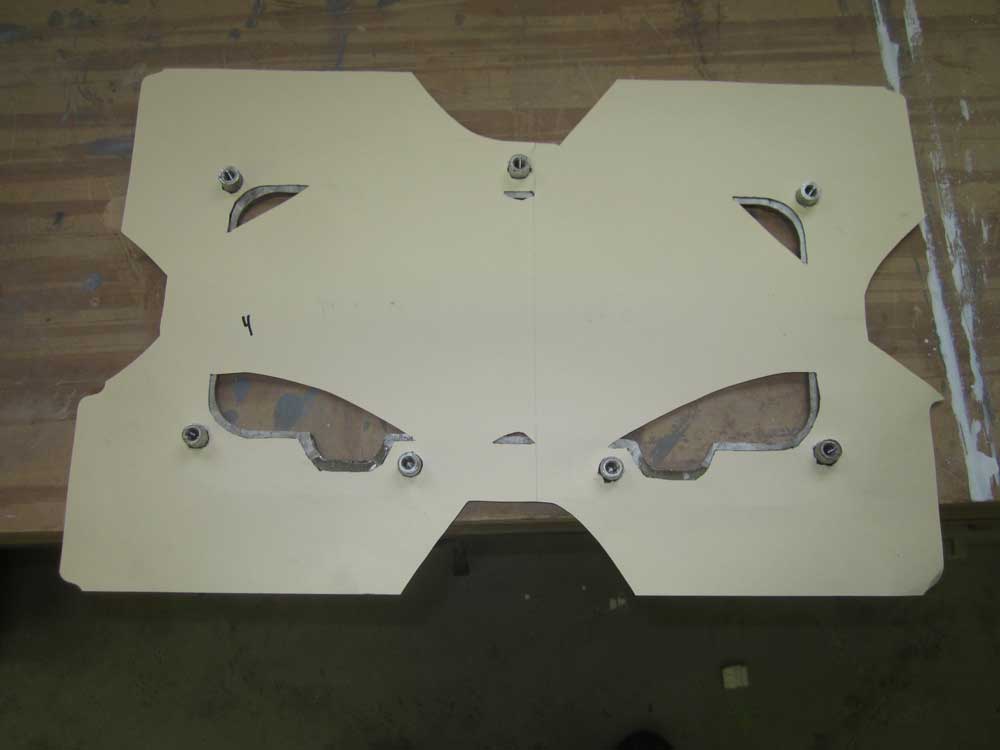

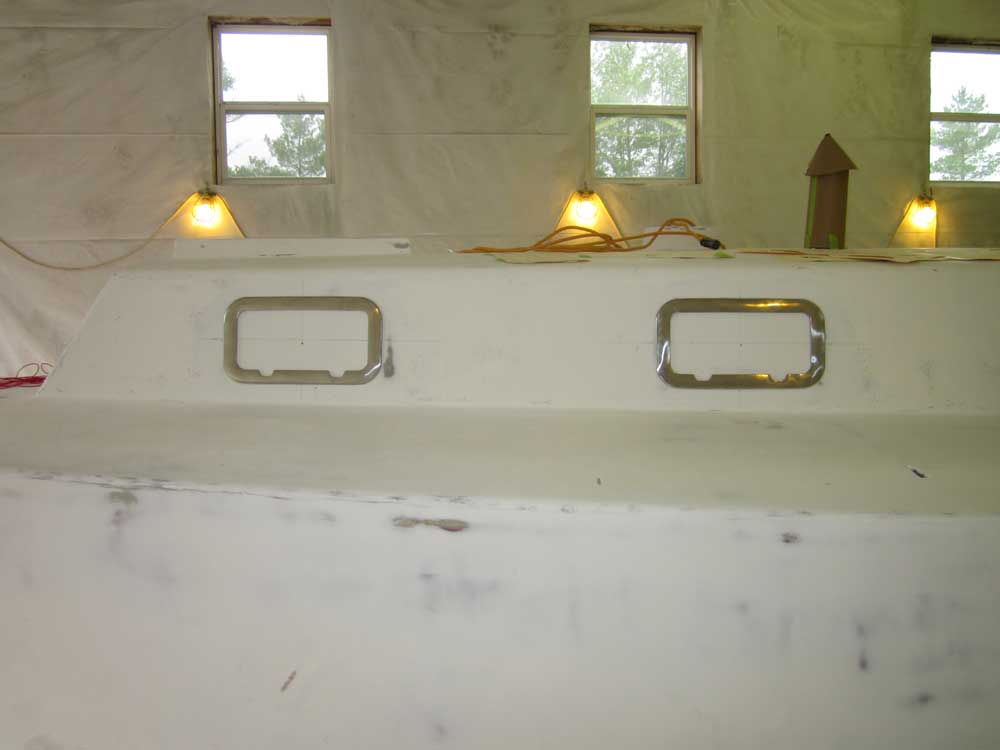
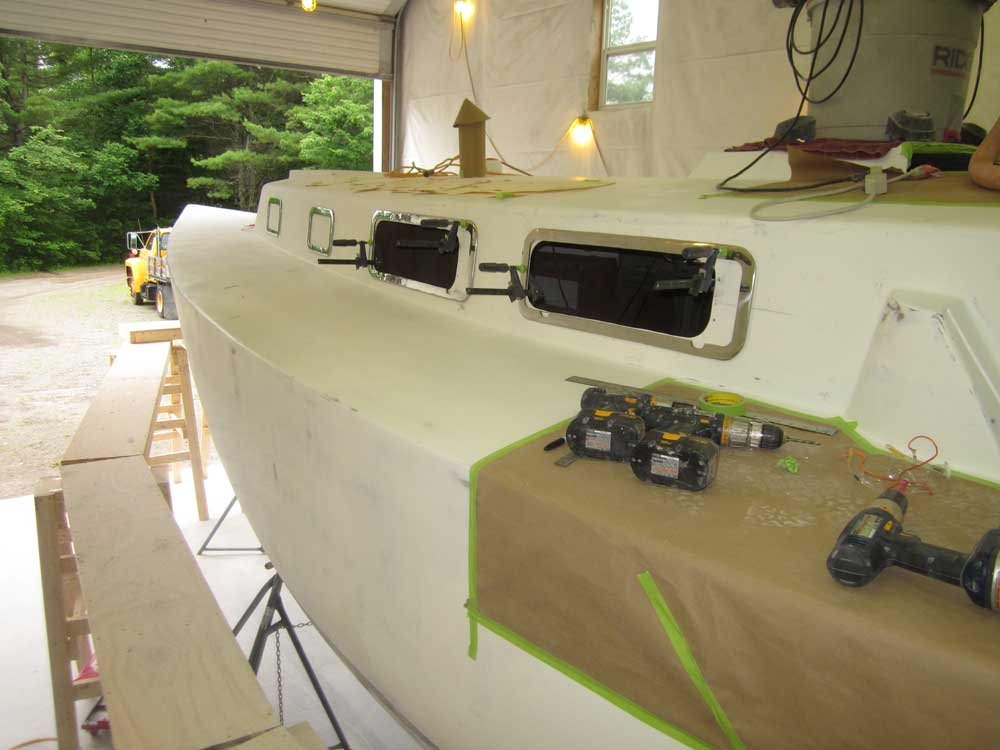
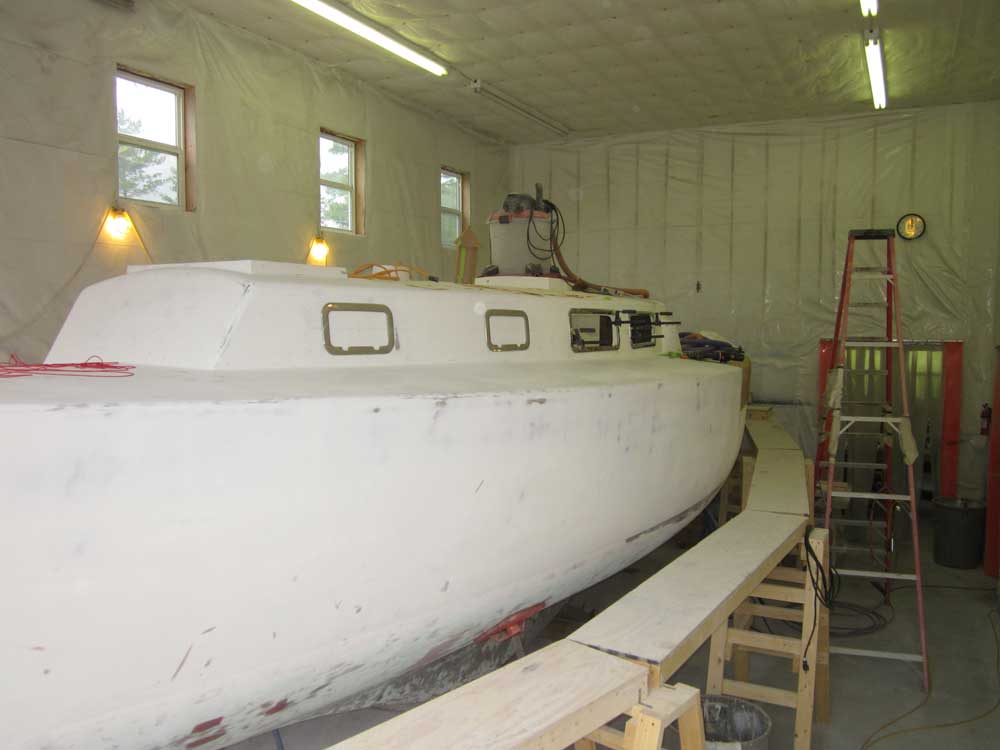
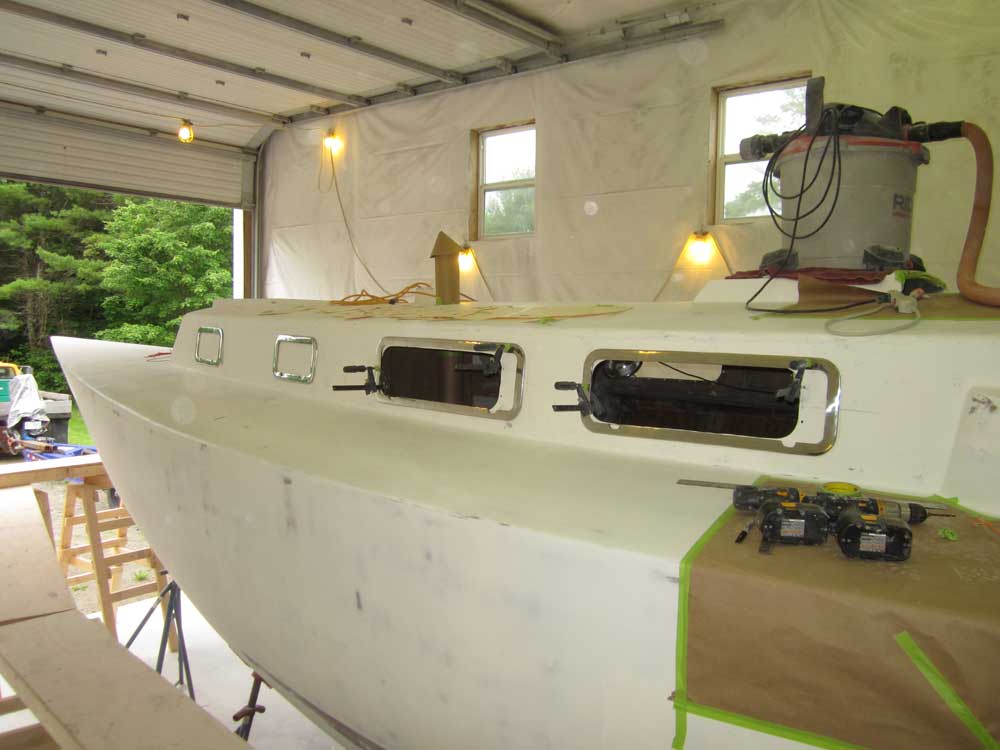
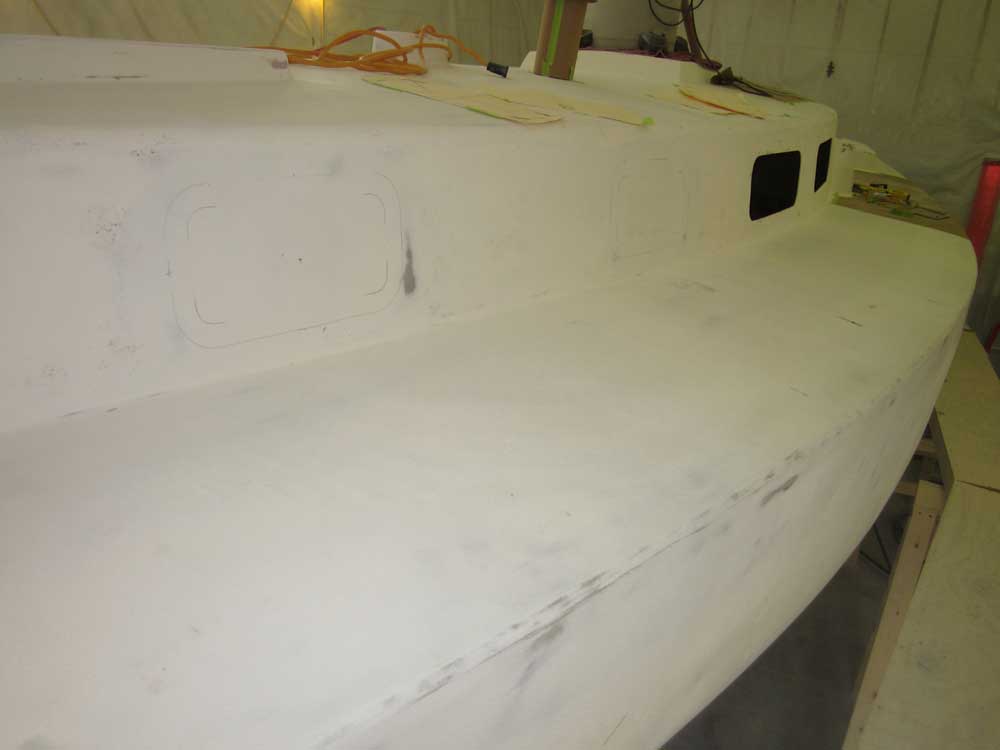
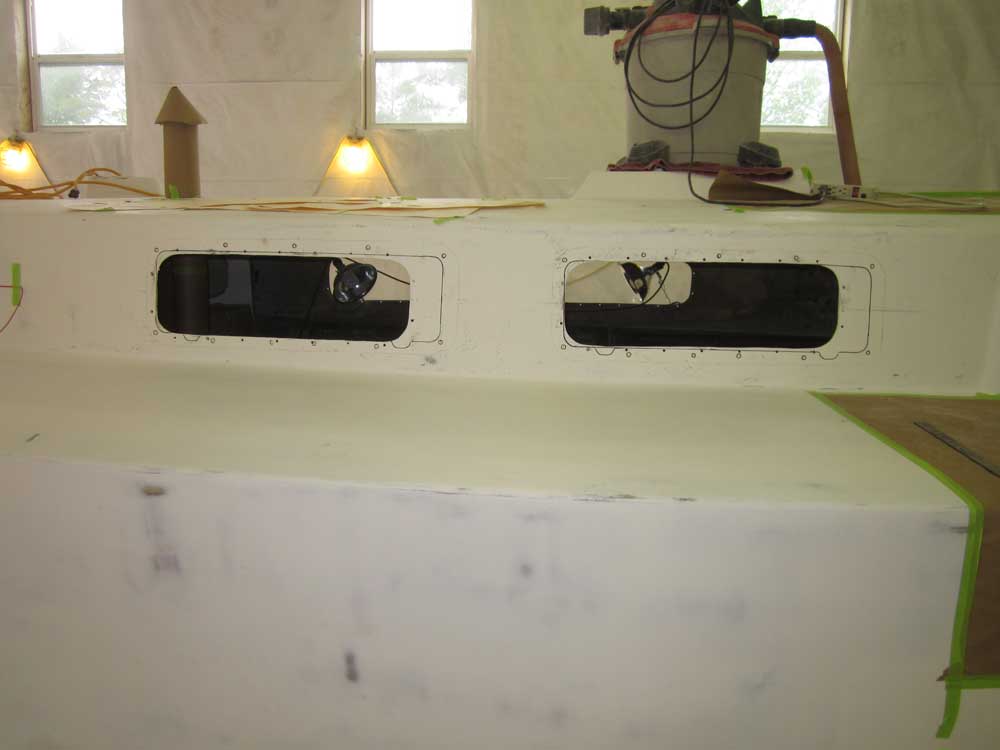
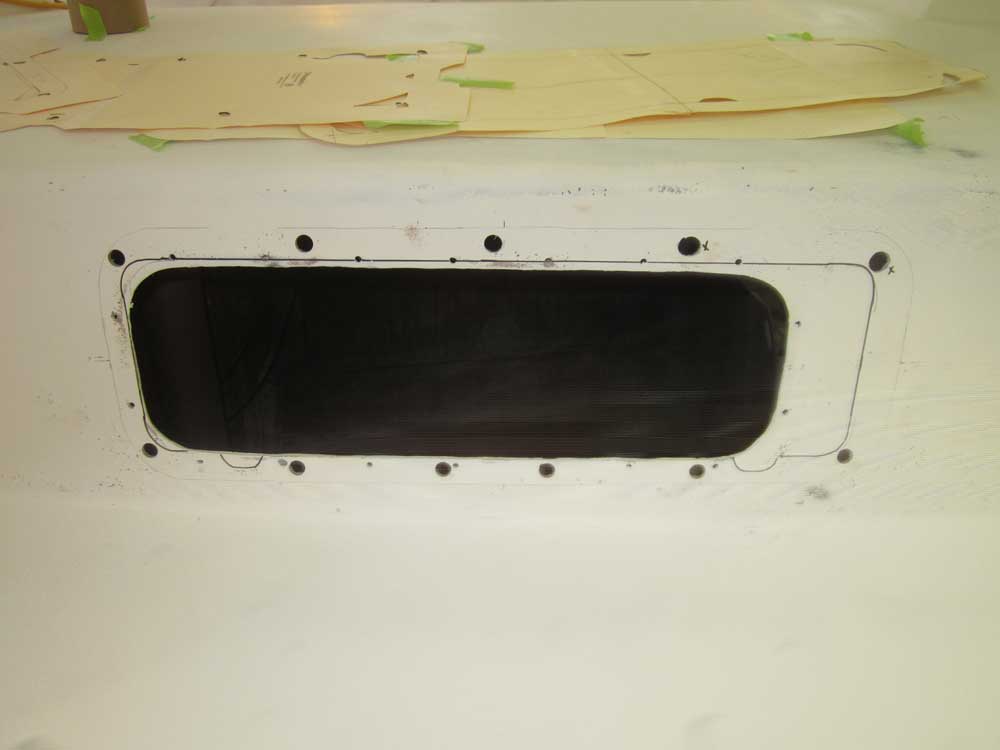
Happy with all four ports' locations, I cut out the openings to the templated lines with a jigsaw and carbide blade. Later, once I completed the other side, I'd finish up the cuts and holes by easing/chamfering the edges as indicated in the NFM installation guidance.

These photos show the view from inside, from aft to forward, with the studs visible around the openings.

Armed with the lessons learned from this side, I tested the 7x26 template against the two units designated for the starboard side. Most of the studs aligned well, but, as with the second trim ring on the port side, several of the studs were slightly different than the one I'd used to make the template, but fortunately I could easily change the template to accommodate the slight change, and I'd be able to use it on the starboard side.
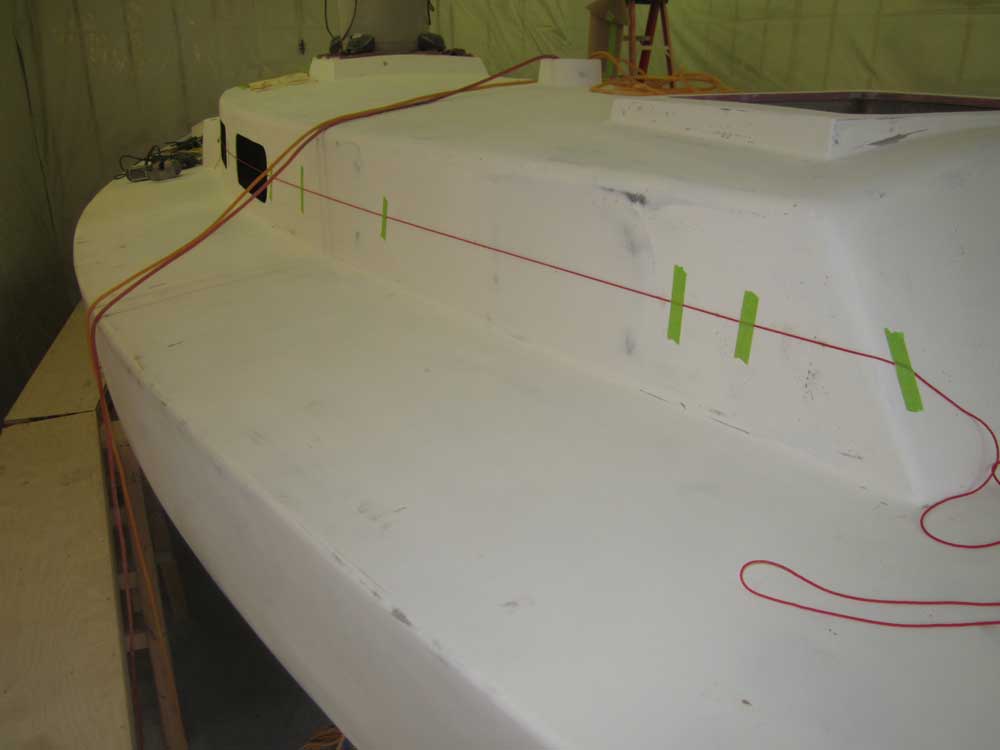
I relocated my equipment to the starboard side, and, following the process I'd used on the port side, measured and marked a centerline on the cabin trunk's height before installing a string to demark the baseline for the starboard ports' alignment. Next time, I'd lay out and cut the openings on this side, which would go more quickly since I already had templates ready, and basic layout issues determined.
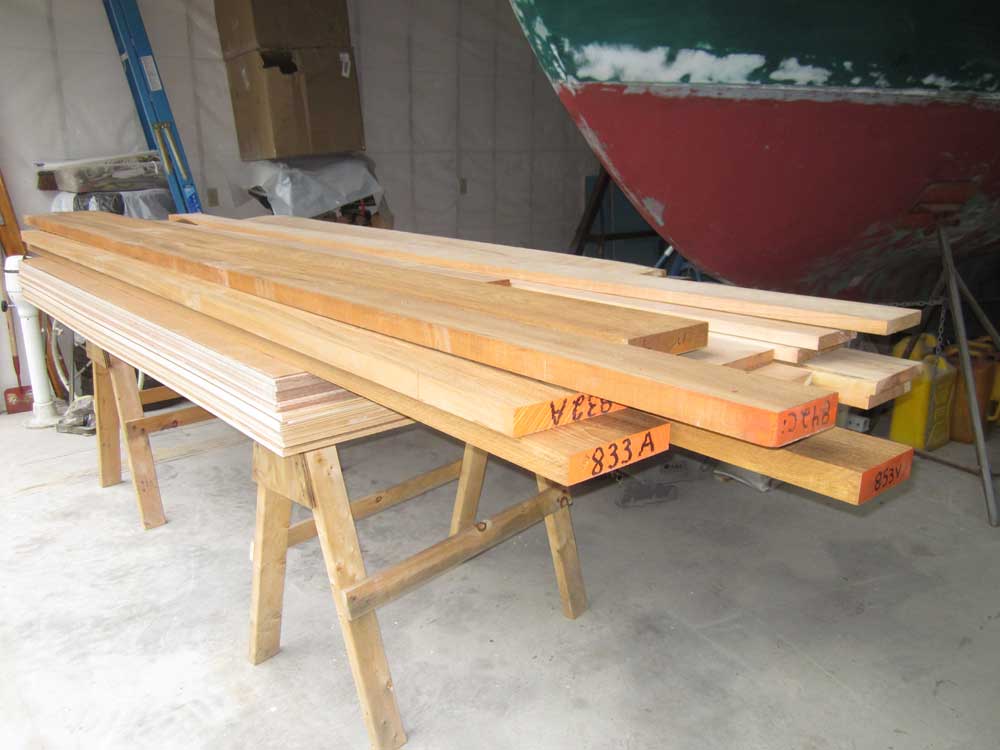
In other news, I received a shipment of sheet goods and solid hardwood (teak and cherry) for various interior and on-deck projects that looked like it might keep be busy for a while to come.
Total Time on This Job Today: 8 hours
