| Kaholee Refit |
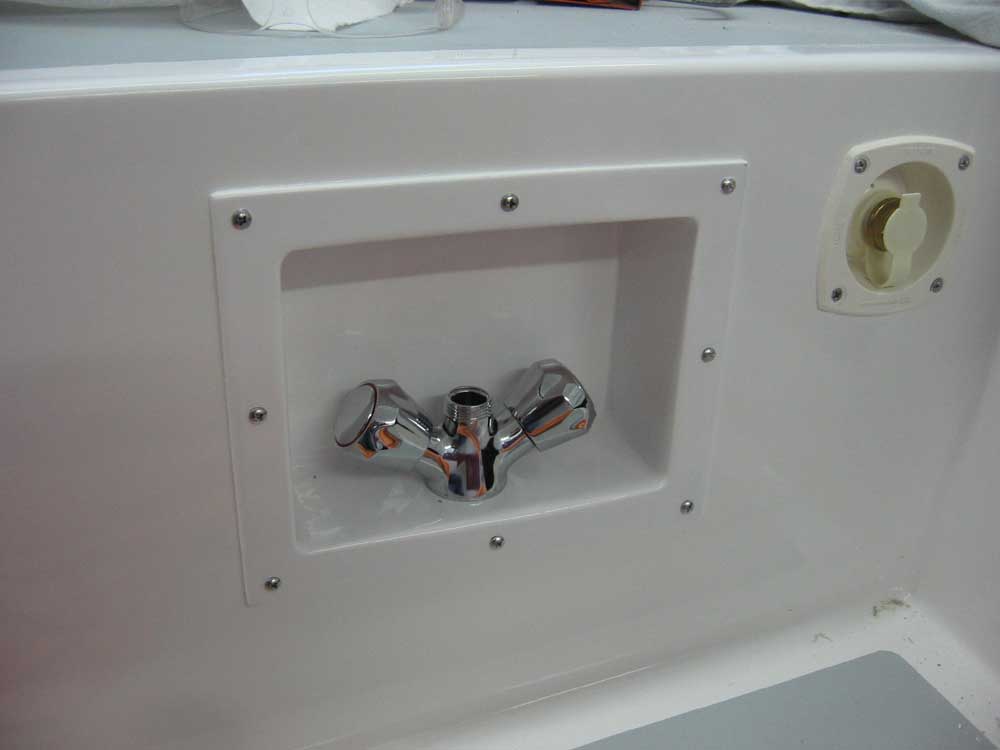
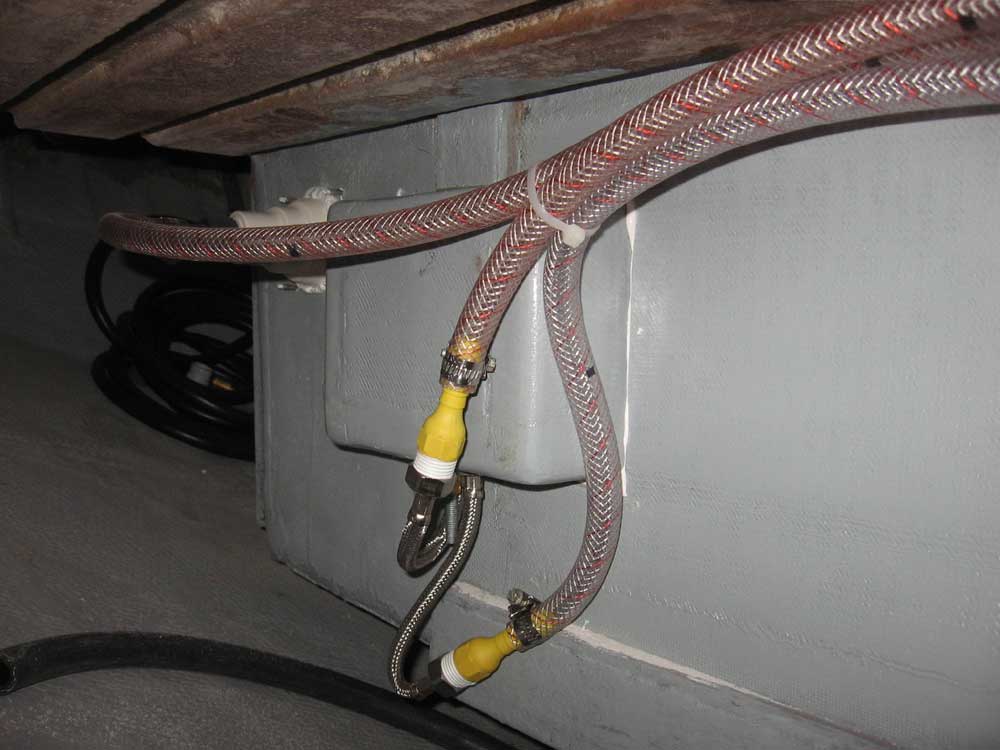
October 22, 2007 I decided first off this morning that I wanted to install the shower box and wrap up the fresh water side of the plumbing system. In fact, this would wrap up the entire supply side of the plumbing system, except for a saltwater hose to the manual pump in the galley (I needed more hose). A test fit showed that I needed to enlarge slightly the opening in the cockpit well for the shower box, partly because the laminated box ended up a bit thicker than I had allowed for, and partly because the way the faucet clamp and hoses worked at the bottom of the box, I needed a bit of additional clearance there in order to twist the box into position. So I taped up the surrounding paint and jigsawed the opening a bit larger as required. I applied tape over the flanges of the shower box and drilled screw holes in appropriate positions around the flange. Then, after removing the tape (applied only to protect the paint during the drilling), I applied polysulfide to the back of the flange and screwed the box to the cockpit, manually driving the screws to prevent the possibility of overtightening a screw and possibly damaging the flange or paint. I cleaned up the excess sealant and made the final hose connections behind the box. |
|
|
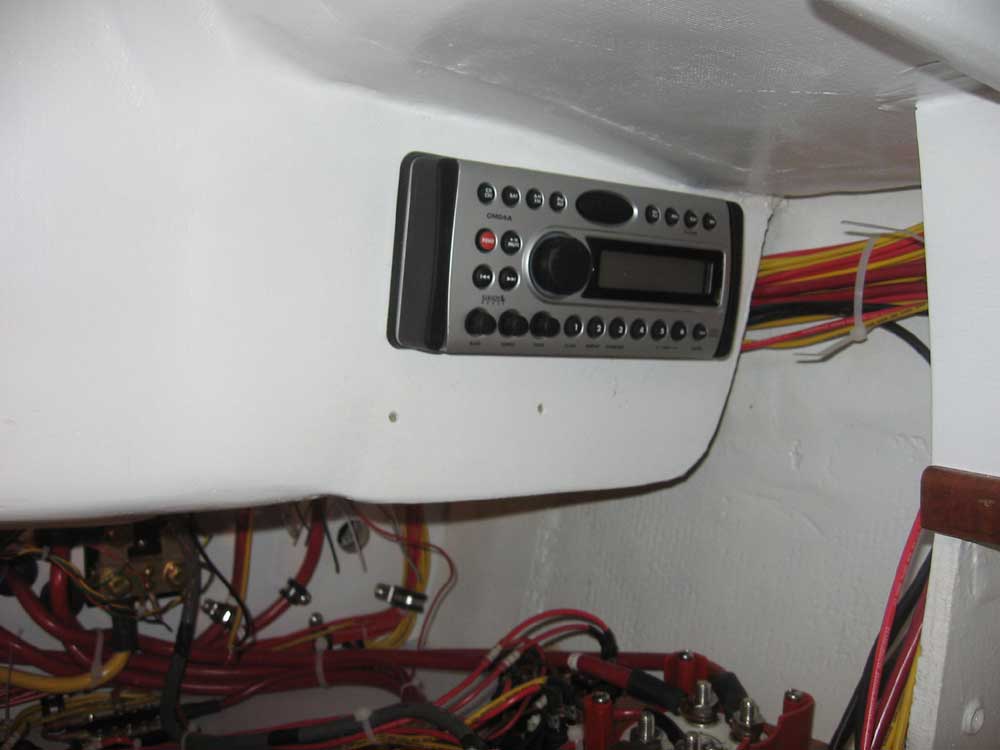
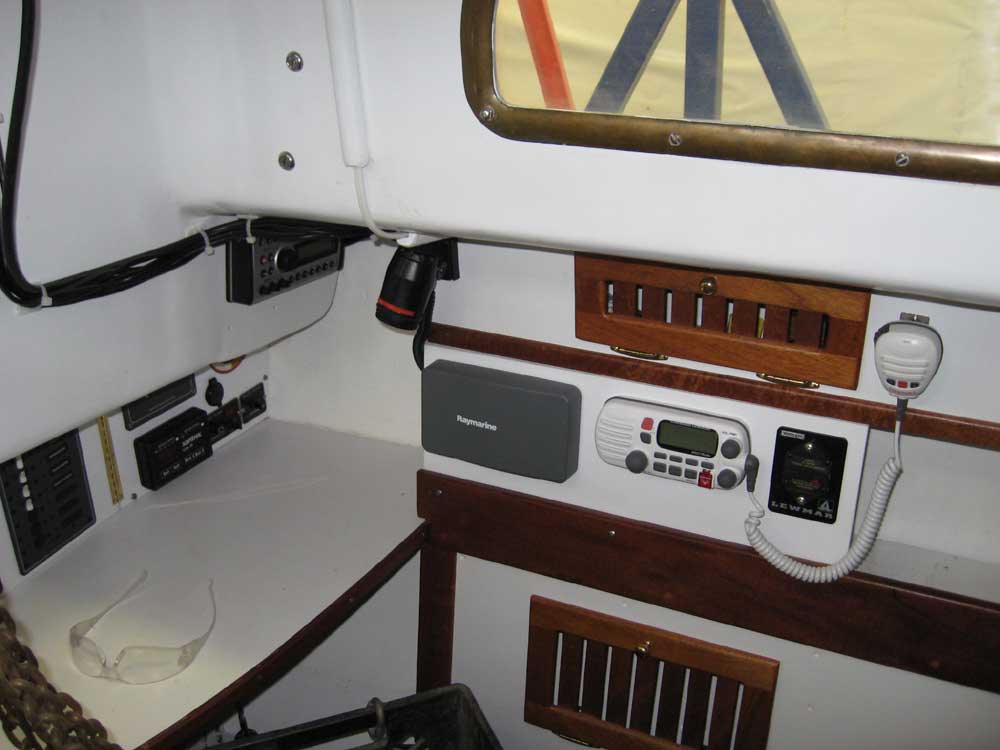
Next, I wanted to install the stereo. Allen and I had chosen a location in the corner of the nav station, where there was a sloppy pre-existing hole. Using a nifty clear adhesive template provided with the stereo, it was straightforward to make an opening large enough for the stereo, though the location made accessibility rather challenging. Once I had the hole complete, installation was a snap--four screws through the face panel, again complicated only by the challenge in accessing the back pair of screws. |
|
|
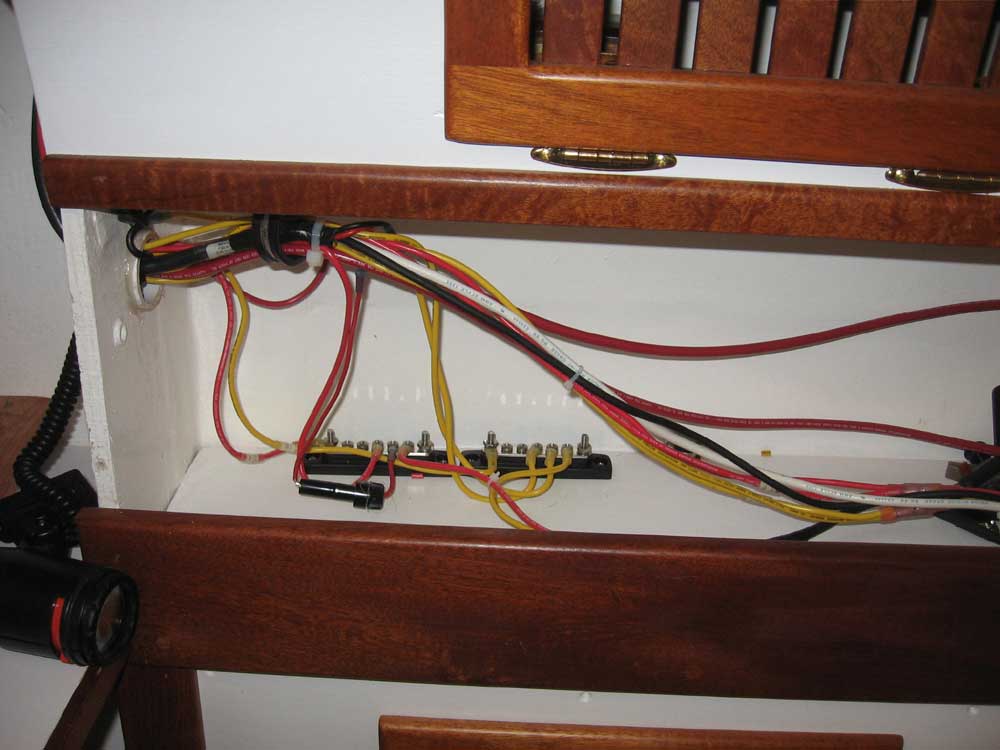
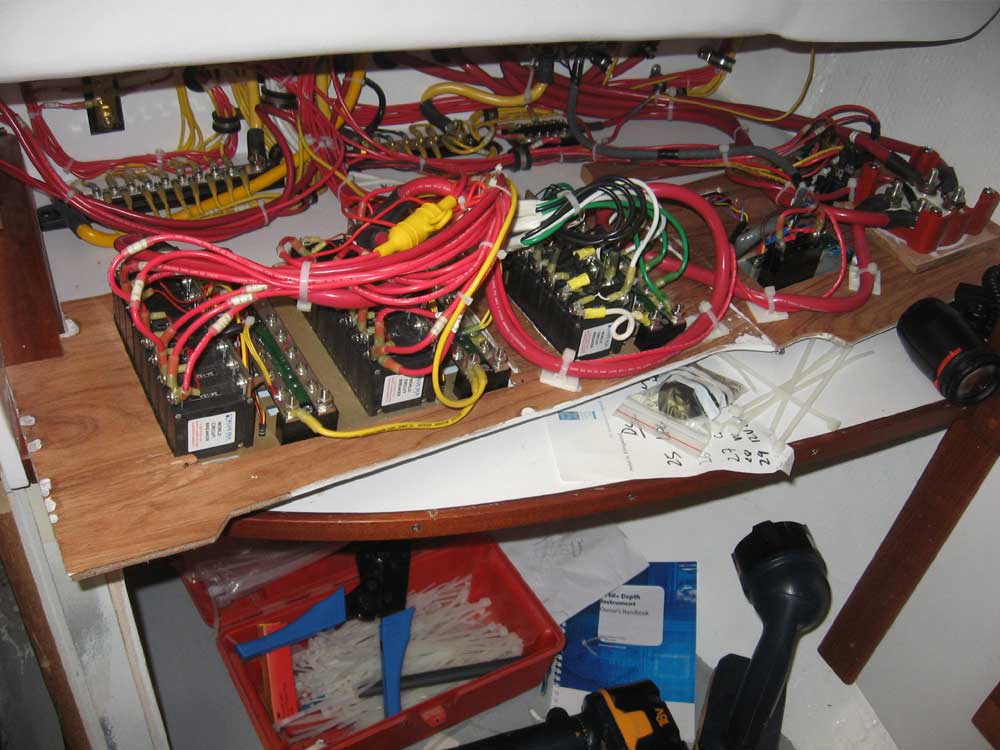
I spent the rest of the day on wiring--yes, again. Today, I concentrated on the new electronics sub panel, adjacent to the nav station. I installed the Raymarine GPS and Standard Horizon VHF in the holes in the panel, and then worked on installing the requisite wiring for these instruments as well as for the sailing instruments in the cockpit. Completing this major wiring, including wiring for the autopilot's fluxgate compass and running the beginnings of a power wire from the control unit to the eventual location of the tiller arm, required plenty of time, along with the other connections. Since the sailing instruments and electronics were sourced from a single circuit breaker on the main panel, I chose to install small busses behind the sub panel for their associated wiring, thereby reducing the wire runs back to the main panel. I also combined the wiring for the VHF and stereo into a single pair of leads, though I ran the memory wire from the stereo over to the "always hot when the battery switch is on" buss behind the main panel. (This is different from the "always hot" buss, which remains energized even with the battery switch off; this buss is for emergency equipment like the bilge pumps only.) Then, I made up the final connections to the VHF, including the antenna and the connection for the RAM mike from the cockpit, and temporarily installed the panel. (No pictures of this: I dropped my camera off the boat, and it didn't survive. I have a new camera on the way, but there may be no pictures of tomorrow's work before the camera arrives.) |
|
|
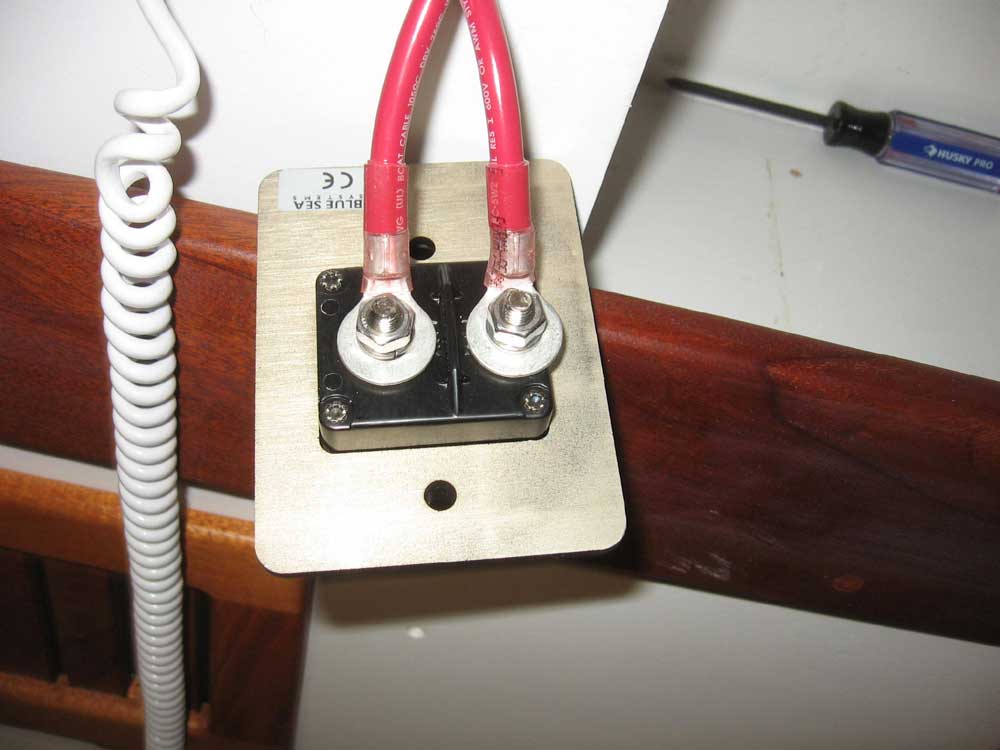
I was increasingly anxious to complete the wiring installation, at least as far as the panels were concerned. I was, frankly, amazed at how complex the system had become, and how many wires were required for the desired system, and was ready to move on. Today's chores brought me nearly all the way to the end of the electrical system, other than some final connections at a couple of the destinations (tiller control for the autopilot, windlass). And later, I'll need to run the cabling for GPS antennae and the radome. I made up the connections from the windlass cables to the back of the supplied dedicated circuit breaker, which we had also planned for in the sub panel. Now, I knew that the breaker fit in the opening; I had tested it before. But after making the wiring connections, the breaker wouldn't fit into the panel. Eventually, I determined that the ring terminal was hanging over one side of the breaker--partly because the rings were quite large, but also because, for whatever reason, the terminal studs on the back of the breaker were off-center, with the offending one being much closer to the edge. (Why aren't they symmetrical and centered, I wondered? Who designs these things this way?) The fix was easy: I used a drum sander to create a semicircle on one side of the opening to allow the terminal to pass by, but this illustrates just one reason why so many tasks take so long. This is par for the course. The materials I needed to continue the engine installation arrived in the afternoon, so I'd be all set for the 'morrow. |
|
|
|
|
|