| Hattie
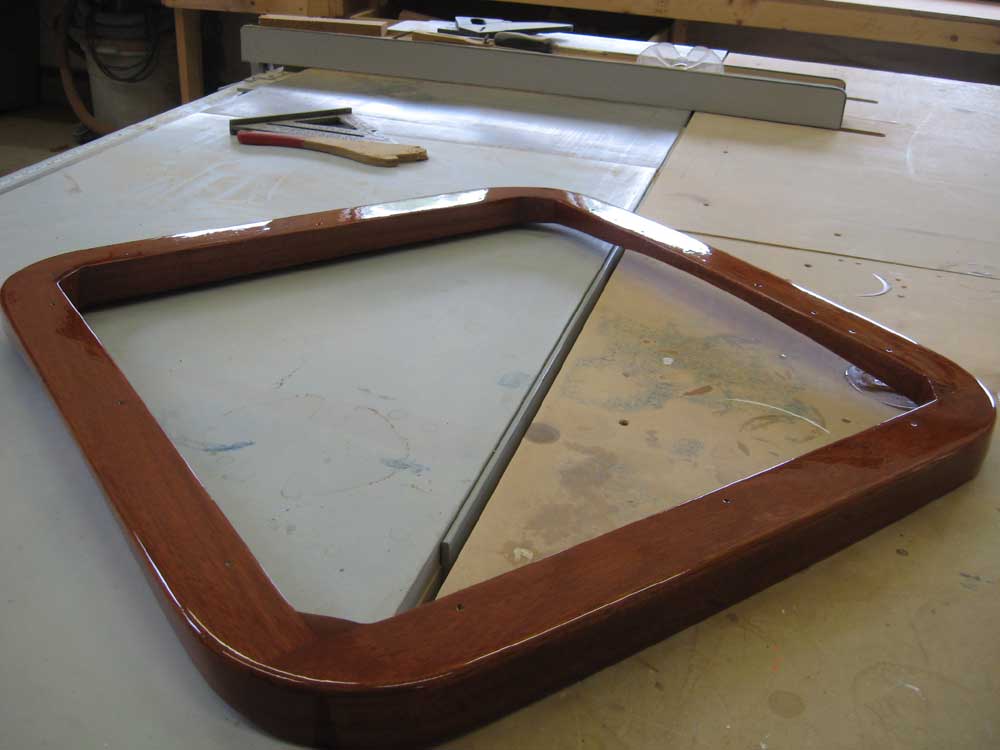
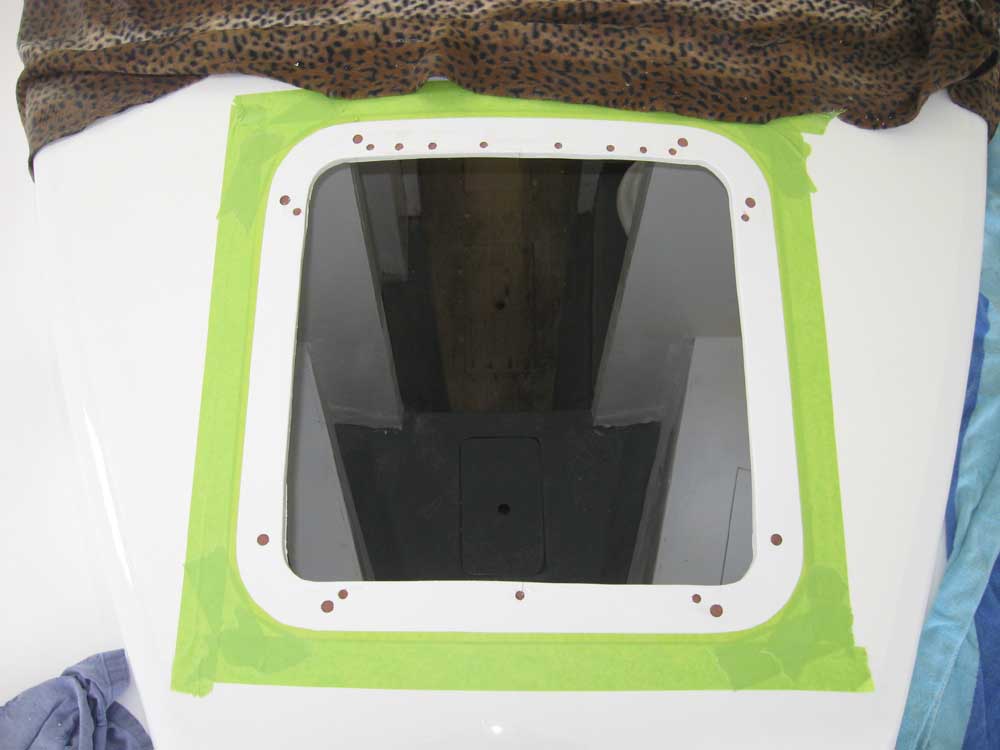
Mae | Tuesday, June 30, 2009 I had business away from the shop in the morning, but during the afternoon I turned to two of the remaining tasks on my list. With the forward hatch frame now sufficiently varnished--I continued applying coats over the weekend--I made preparations for the final hatch installation. First, I clamped the frame in its proper position on the deck, and then masked off around the edges to protect the area during later steps. Then, I drilled a series of holes for bolts and screws as needed to secure the frame and, ultimately, the hatch, and overbored the holes in the deck as required to allow me to eliminate the core material in those areas. I cleaned up the dust and debris, and filled the holes with an epoxy mixture, and left things to cure overnight before continuing. |
|
|
|
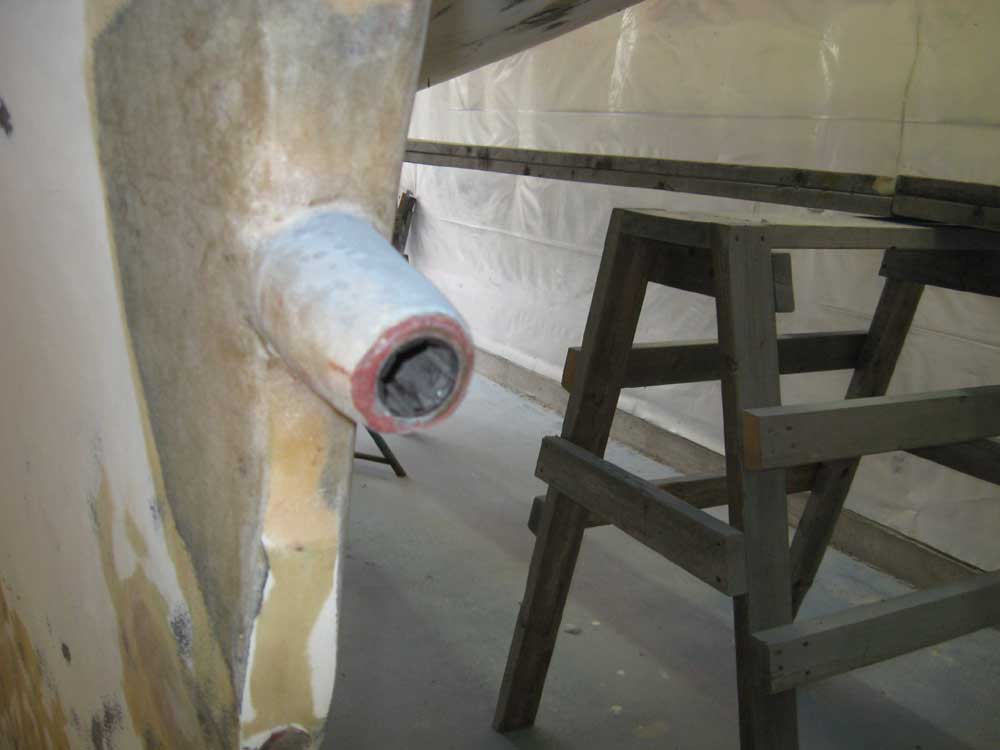
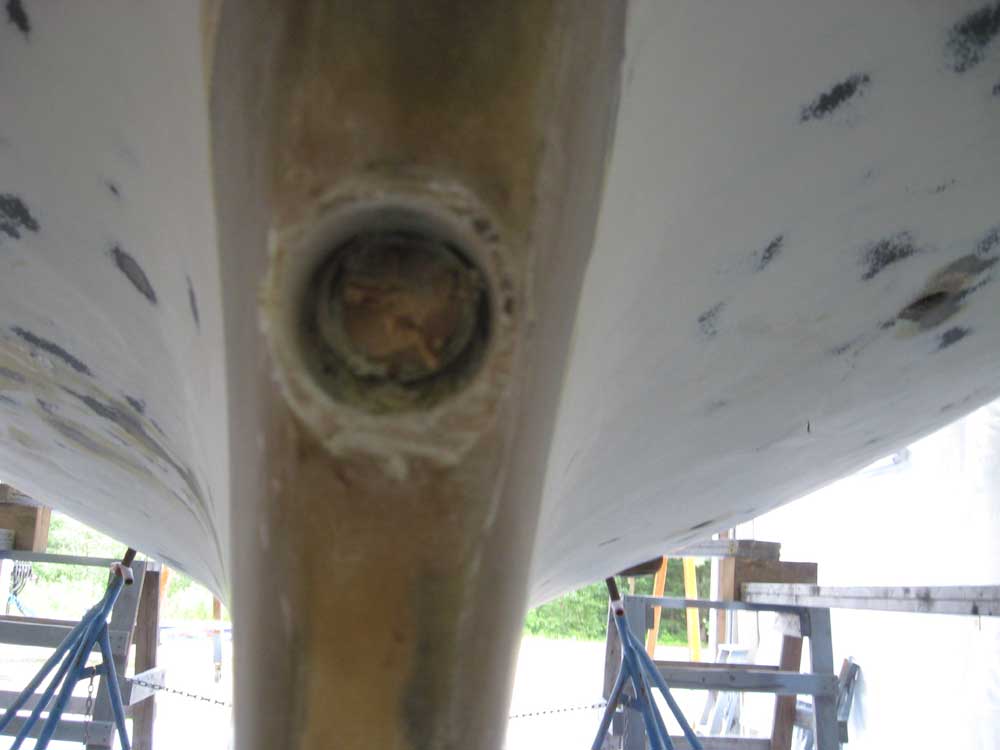
After consulting with the owner last week about my initial findings on the removal of the Cutless bearing, I forged ahead with that job. My inspection of the area had revealed the likelihood that the bearing was more or less permanently installed in the protruding housing, with no visible setscrews and few other optimistic signs. I was concerned that it wouldn't be possible to remove the bearing alone given the way it had been installed, and I didn't plan to spend a lot of time fighting it when I knew I could simply remove the entire stern tube and start anew in much less time. First, though, I made an attempt at removal, in case the situation belied its outward appearance. I used a saw to slit the bearing longitudinally from the inside, carefully cutting through the rubber and brass till I reached the fiberglass housing. Then, I tried prying the bearing free with a variety of tools, but it rapidly became clear that my worst fears were realized: the bearing was permanently affixed. Some heat application softened the fiberglass around the bearing, but didn't help the bearing release from its housing. Whether it would ever come or not is something that will remain unknown, as it was clear that it would be a waste of my time to continue trying. |
 |
|
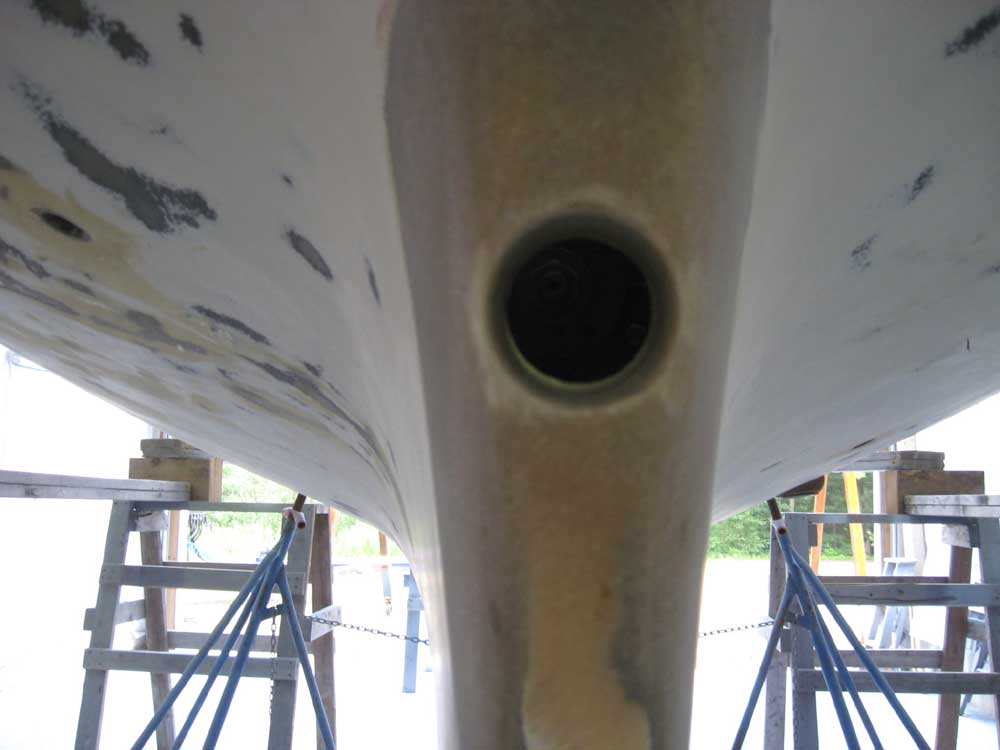
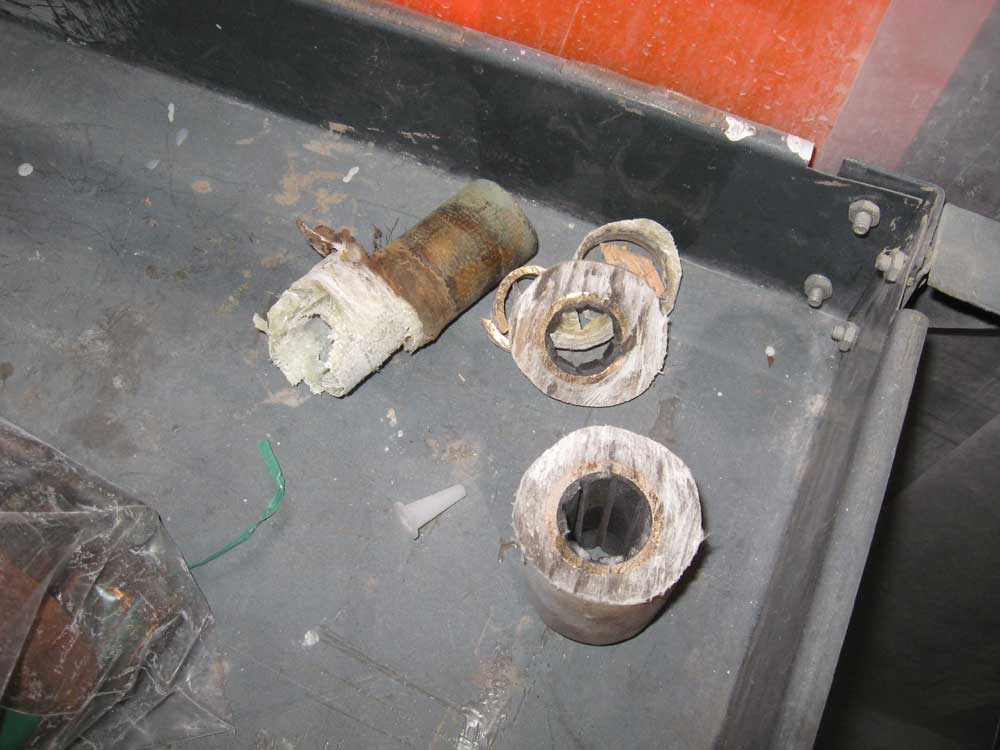
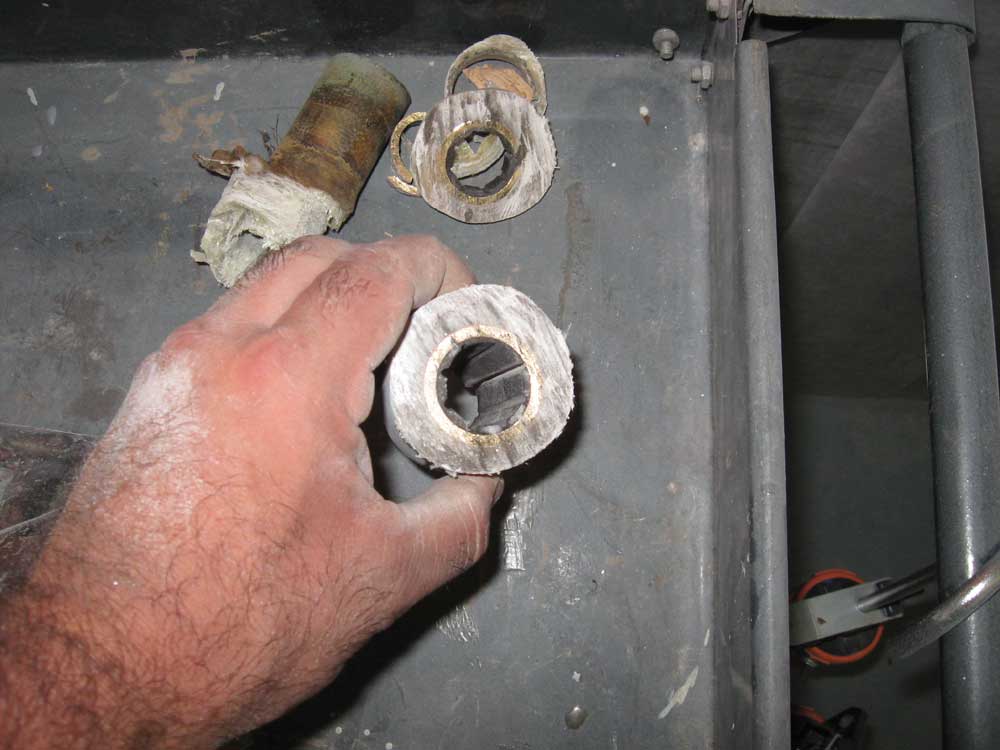
Without further ado, and as I had suspected from the getgo, I gave up on the idea of removal and simply cut off the protruding bit of the housing (I am specifically not referring to it here as a stern tube for a reason that will become clear). To remove the remaining part of the stern tube, I used a hole saw to simply drill it out of the deadwood, after first inserting a scrap of wood into the center of the tube to give the pilot bit something to grab. Because the hole saw wasn't deep enough to go all the way through in one pass, I had to stop every so often and chisel out the portion that I'd already cut around, allowing the bit to pass more deeply into the hole. In relatively short order, though, the old tube was history. It turned out that the Cutless bearing I'd removed had not been installed within a tube at all. Instead, what a previous installer had done was to remove the original external part of the stern tube and bore into the deadwood and internal tube 1/2" or so. Then, that installer inserted the end of the Cutless bearing into the slight recess in the deadwood, and simply glassed around it and over it to secure it in place, more or less creating a tube around the bearing using it as a mold. The issue wasn't that it was done this way, per se; rather it was that no attempt was made to make the bearing removable at a later date. I never would have gotten the bearing out the way this was constructed. |
 |
|
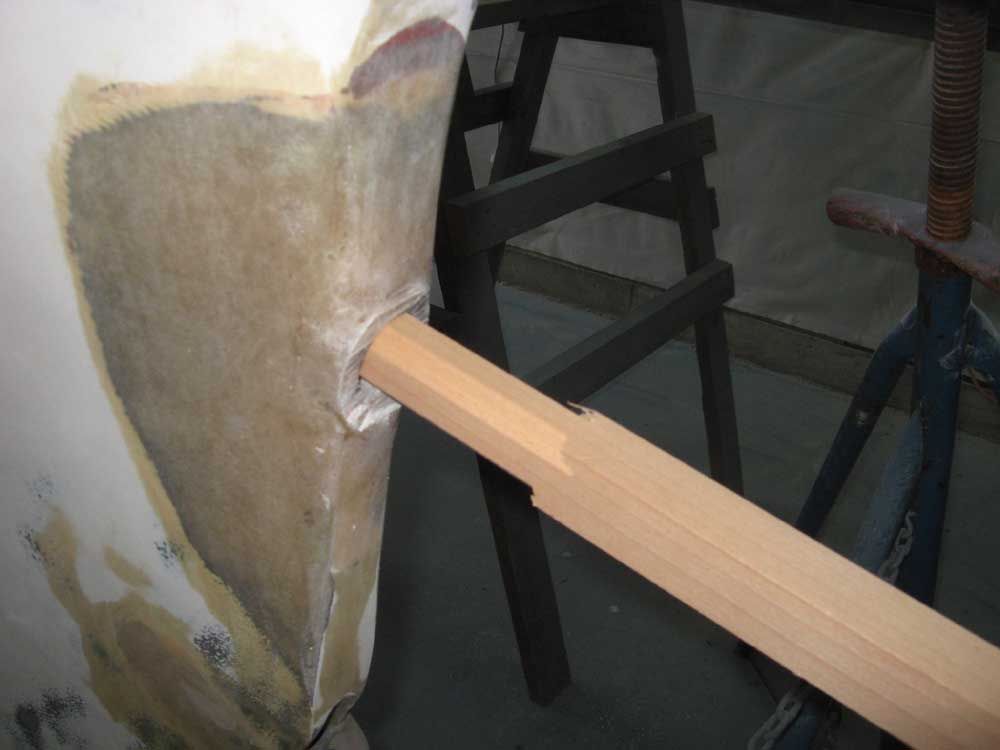
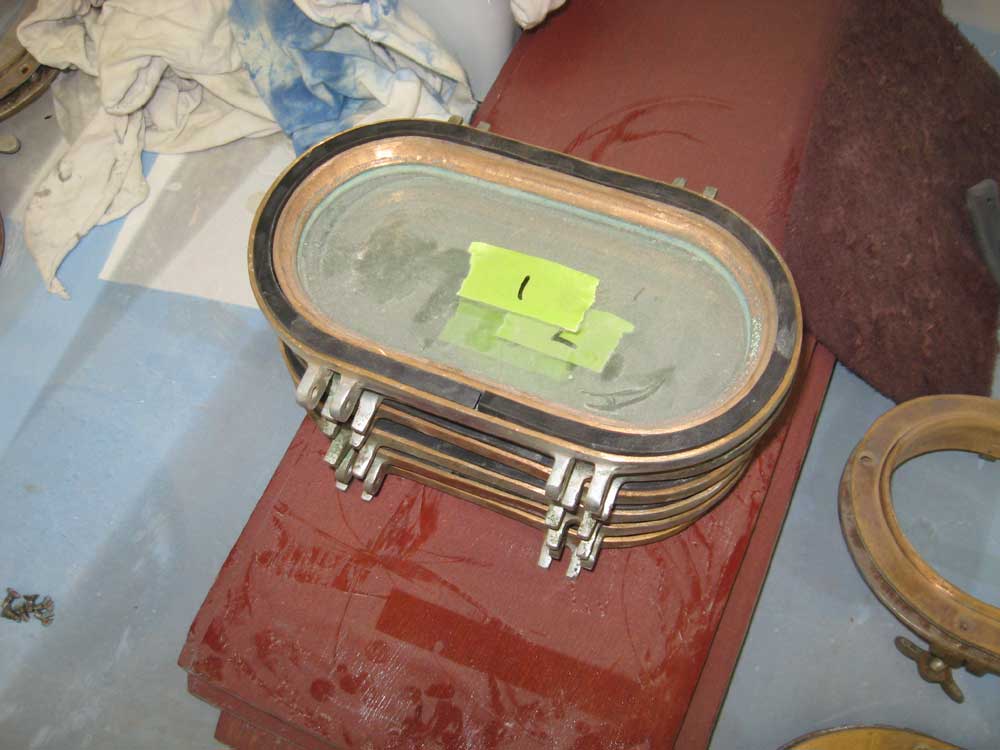
I sanded the deadwood smooth around the aft end of the new cut, and sanded the areas on all sides to prepare them for later reinforcing work when I installed the new tube. I also sanded the inside of the hull where the tube would pass through. I prepared a length of 1-1/2" OD fiberglass tubing for installation as the new stern tube, but couldn't install it just yet since I needed to order the proper new Cutless bearing and stuffing box hose so they'd be on hand for the installation, as I would use the shaft itself to align the new tube perfectly with the engine as mounted. I had waited on ordering the new parts till I knew whether I'd have to replace the tube or not, since the existing setup would have required a different size bearing than the new. It was a little late in the day to hope that the parts would ship before the end of the day, but with luck they might arrive tomorrow; if not, I'd install them on Thursday. To wrap up the day, I made a few preparations for the pending port/deadlight installation. The gaskets in the opening ports required replacement, and I'd previously ordered 1/4" square rubber stock for this purpose. Now, I simply pressed the gaskets into place and cut them to length, leaving the seam at the top of the housing. |
 |
|
|
|