| Circe
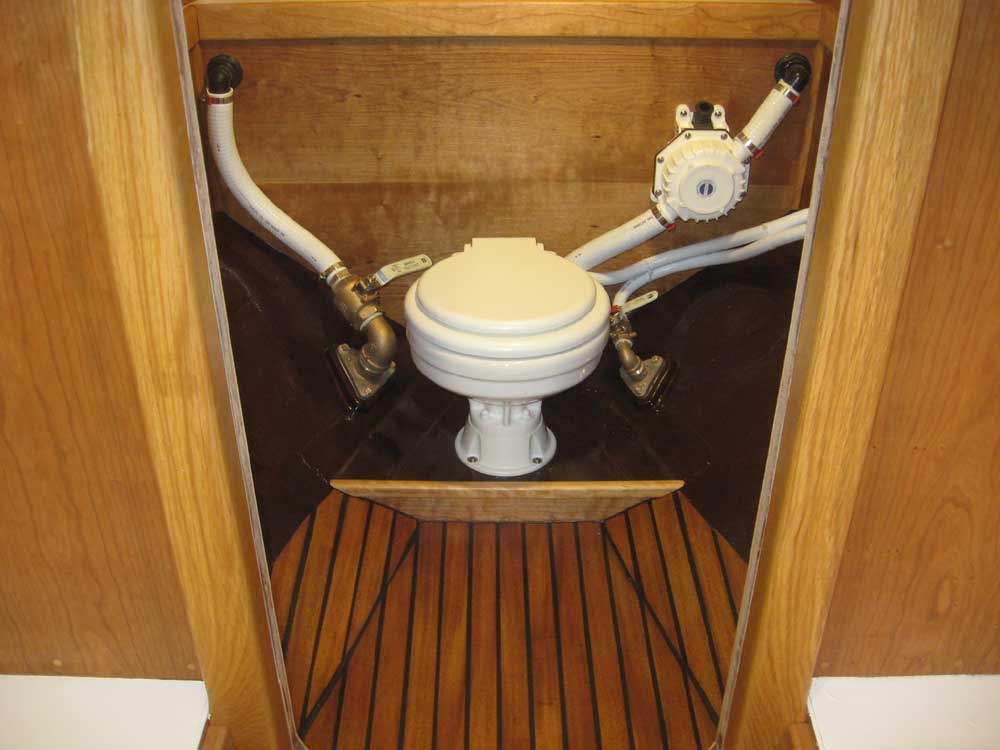
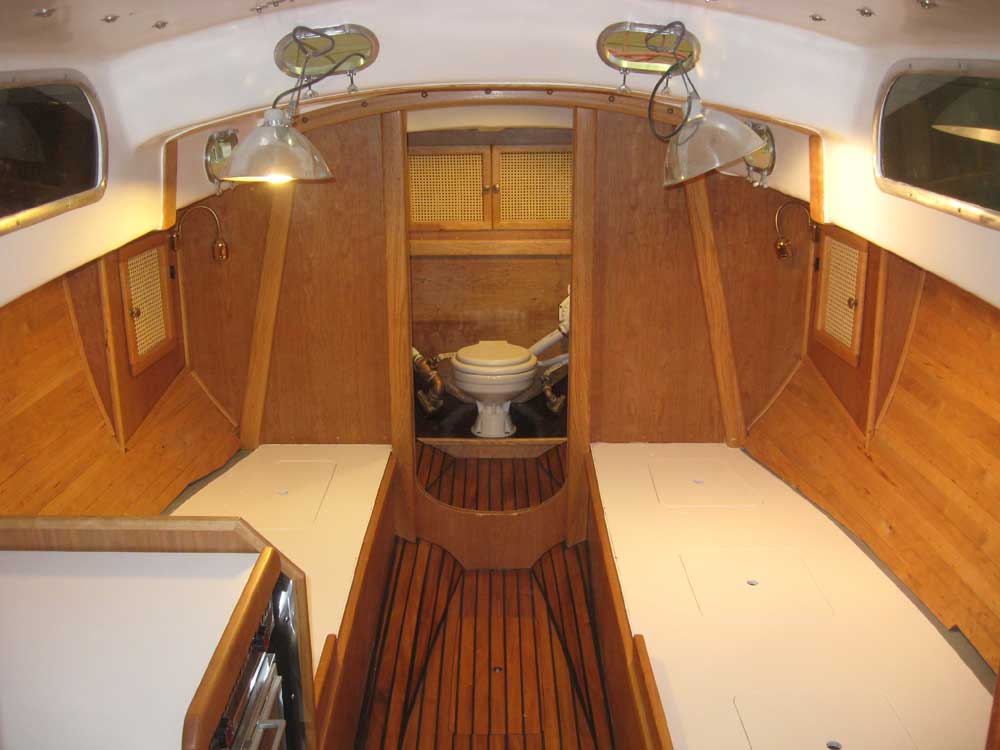
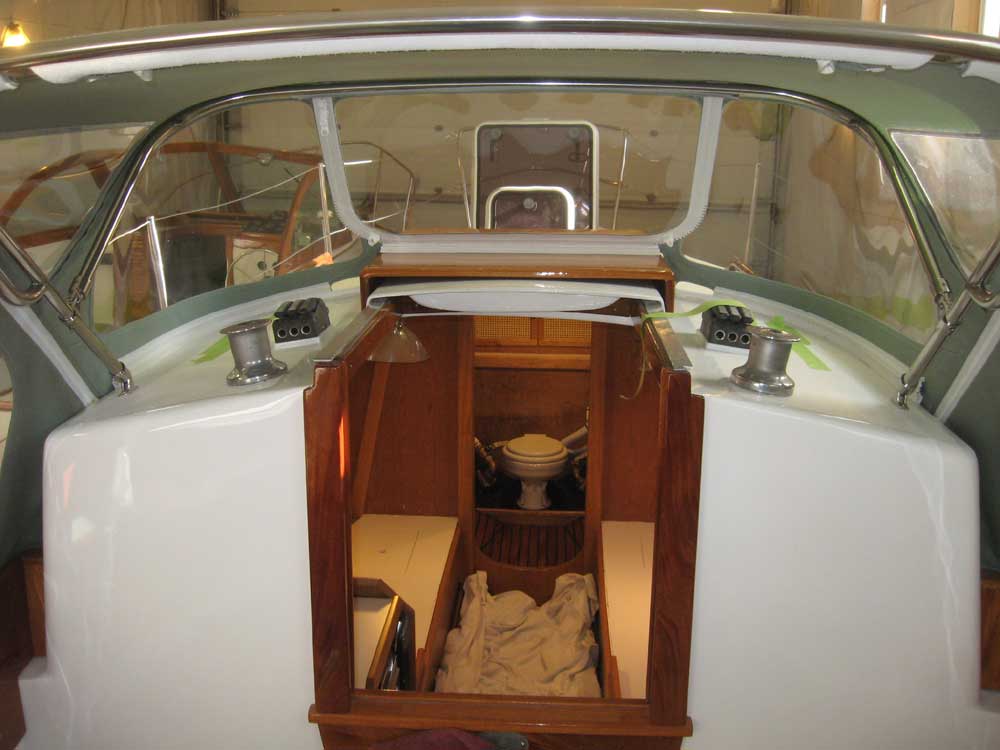
| Thursday, March 25, 2010 The painting in the head was complete, so I continued with the final installation of the toilet and associated bits of plumbing. This went quite quickly, since most of the groundwork had been laid well before. |
|
|
|
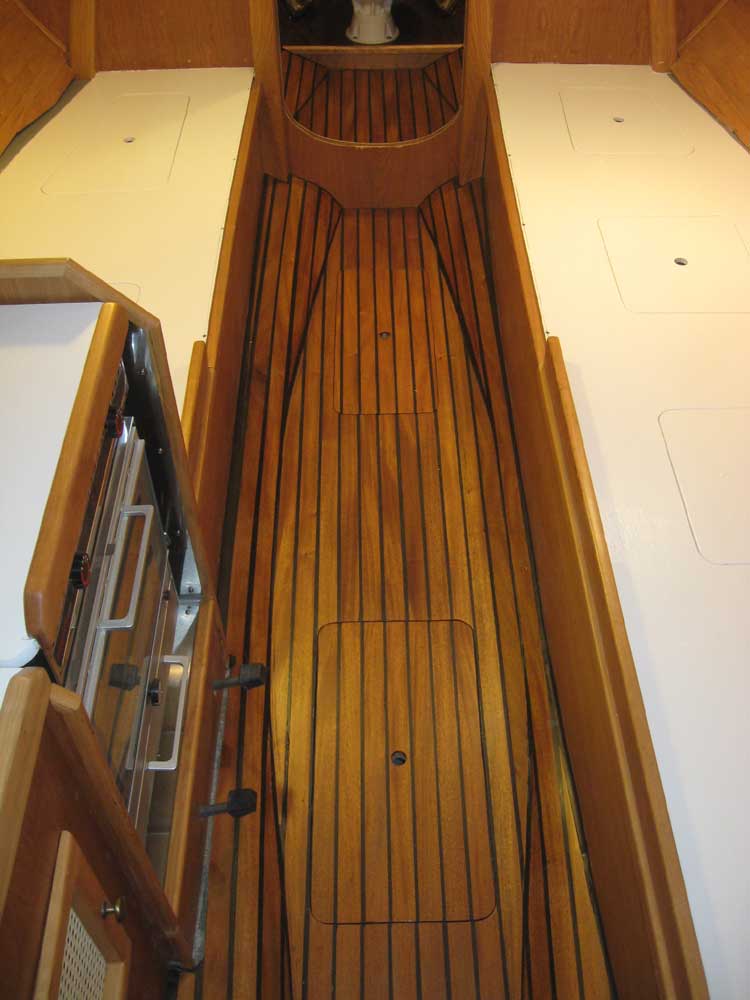
I planned more cabin sole varnish over the weekend, but for the moment it was looking good in its first coat of satin varnish. I replaced the hatches for the moment to improve the view and make work easier in the cabin. |
 |
|
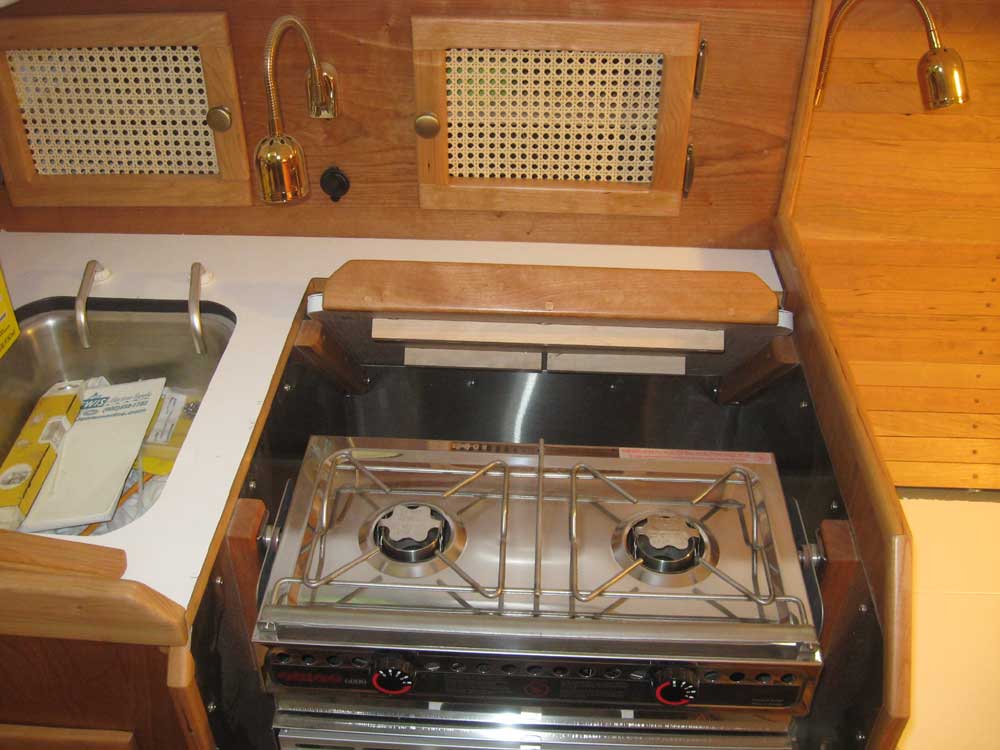
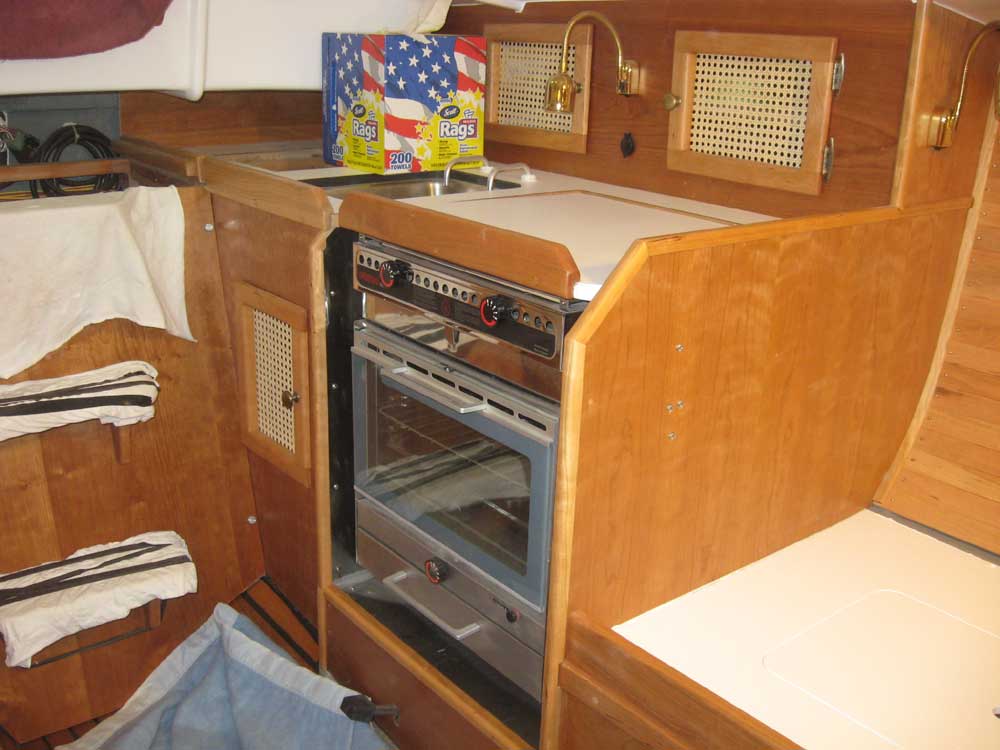
A couple of the small trim pieces were ready for installation in the head and galley, to cover some of the last remaining raw plywood edges in the cabin. I installed these pieces with glue and brads. I also fitted the stove cover to see how it looked and worked; I'd need to add some small spacers at the outboard edge since it lacked support there, but otherwise it seemed to function as I'd intended. |

 |
|
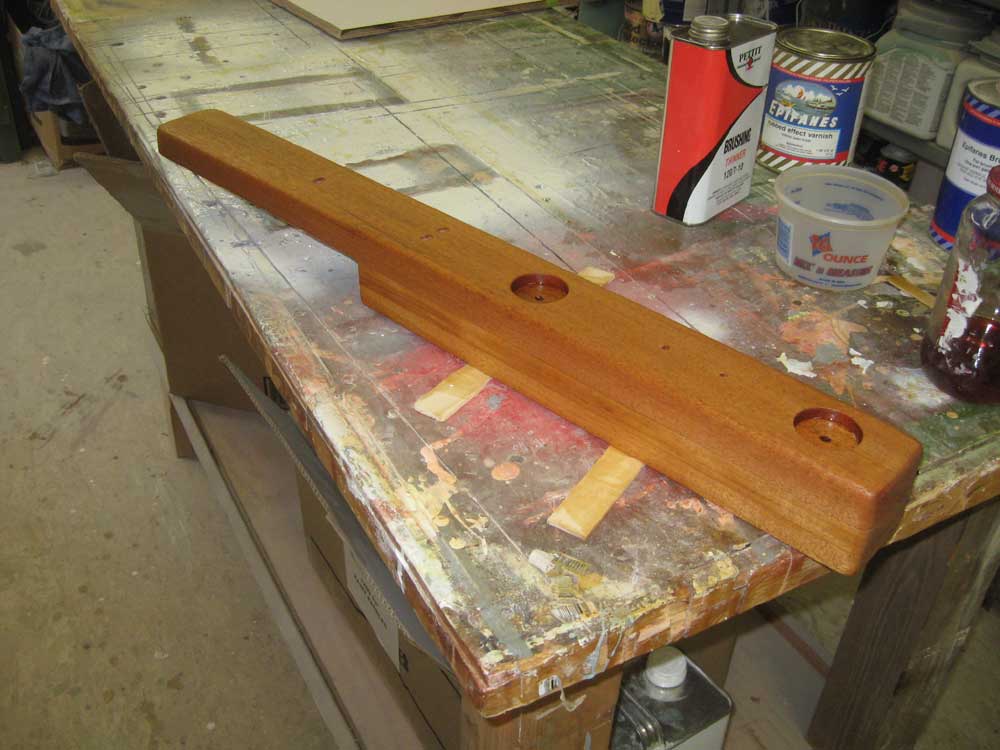
I continued work on the anchor platform. The laminated blank had cured, so I trimmed it as needed and sanded it smooth after checking its fit up on the boat. Then, I partially drilled the bolt locations for the anchor roller and tensioning device, as well as two larger counterbores to recess the washers and boltheads for two bolts through the platform assembly itself, which would eventually help secure the platform to the deck. In the meantime, it was off to the varnish room with it for multiple coats of varnish before installation. |
 |
|
In between this and other jobs of the morning, I applied two coats of paint to the rudder after trimming the excess bolt length from the new pintle fasteners. |
 |
|
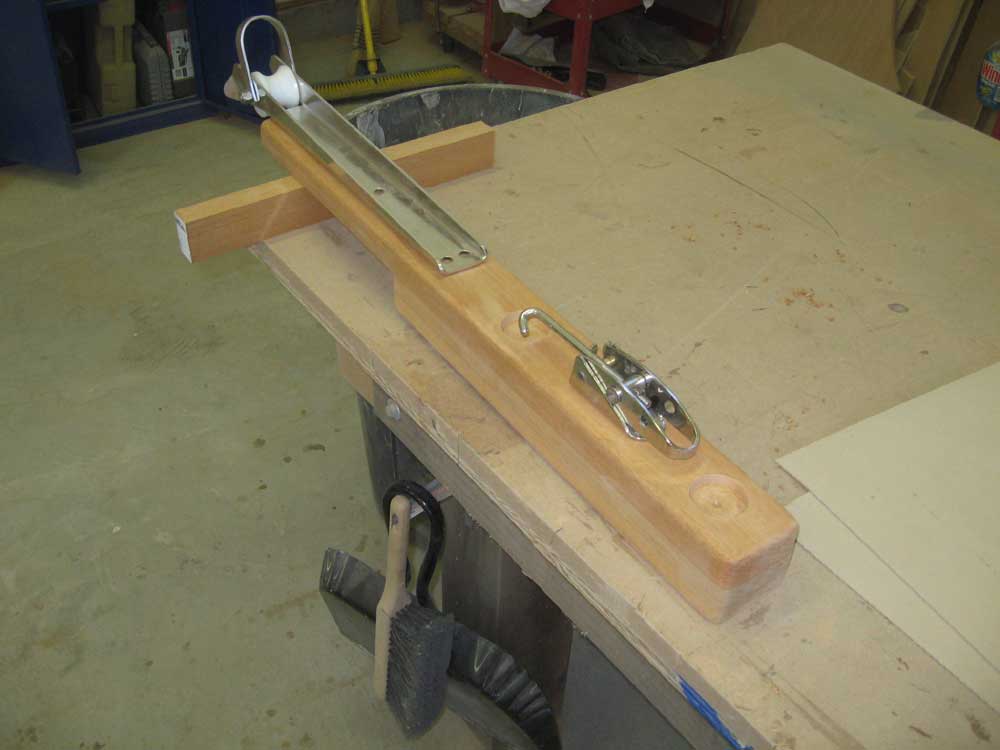
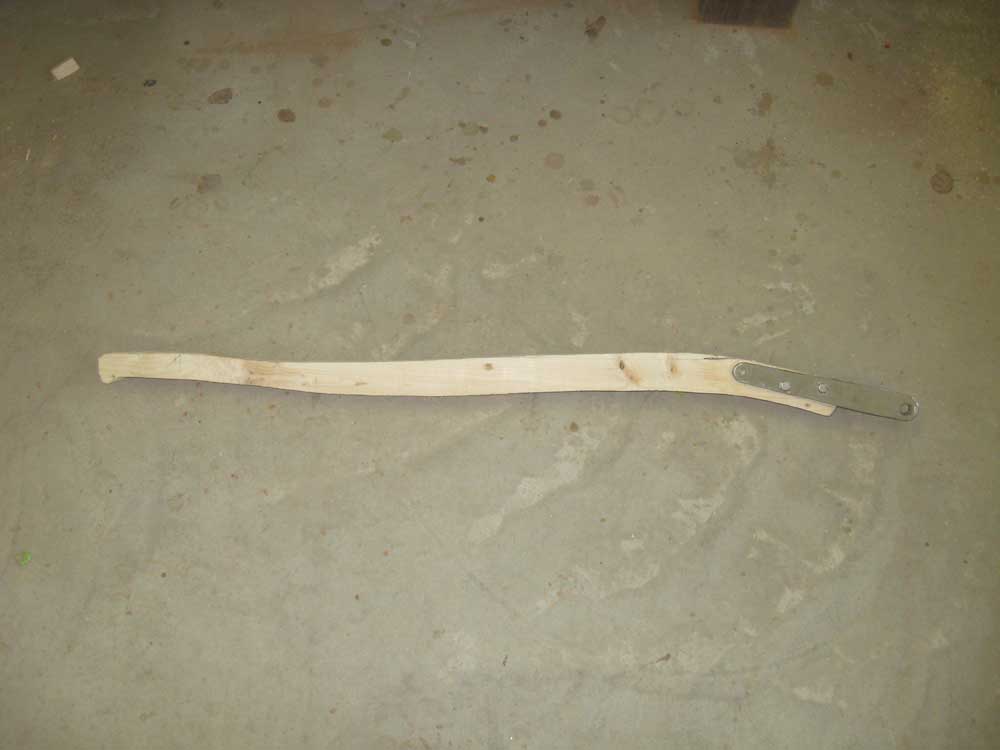
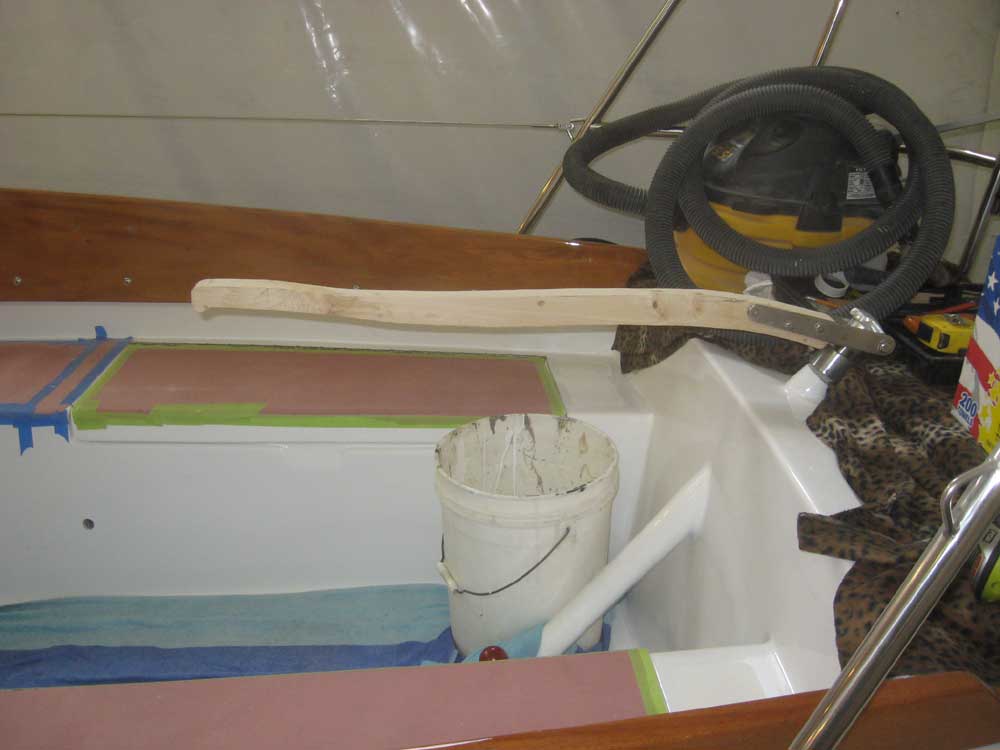
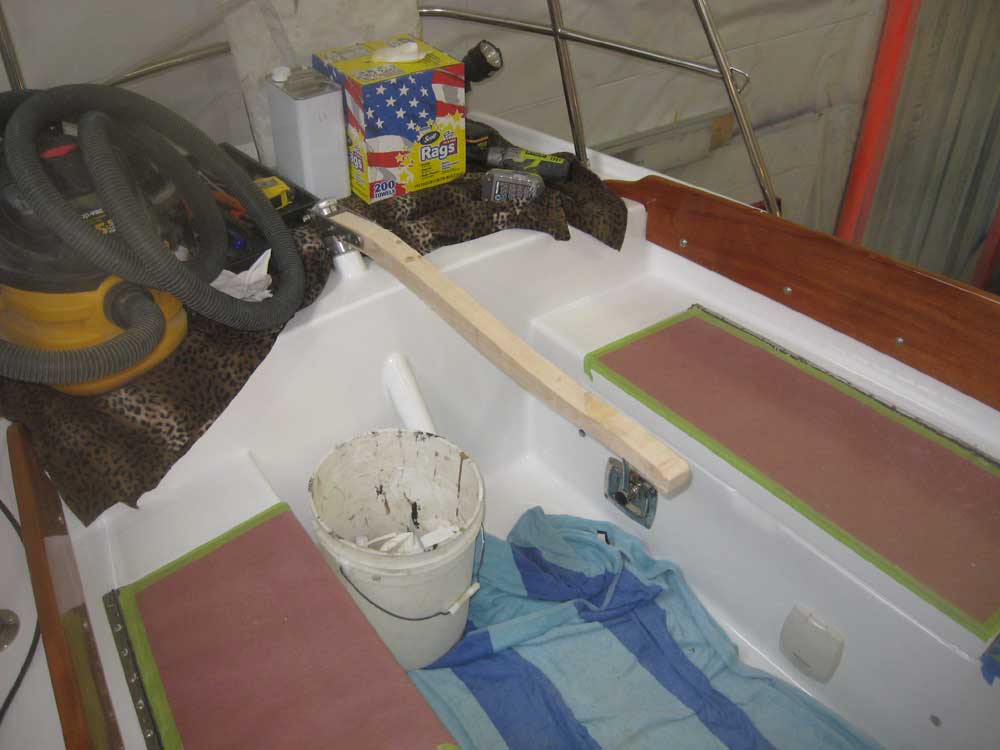
Using a scrap 2x4, I created a mockup of a proposed tiller design, one that incorporated the angle required at the strap end and (I hoped) flowed cleanly into its termination at the handle end. The overall attitude of the tiller when installed was essentially level: during the early stage of the mockup, I'd struck a level line on the uncut 2x4 as a reference, since the tiller didn't want to point up or down from its general position. Should I build a tiller from this mockup, the end result would incorporate additional shaping and smoothing to improve appearance and offer a comfortable grip at the handle end. I thought the design worked well and was aesthetically pleasing, but didn't want to rush into decisions. |
 |
|
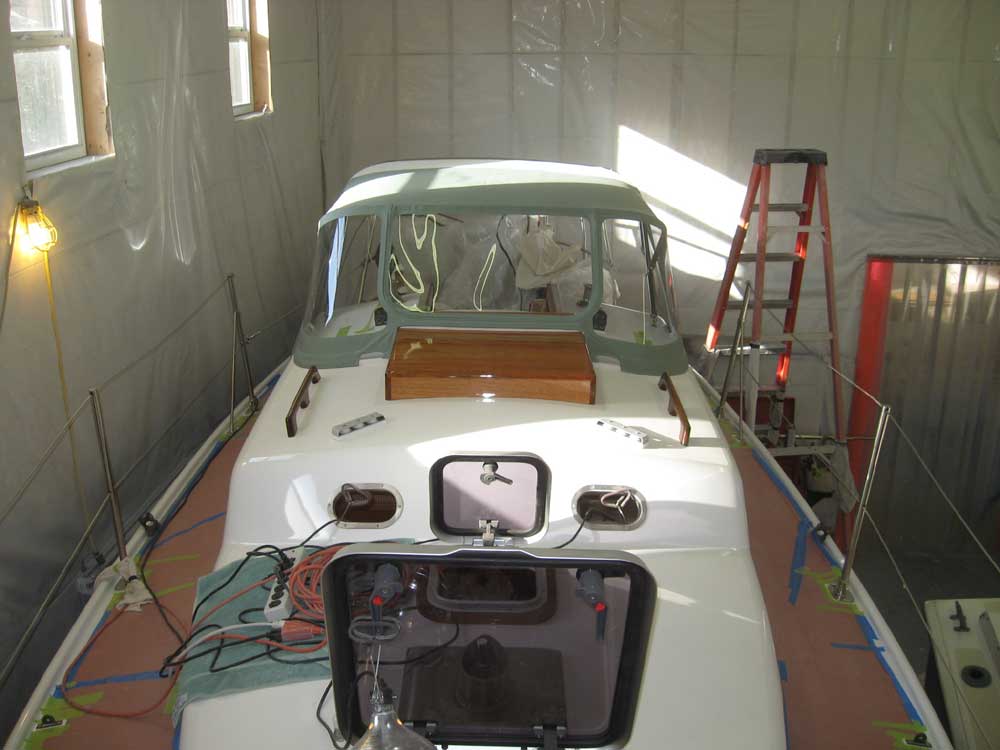
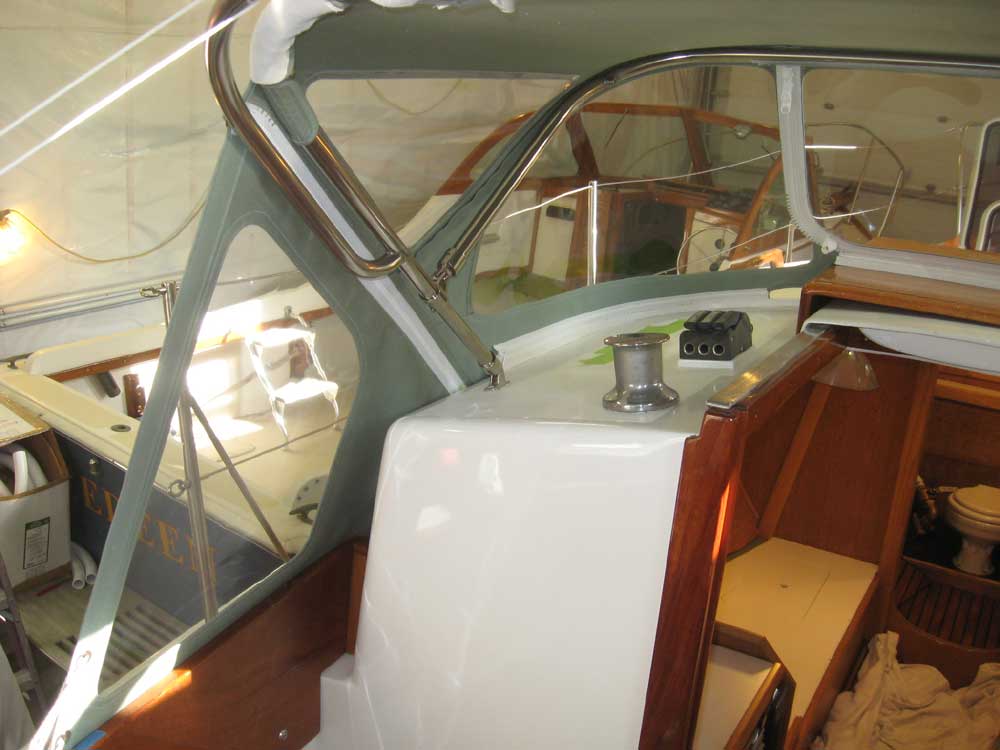
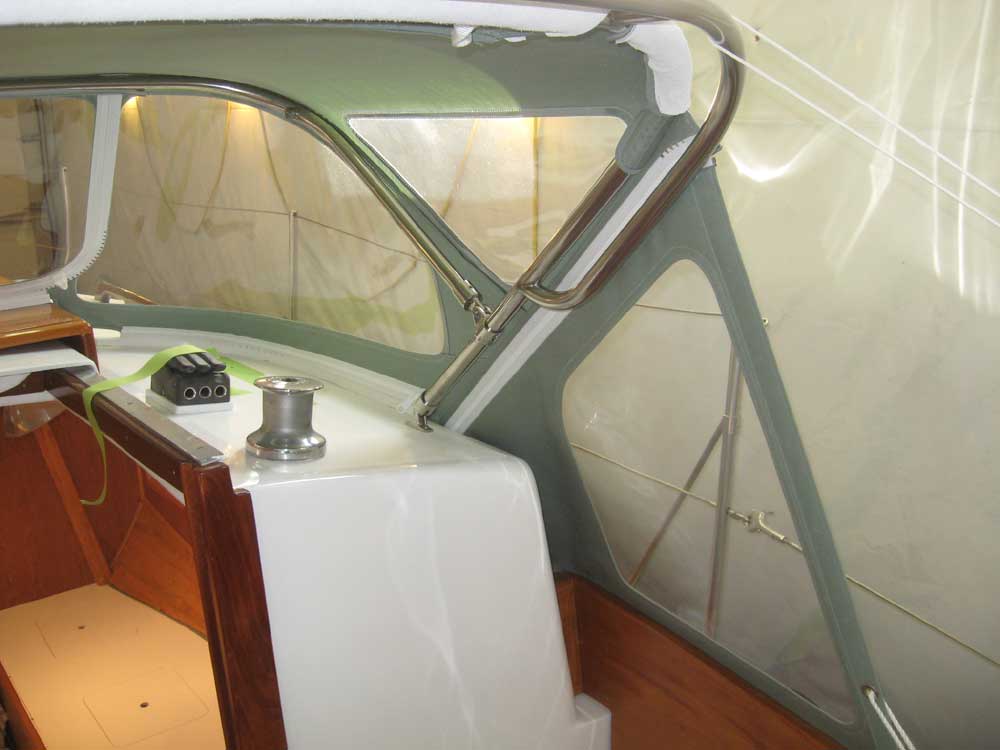
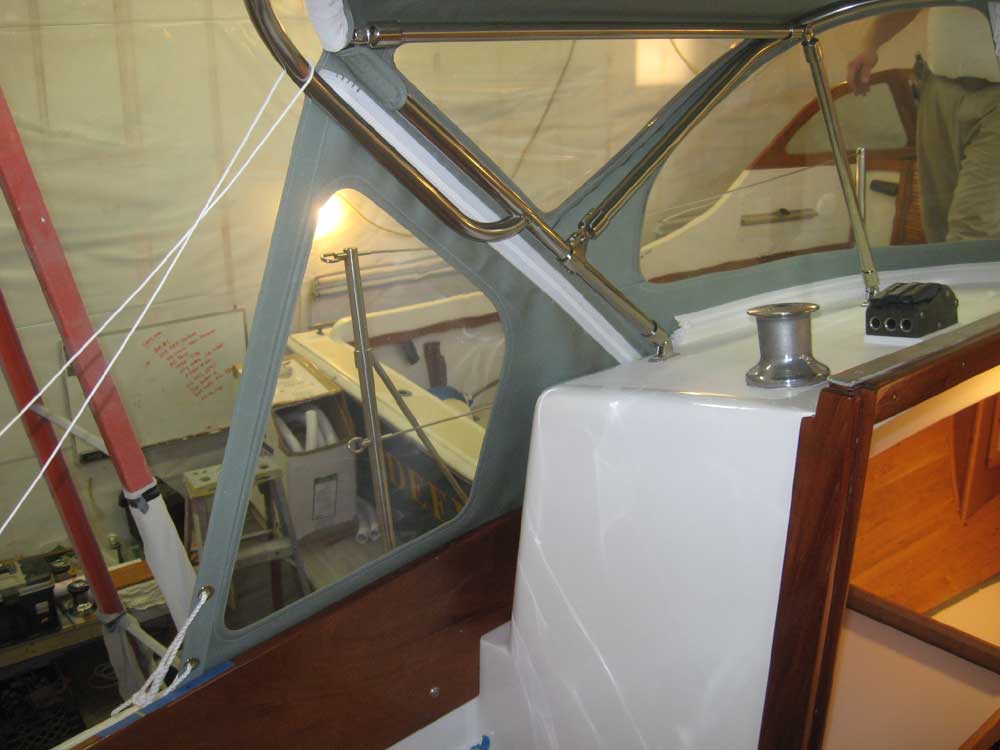
Of some long standing concern to me was the interplay between the tiller and tiller head and the proposed mainsheet position behind the cockpit. We'd long ago dispensed with a traveler, choosing instead to rely on a rigid boom vang to offer the same sort of sail control, and similarly rejected the idea of a mid-boom sheeting arrangement. The initial idea had been to use a horse, mounted somewhere behind the cockpit, to span the tiller and provide a centerline mainsheet attachment. This would have worked had the rudderpost exited the deck near a 90° angle; at the 45° angle that we had to work with, however, the tillerhead and strap simply ended up projecting too far, and while the horse idea would work with the tiller in its service position, it would greatly interfere with the potential to raise the tiller up out of the way when not in use, as seen in these photos--unless the horse was mounted much further aft, which would interfere with the lazarette hatch. |
|
|
|
Therefore, I thought of reverting to a mainsheet system with two attachment points on deck, similar to the original setup found on these boats and many others of similar vintage. This would offer a cleaner, simpler installation, and would avoid the clearance issues. Further investigation and research into the appropriate hardware is pending. |
|
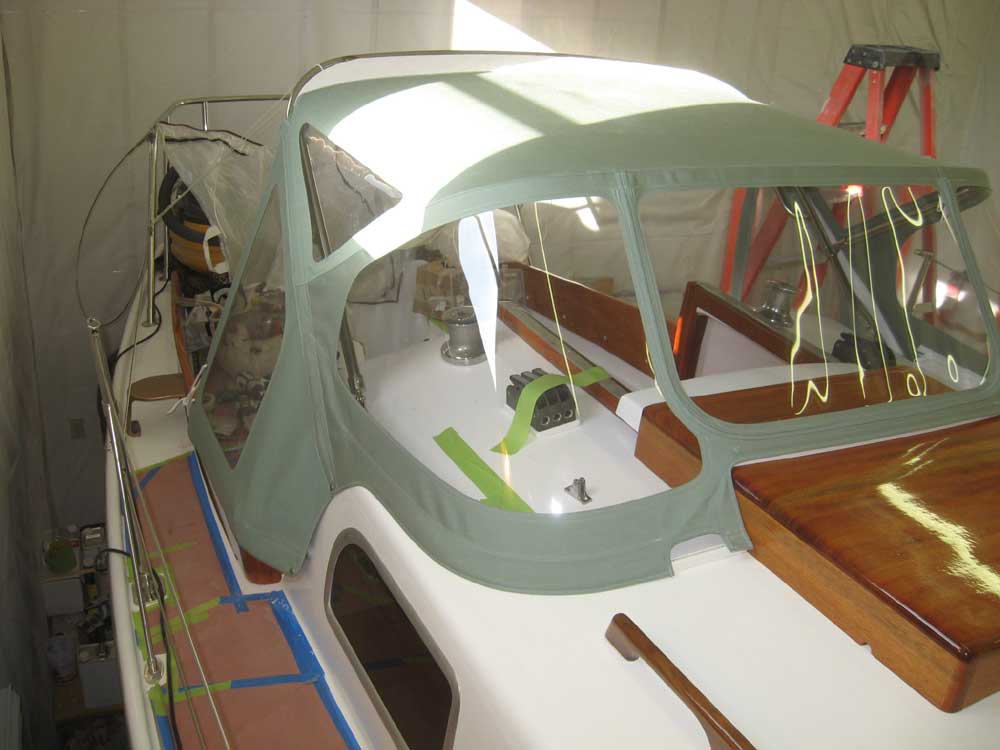
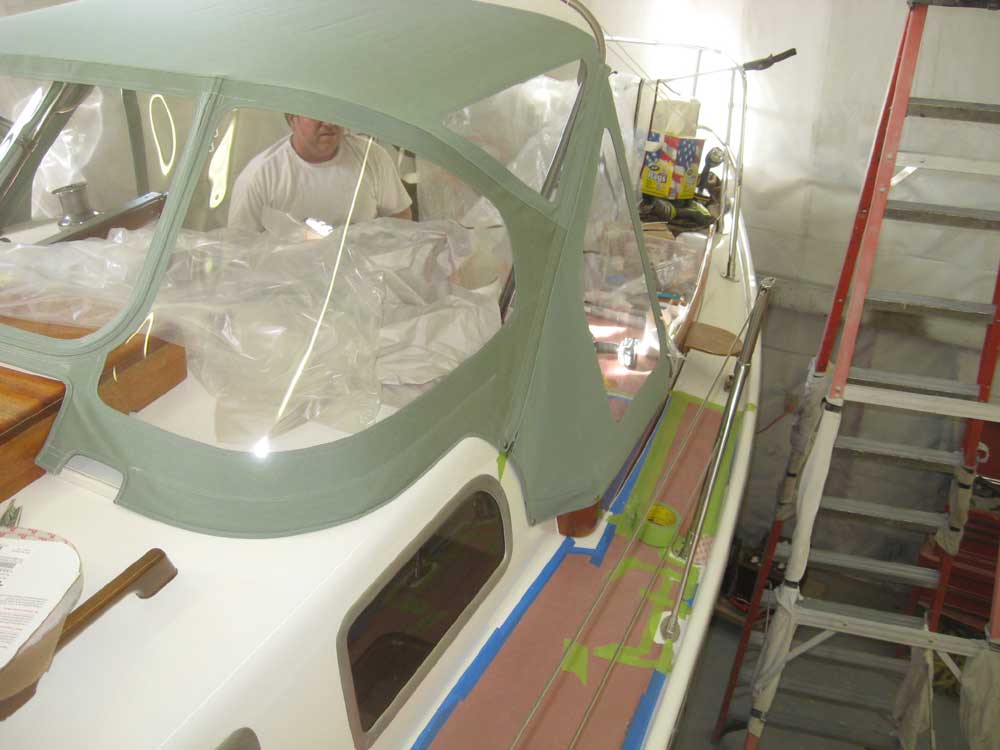
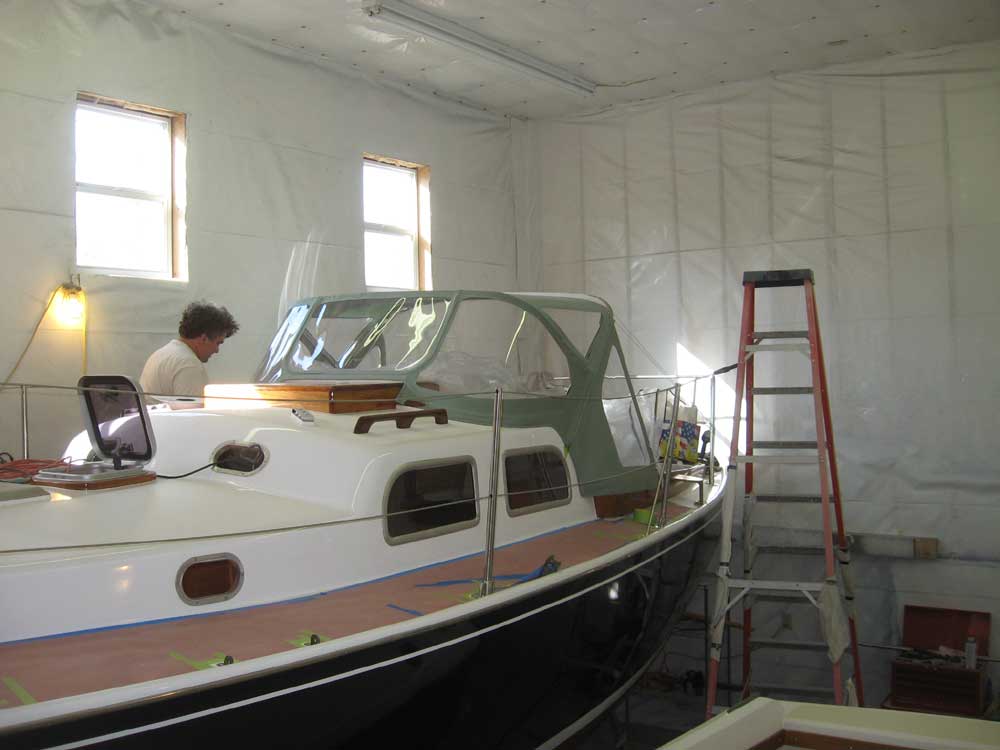
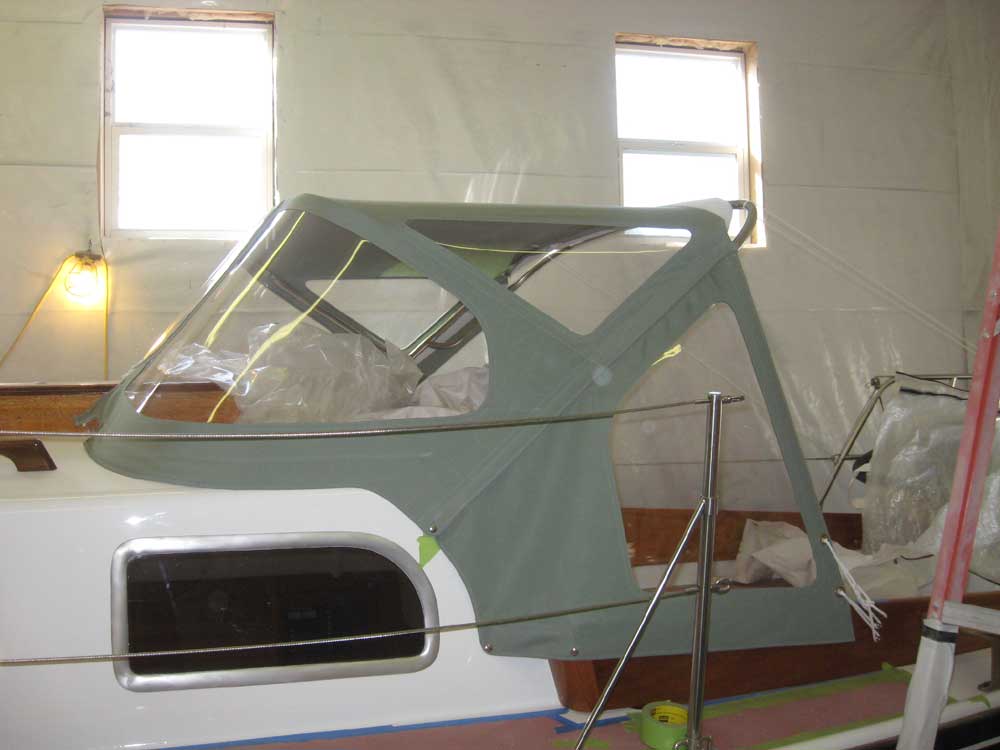
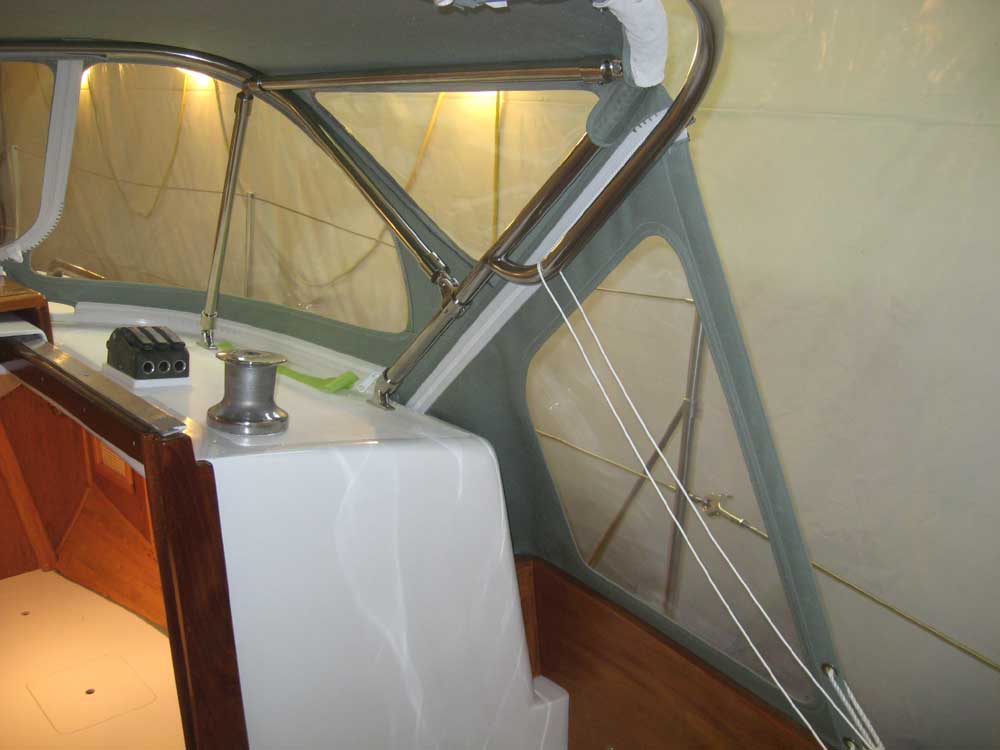
During the afternoon, Seth from Mobile Marine Canvas was back with the dodger for its more or less final fitting. Seth's installation process requires one additional visit beyond this one, as his meticulous fit requires installation details that occur incrementally. We'd experienced a few hiccups in Seth's original schedule for this installation, as it should have occurred a week or two ago, but, having made my position on that as clear as I could with him, we moved on more positive places. During a long afternoon, we installed the dodger, marked and installed the few snaps required to hold sections against the cabin trunk and coamings, and cut and installed the rigid interior bracing that would support the dodger, particularly when the removable wings were off. The dodger fit beautifully, and required no significant changes (as expected). I thought the chosen color was a grand success and, pending final installation details, the dodger was a fine addition to the boat--aesthetically and functionally. That said, Seth identified a few minor issues, including wing tie-down lines that were too short, and in which the splice was longer than ideal for this installation; the zippers for the removable wings were installed the way he normally does, with the zipper operable from the inside of the dodger, but that didn't work on this boat, so he'd reverse those. The final installation also required several snaps through the fabric and frame, to hold the canvas tightly against the tension required for its good fit, and these could only be marked and installed during this fitting. Finally, still ahead was some final work on the dodger frame, including wrapping the handgrip in leather and final polishing around the welds. Also, the forward section of the interior bracing, which was installed for this test with rigid tubes, would be replaced with adjustable braces to ease installation and allow proper tensioning of the canvas. In addition, the rope groove at the leading edge of the dodger required the installation of a slot to allow the short section of rope between the halyard opening and the seahood to be installed. Note that in all today's photos, this short section of the dodger is not installed, affecting the tension of the dodger in its forward center portion. In between now and the final installation, promised in about a week, I'd remove the new deck mount required for the forward brace and reinstall it properly with bedding and so forth. Also expected during Seth's next visit would be the interior cushions; he'd used the tail end of this visit to mark the steep angles of the aft end of the starboard berth on a piece of foam so he could recreate it accurately for the final installation. Note that some of these photos were taken before the installation of the permanent interior bracing, and some after. We'll all use this public opportunity to help Seth hold to his next promised (and final, for this job) appointment, currently either next Thursday or Friday. |
 |
|
|
|