
110 Cookson Lane | Whitefield, ME 04353 | 207-232-7600 | tim@lackeysailing.com
Ashantee | Monday, April 13, 2015
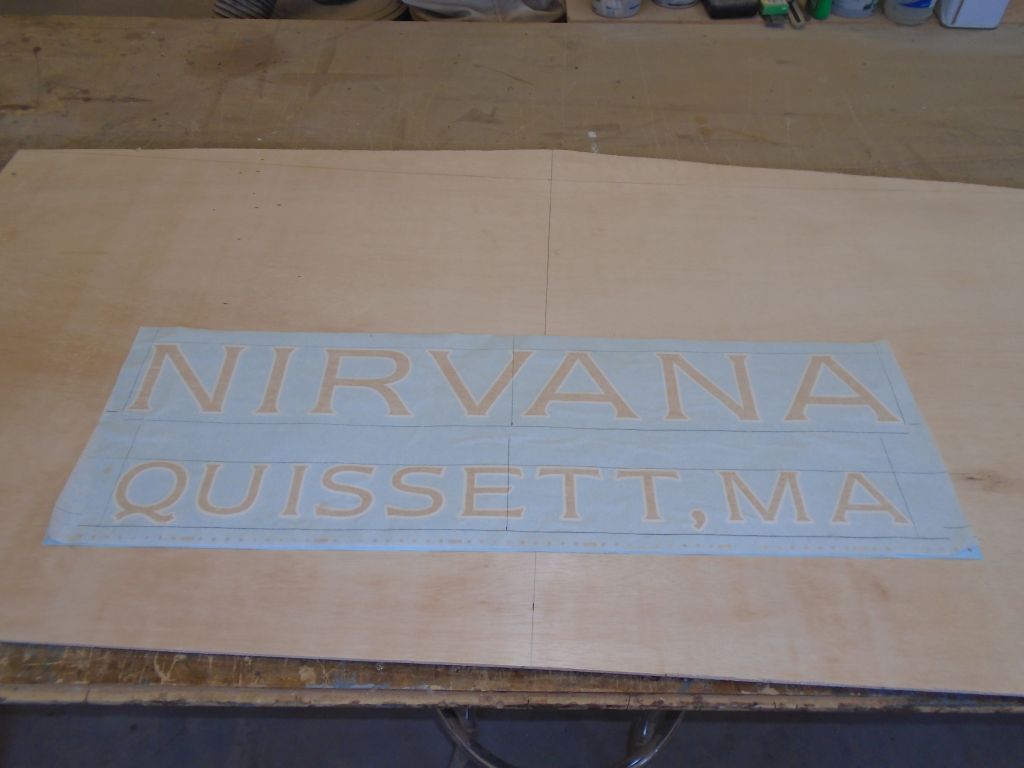
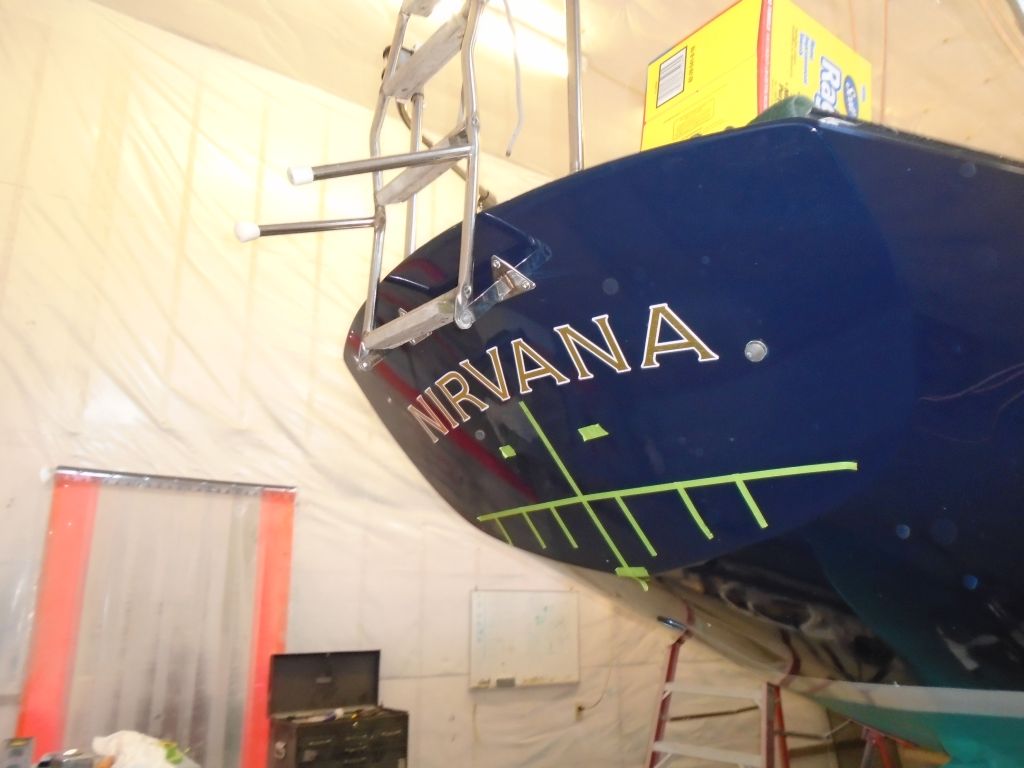
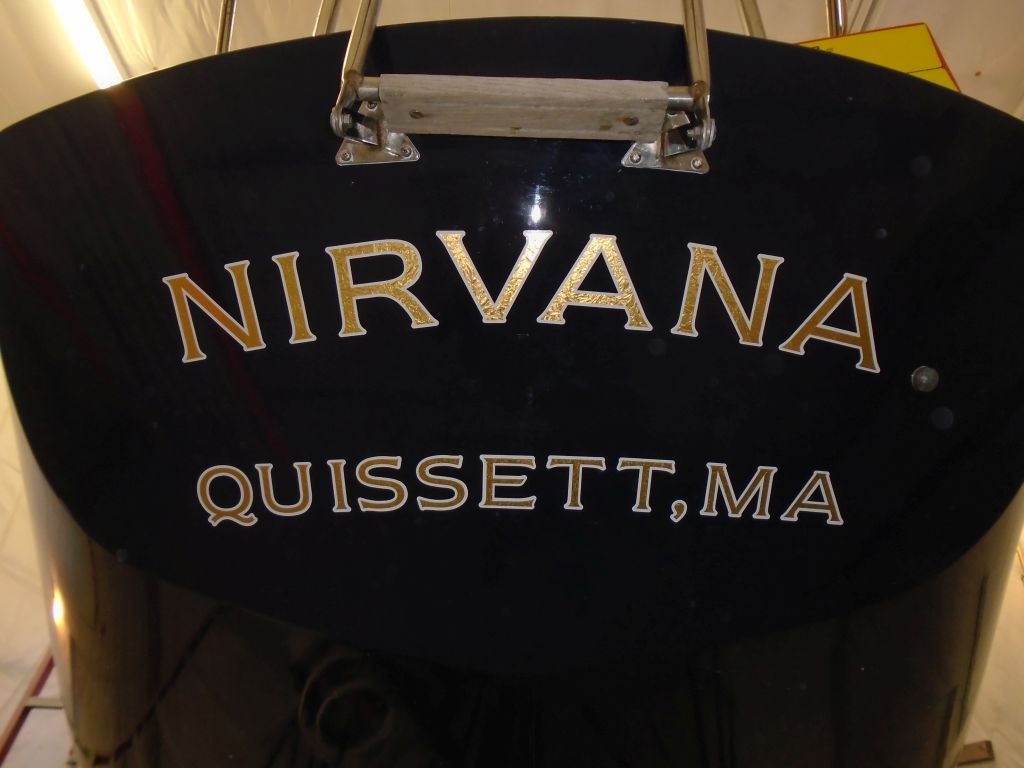
I though I'd get the day started with the new name and hailport on the transom. I'd had these made to the owner's specifications at a local graphics shop. I started by striking some reference lines on the vinyl masking to help me align the vinyl, and separated the name and port from one another for installation. I kept my horizontal reference lines 1/2" below the lettering in each case to help with installation later.
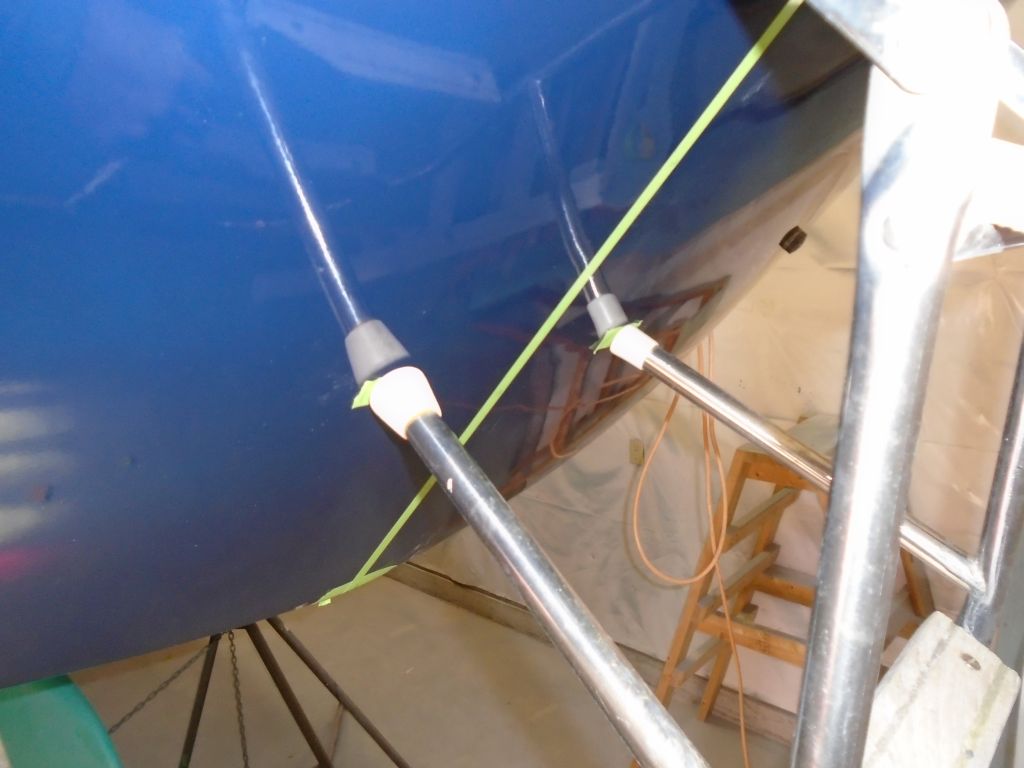
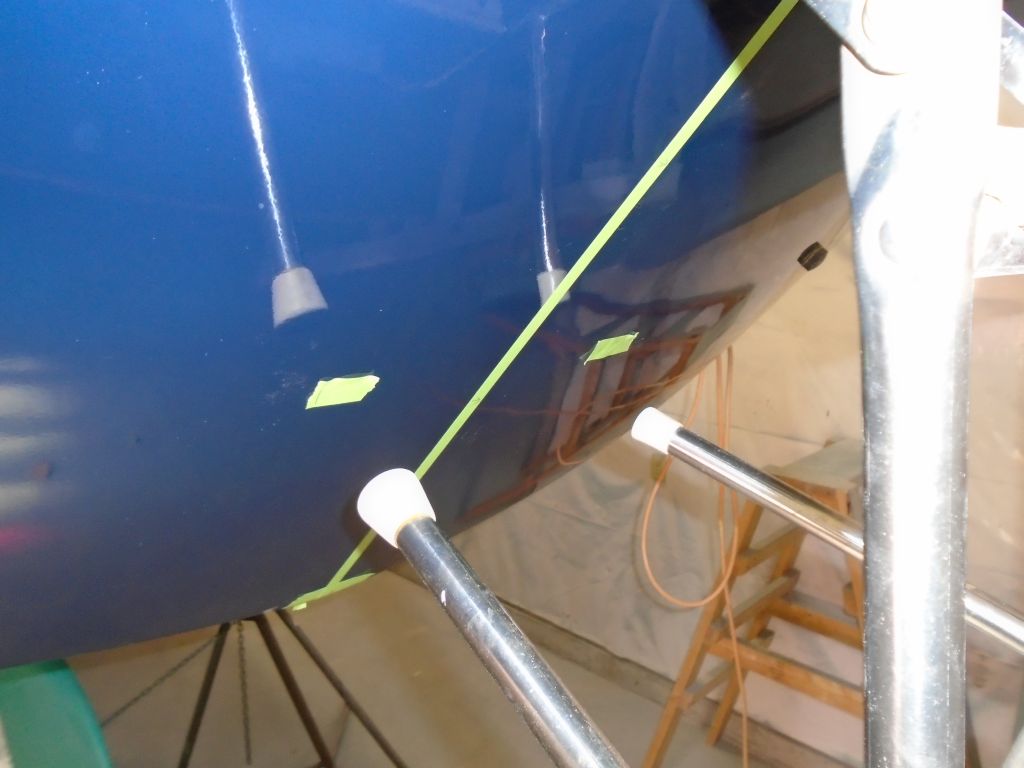
The way the stern boarding ladder worked, with its two supports that rested against the transom when lowered, I wanted to ensure that these bearing locations were not directly on top of any of the lettering, so I lowered the ladder (because of close clearance with the shop wall, I had to unbolt the swinging part of the ladder in order to do so) and marked where these supports rested against the hull.
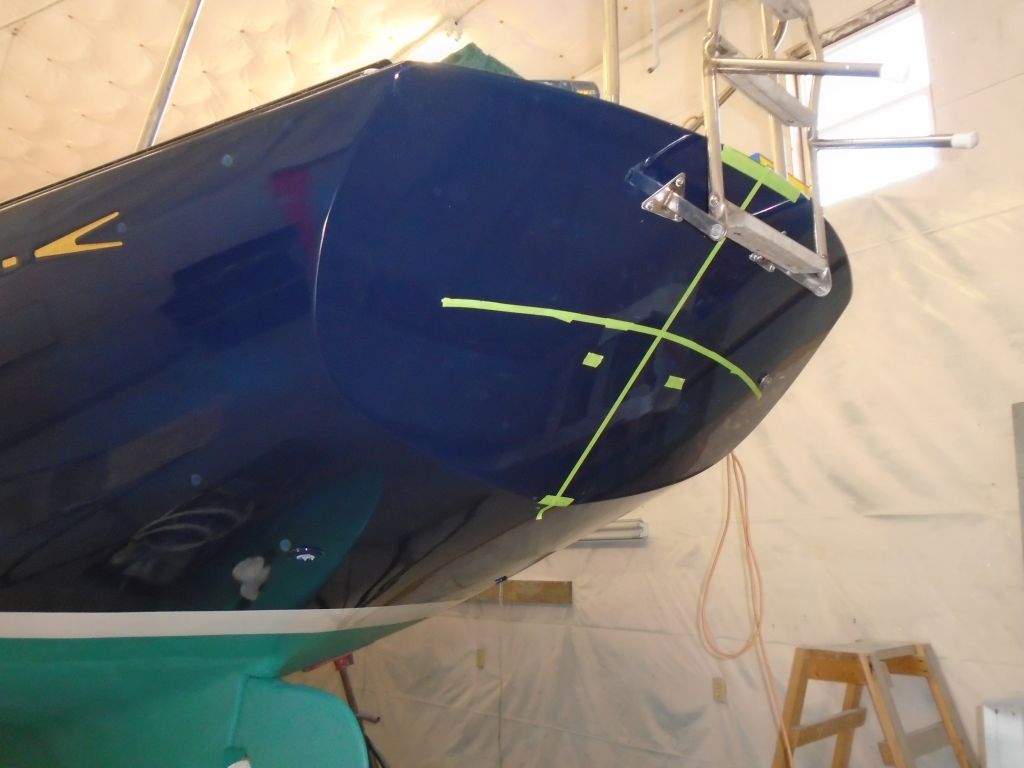
I used tape to mark a vertical centerline on the transom, then determined where to place the name, juxtaposing between the boarding ladder mounts, the two bearing surfaces I'd marked, the fuel tank vent on the starboard side, and basic visual and cosmetic concerns. Once I'd made the basic determination, I measured off the top of the transom in several areas and marked a consistent measurement in several places, creating a lightly arced line that paralleled the transom crown. The top of the masking tape represented a line 1/2" below the actual bottoms of the letters, which matched the layout line I'd drawn on the vinyl masking.
In order to curve the name to this line, I made cuts between the letters as needed, and dry-fit the name to check the fit and make some final reference marks. Then, I installed the name.
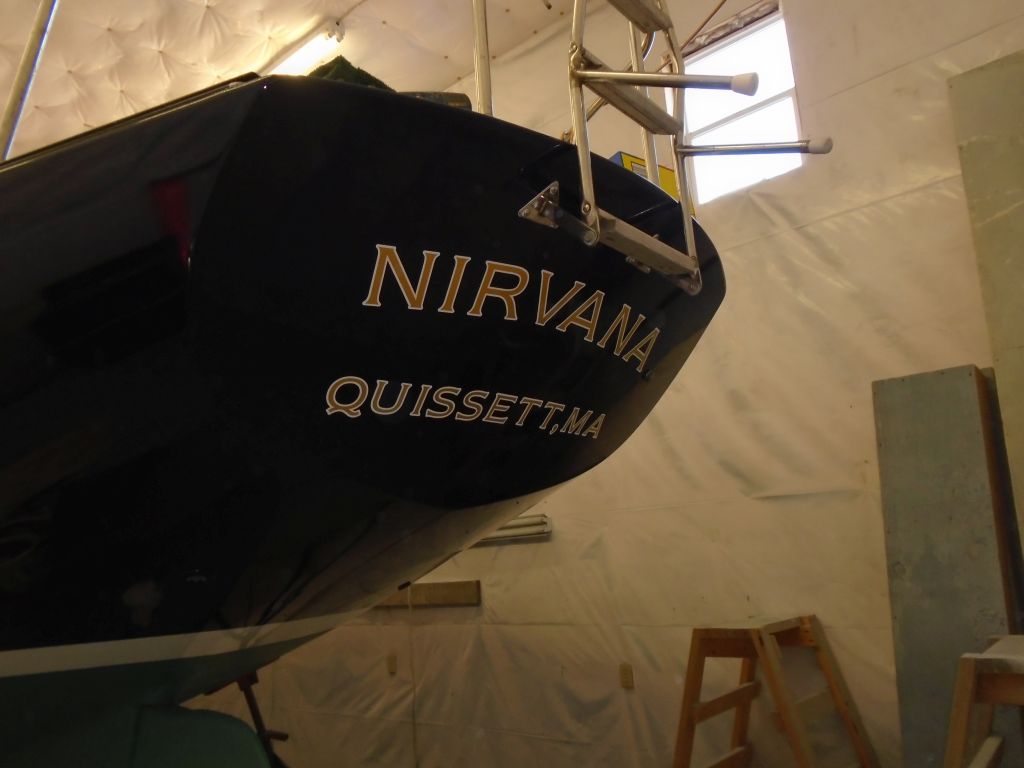
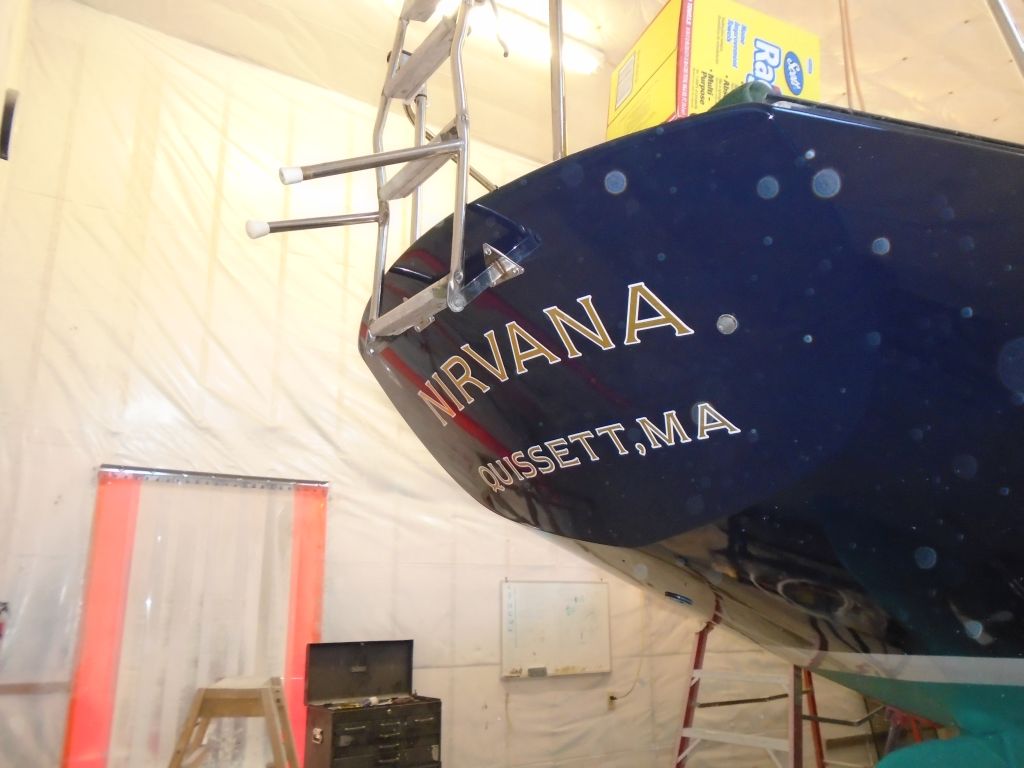
Keeping the lettering below the ladder marks on the transom, I laid out for the hailport next. Here, I created a visually horizontal line across the transom, though this still described an arc thanks to the camber of the surface. As before, I had to make cuts in the vinyl masking to allow the lettering to match the slight arc required across the transom.

With layout complete, I installed the hailport according to the reference marks I'd made.
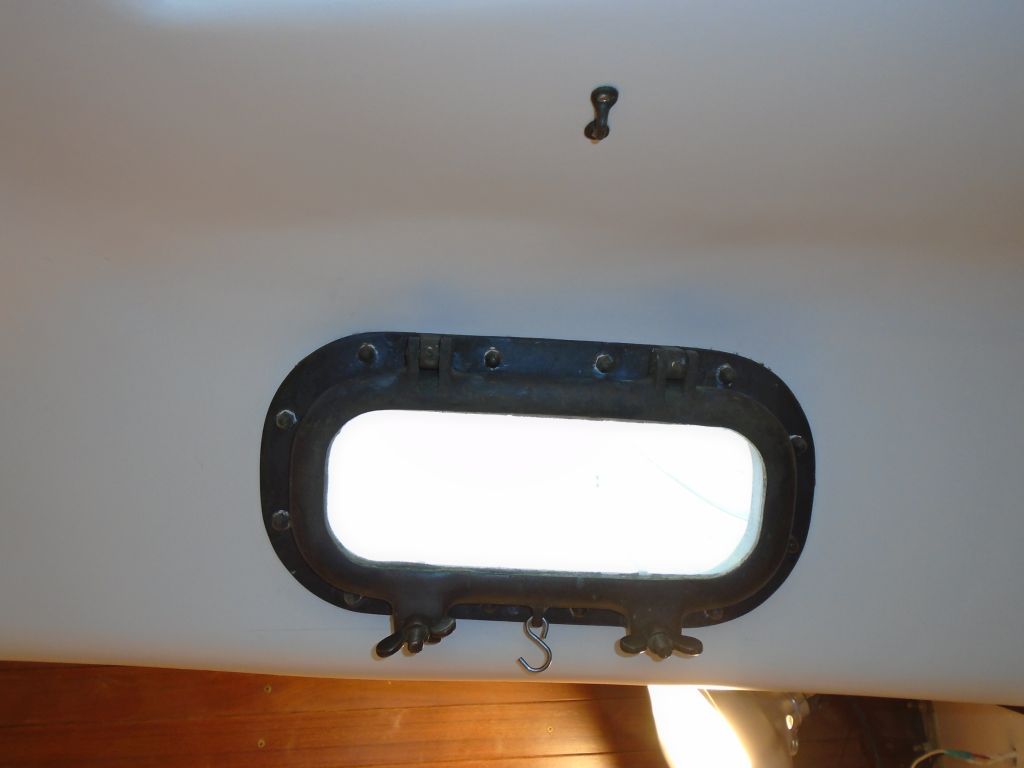
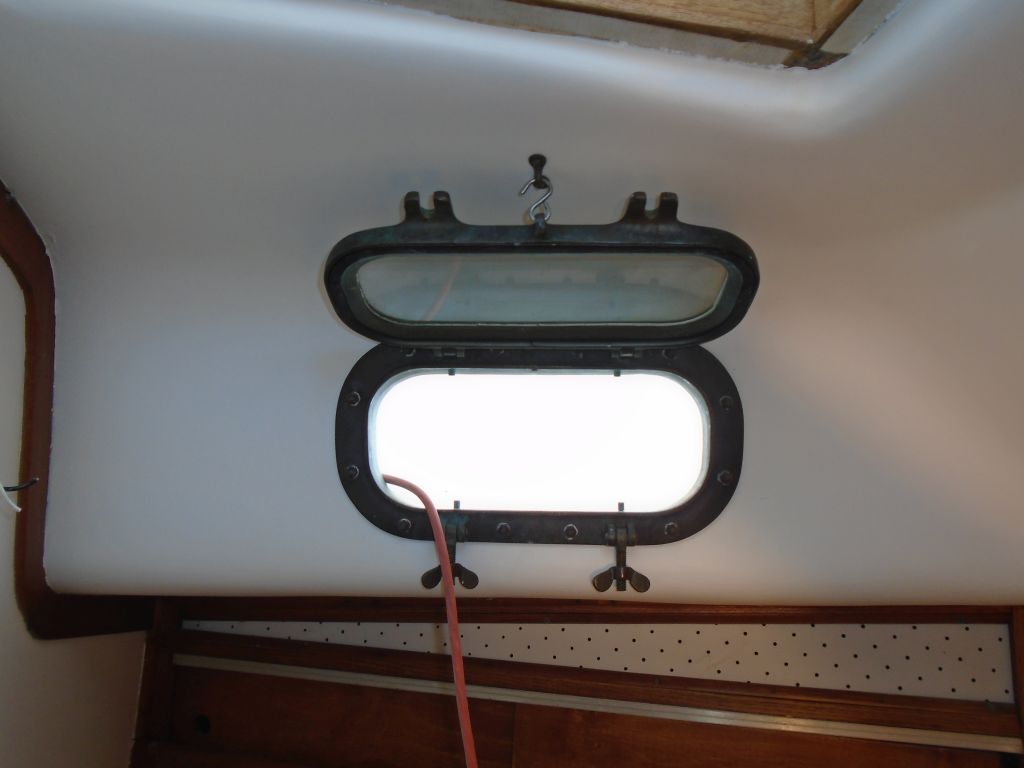
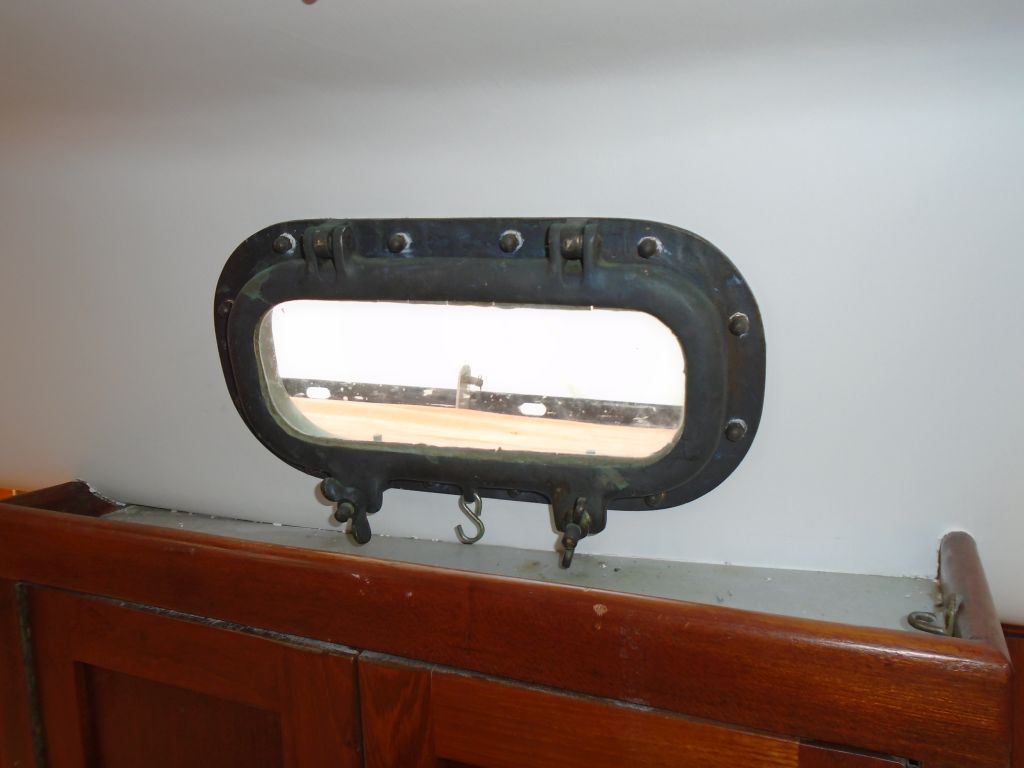
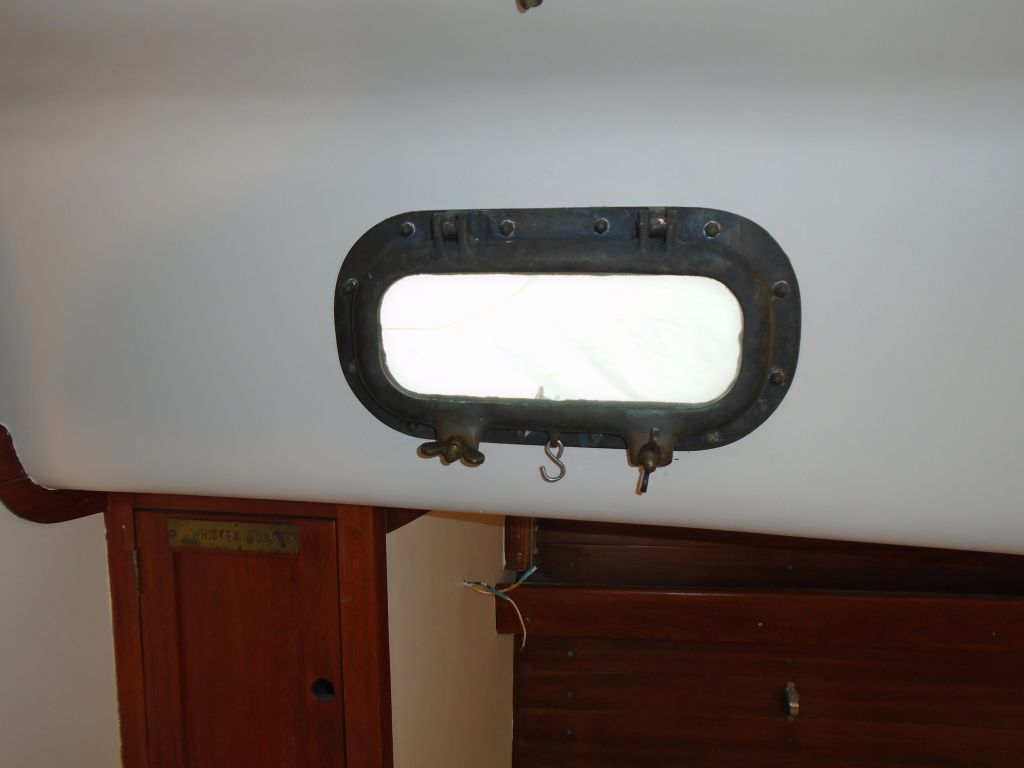
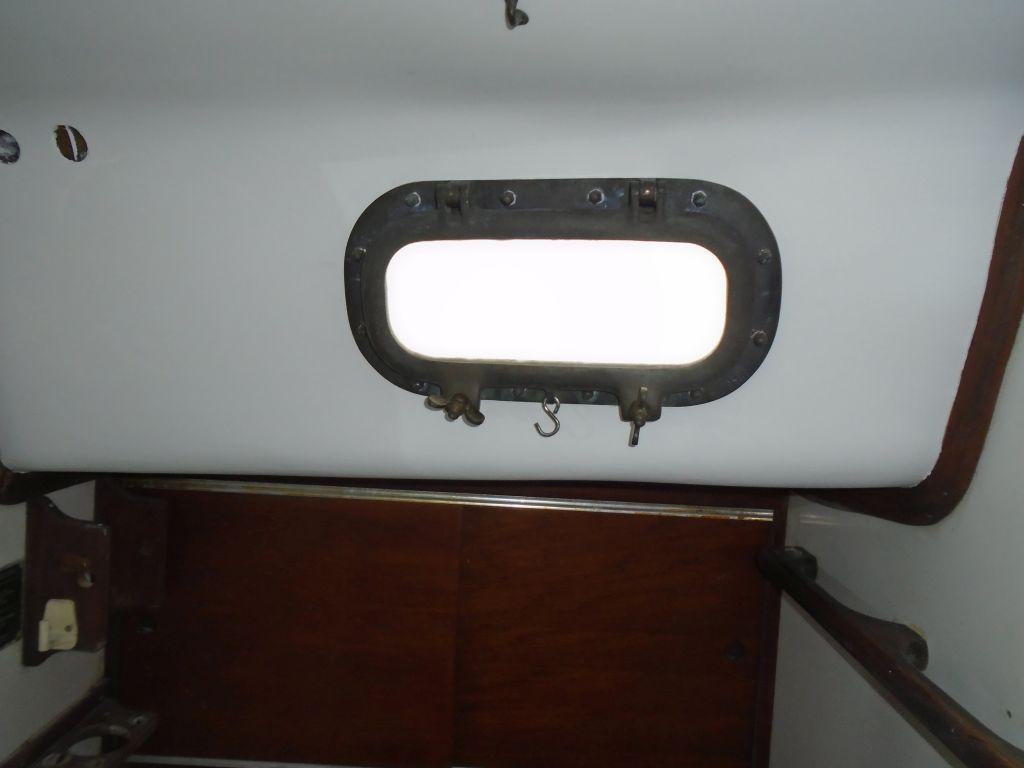
Back inside the boat, I returned to work on the opening ports. Each port had twelve protruding bolt ends that I needed to cut off. I also wanted to leave room for the original bronze cap nuts to finish off the raw bolt ends. So for each bolt (working in groups of four at a time), I spun on a second hex nut, then broke off the excess bolt length beyond the new nut with locking pliers.
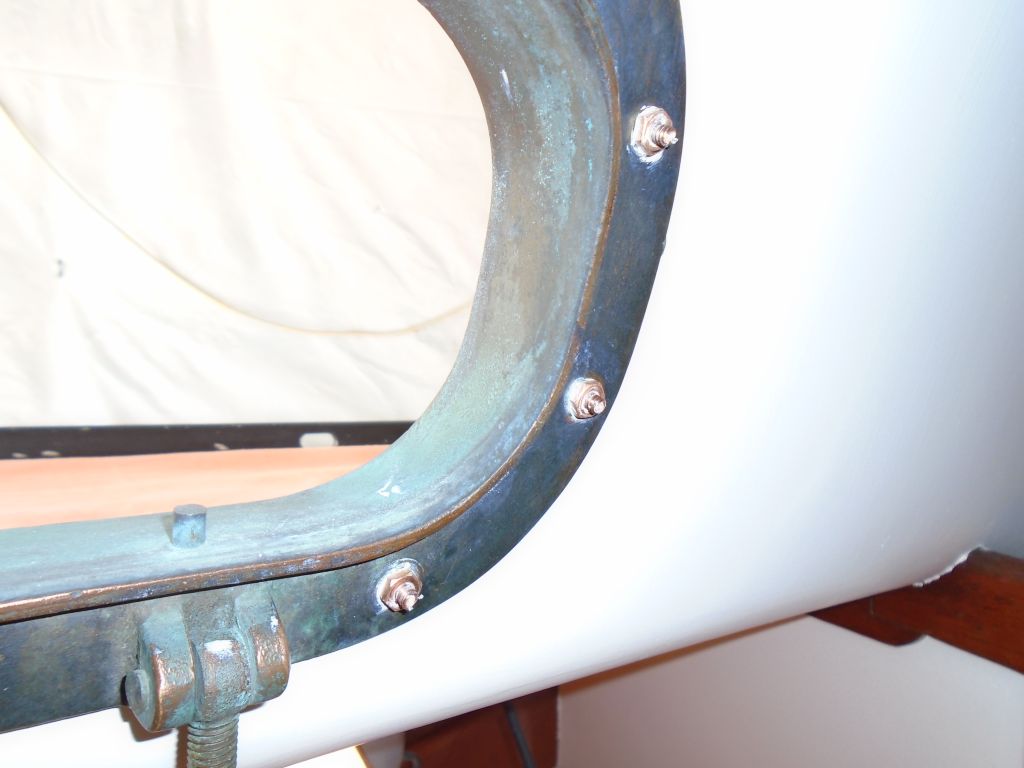
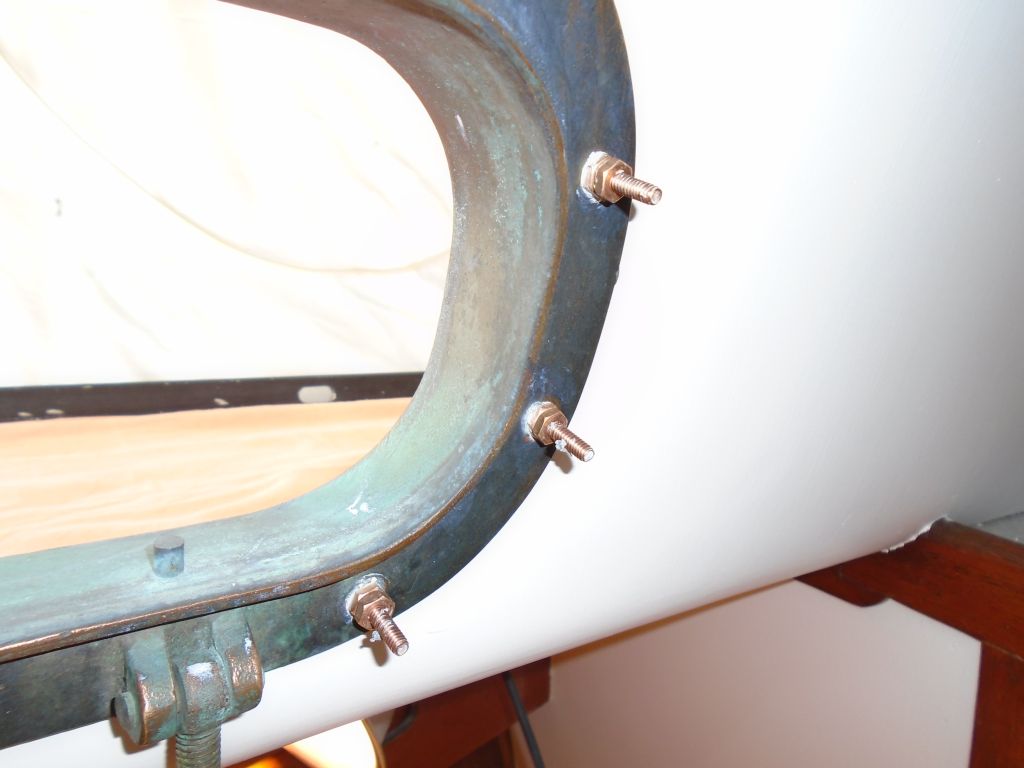
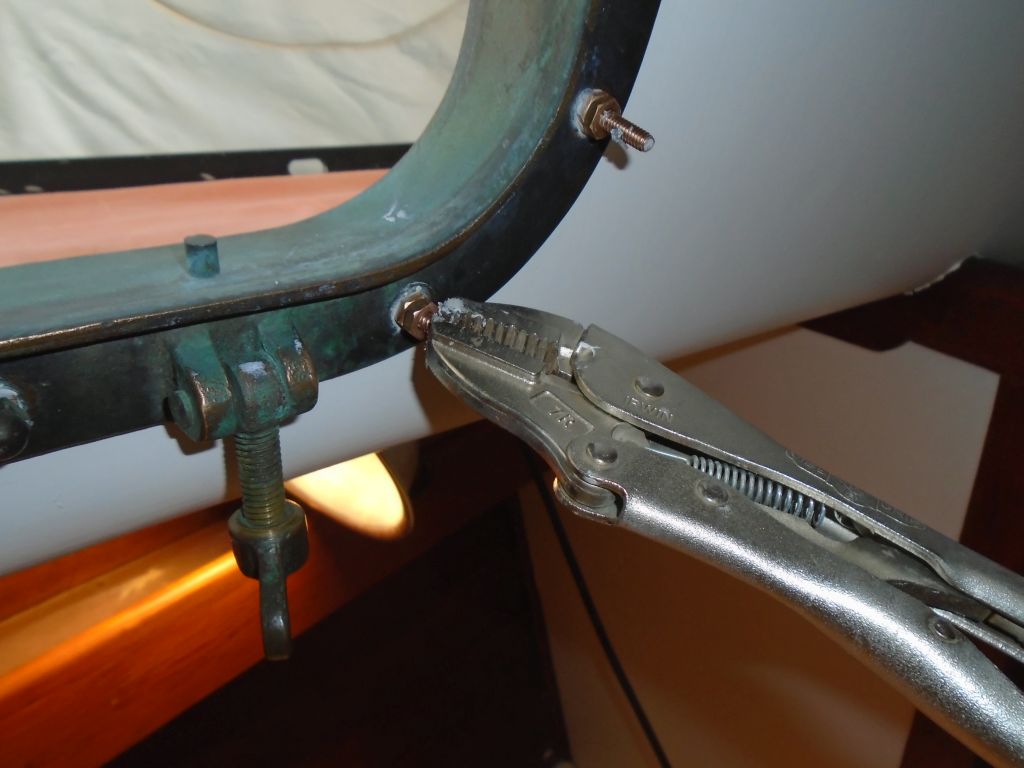
The second nut left just the right amount of threads for the cap nuts, and the act of removing the nuts worked to restore the threads at the cut end, allowing me to install the cap nut to finish off the appearance.
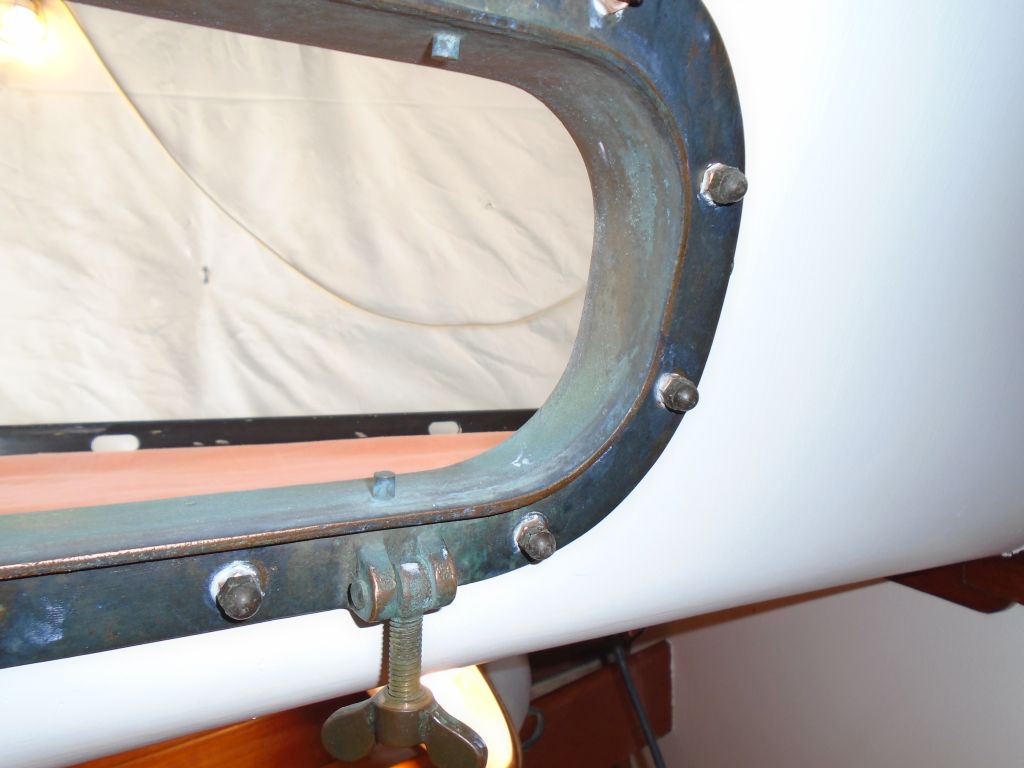
In this way, I finished all 72 bolts. Meanwhile, I reinstalled the little strap eyes above each port that allowed the opening part to be secured when open.

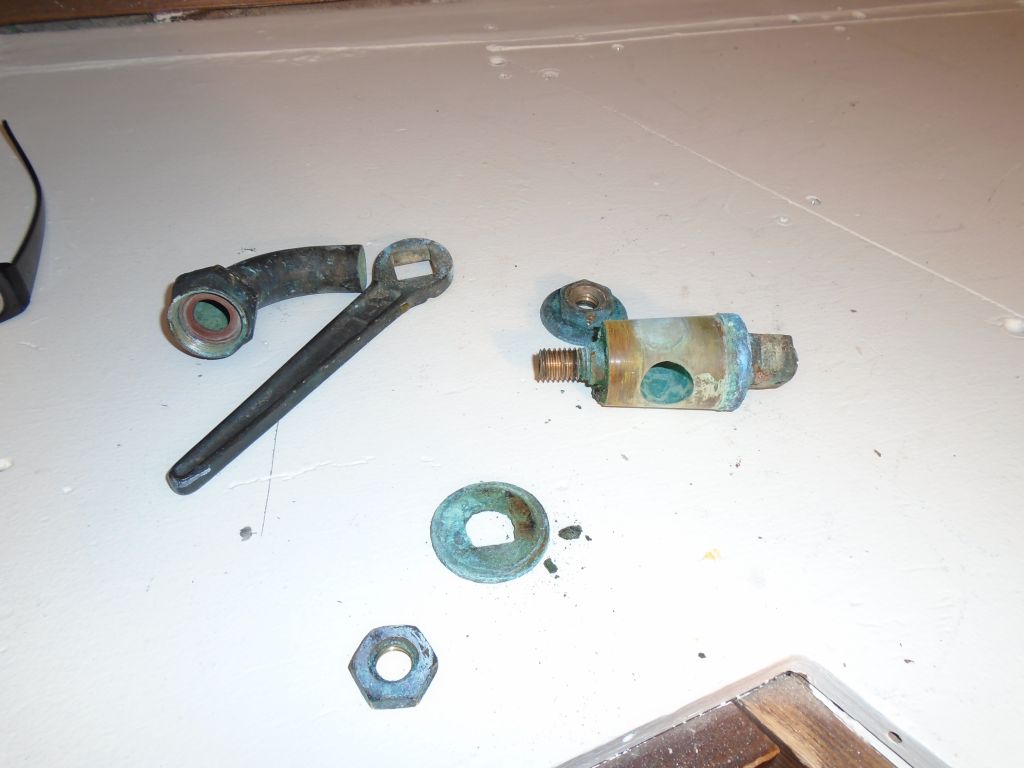
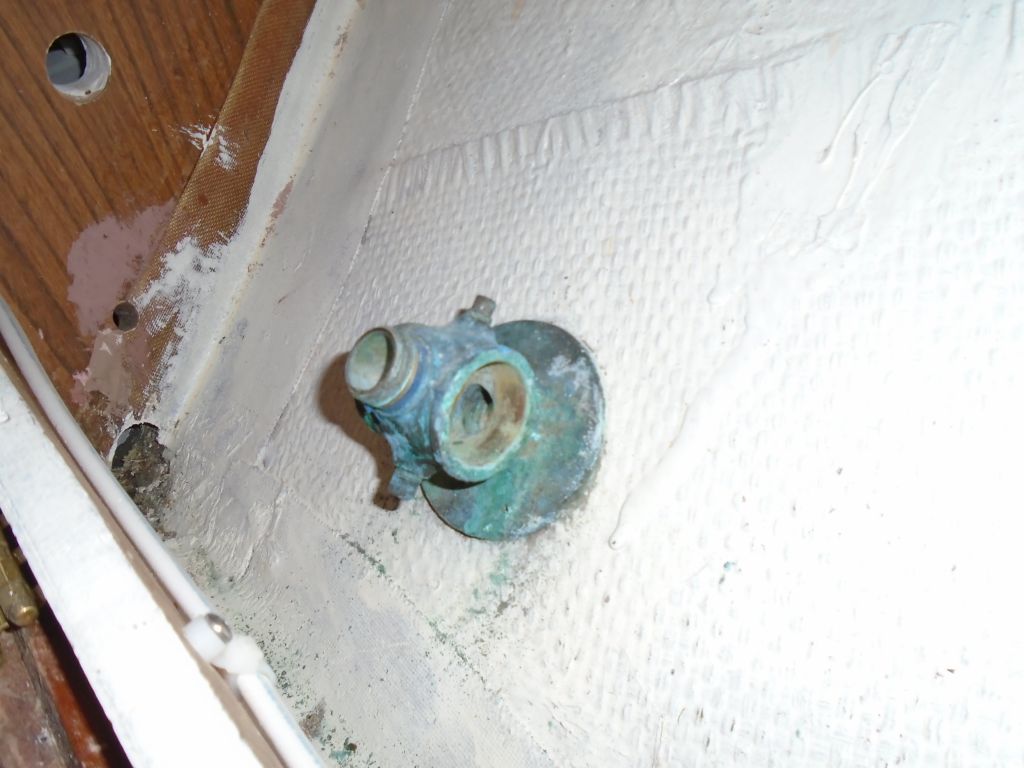
With most of the big jobs now complete, I started to work my way through a laundry list of other tasks requested by the owner, starting with the head intake seacock, which he said continually (and gently?) wept. A tapered plug valve, I hoped that disassembly and maintenance (lapping and regreasing) would take care of the problem. Typically these plugs simply require the lapping process to allow them to seal tightly over time, particularly when the valve hasn't been fully or properly maintained over its lifespan.
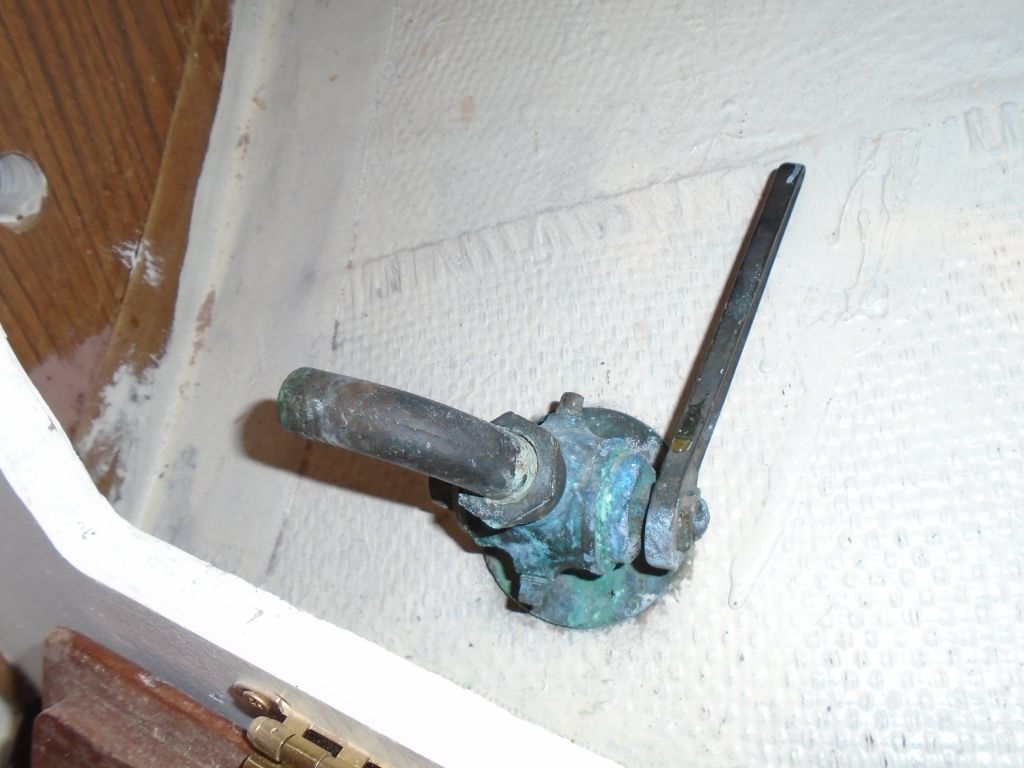
I knew that the valve had operated several months ago, but I found that the residual corrosion had locked it in the closed position, but I broke it free with a wrench and soon had the seacock disassembled for inspection. Although I was sure I'd once bought a container of valve lapping compound, I couldn't lay my hands on it, so I ordered more, along with the seacock grease required, and would continue work on the valve once the new materials arrived. The various components looked to be in good condition, and I saw no reason why normal maintenance shouldn't take care of the leak.
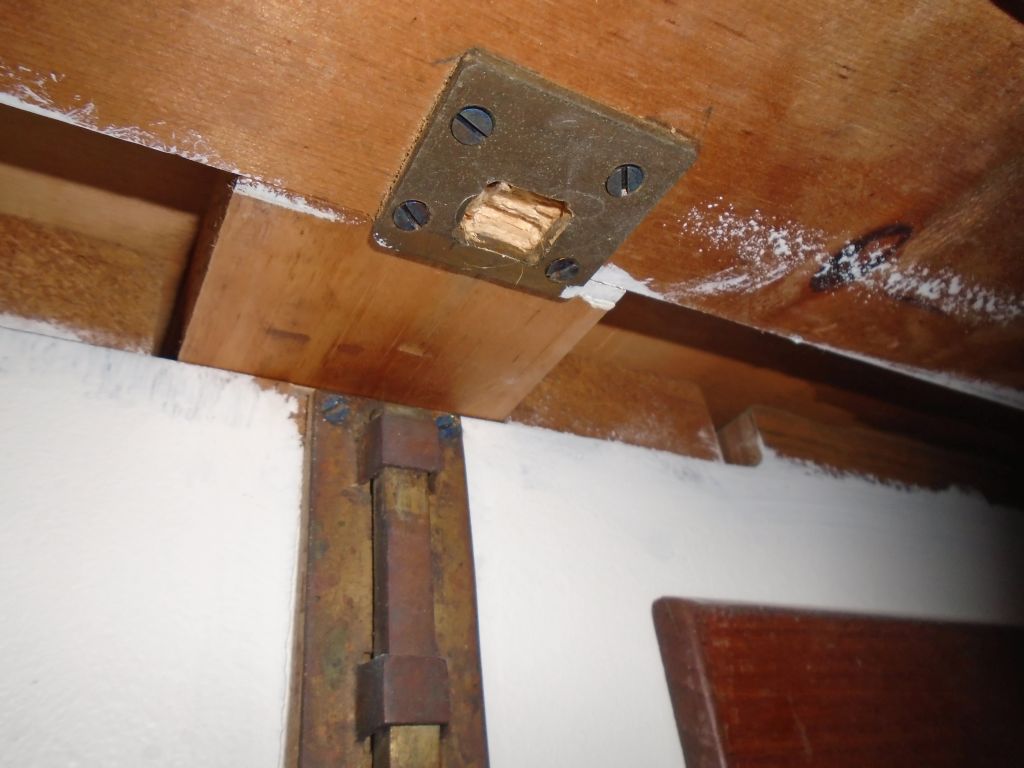
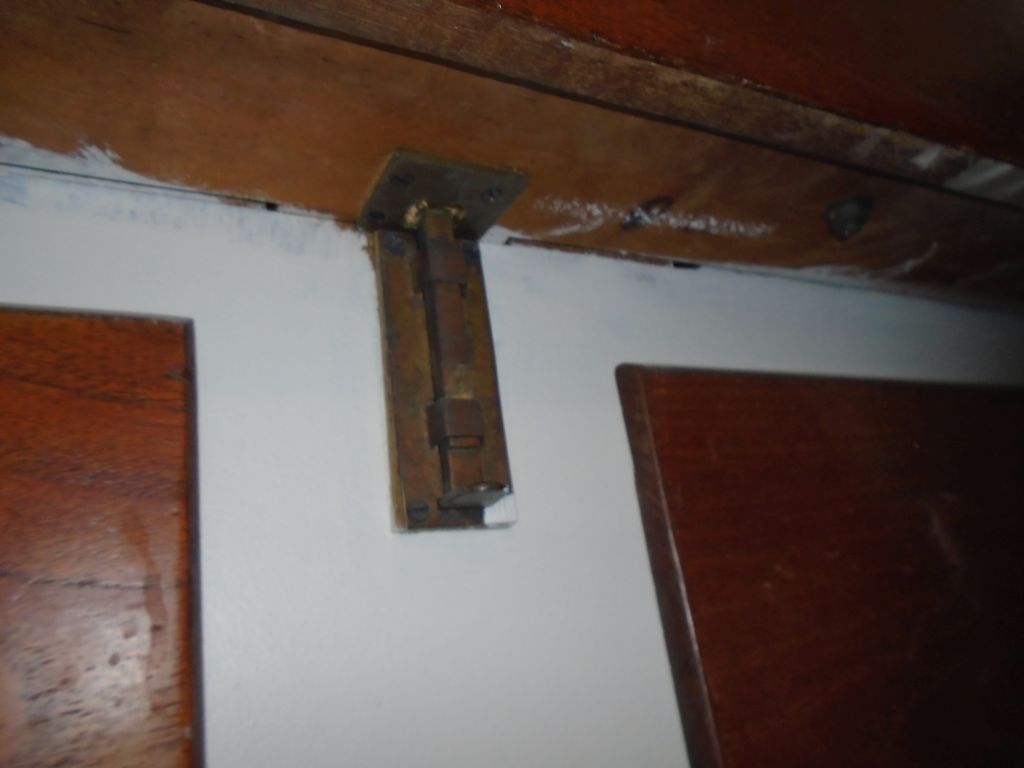
Next on my little list was the sliding starboard settee berth, which the owner said didn't latch properly when closed. The latch, a simple slide bolt beneath the center of the overhang, worked well, and engaged its metal strike plate, but to help drive the latch home just a little more for a more positive action I chiseled out some wood within the strike plate.
The finger latch for the engine room door also didn't engage properly, as the strike/catch was located just a bit too far aft for the spring-loaded catch to--well--catch. I repositioned the catch just far enough forward to give me new wood to resecure it with longer screws, and this did the trick.
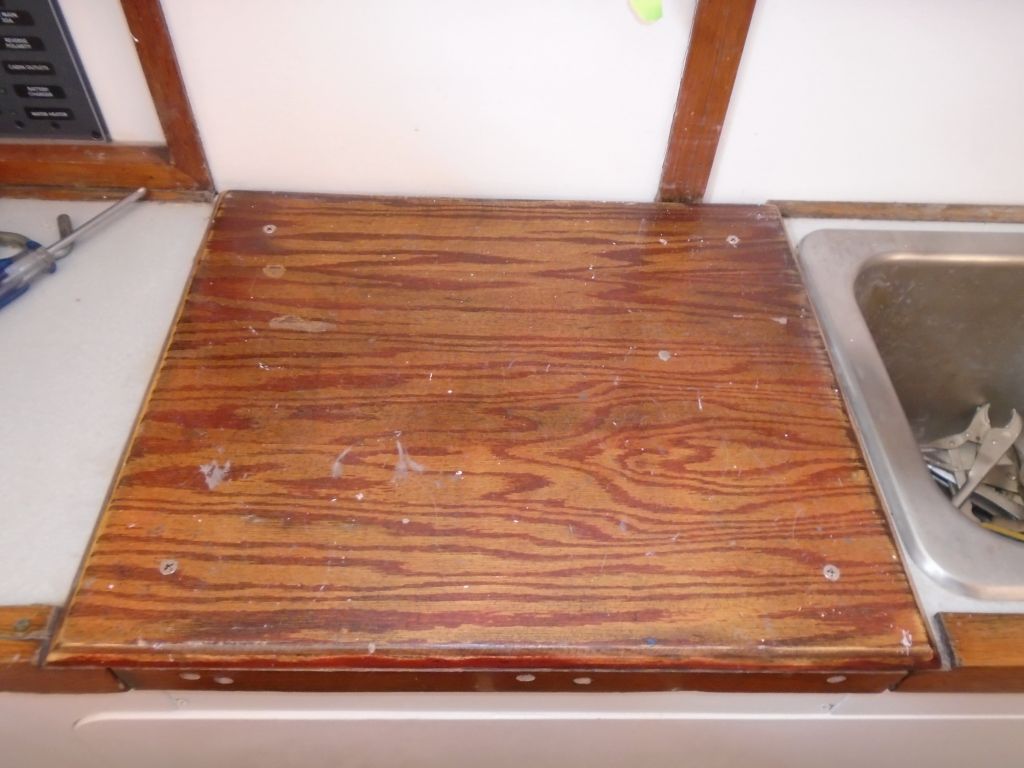
A plywood step pad on the countertop at the companionway had been once secured with (wait for it) silicone sealant, which had either failed or had been pried apart to allow the top engine access panel beneath to be removed. Since the step pad did need to be removable for this reason, I chose to secure it with four countersunk surface screws, allowing future access while holding the pad in place.
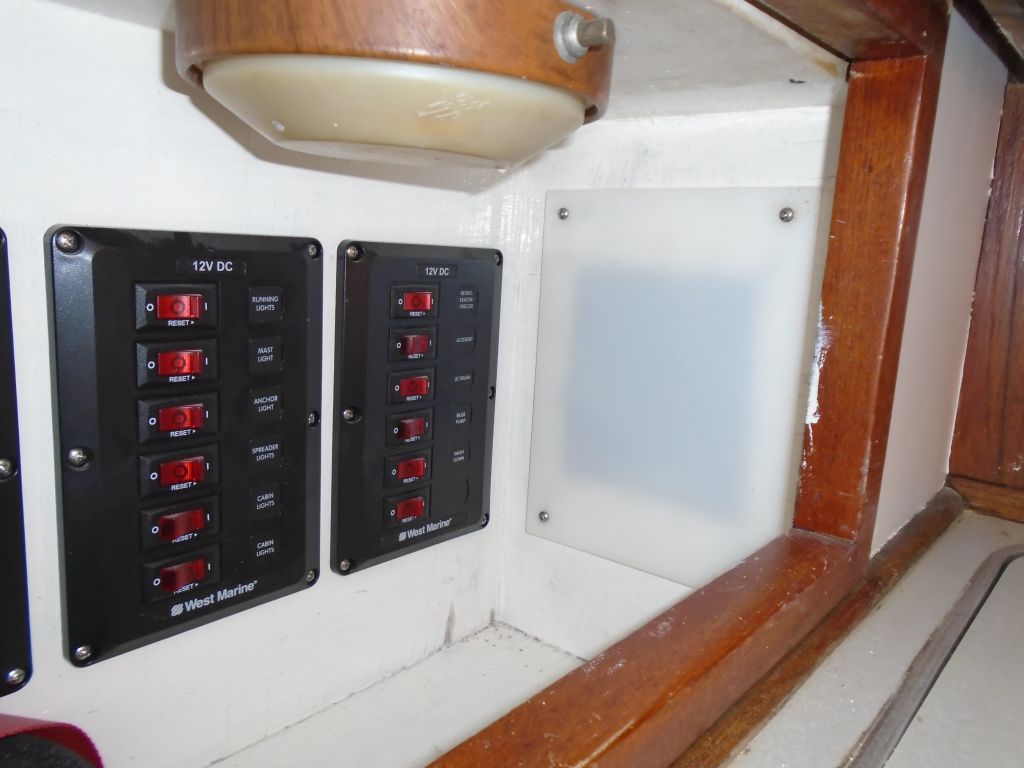
Next door, in the recessed electrical panel area, the owner requested that I cover an old panel hole on one side. I found a piece of white acrylic that was perfect for the job, and cut it to size before installing it with screws. The minimal translucence of this panel was not visible in this way without the effects of the camera flash.
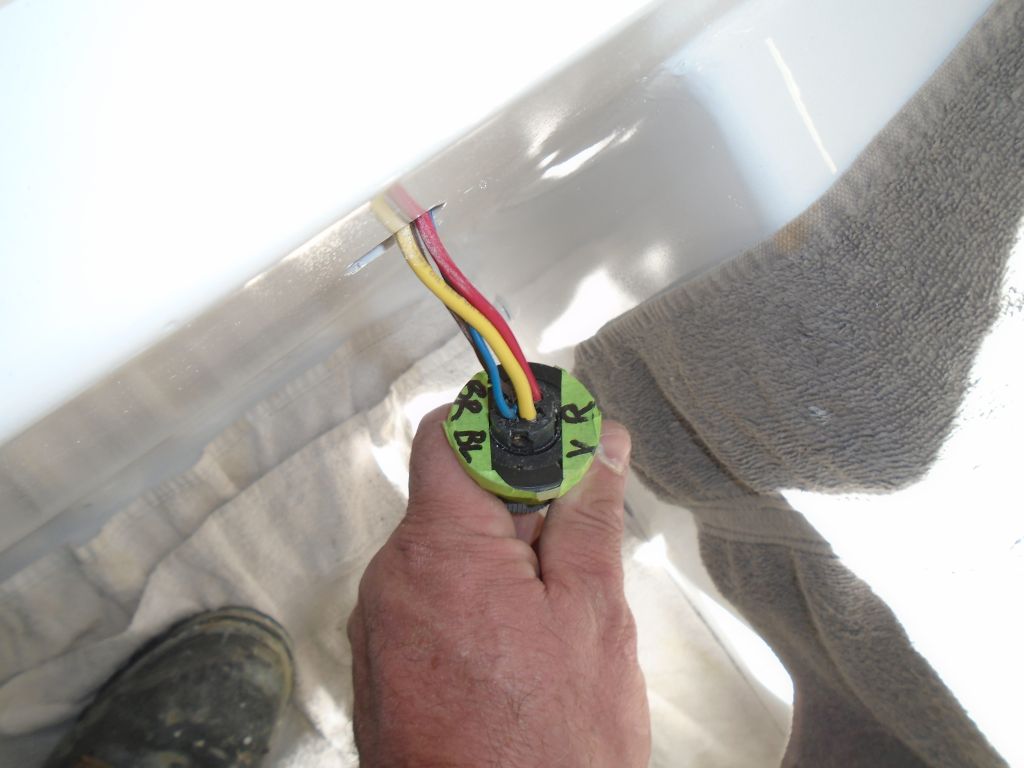
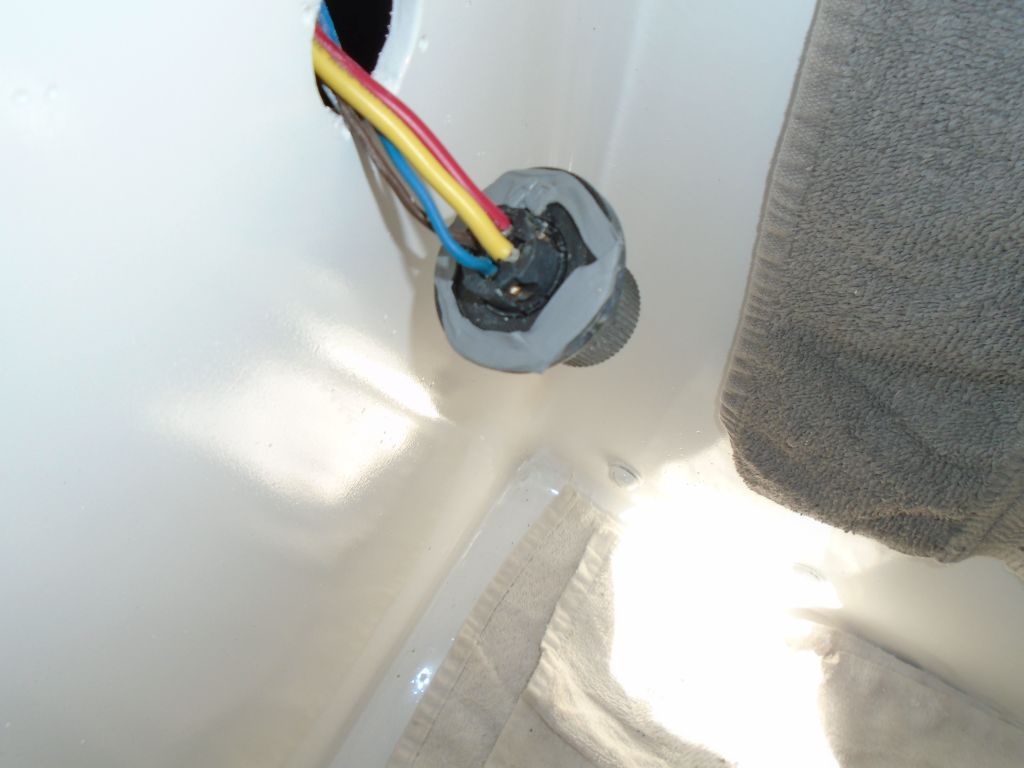
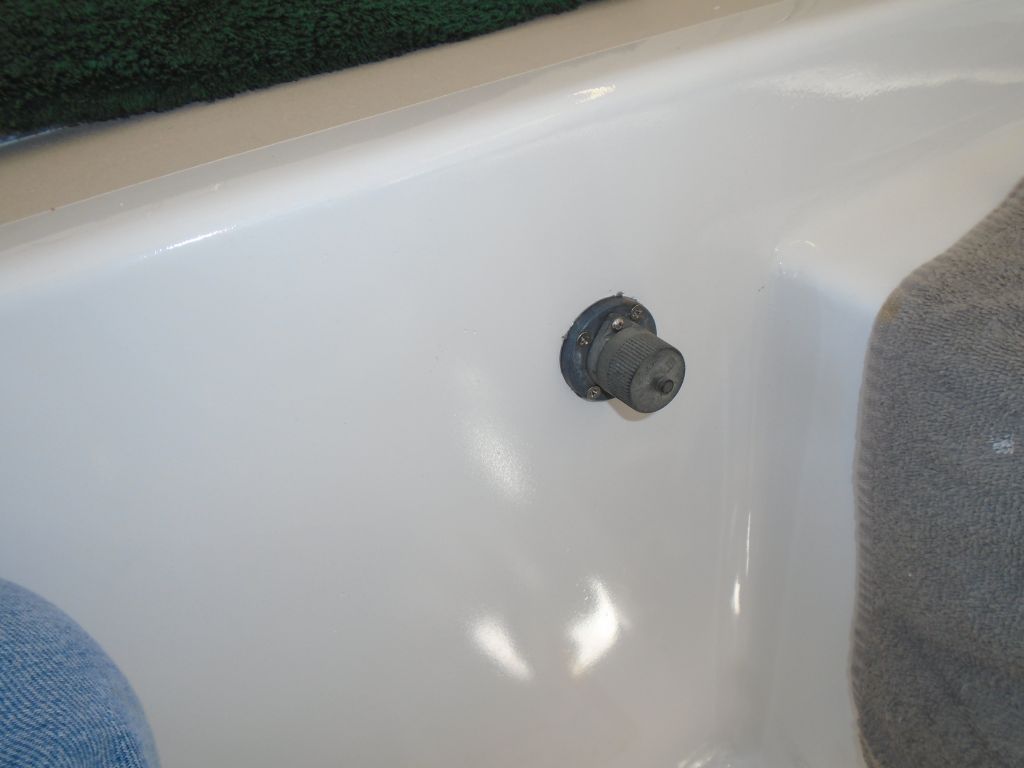
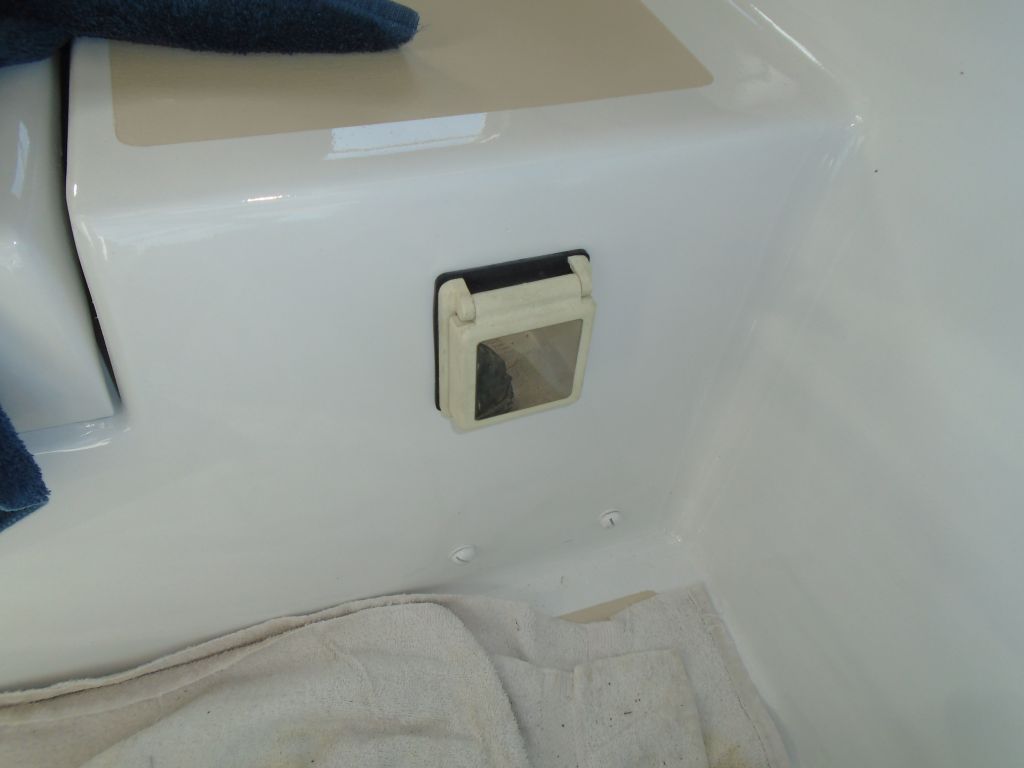
In the cockpit, there were a few things still requiring reinstallation, starting with a round outlet plug at the aft end. I reinstalled the wiring according to the marks I'd made during removal, then installed the outlet with some butyl tape sealant.
Next door, I reinstalled the shore power receptacle on the starboard side.
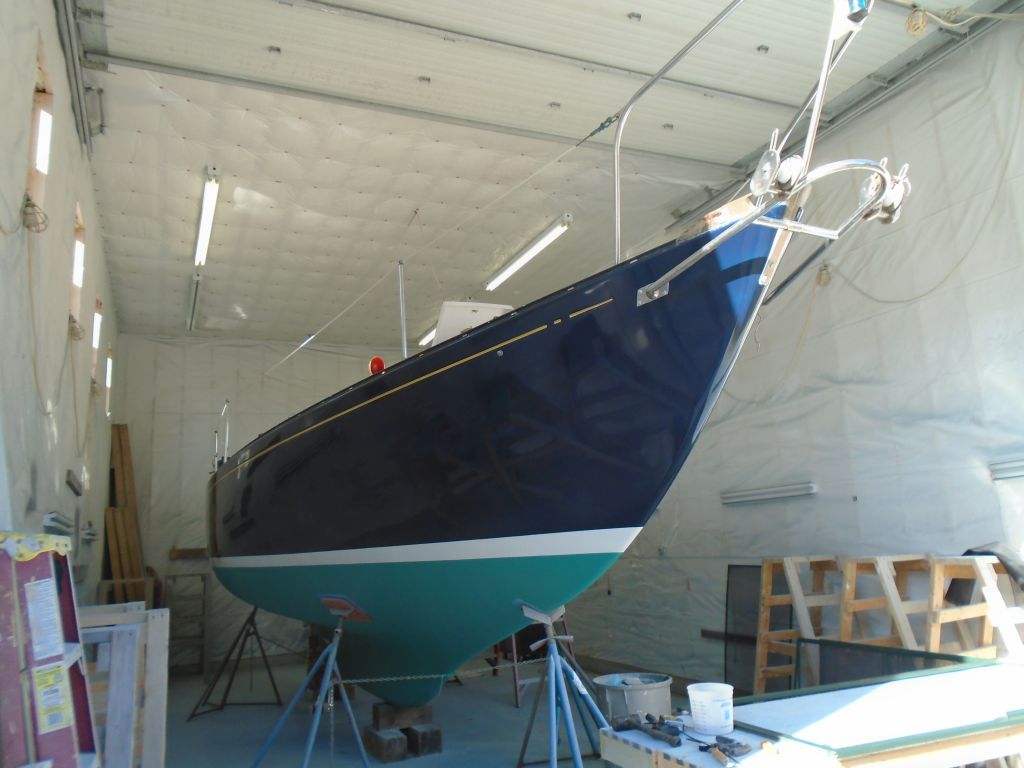
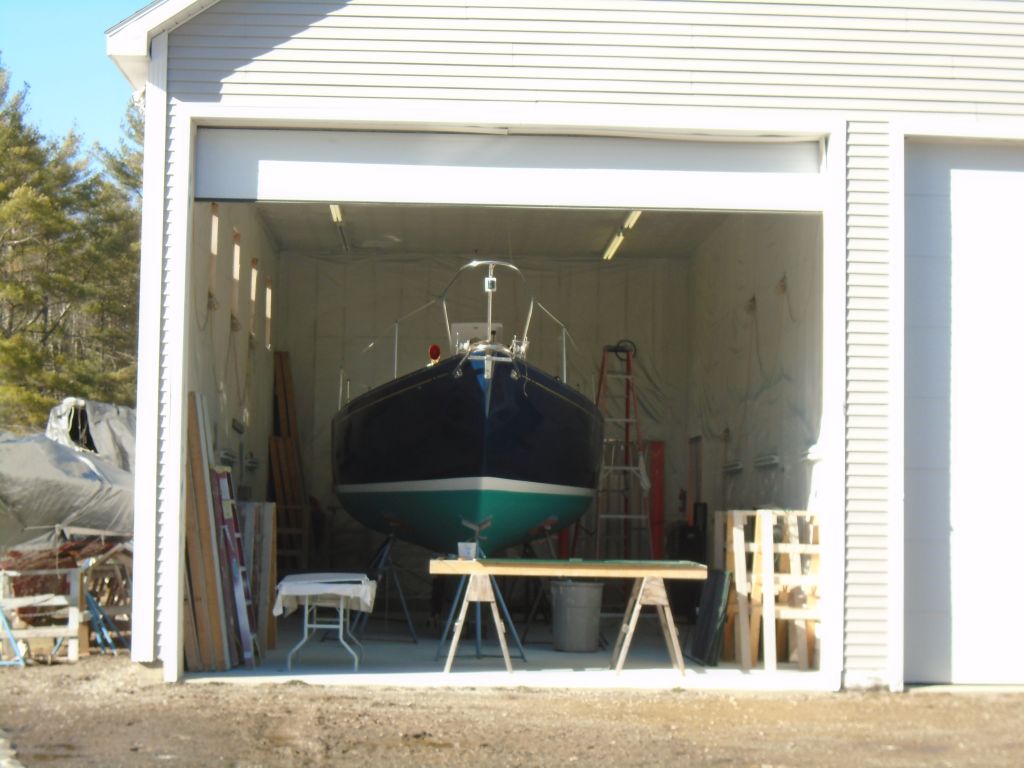
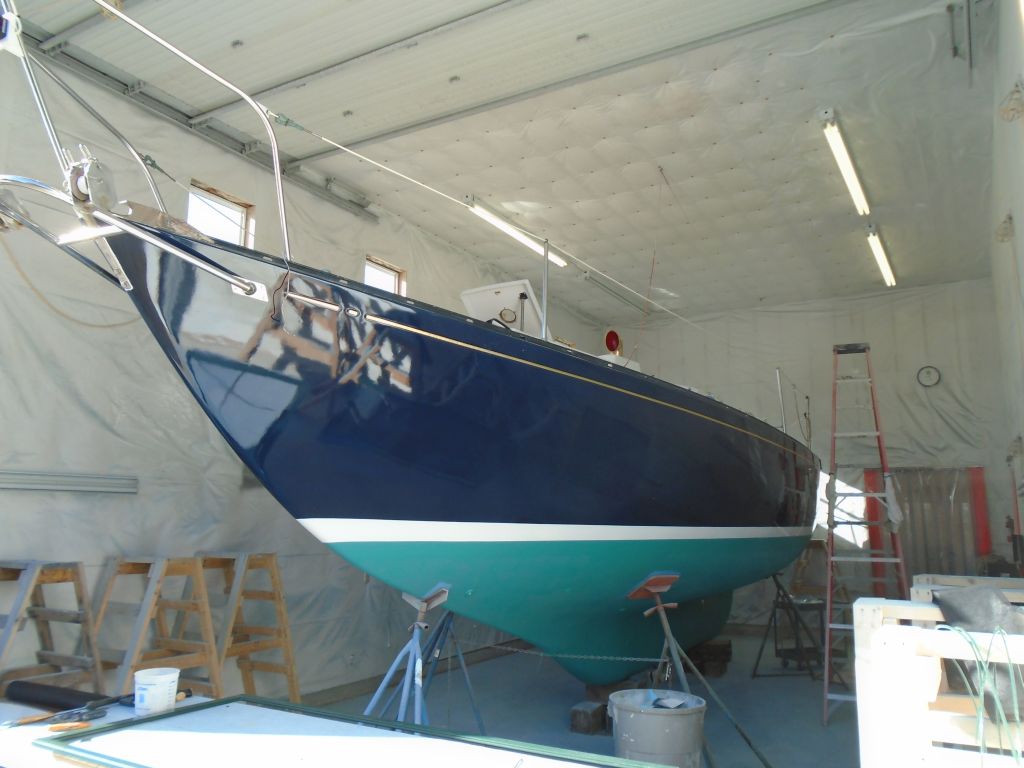
With glorious weather outside--something that had been a long time coming this "spring"--it was a pleasure to finally work with the shop door open, which also allowed me the first view of the boat in this way since she came indoors in December.
Total Time Billed on This Job Today: 7.5
Hours
0600 Weather Report:
25°, clear. Forecast for the day: Sunny, low 60s
